API Key field
Paste here the API key you obtained from HubSpot.
A mailing list addon that lets you alter the existing contacts and easily add new ones.
Buy from $39
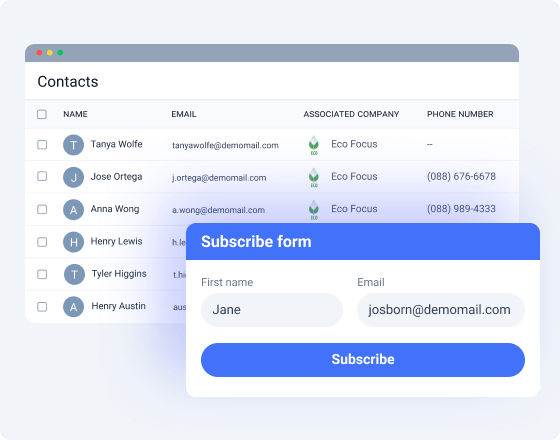
HubSpot is a JetFormBuilder addon that lets you connect to HubSpot’s free CRM platform. Add new and manage the existing contacts, monitor companies, leads, and contact owners. HubSpot Addon is indispensable when it comes to event registrations, subscriptions to the fanbase, paid offers promotion, newsletters with exclusive content, ordering goods online, and so on. You can achieve any business objectives through wise email marketing.
Paste here the API key you obtained from HubSpot.
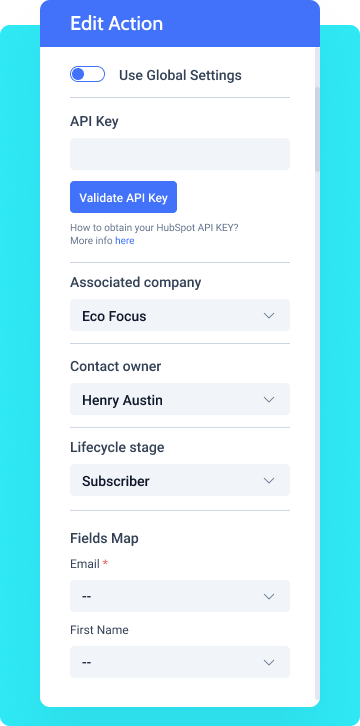
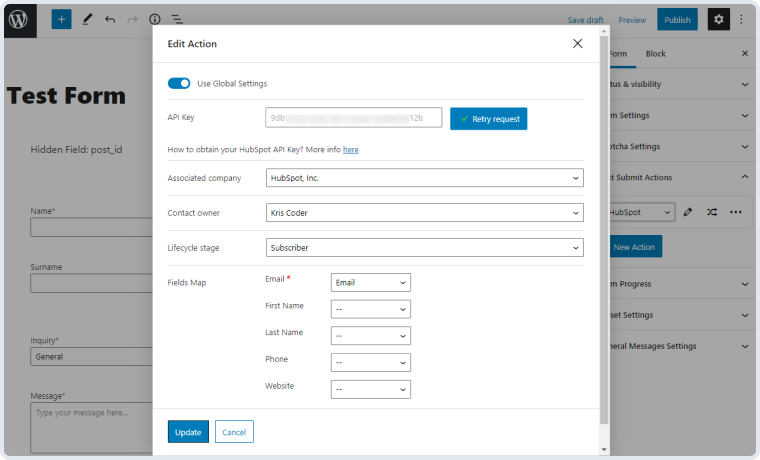
Press it to validate the API key. Hit “Retry request” to make sure the key is relevant.
These fields – email, first/last name, phone, website, etc. – will be displayed on HubSpot’s end and need to be linked with the corresponding meta fields.
A drop-down Select field type where you need to pick the company registered at HubSpot. Can store multiple companies.
A Select drop-down field where you are supposed to pick the owner associated with the company registered at HubSpot.
A drop-down Select field storing a static set of HubSpot’s user roles.
To install the addon, go to JetFormBuilder > Addons and find the “HubSpot Integration” addon in the All Available Addons section. Press the “Install Addon” button and, once installed, it will appear on Your Installed Addons. Next, click “Activate Addon” to get it ready for further work.
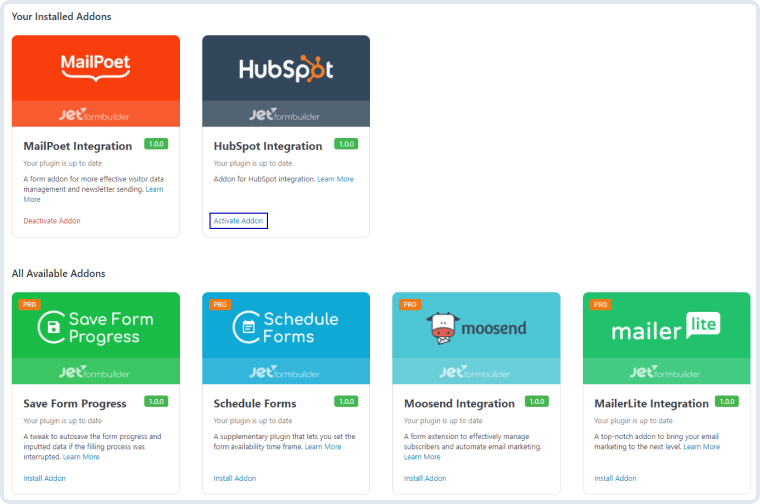
As you can see, all PRO version addons can be installed and activated through JetFormBuilder Dashboard.
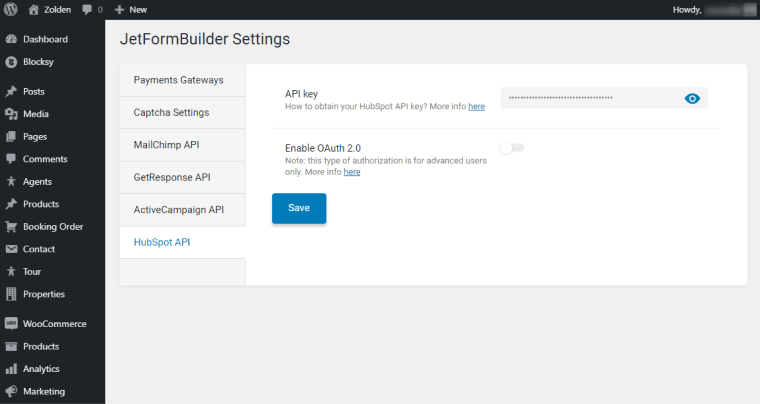
After the plugin is activated, a new settings section titled HubSpot API will appear in JetForms > Settings. To create a connection between HubSpot’s CRM platform and JetFormBuilder forms, you need to create an API key or use Enable OAuth 2.0. Let’s check each of them.
Go to the HubSpot website and create an account. If you already have a Stripe account, log into it.

Fill out the registration form and confirm your account by following a link in the email you received from HubSpot. You’ll be asked to create a password. Do so to finish the profile creation process.
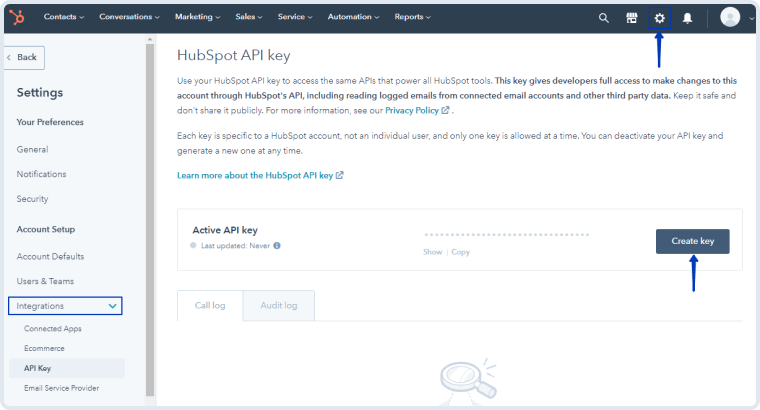
Next, click on the cog-shaped button next to your profile name in the right corner of the top toolbar. You will be taken to the User Preferences page. In the left sidebar, click on the Integrations drop-down and then press “API Key”. To obtain a HubSpot API key, click on the “Create key” button and confirm you are not a robot.
Now, copy that key and proceed to JetForms > Settings. Find the HubSpot API tab and click to open it. Paste the copied key to the API key field; then press the “Save” button.
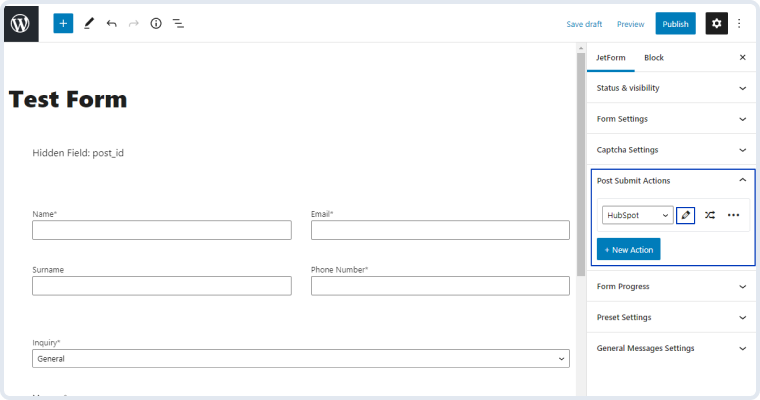
Now, follow the JetForms > Forms directory. If you’ve got a form you would like to link with HubSpot, open it. If not, click on the “Add New” button.
We prepared a detailed tutorial on how to enable the OAuth 2.0 authorization type. Please follow the link to read it.
In the right sidebar, click on the JetForm tab and open the Post Submit Actions section. Hit the “New Action” button and choose the “HubSpot” option from the drop-down list.
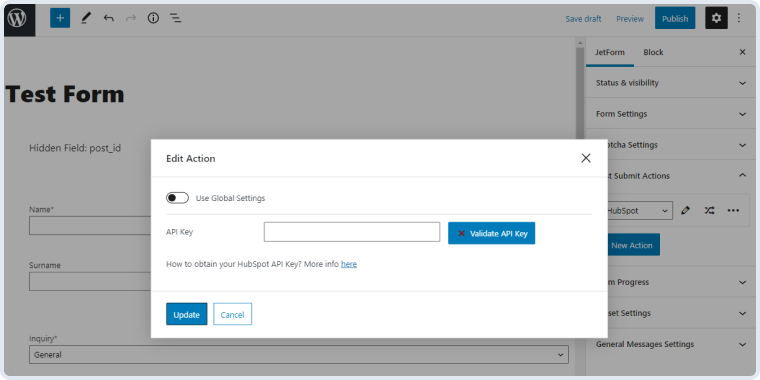
Press the edit button with a pencil-shaped icon on it and you will see the Edit Action window. You can paste the API key to the API Key field manually or enable the Use Global Settings toggle to pre-fill it. Then press the “Validate API Key” button.
Afterward, you will see the full list of the HubSpot action settings. Let’s go through them now.
Once you are done setting the HubSpot action, press the
Buy JetFormBuilder Pro – get all Addons at once
A lightweight addon to control the overall number of form submissions and those per user.
Learn moreproAn email marketing addon to ensure higher audience reach and income from mailing lists.
Learn morepro


