Automated payments are no longer a fancy; it’s a necessity. Using the JetFormBuilder plugin’s functionality, you will be able to add the desired payment methods to your website. In this tutorial, you will learn how to activate the WordPress payment gateway option, add one to the form, and customize its settings.
- How to Enable the Payment Gateways Option
- How to Configure the PayPal Gateway
- How to Obtain the PayPal API Key
- PayPal Checkout Settings
- How to Configure the Stripe Gateway
- How to Obtain the Stripe API Key
- Stripe Checkout Settings
- Action Events Settings
How to Enable the Payment Gateways Option
Before JetFormBuilder v1.2.1, the WordPress Payment Gateways for both JetEngine and JetFormBuilder had to be set up manually. You were supposed to go to WordPress Dashboard > Appearance > Theme Editor, click on the functions.php file in the right sidebar, and add the filter:
add_filter( 'jet-form-builder/allow-gateways', '__return_true' );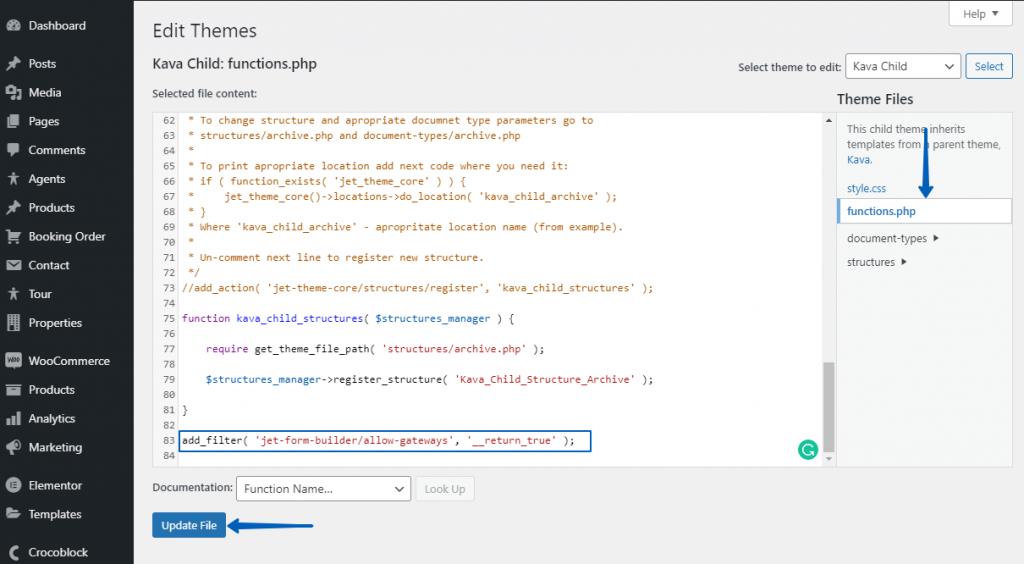
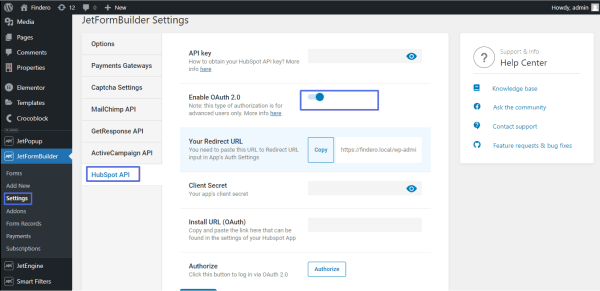
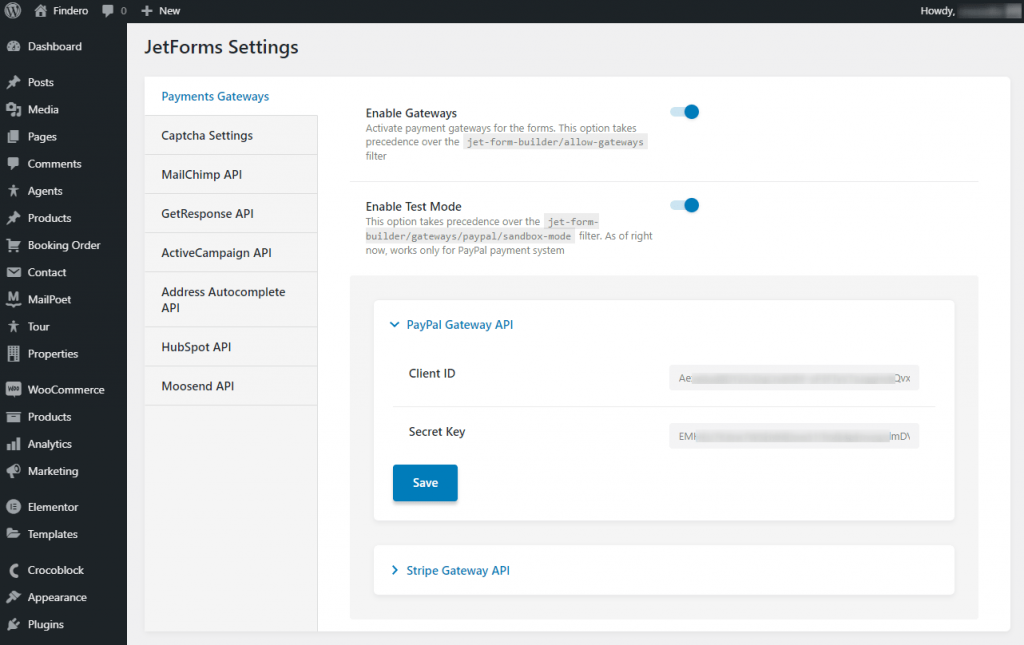
There is a much more convenient way to enable the WordPress Payment Gateways option with the latest update. Proceed to WordPress Dashboard > JetFormBuilder > Settings, locate the Payments Gateways tab, and click on it.
Inside, you will see the Enable Gateways toggle switch. Once enabled, this option takes precedence over the manually added allow-gateways filter. This means that new users who haven’t enabled the gateways yet won’t have to alter the child theme file in any manner.
For those users who had already added the filter by hand, there is no need to remove it from functions.php – the gateway will still be working. Turn the Enable Gateways toggle on to activate the functionality.
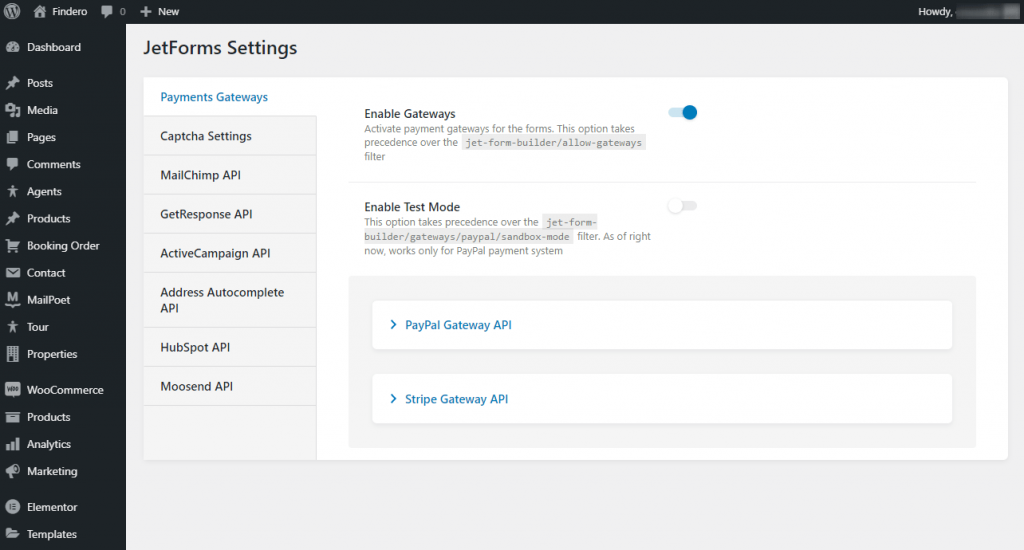
Below it, you will see another toggle – Enable Test Mode. Once enabled, this option takes precedence over PayPal’s sandbox-mode filter. Again, if you had that filter added to the code, it would continue working. So far, this option works for the PayPal payment system only.
Also, the Payments Gateways tab will output all the payment integrations you have added. By default, there is only one payment system – PayPal. All the new ones will land below it.
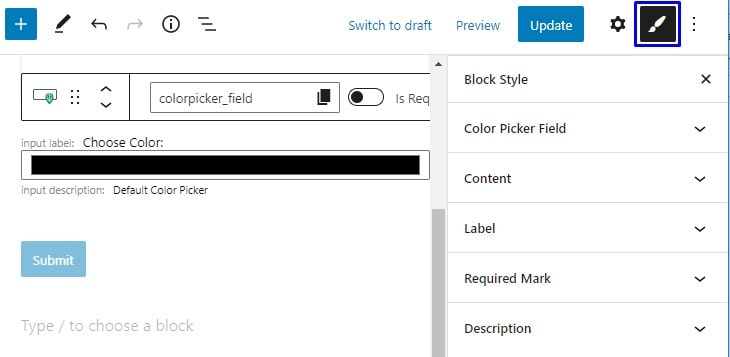
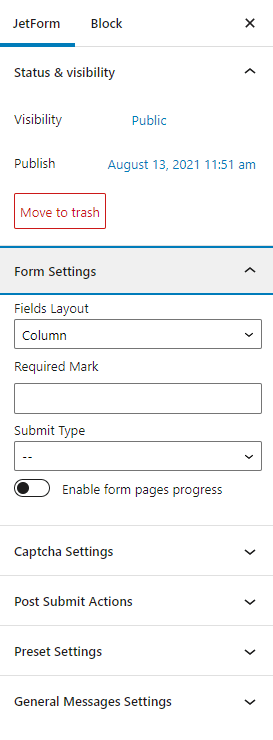
After you finish the Gateway activation, a new settings section called Gateways Settings will appear in the WordPress form editing interface. To find it, go to WordPress Dashboard > JetFormBuilder > Forms and open one of the created forms. In the right-side menu, you will see the Gateways Settings section.
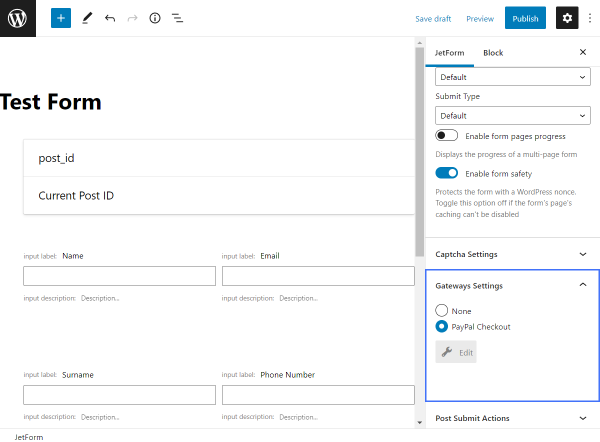
Now, let’s go through the section settings.
- None — when selected, this option means none of the available checkouts will be attached to the current form;
- PayPal Checkout — select this Radio button to create a connection between the PayPay checkout and the form you are currently editing;
- Stripe Checkout — if you want to connect the JetFormBuilder form to Stripe’s payment software, select this option;
- Edit — a button with a wrench icon opens the additional checkout settings pop-up window.
How to Configure the PayPal Gateway
To set it up correctly, you need to register your PayPal app and receive the Client ID and Secret Key for your authentication.
How to Obtain the PayPal API key
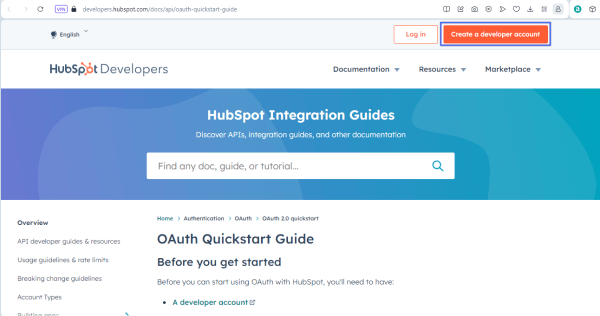
Go to the PayPal developer’s website and hit the “Log Into Dashboard” button. If you already have an account, log into it. Otherwise, create one.
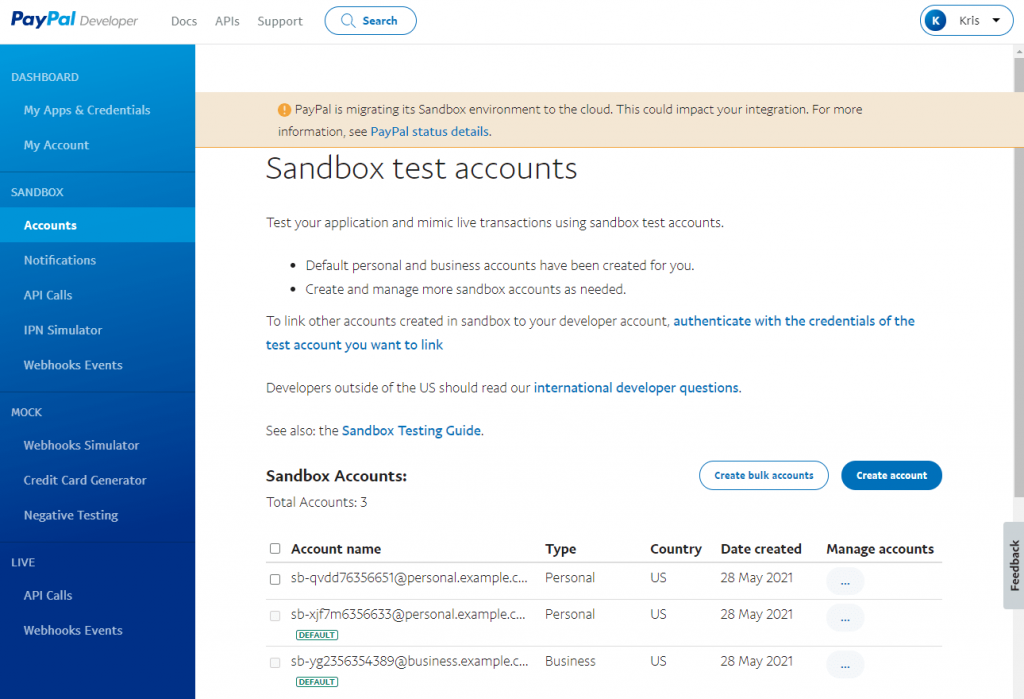
For a form to work correctly in a live environment, set up the appropriate API credentials (Live or Sandbox, the instructions are in the Get started with PayPal Developer tutorial) and indicate a proper currency code (the list of codes can be found on the Country Currency Codes page).
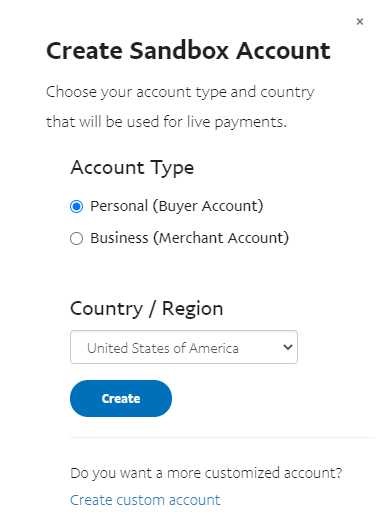
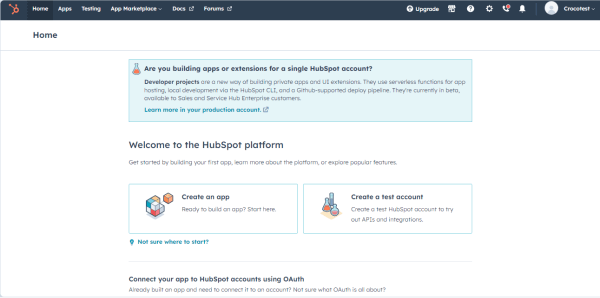
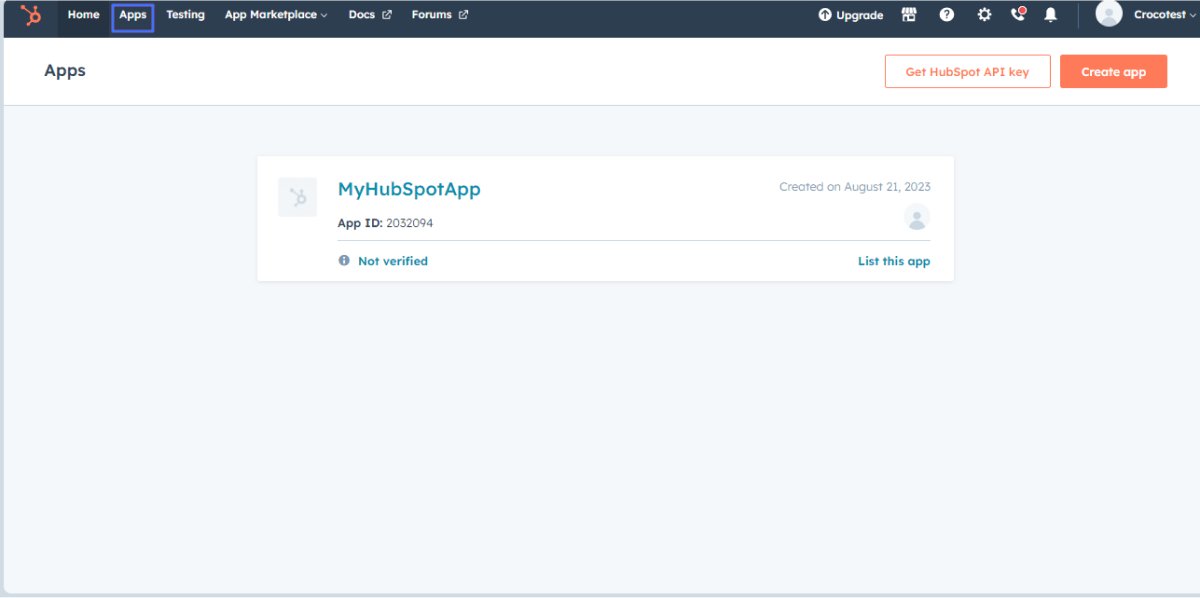
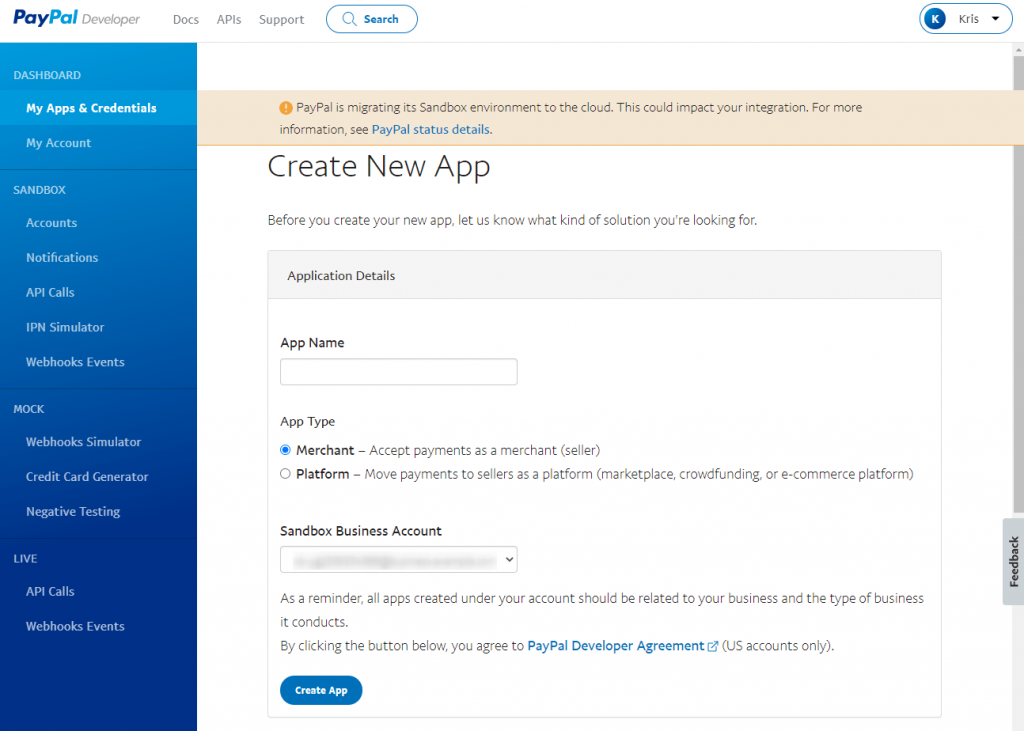
Now, go to Dashboard > My Apps & Credentials and click on the “Create App” button. Give your new app a name and choose the “Merchant” App Type. Then click the “Create App” button once again.
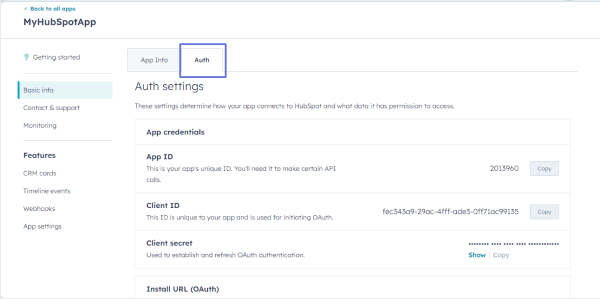
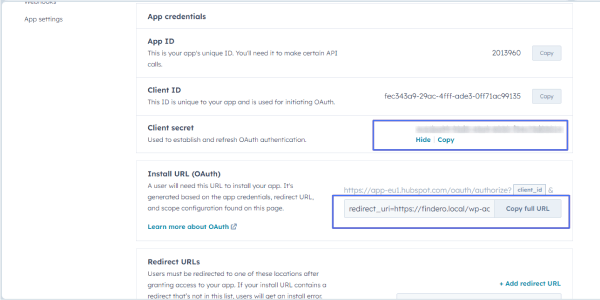
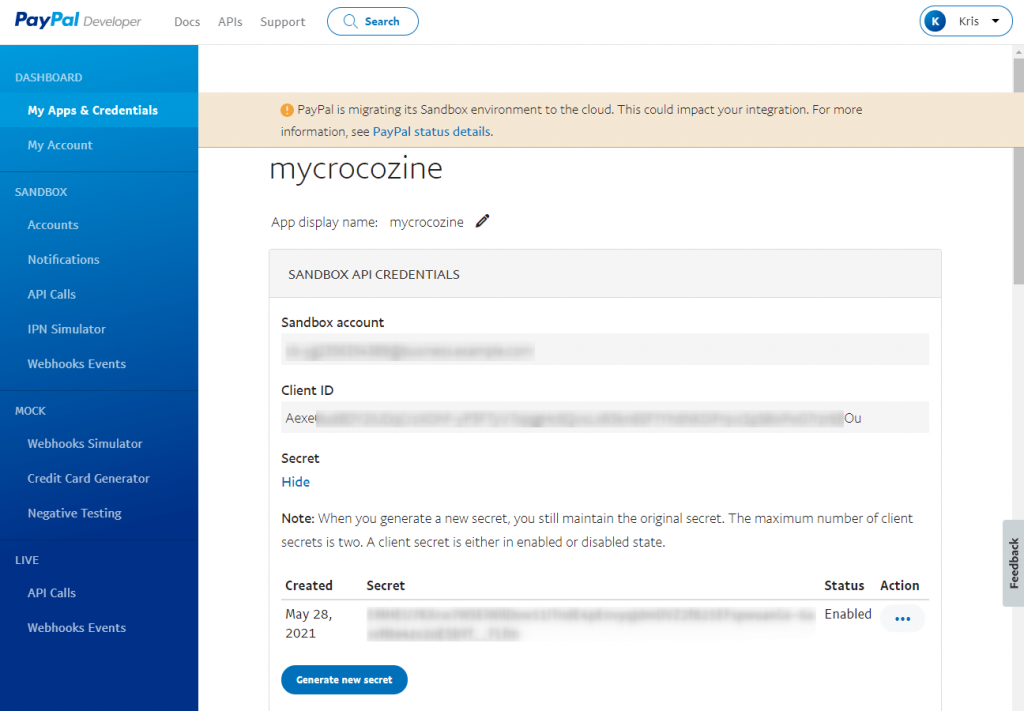
You will be redirected to the app’s page. The Client ID and Secret Key are right there – just copy them.
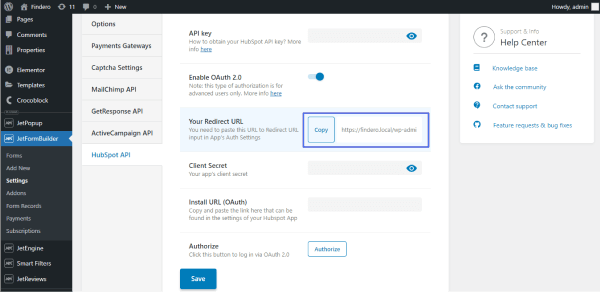
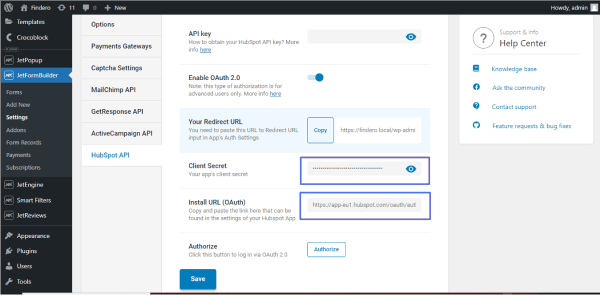
Proceed to WordPress Dashboard > JetFormBuilder > Settings. In the Payments Gateways tab, find the PayPal Gateway API drop-down and click on it. Paste the obtained keys into the corresponding fields and press the “Save” button.
Now, go to WordPress Dashboard > JetFormBuilder > Forms and open one of the created forms. In the right-side menu, you will see the Gateways Settings section. Choose “PayPal Checkout” and click the “Edit” button to open its settings.
PayPal Checkout Settings

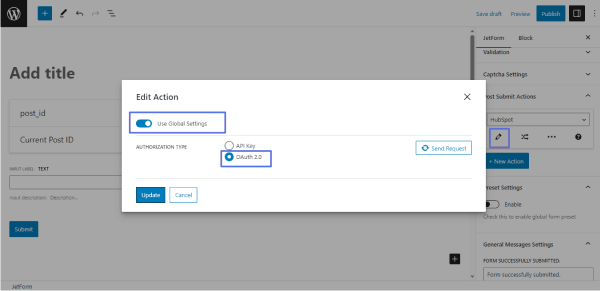
- Use Global Settings — enable this toggle to pull the data from the PayPal Gateway API’s settings and pre-fill the Client ID and Secret Key fields;
- Client ID — paste the Client ID that you obtained from PayPal into this bar;
- Secret Key — this is where you paste the Secret key generated through the PayPal website;
- Gateway Action — pick a payment scenario that will perform once the form is submitted;
- Request Button — press the “Sync Access Token” button to work on the payment settings;
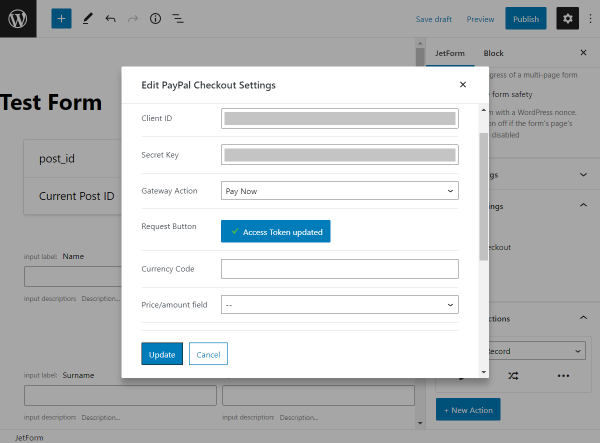
- Currency Code — type here a three-letter code that represents the currency used in your form;
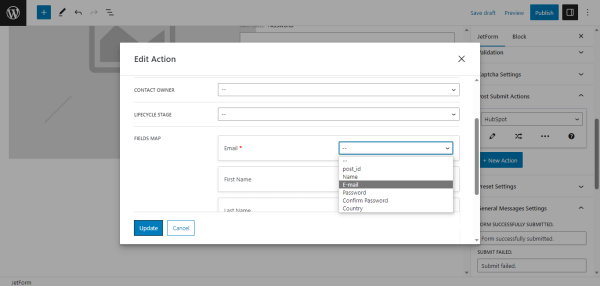
- Price/amount field — in this drop-down select, pick the corresponding price field within your form;
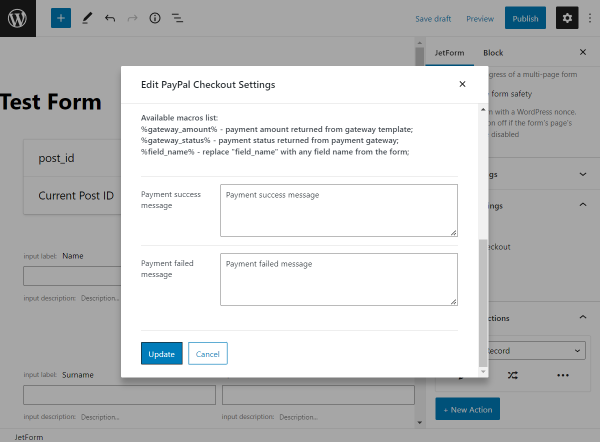
- Available macros list — these macros can be used in the fields below – Payment success message and Payment failed message – if you would like to specify some details for the customer:
- %gateway_amount% — will provide the payment amount returned from the gateway template;
- %gateway_status% — will give the payment status returned from the payment gateway;
- %field_name% — will provide any necessary details from the form field, the name of which you write instead of the “field_name”;
- Payment success message — this is a message that will be shown to the user after their payment is confirmed to be successful;
- Payment failed message — this message will be directed to the user if their payment does not come through.
How to Configure the Stripe Gateway
You need to register a new business on Stripe and receive the Publishable and Secret keys for your authentication to set it up correctly.
How to Obtain the Stripe API Key
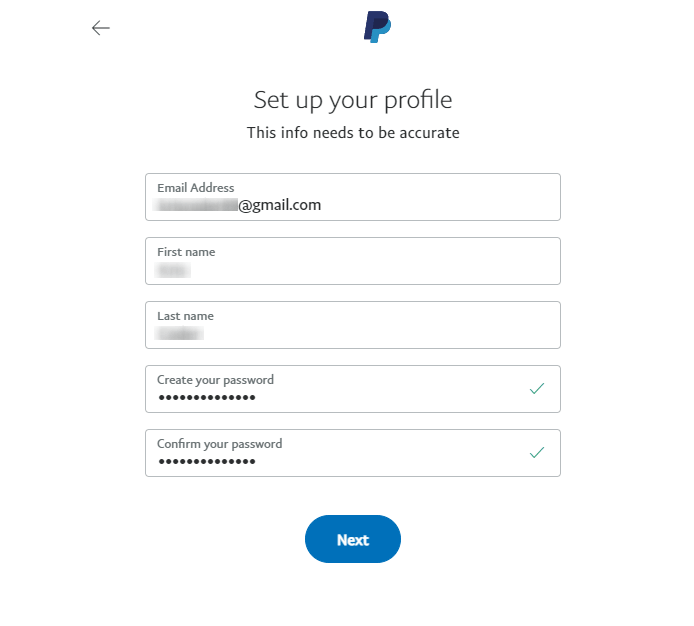
Go to the Stripe website and create a new account.
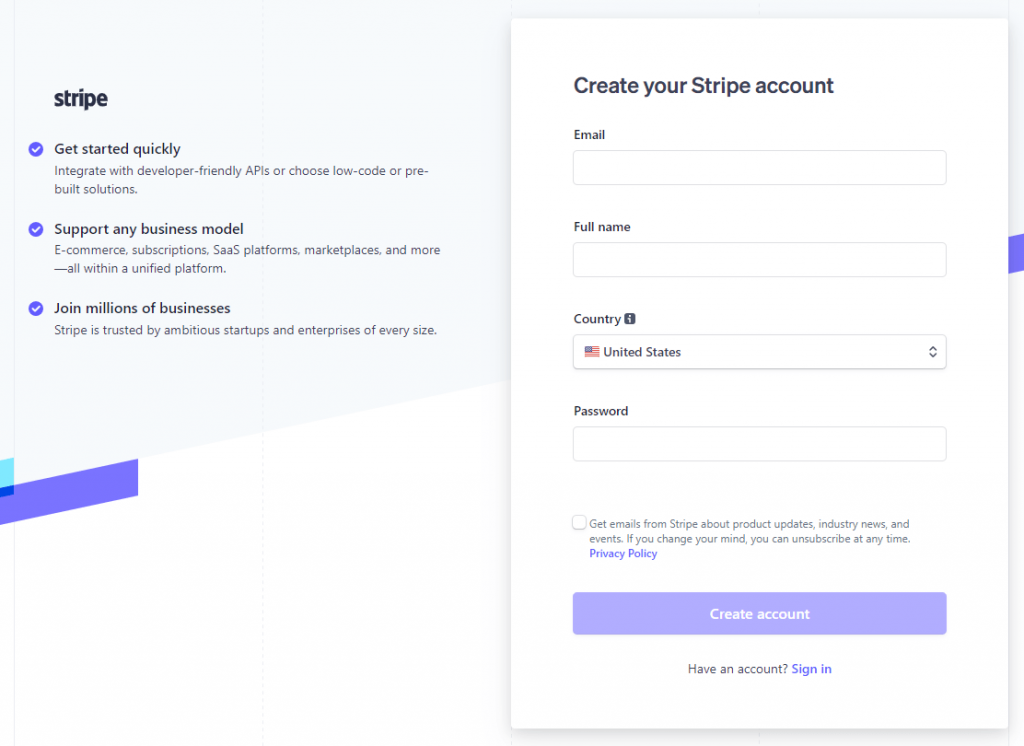
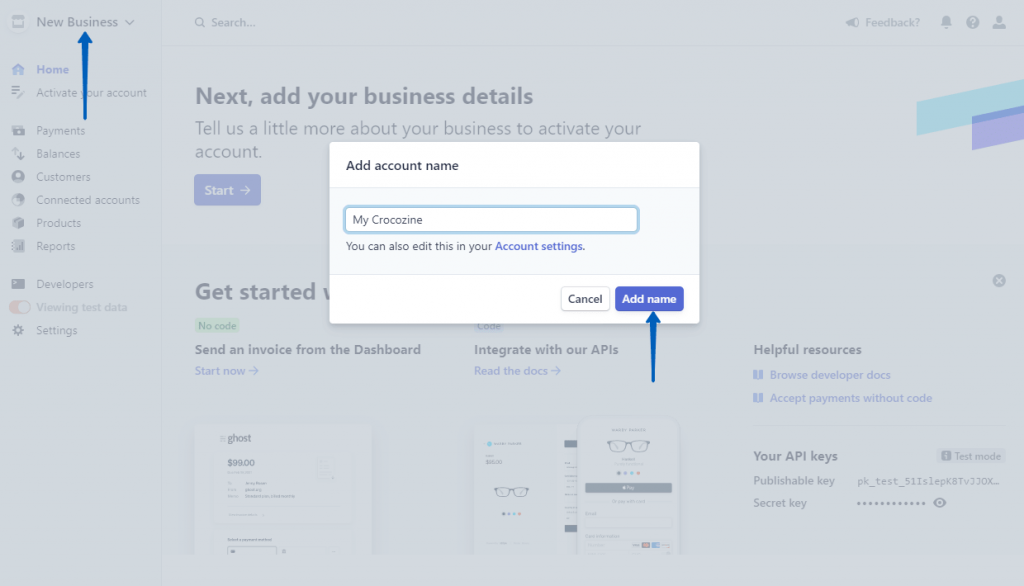
A confirmation letter will be sent to your email. Proceed to the inbox and click the link in the email to pass verification. Afterward, you’ll be redirected to Stripe’s dashboard page. Click on the New Business bar in the upper left corner of the sidebar, enter the account name and press the “Add name” button.
Good. Now, you will be able to locate two Stripe API keys – the first is the Publishable key, and the second is the Secret key. Copy them.

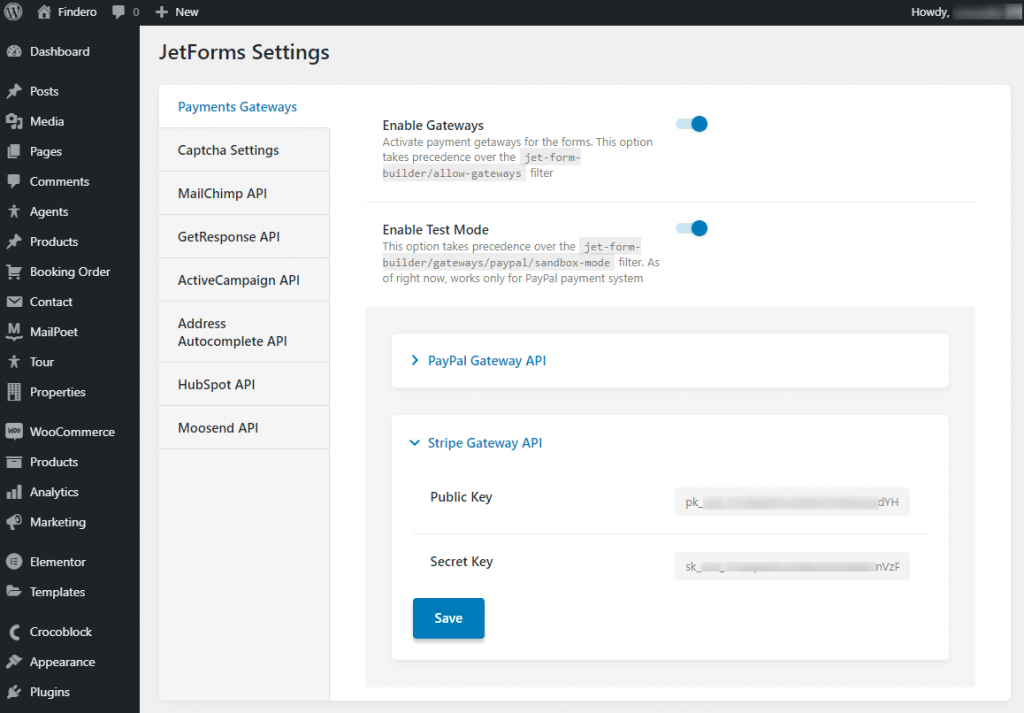
Proceed to WordPress Dashboard > JetFormBuilder > Settings. Find the Stripe Gateway API drop-down in the Payments Gateways tab and click on it. Paste the obtained keys into the corresponding fields and press the “Save” button.
Now, go to WordPress Dashboard > JetForms > Forms and open one of the created forms. In the right-side menu, you will see the Gateways Settings section. Choose “Stripe Checkout” and click the “Edit” button to open its settings.
Stripe Checkout Settings
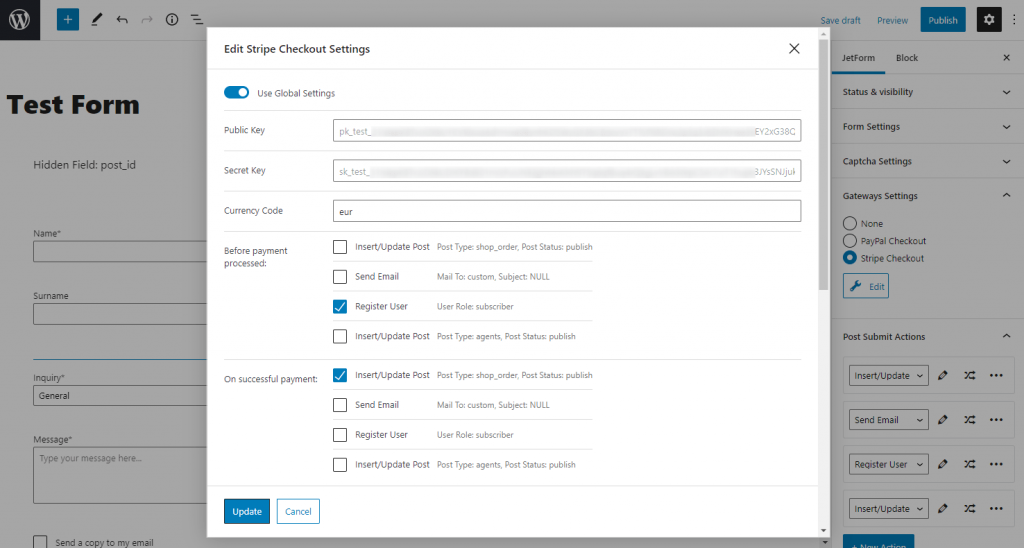
The Stripe Checkout settings are pretty similar to PayPal Checkout except for one field. Instead of the Client ID field, there is the Public Key field. You are supposed to input here the Publishable Key obtained from Stripe.
However, if you enable the Use Global Settings toggle, both fields with the keys will be pre-filled automatically.
Action Events Settings
The Event logic for the Submit Actions is available after the 2.1.0 version of the JetFormBuilder plugin.
With this new feature, you can set the time and condition for every action in the form when it should be performed. If you use the PayPal or Stripe payment method in the form, you can also set what action should be executed after a successful or failed payment.
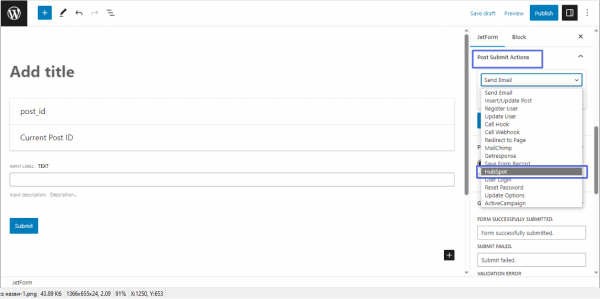
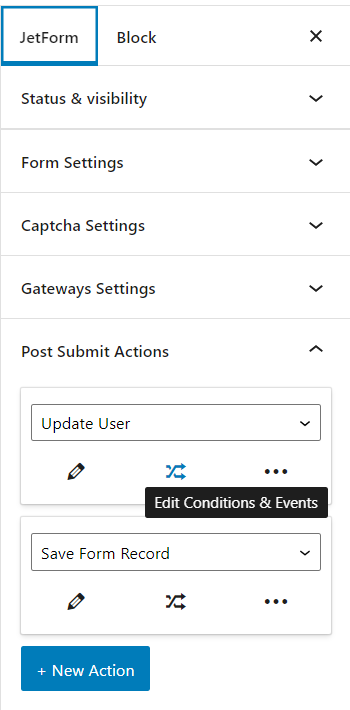
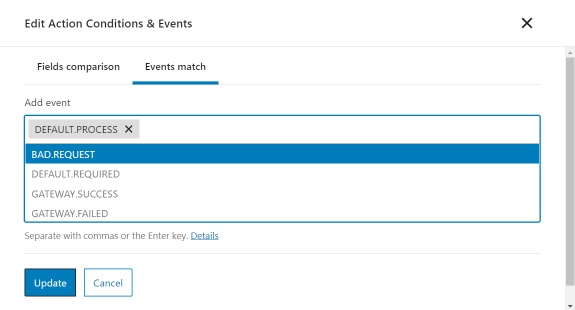
To set an action event, proceed to the Post Submit Actions tab of the form and hit the “Edit Conditions & Events” button.
In the Events match tab, you can add such events:
- DEFAULT.PROCESS – defines the time of action performance. This event is needed when the payment (PayPal/Stripe) function is included in the form so that the JetFormBuilder plugin can complete the submit actions with such an event before a user is redirected to the checkout page;
- BAD.REQUEST – is executed after processing the request if there are errors in the form fields (for example, when you filled out a Media field with the wrong format file or exceeded the file limit). Overtakes the DEFAULT.PROCESS event;
- DEFAULT.REQUIRED – is executed in any case, even if the form fields contain some errors or in case of unsuccessfully performed actions. This event runs at the end before the form response is sent. By default, this event is used by the Save Form Record action and cannot be added to other events through the form editor;
- GATEWAY.SUCCESS – replaces the former “On success payment” option for actions. It is executed after passing the checkout page on the side of the payment system if a payment or a subscription has been made;
- GATEWAY.FAILED – replaces the former “On failed payment” option for actions. It is performed when the user returns from the checkout page of the payment system without making a payment or subscribing.
After you select one or several events, hit the “Update” button. The event in the submit action will look like that:
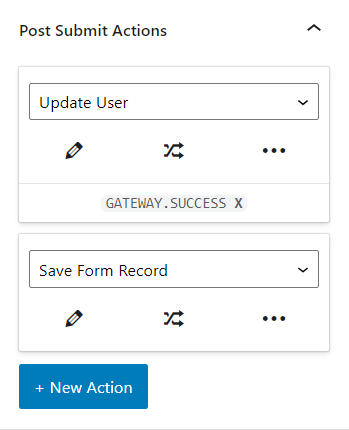
Don’t forget to “Update” the form to save changes.
That’s it. Now you know how to configure WordPress Payment Gateways and use them in JetFormBuilder forms.