
Effective optimization of workflows is the key to success in modern business. Entrepreneurs, team leaders, and professionals from various industries are striving to achieve more in less time today. If they can also reduce costs in the process, that’s even better. A variety of tools and services aimed at solving a wide range of tasks in marketing, project management, data organization, and beyond assist them in these efforts. We will look at two widespread tools – JetFormBuilder and Google Sheets. If you actively use them both, you will likely be interested in how to optimize and automate your workflow with them. One proven method is automating the transfer of data from forms to spreadsheets. This can be achieved through the integration of JetFormBuilder and Google Sheets using the online connector ApiX-Drive.
ApiX-Drive is a cloud-based integration platform designed to optimize business processes by seamlessly connecting diverse software applications. By eliminating the need for complex coding, ApiX-Drive empowers organizations to establish efficient data flow between their CRM, marketing automation, eCommerce, and other critical systems. This integration facilitates a wide range of use cases, including synchronizing customer data, automating lead generation and nurturing, and streamlining financial operations. Through its user-friendly interface and extensive app library, ApiX-Drive enables businesses of all sizes to enhance productivity, improve data accuracy, and make data-driven decisions.
Common use cases:
✔️ Integrating CRM systems with marketing automation tools.
✔️ Connecting eCommerce platforms with accounting software.
✔️ Synchronizing customer data between different applications.
✔️ Automating lead generation and customer follow-up processes.
Automation of data transfer transforms how organizations manage and move information across systems, processes, and teams. By removing manual intervention, companies can significantly reduce the risk of errors, enhance productivity, and optimize workflows.
Let’s delve into the advantages of automating data transfer:
To give you a preview, setting up the integration between JetFormBuilder and Google Sheets via ApiX-Drive will allow you to immediately appreciate its benefits after launching. Data incoming from forms will be automatically transferred to a spreadsheet without your involvement, freeing you from the need to enter it manually.
The connection between both programs not only optimizes workflows but also ensures higher quality and faster service for your clients. Moreover, it will help you stand out advantageously among competitors who have not yet automated their business.
So, let’s get started right now. The first step is to sign up for an ApiX-Drive account. Once registered, you will be able to proceed with setting up the integration.
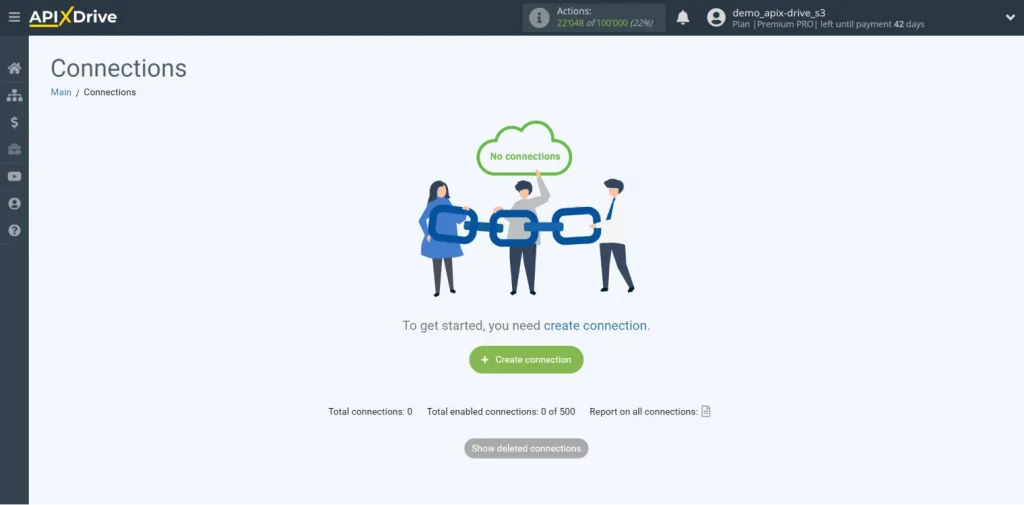
To start setting up the JetFormBuilder integration with Google Sheets, create a new connection.
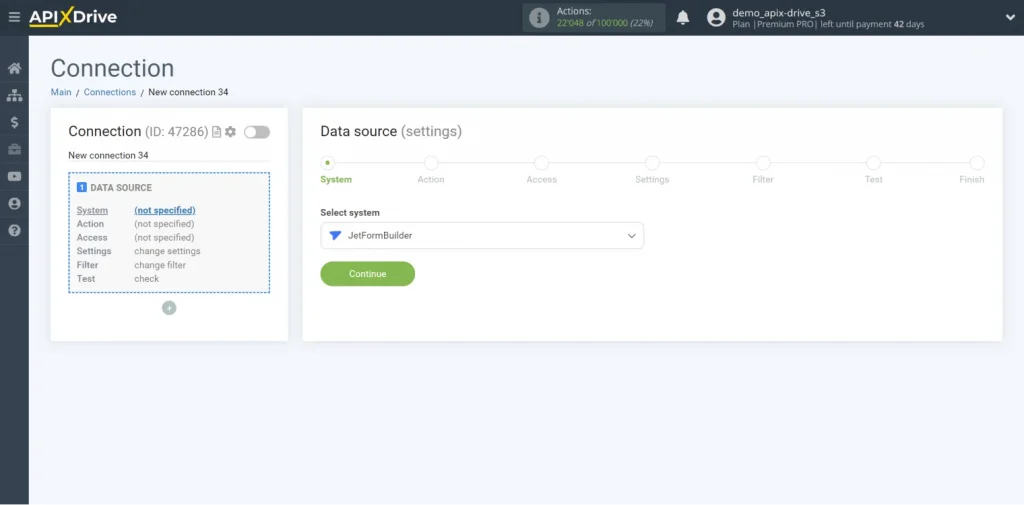
Select the data source system. It is JetFormBuilder.
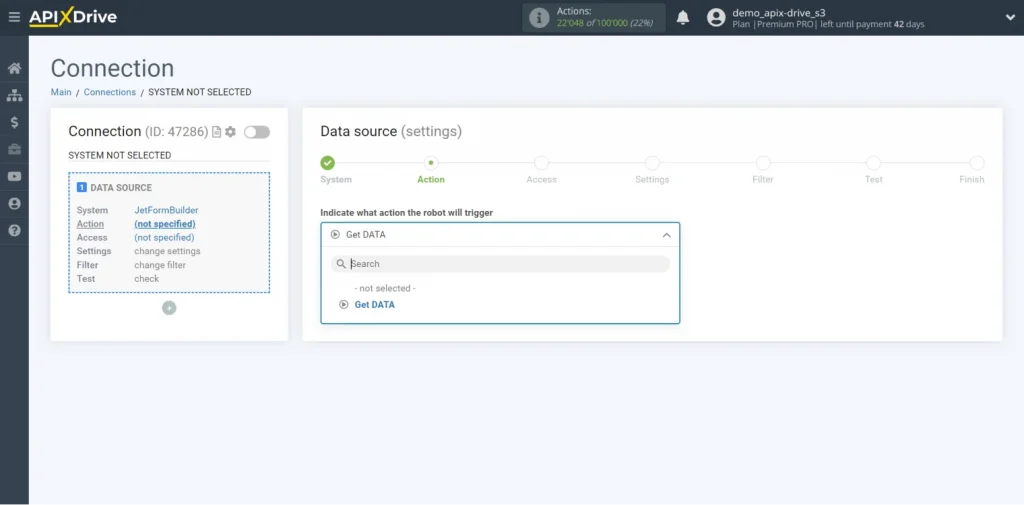
Choose the “Get DATA” action.
Connect your JetFormBuilder account to ApiX-Drive.
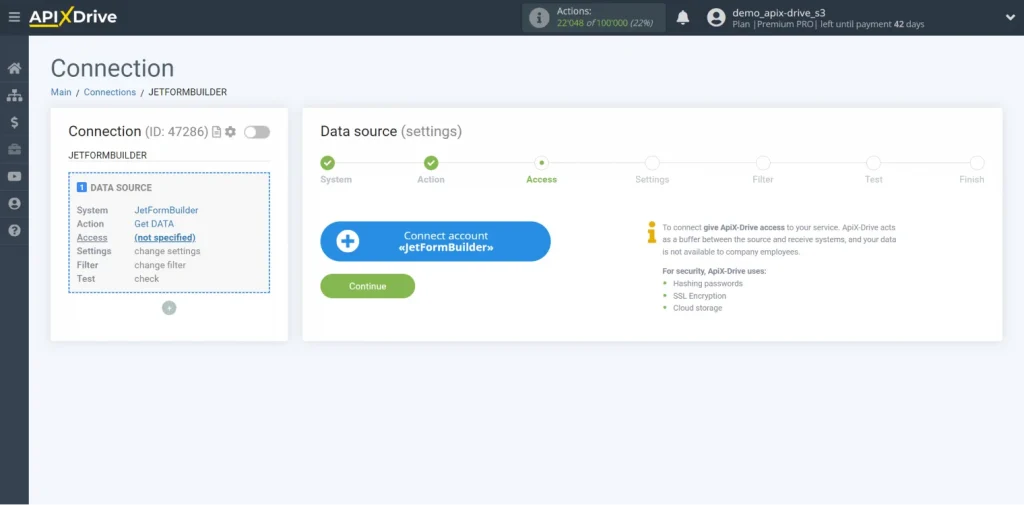
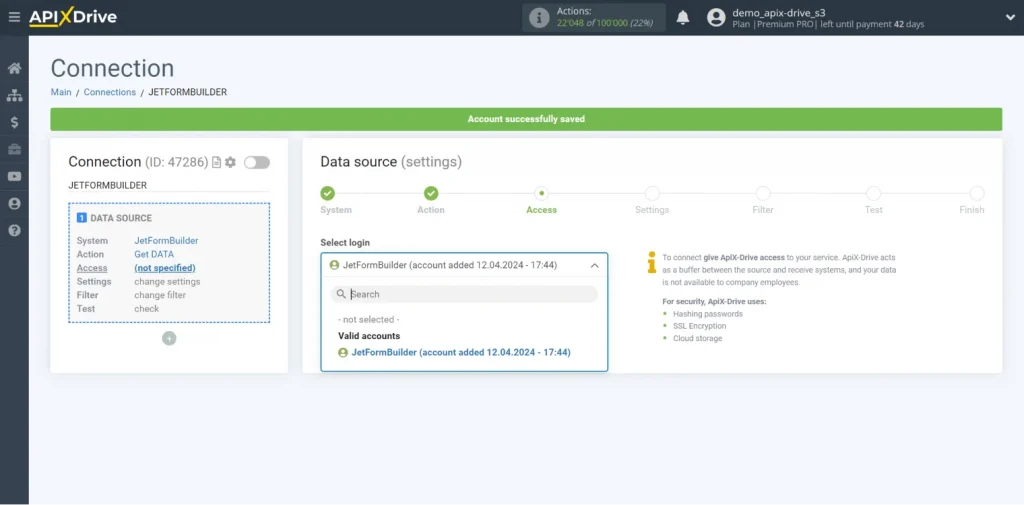
Select the connected account from the list and click “Continue.”
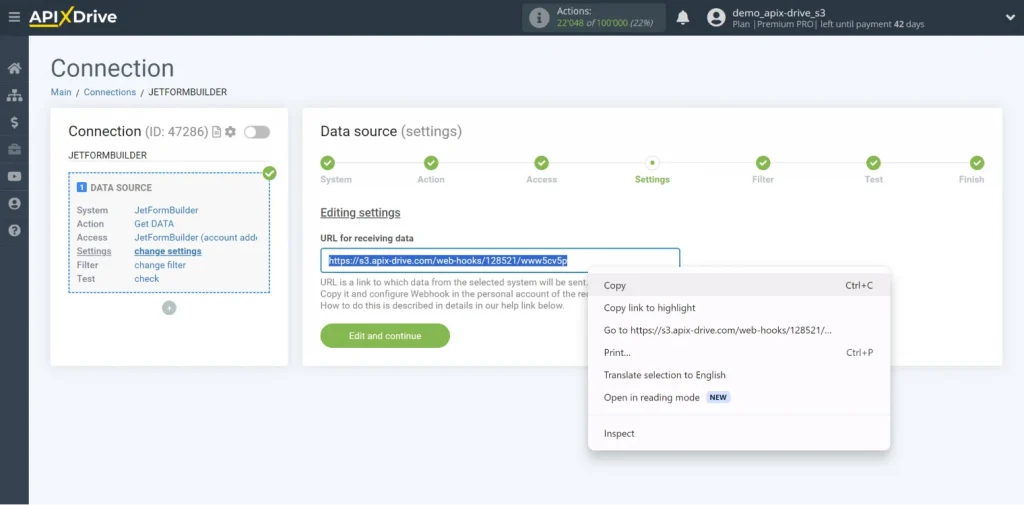
Copy the link in the “URL for receiving data” field.
Then, go to the admin panel of your WordPress site. There, find the JetFormBuilder plugin. After this, go to the Forms section.
Choose the form from which you will receive data and click “Edit.”
In the right zone of the screen, go to Settings, expand the Post Submit Actions section, and click on “New Аction.”
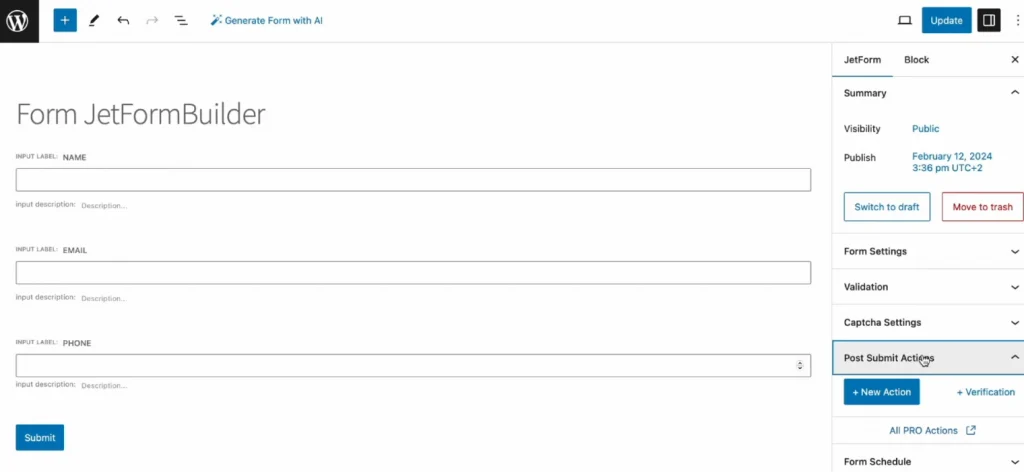
From the drop-down list, select the “Call Webhook” option.
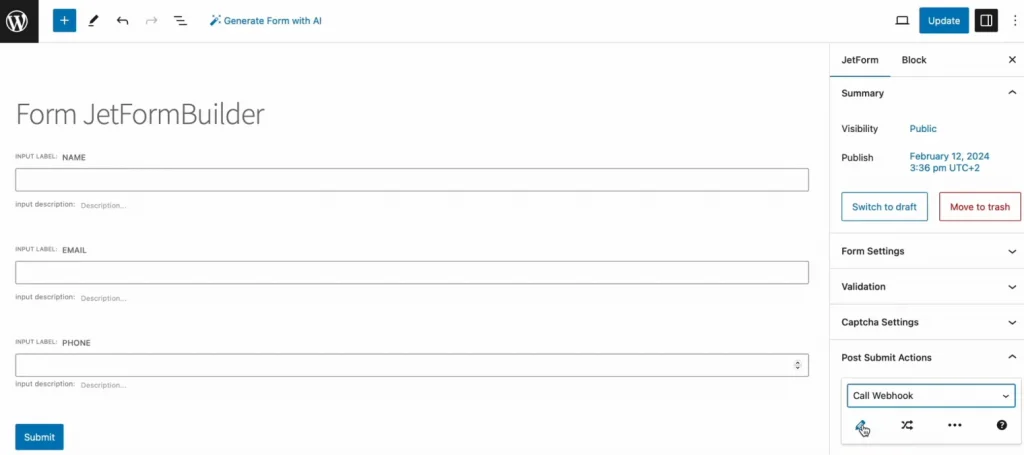
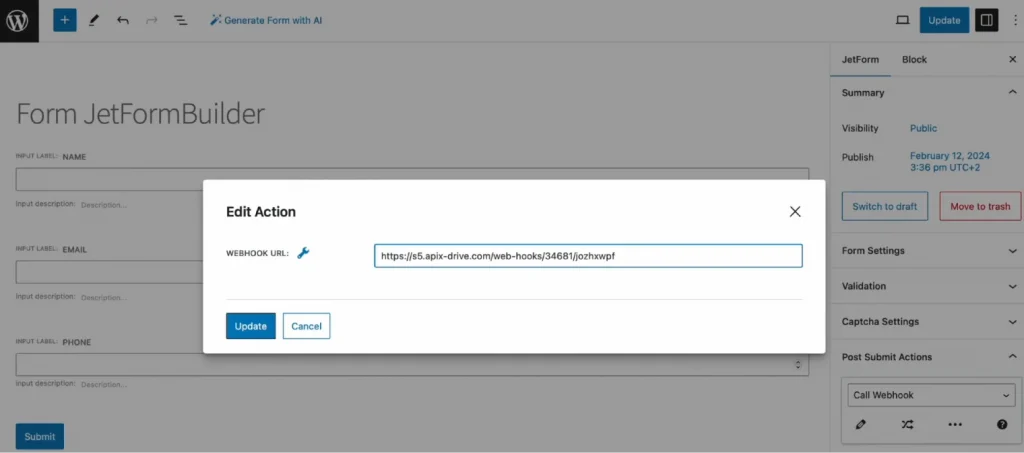
Next, click on the pencil icon and the Webhook URL field. Paste the Webhook link copied from ApiX-Drive and press the “Update” button. Then, click on the “Update” button inside the form itself to save the settings.
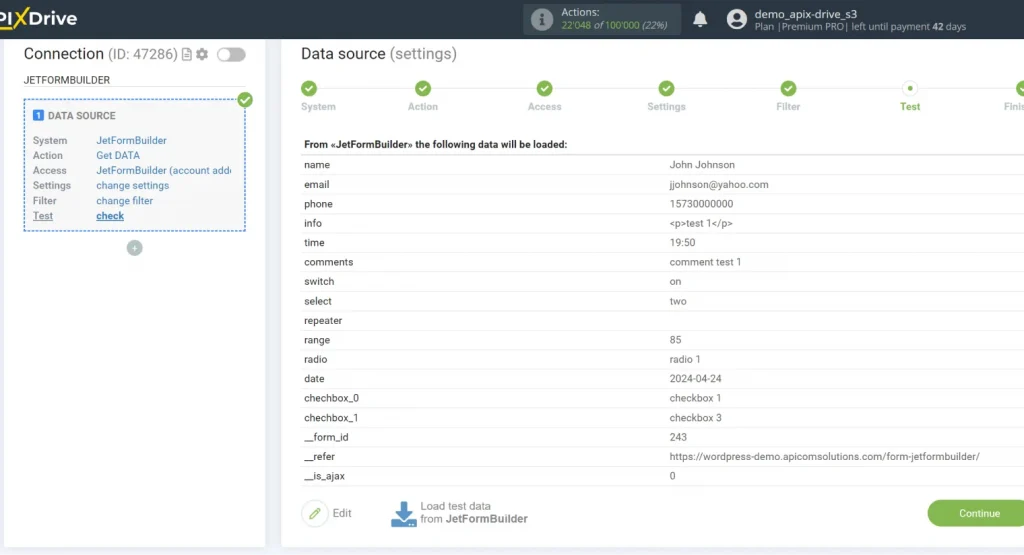
Set up a Data Filter. If you want to skip this step, click “Continue.” There is test data for the form. If the test data doesn’t appear automatically, click “Load test data from JetFormBuilder” or try generating actions in your JetFormBuilder.
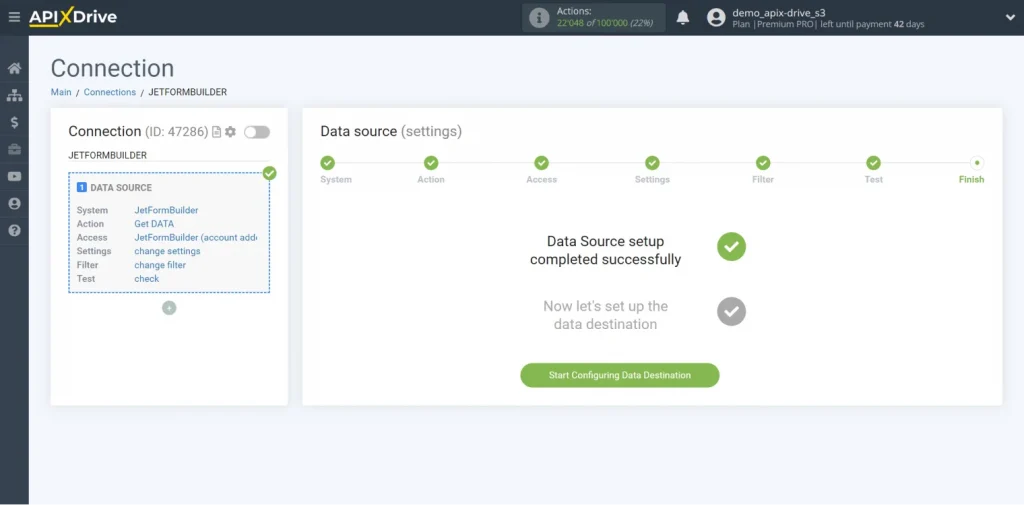
To begin configuring the Google Sheets integration with JetFormBuilder, proceed to the data destination setup.
Choose the system, Google Sheets.
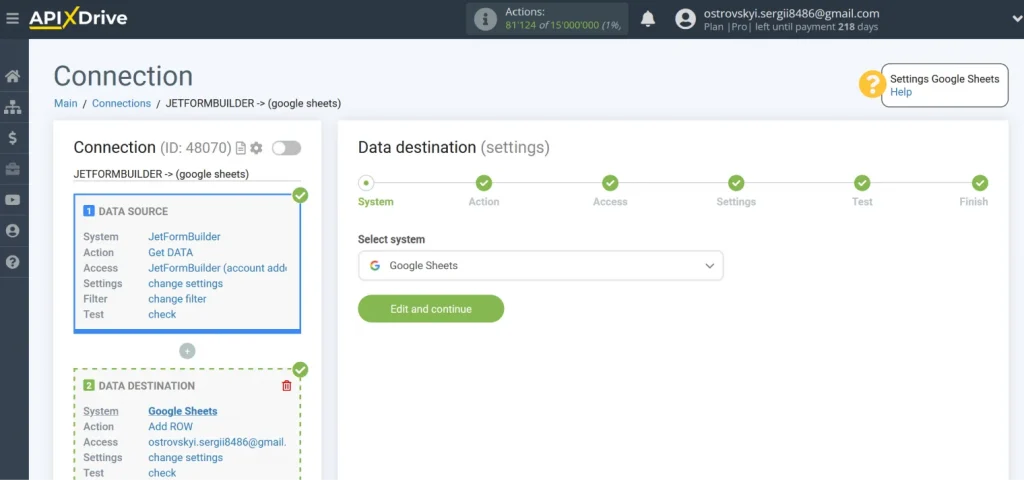
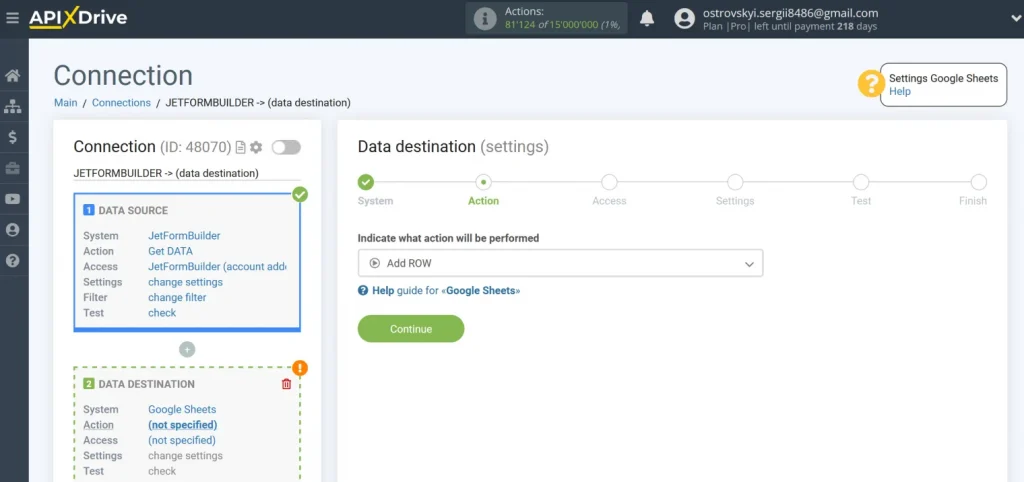
Select the “Add ROW” action.
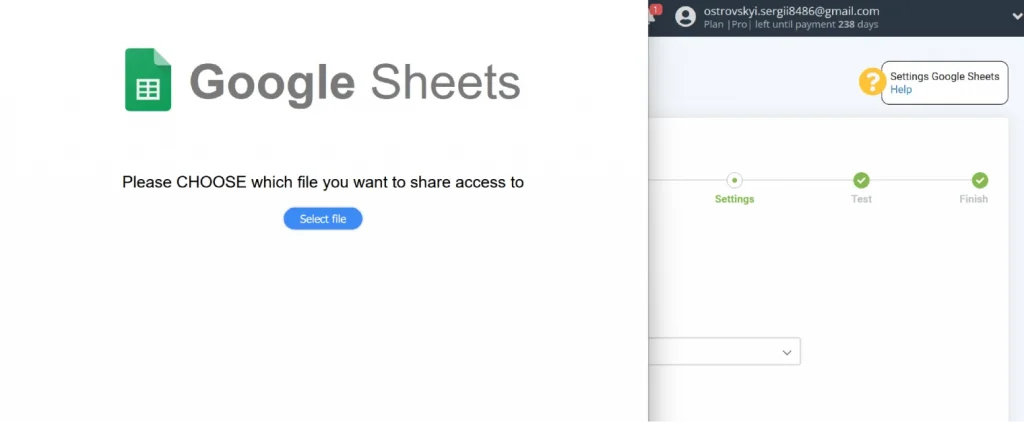
Connect your Google Sheets account to ApiX-Drive. Select a file.
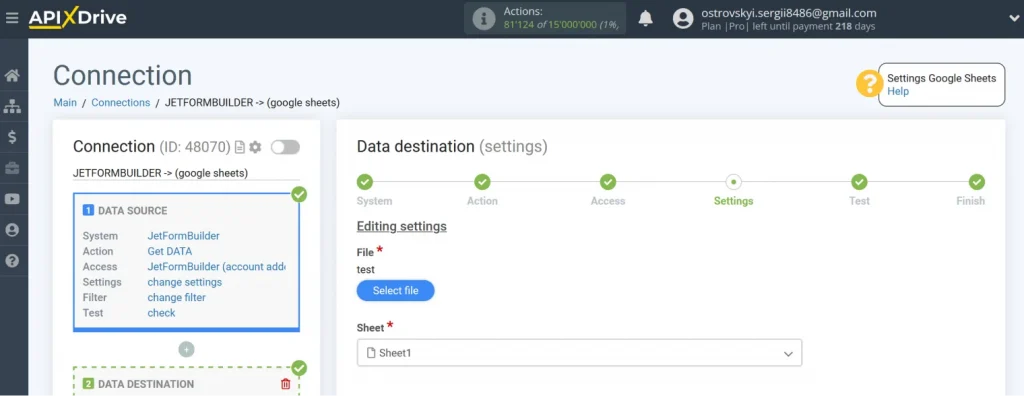
Select a sheet to which new rows will be added with each new form from JetFormBuilder.
Now, you will see Google Sheets fields to which you can assign variables from JetFormBuilder. Click on the field and select the variable you need from the drop-down list. You can also enter data manually.
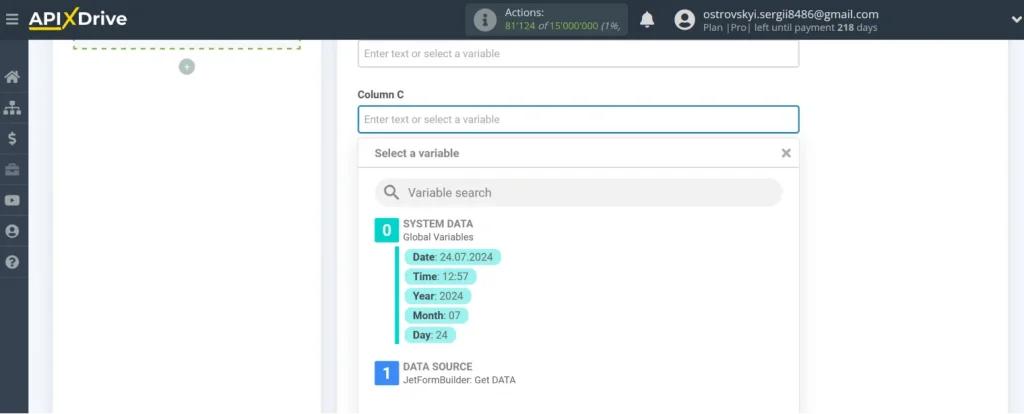
When all required fields are completed, click “Edit and Continue.”
Then, you will see an example of the data that will be transferred to Google Sheets as new rows for each new data from JetFormBuilder. To check if you have made the settings correctly, click on “Send test data to Google Sheets.” After successfully sending it, go to Google Sheets and check the result. If everything is okay, return to the ApiX-Drive system and complete the setup.
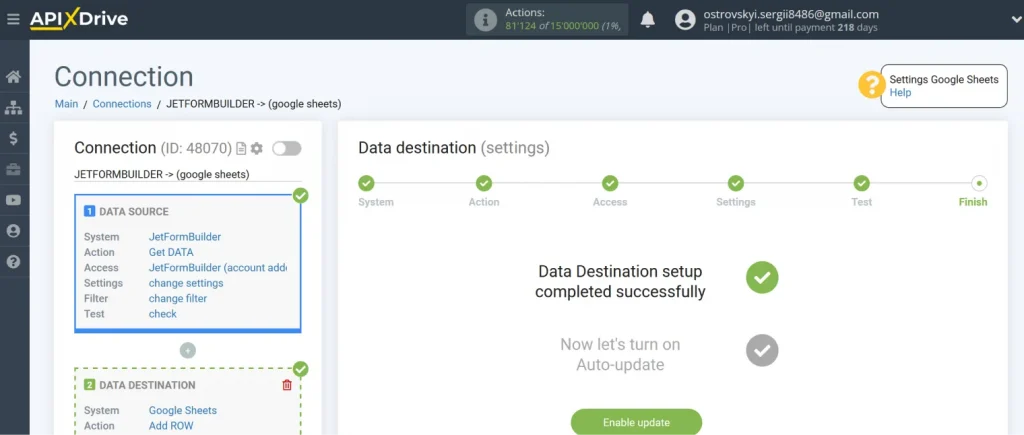
To enable automatic data transfer, configure the auto-update feature. Click on the “Enable update” button.
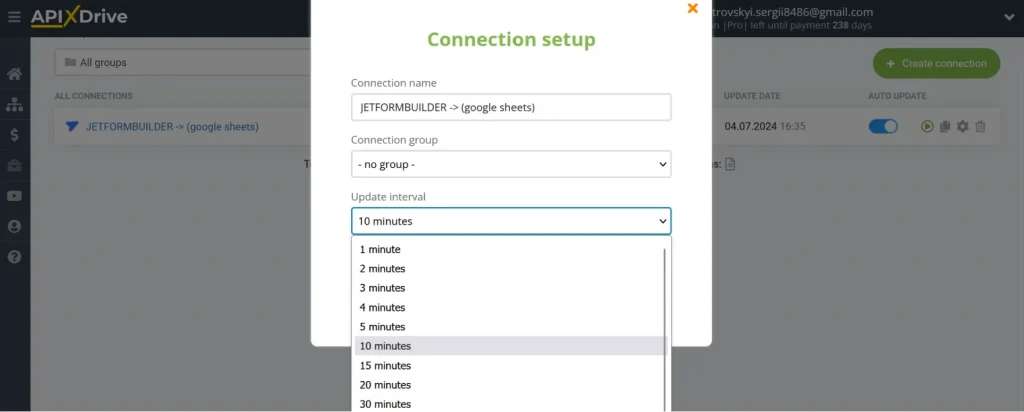
Next, click on the gear icon. Select the interval for updating the data. For instance, every five minutes. Additionally, you can modify the integration’s name and assign it to the desired group. Click on “Continue.”
That’s it. The integration between JetFormBuilder and Google Sheets has been successfully set up. Well done!
Using system integrations to automate the transfer of data is a progressive method for enhancing productivity. We demonstrated how this works using the example of the no-code service ApiX-Drive, which allows even inexperienced newcomers to set up integrations.
The integration of JetFormBuilder and Google Sheets starts working and delivering results immediately after its successful setup and the initiation of auto-updates. It frees you from the need to perform monotonous manual labor. The process of transferring data is fully automated. You will no longer have to handle this task yourself.
Essentially, you are delegating the routine to the ApiX-Drive connector. Meanwhile, you can focus on improving customer service, mastering new marketing strategies, and other aspects that will contribute to your business’s development.
Setting up the JetFormBuilder and Google Sheets integration typically takes about ten minutes. If you have prior experience with similar tasks or have previously worked with online connectors, you can complete the process even faster.
The integration itself is free. You only pay for the amount of data that was actually transferred from one service to another via ApiX-Drive in a month. If the volume of data transferred is minimal, the free plan may suit your needs well. If desired or necessary, you can always switch to one of the paid plans.
Currently, ApiX-Drive offers 150+ integrations of JetFormBuilder with other systems.