3 JetFormBuilder WordPress Automation Cases with Make
In the competitive realm of digital marketing and web development, automation stands as a pivotal force driving efficiency and productivity. Integrating sophisticated automation workflows for WordPress users leveraging the dynamic JetFormBuilder plugin can revolutionize website management and user interaction. This is where Make steps in, a robust platform designed to effortlessly connect applications and automate tasks, eliminating the need for intricate coding.
This article will delve into three impactful automation use cases that illustrate the powerful combination of JetFormBuilder and Make. These examples will explore how businesses can automate routine tasks, enhance data integration, and create a more interactive user experience. Whether you’re seeking to streamline form submissions, connect with third-party services, or simplify complex workflows, these automation cases provide valuable insights and practical strategies to elevate your WordPress site’s capabilities and operational efficiency.
Quick Guide to JetFormBuilder
JetFormBuilder is a versatile and dynamic form-building plugin designed for WordPress, offering users a powerful tool to create complex forms easily. Developed by Crocoblock, JetFormBuilder stands out due to its drag-and-drop interface, which simplifies the form creation process and allows users to build and customize forms without extensive coding knowledge. The plugin supports various field types and functionalities, including multi-step forms, conditional logic, calculated fields, and more, enabling users to create forms tailored to their specific needs.
One of JetFormBuilder’s key strengths is its integration capabilities. It supports various third-party services such as Make, Mailchimp, and Zapier, allowing users to automate workflows and streamline their data collection processes. Additionally, JetFormBuilder includes features for managing form submissions directly from the WordPress dashboard, providing a centralized location for handling all form-related activities.
With its extensive customization options, users can design forms that align perfectly with their website’s branding and functionality requirements. Overall, JetFormBuilder offers a robust solution for WordPress users looking to enhance their site’s interactivity and user engagement through sophisticated forms.
Overview of the Make Automation Platform
Make revolutionizes the way businesses handle their workflows by providing a sophisticated yet user-friendly automation tool. With Make, you don’t need to write a single line of code. Its intuitive drag-and-drop interface lets you create intricate scenarios – automated workflows that connect different applications to perform tasks automatically. Whether managing data, communicating with customers, or syncing information across platforms, Make simplifies the complex, turning mundane tasks into automated processes that save time and reduce errors.
What truly sets the Make automation platform apart is its extensive and diverse library of pre-built templates and connectors. Imagine having a vast toolkit integrating hundreds of apps and services, from essential tools like Google Workspace and Slack to specialized software tailored for niche industries. Collaboration and scalability are at the heart of Make, making it an ideal choice for teams of any size. Furthermore, Make offers flexible pricing plans, catering to everyone from solo entrepreneurs to sprawling enterprises, enabling businesses to scale their automation efforts as they grow. Make transforms your business operations, allowing you to achieve more with less effort.
Key Advantages for Users of JetFormBuilder and Make Integration
JetFormBuilder is a powerful form builder and Make, a robust automation platform, form a formidable duo when integrated. This strategic combination empowers users to streamline workflows, enhance efficiency, and achieve remarkable results. Let’s delve into the key advantages users can reap from this integration:
- Effortless automation: manually processing form submissions can be time-consuming and prone to errors. JetFormBuilder and Make integration eliminate this burden. Make enables you to design automated workflows that trigger actions upon form submission.
- Powerful integrations: Make boasts a vast library of pre-built connectors, allowing you to integrate JetFormBuilder with many third-party applications. This opens a world of possibilities, such as creating new customer records in a CRM system upon form submission or automatically sending personalized email notifications.
- Improved user experience: automated workflows can significantly enhance the user experience. For instance, integrating form submissions with email marketing tools can trigger automatic welcome emails or thank-you messages, fostering a more positive user experience.
- Error reduction and improved accuracy: manual data entry is a breeding ground for errors. This integration minimizes human error and ensures data accuracy by automating data transfer between JetFormBuilder forms and other applications.
- Valuable time savings: automating repetitive tasks frees up your time and resources. This integration allows you to focus on more strategic initiatives while Make handles the heavy lifting of form processing and data management.
Synchronizing JetFormBuilder form with Make
To start reaping the benefits of JetFormBuilder and Make combo, you must set up the two correctly. The steps outlined below will show you how to do this.
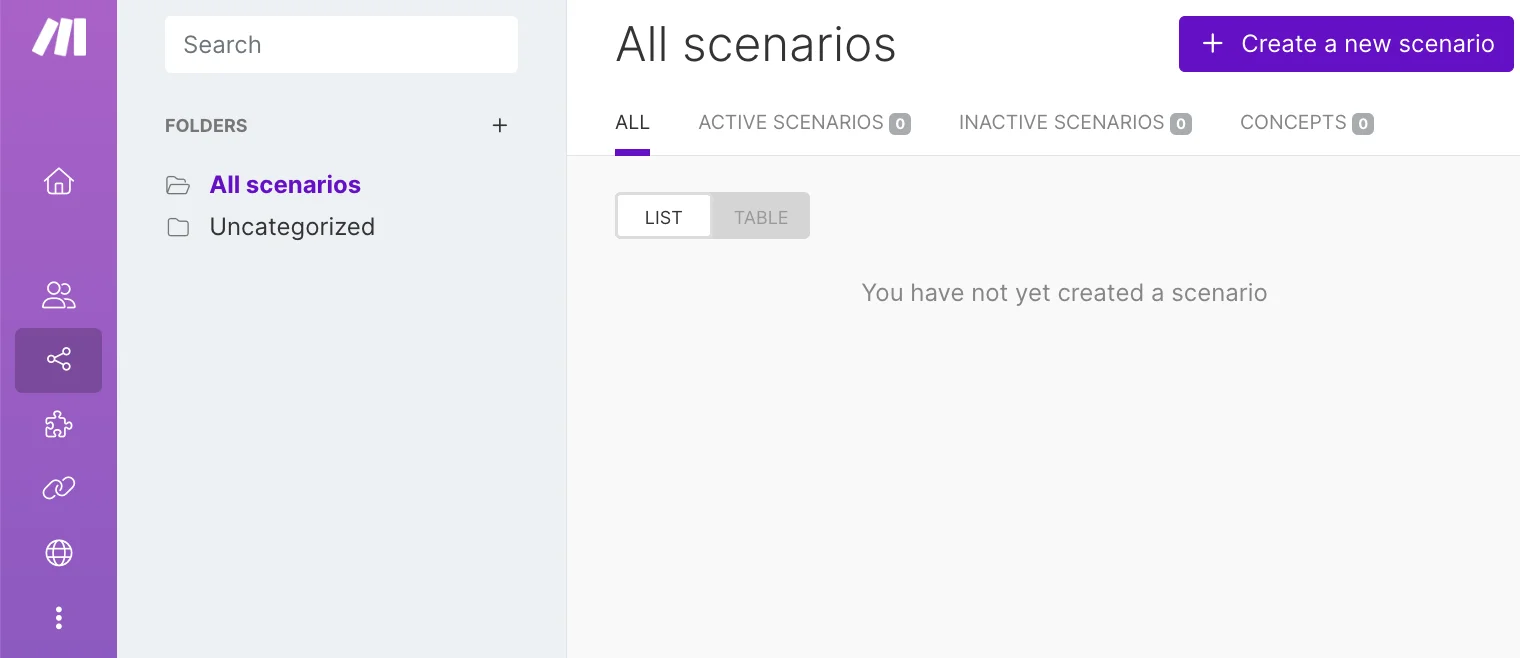
1. Log in to your existing account or create a new one on the Make platform. Once logged in, navigate to the Scenarios tab on the dashboard. In the top right corner, click on “Create a new scenario.“
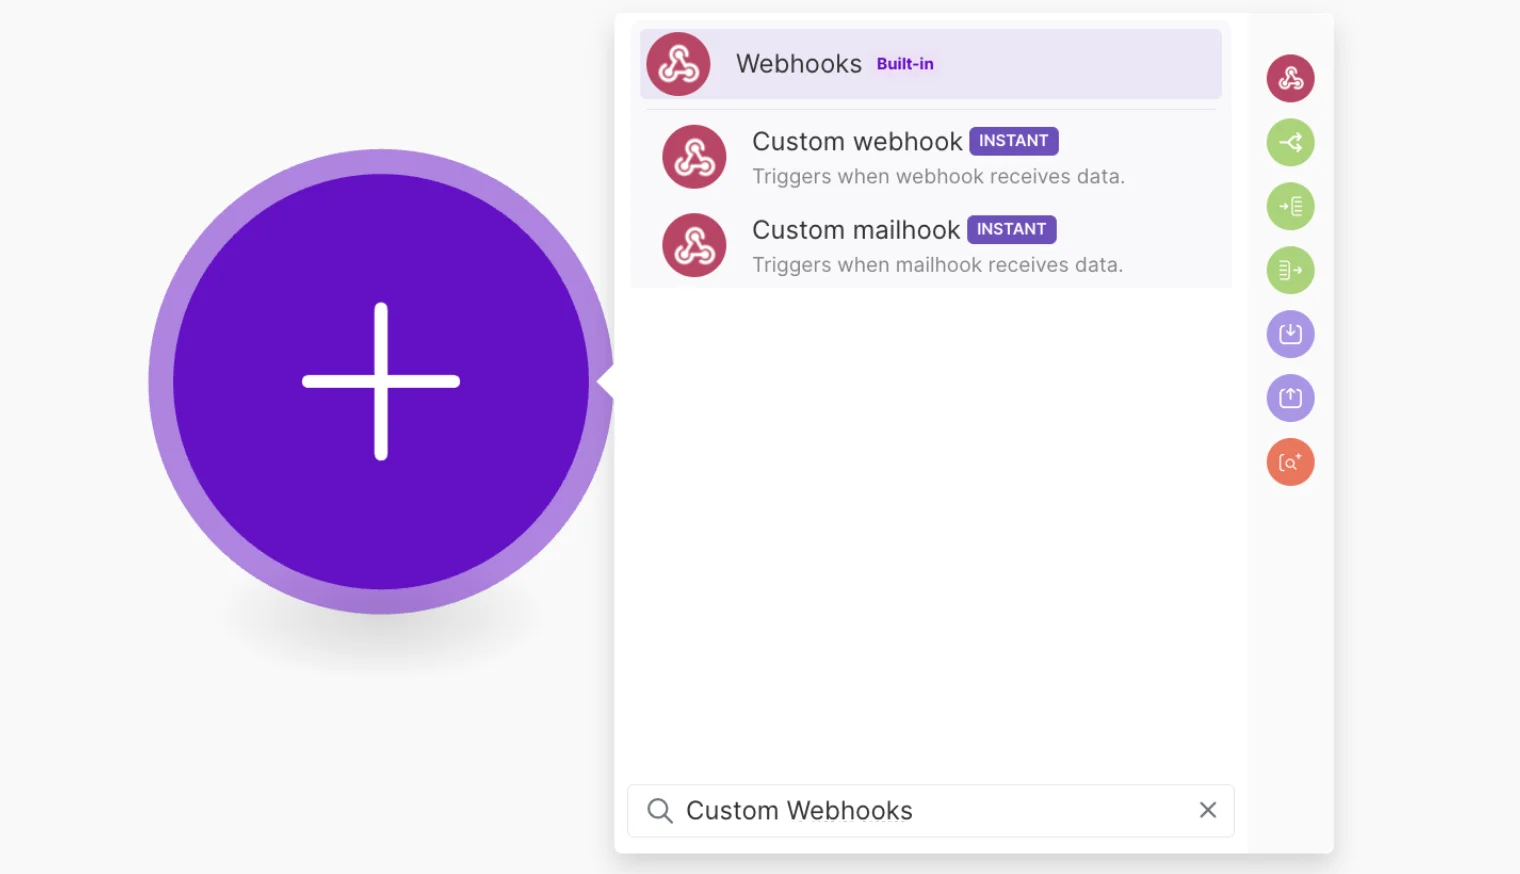
2. Press the big plus icon and pick the Webhooks module from the available tools. Next, select the Custom Webhooks trigger.
3. Once you’ve selected the Webhooks module, click “Add” and then “Save” to name your Webhook.
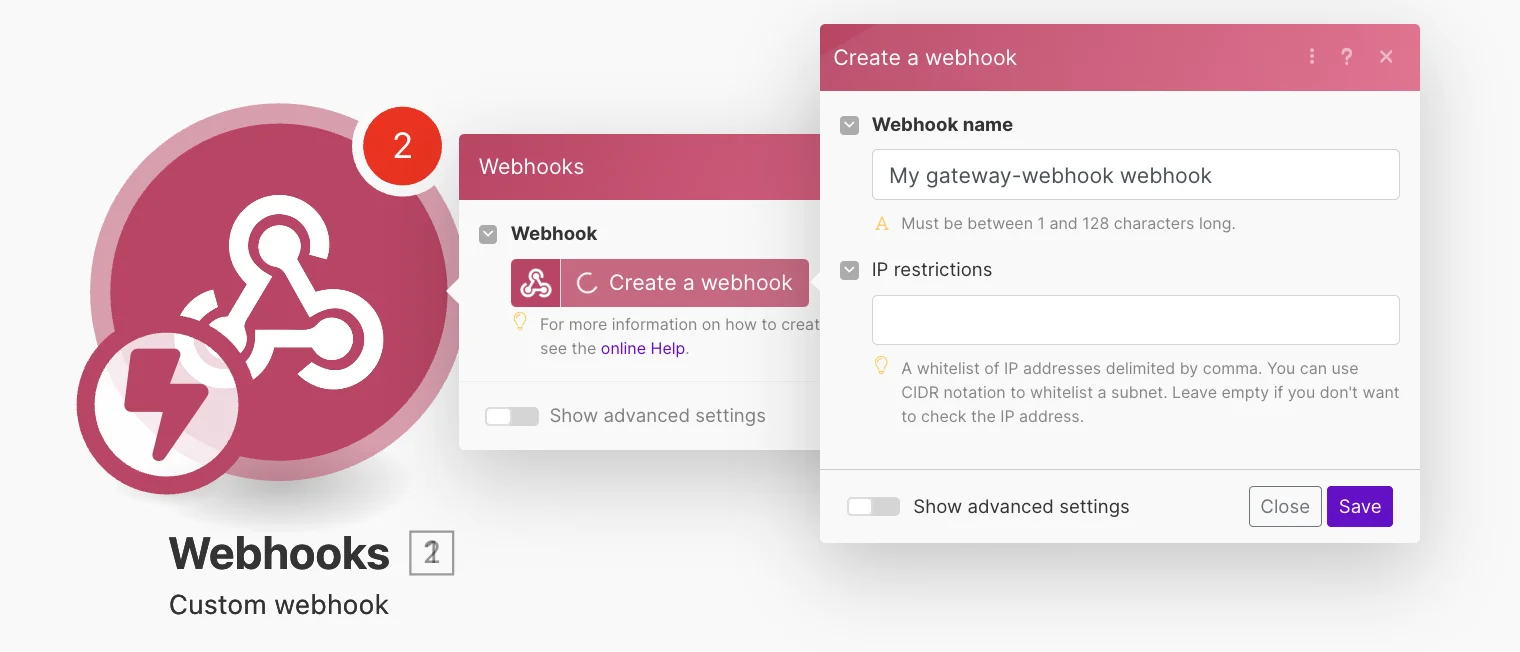
4. Copy the generated link and leave the Make window open.

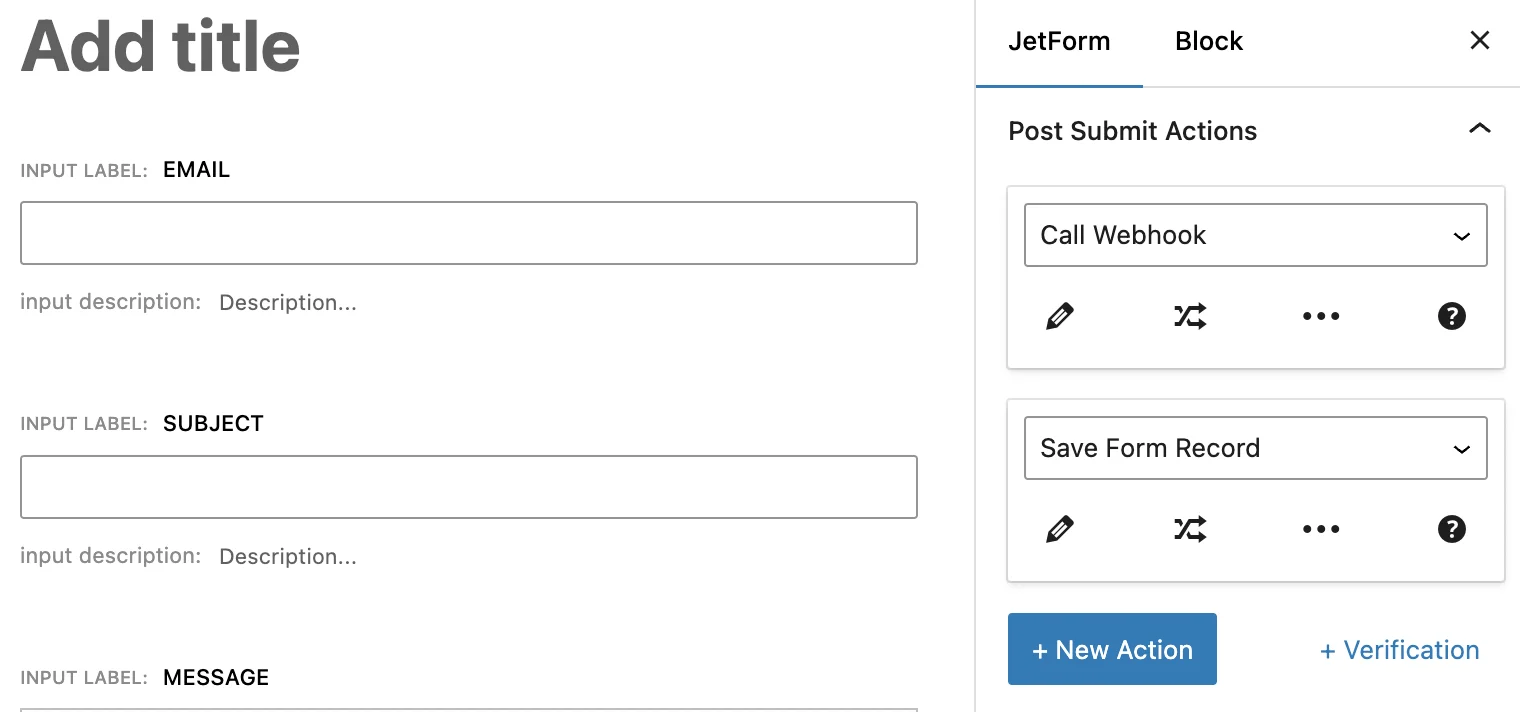
5. Navigate to your WordPress site and go to JetFormBuilder > Forms. Find the form you want to connect with Make and change the default “Send Email” action to “Call Webhook.“
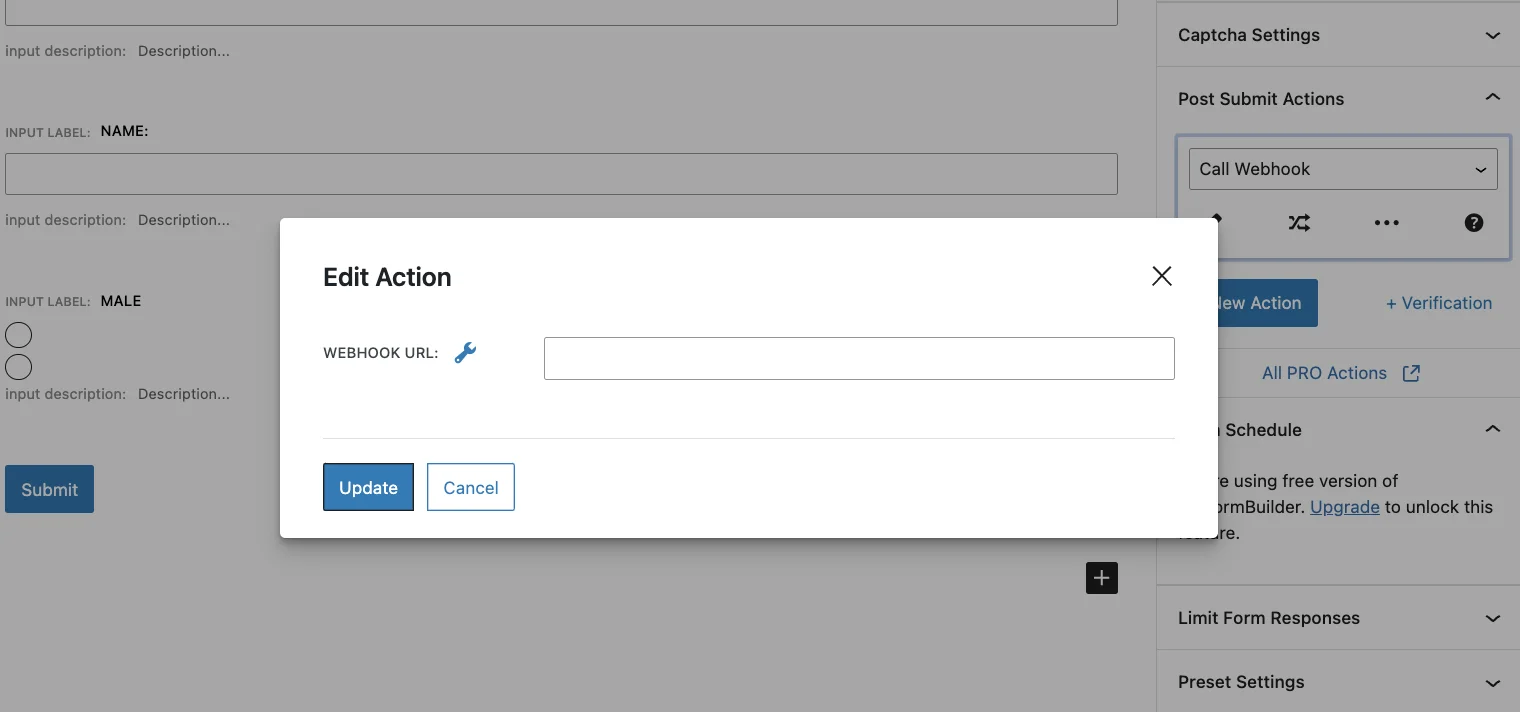
6. Select “Edit” and paste the URL into the appropriate field. Afterward, click the buttons to update both the Post Submit Actions and the WordPress form.
7. Go to the front-end page where the form is located and submit it. After submission, you will see a confirmation message in the Webhook indicating success. Click “OK” to proceed.
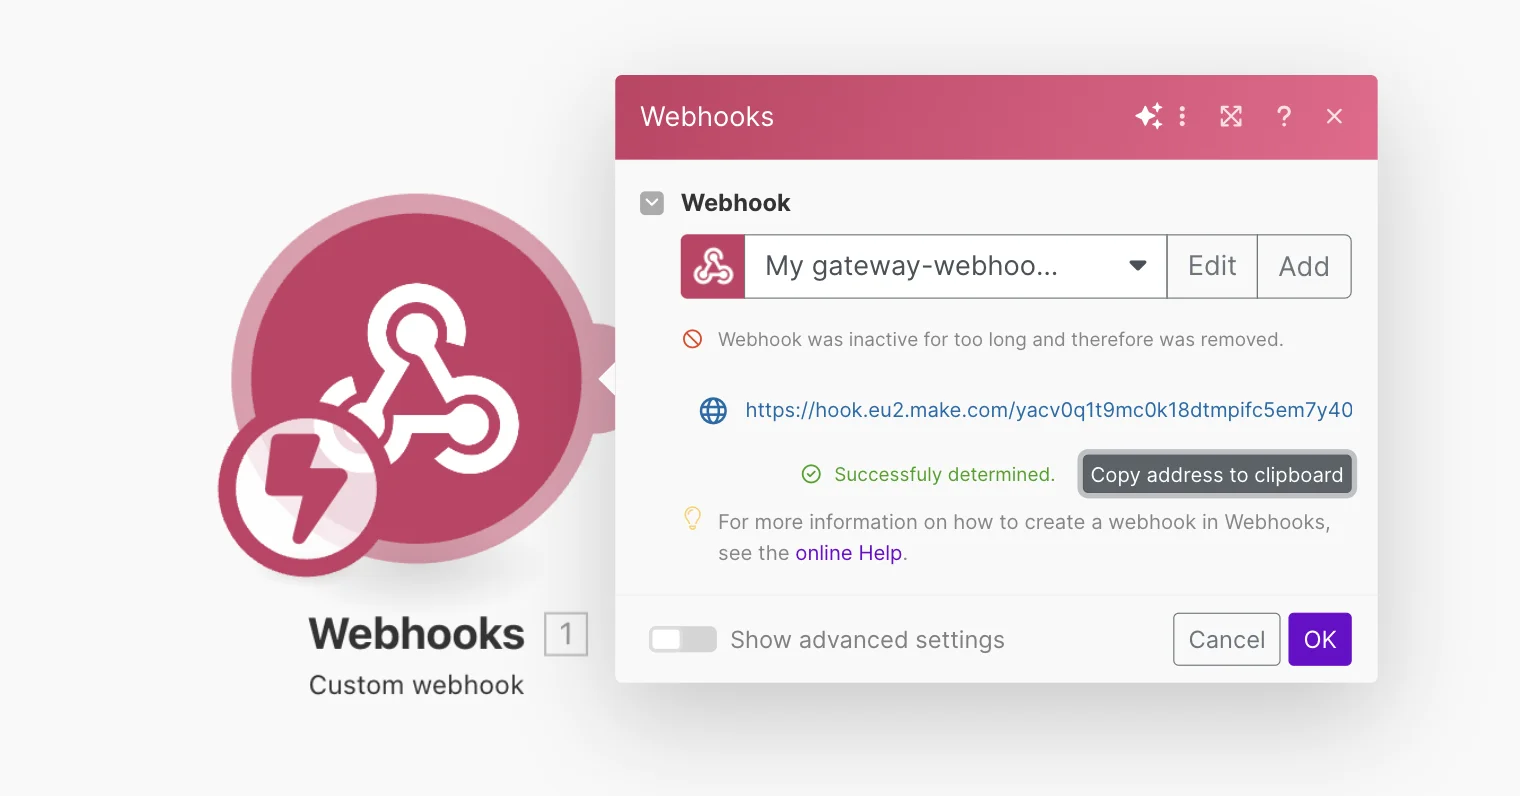
Congratulations! Now, you have connected your JetFormBuilder form to the Make platform.
3 Practical Cases of Using JetFormBuilder and Make
Buckle up because we’re about to unveil the dynamic duo that will revolutionize your WordPress experience. Let’s delve into three practical cases where this powerful combination tackles common WordPress hurdles.
Use case 1: Send data from JetFormBuilder to a Google Form
In Make, include a Google Forms action in your scenario. Choose “Create a Form” and complete the fields as follows: Use ‘title’ for the Title section, ‘document_title’ for the Document Title, and ‘description’ for the Description.
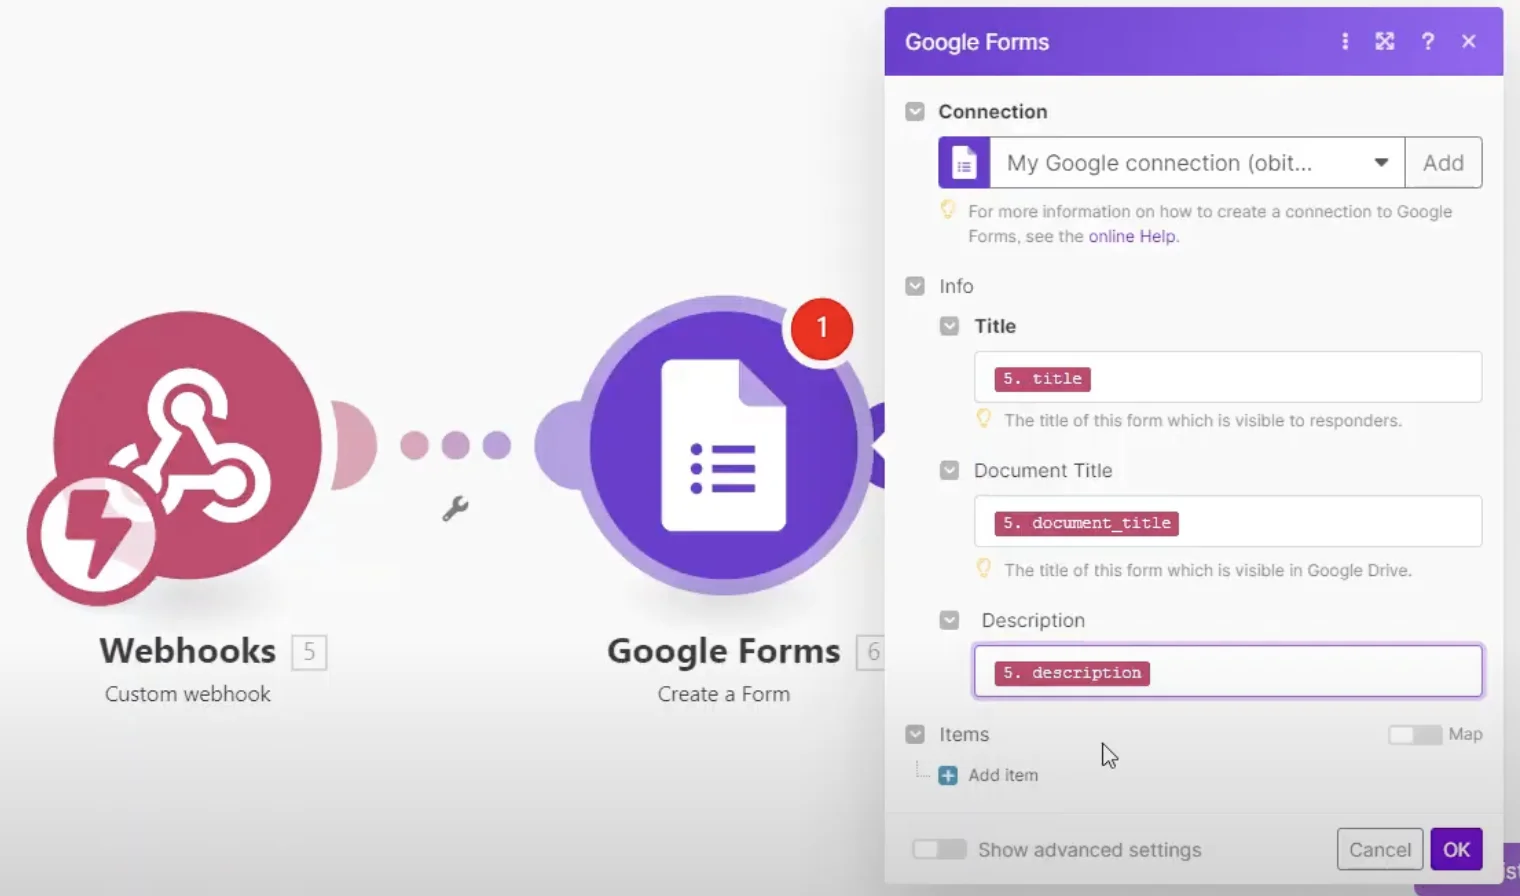
Click the “Add item” button, choose ‘question_title’ for the Title, ‘question_description’ for the Description, and then click “OK.”
Once you have configured your Make scenario, save it and conduct a test to ensure the accuracy of data mapping.
When a form is submitted on your website, the information will be sent to your Google Forms account.
Use case 2: Send an SMS reminder 24 hours before the appointment
For this use case, you will need the JetAppointment plugin, so before you begin, make sure you have installed and activated it.
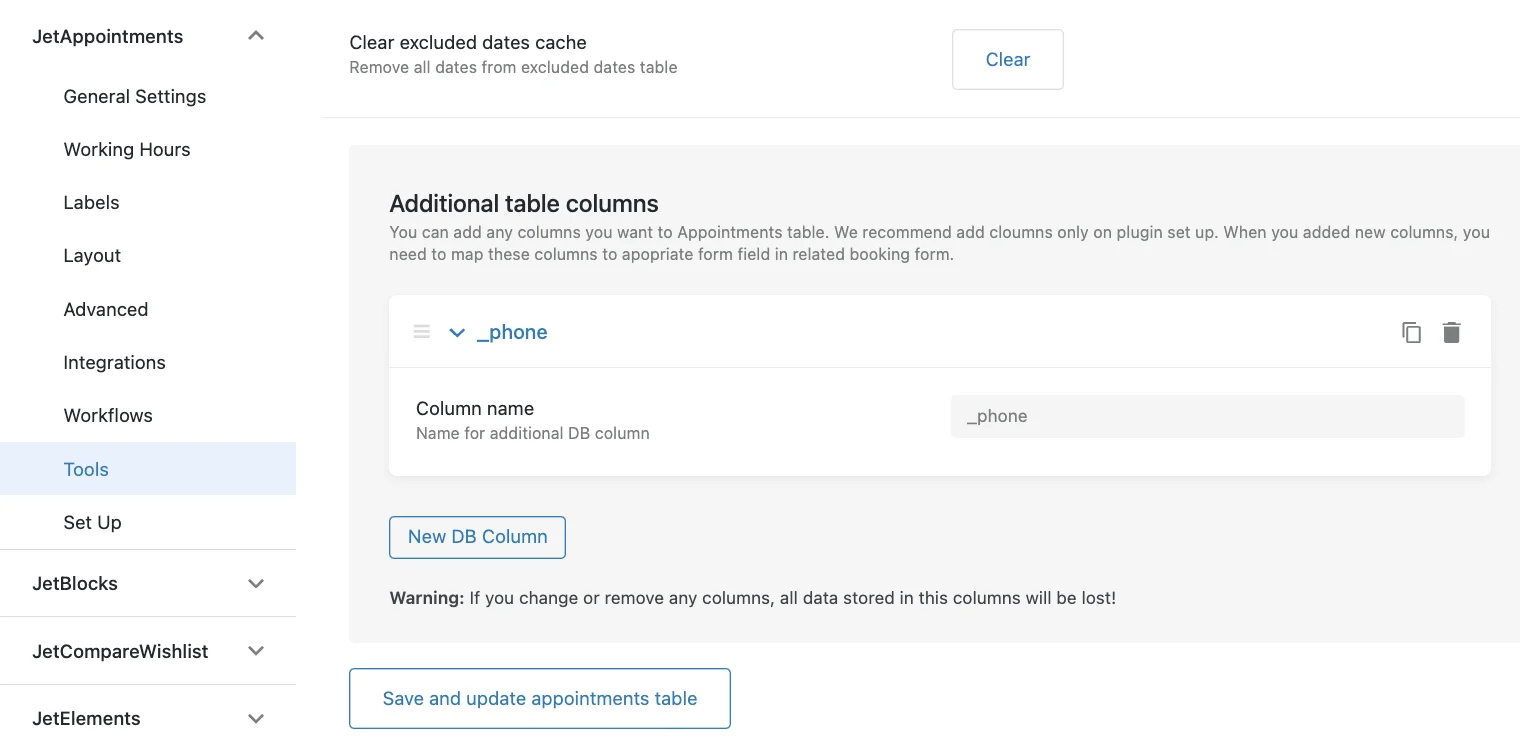
To add a database column for the phone number field in JetAppointment settings, follow these steps:
- Go to your WordPress Dashboard.
- Click on Crocoblock > JetPlugins Settings > JetAppointments > Tools.
- Generate a new column specifically for the phone number field.
- Input all required information.
- Complete the process by selecting “Save and update appointments table.“
This process ensures that the phone number field is properly integrated into your JetAppointment settings and database structure.
In the JetFormBuilder booking form, add a phone number field. Use a Text Field block, set a Field Name, and choose “Tel” as the Field Type.
After adding the field, connect it to store its value in the newly created database column.
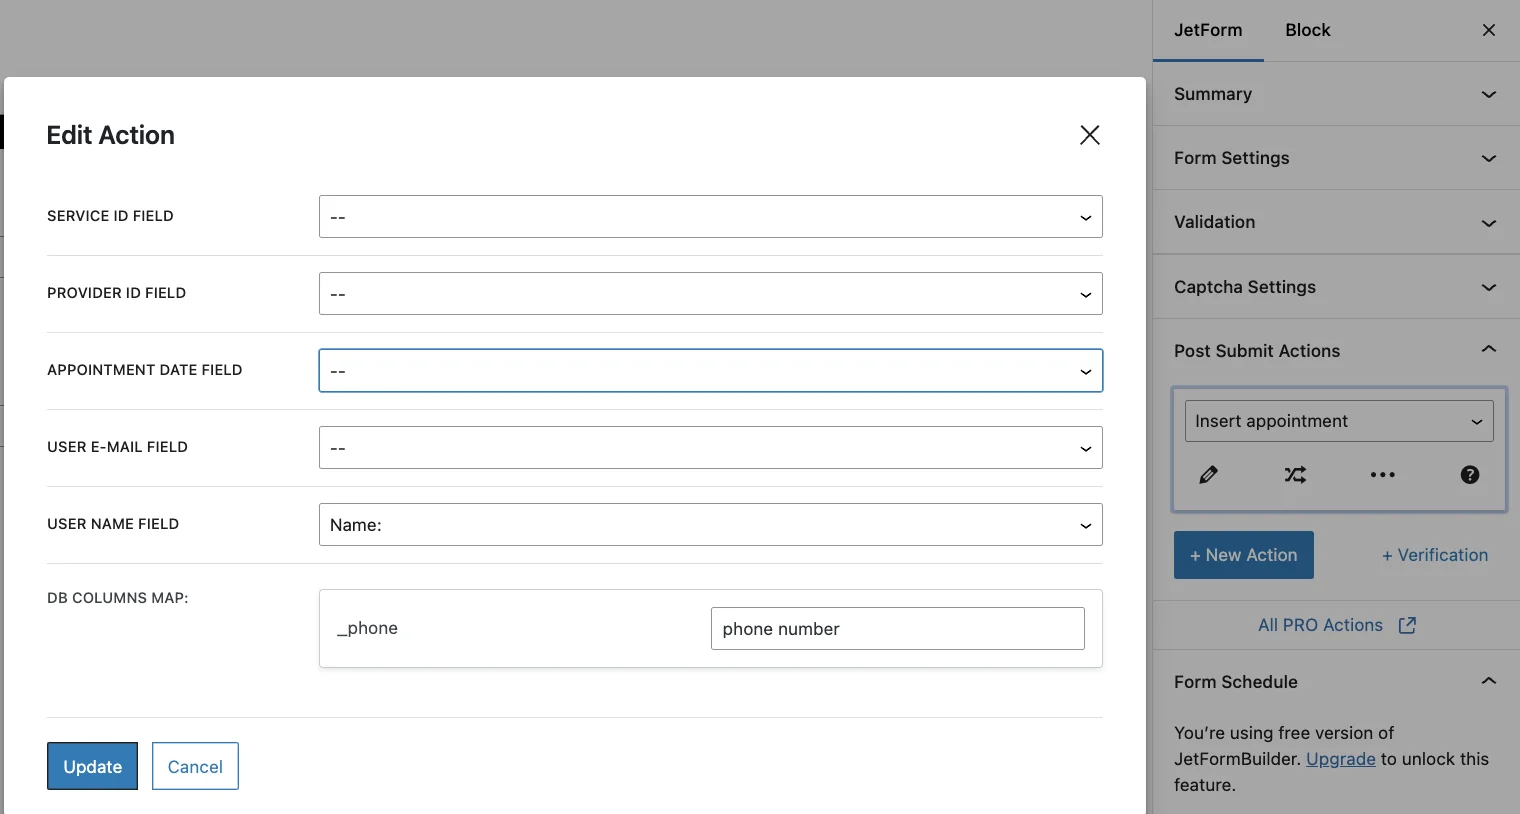
In the JetForm settings, under Post Submit Actions, choose “Insert appointment.” Click the pencil icon to configure it, enter the form field name in the DB Columns Map field, and click “Update” to save the form.
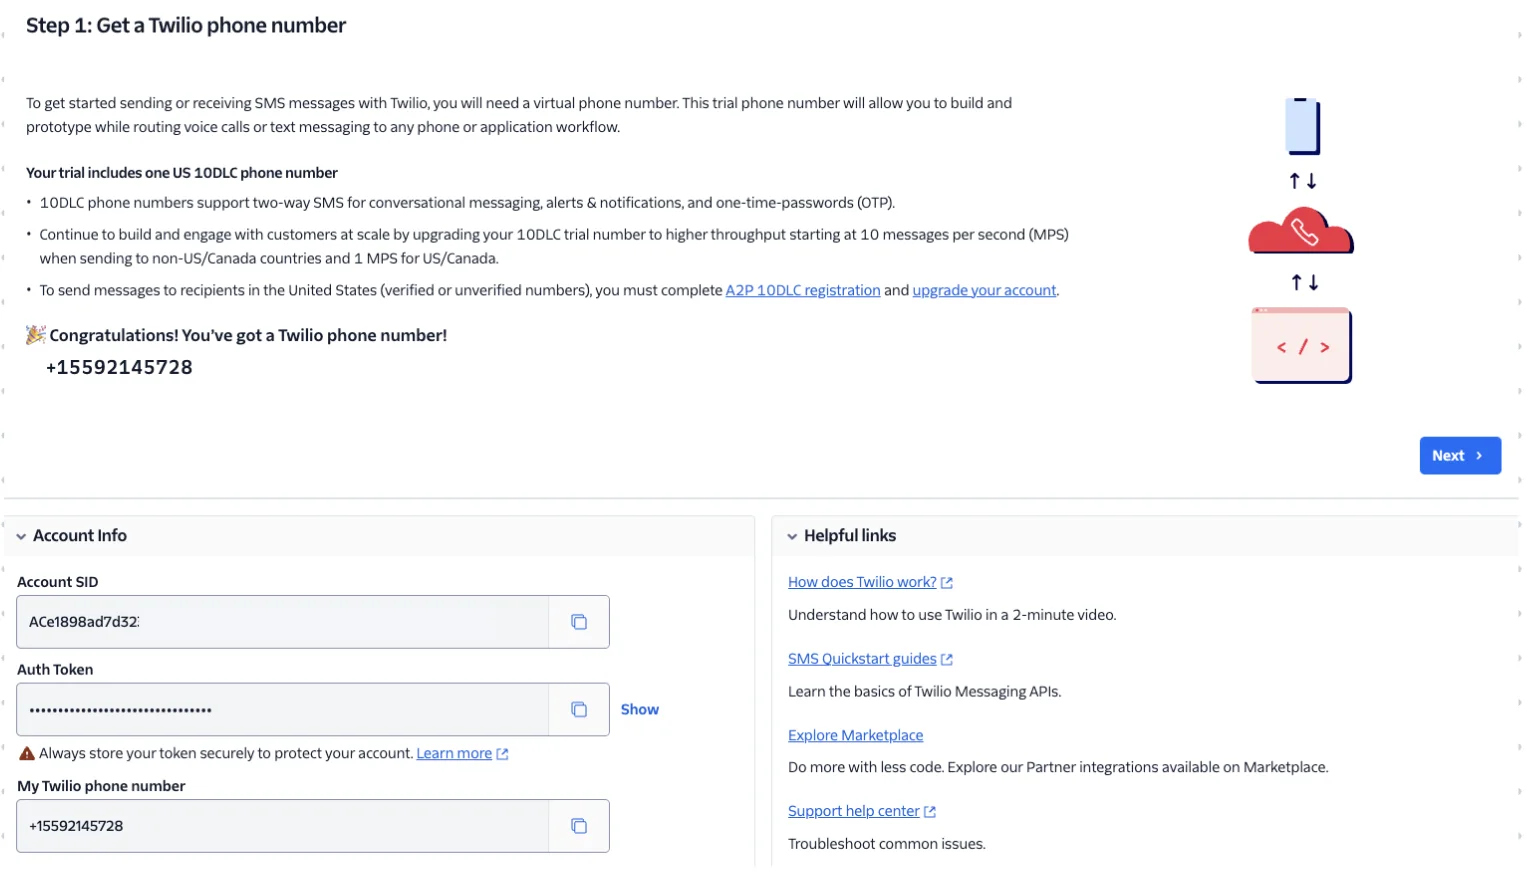
Now, create a Twilio account for integration. Once registered, click “Get phone number.” Access your Account Info tab to find your Account SID and Auth Token, which are essential for integrating with Make.
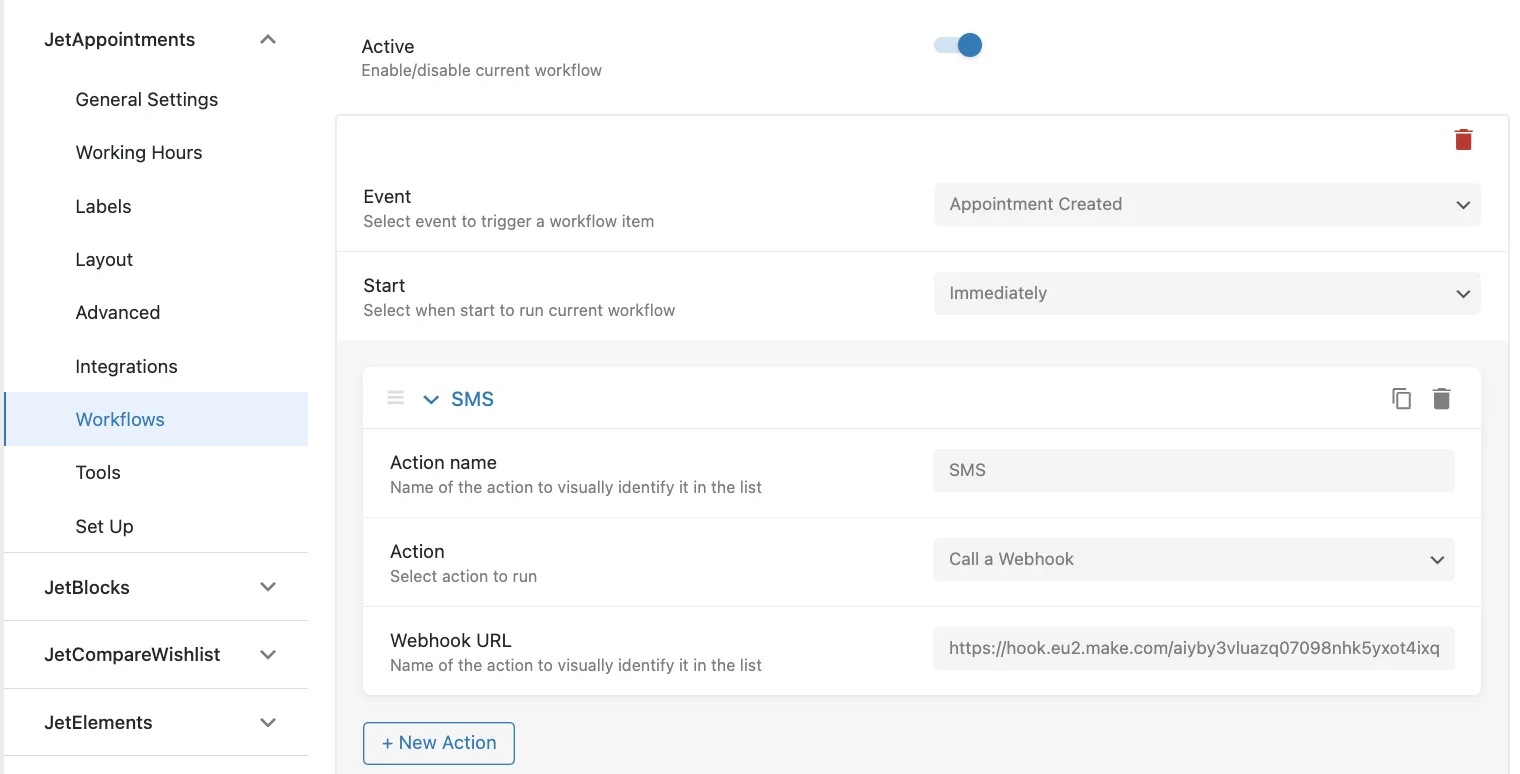
Paste the copied webhook’s link into the Appointment Workflow located at WordPress Dashboard > JetAppointments > Settings > Workflows. Set “Appointment Created” as the Event and “Immediately” as the Start. Click “New Action,” name it, select “Call a Webhook” as the Action, and paste the webhook URL.
After submitting the form on the front end, the appointment fields will be included in the webhook. Look for a green confirmation message in Make indicating the successful parsing of the appointment data.
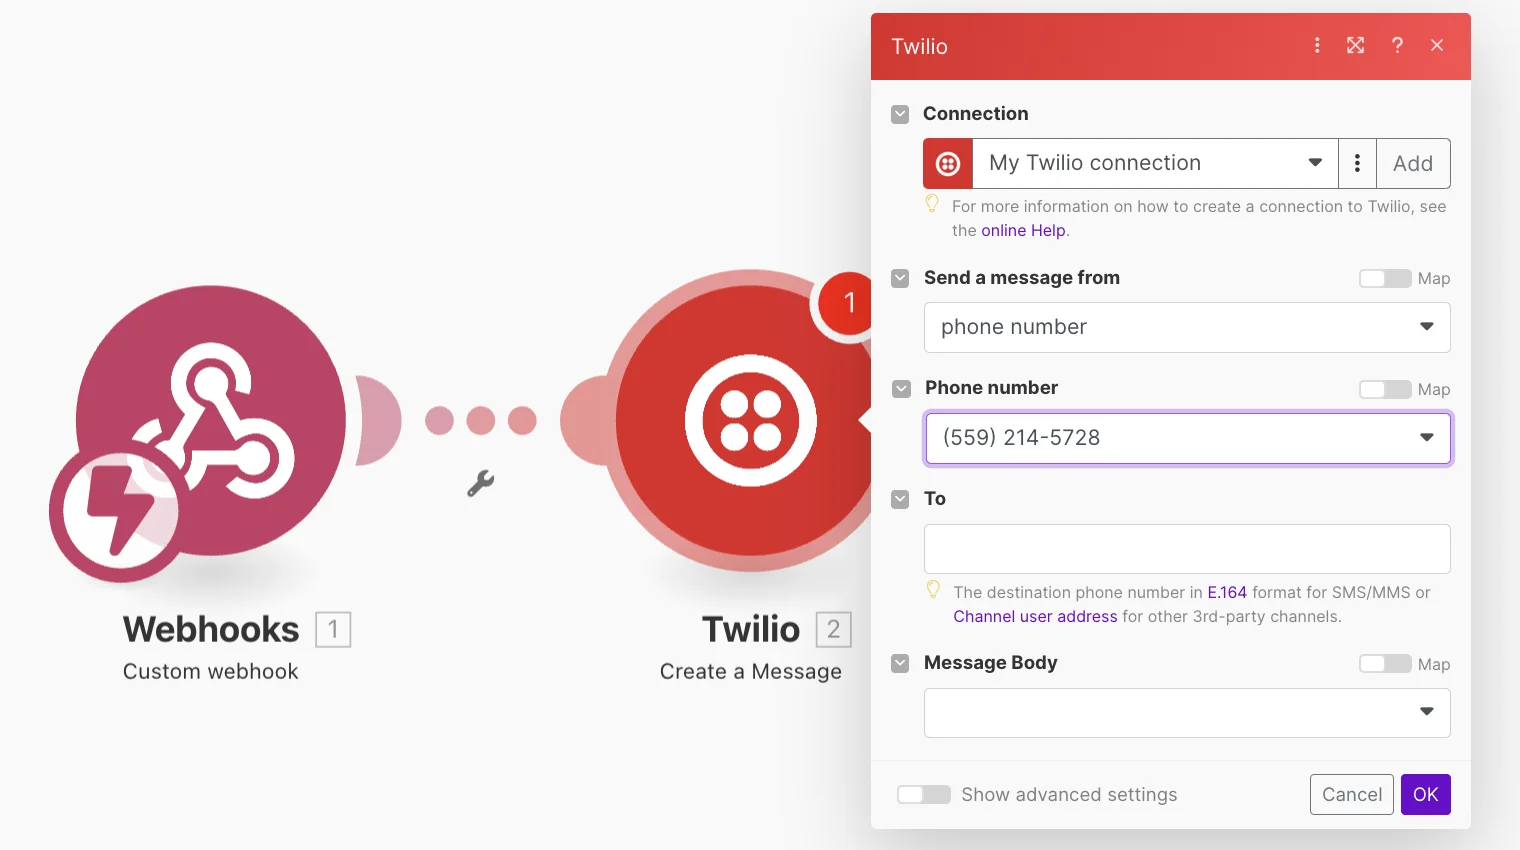
Once the fields are parsed, add another Twilio module. Choose “Create a Message” and customize the “Send a message from” field by selecting the Twilio phone number you obtained earlier.
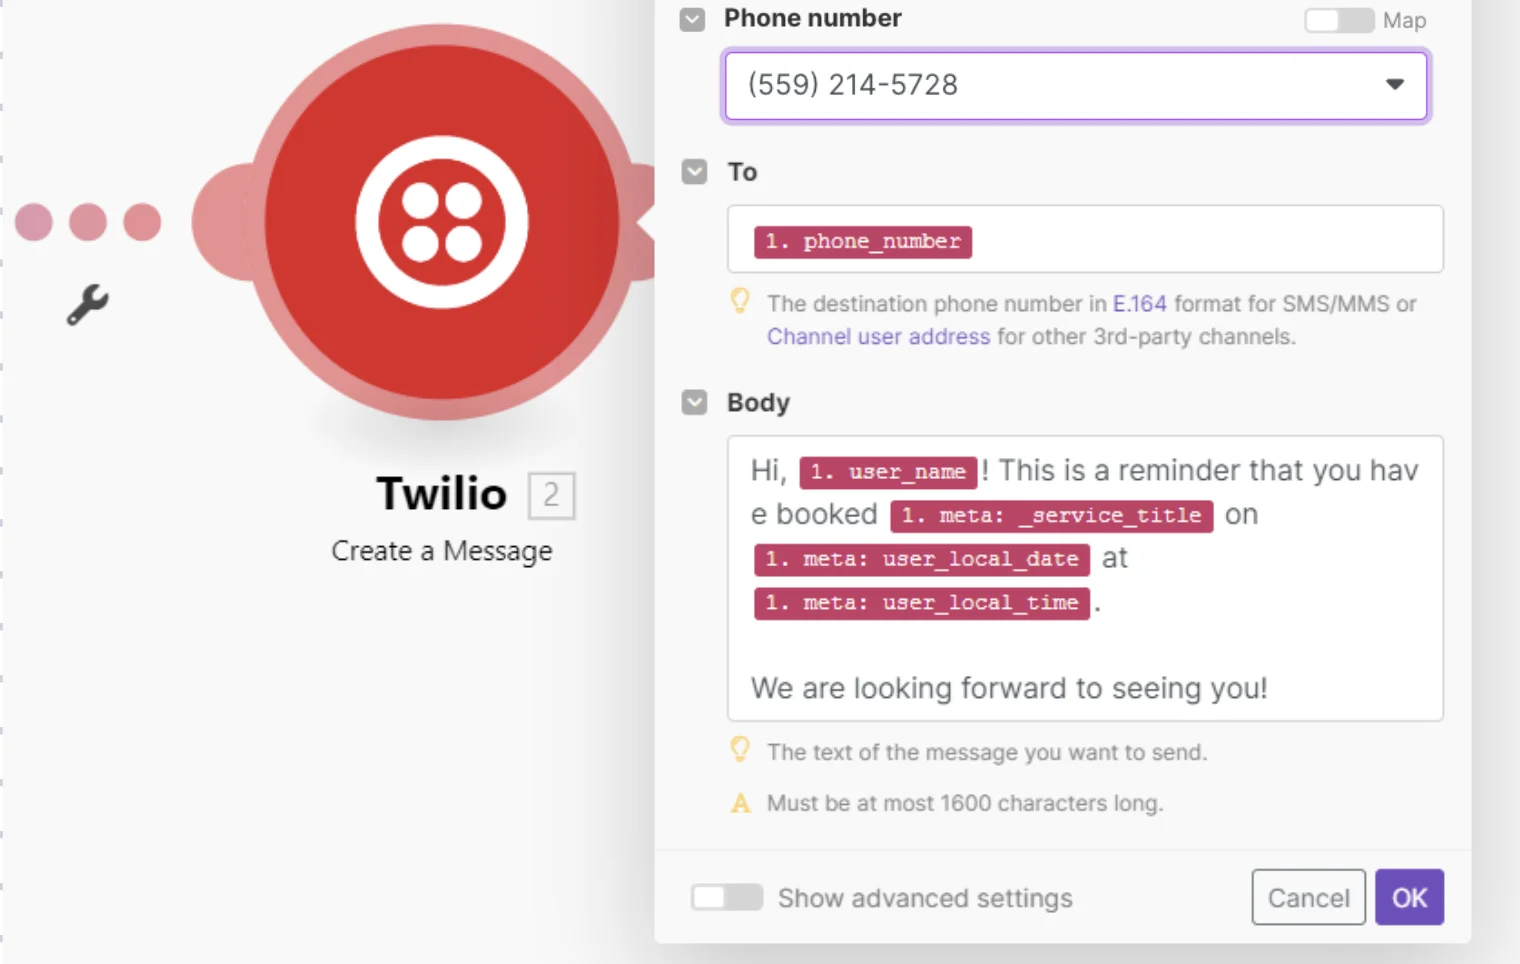
In the To field, include the ‘phone_number’ field to send an SMS to the phone number entered by the user. Ensure the SMS body includes appointment details using previously parsed fields from form submissions: ‘user_name,’ ‘_service_title,’ ‘user_local_date,’ and ‘user_local_time.’ Add any additional fields as needed.
Use case 3: How to add appointments to Google Calendar
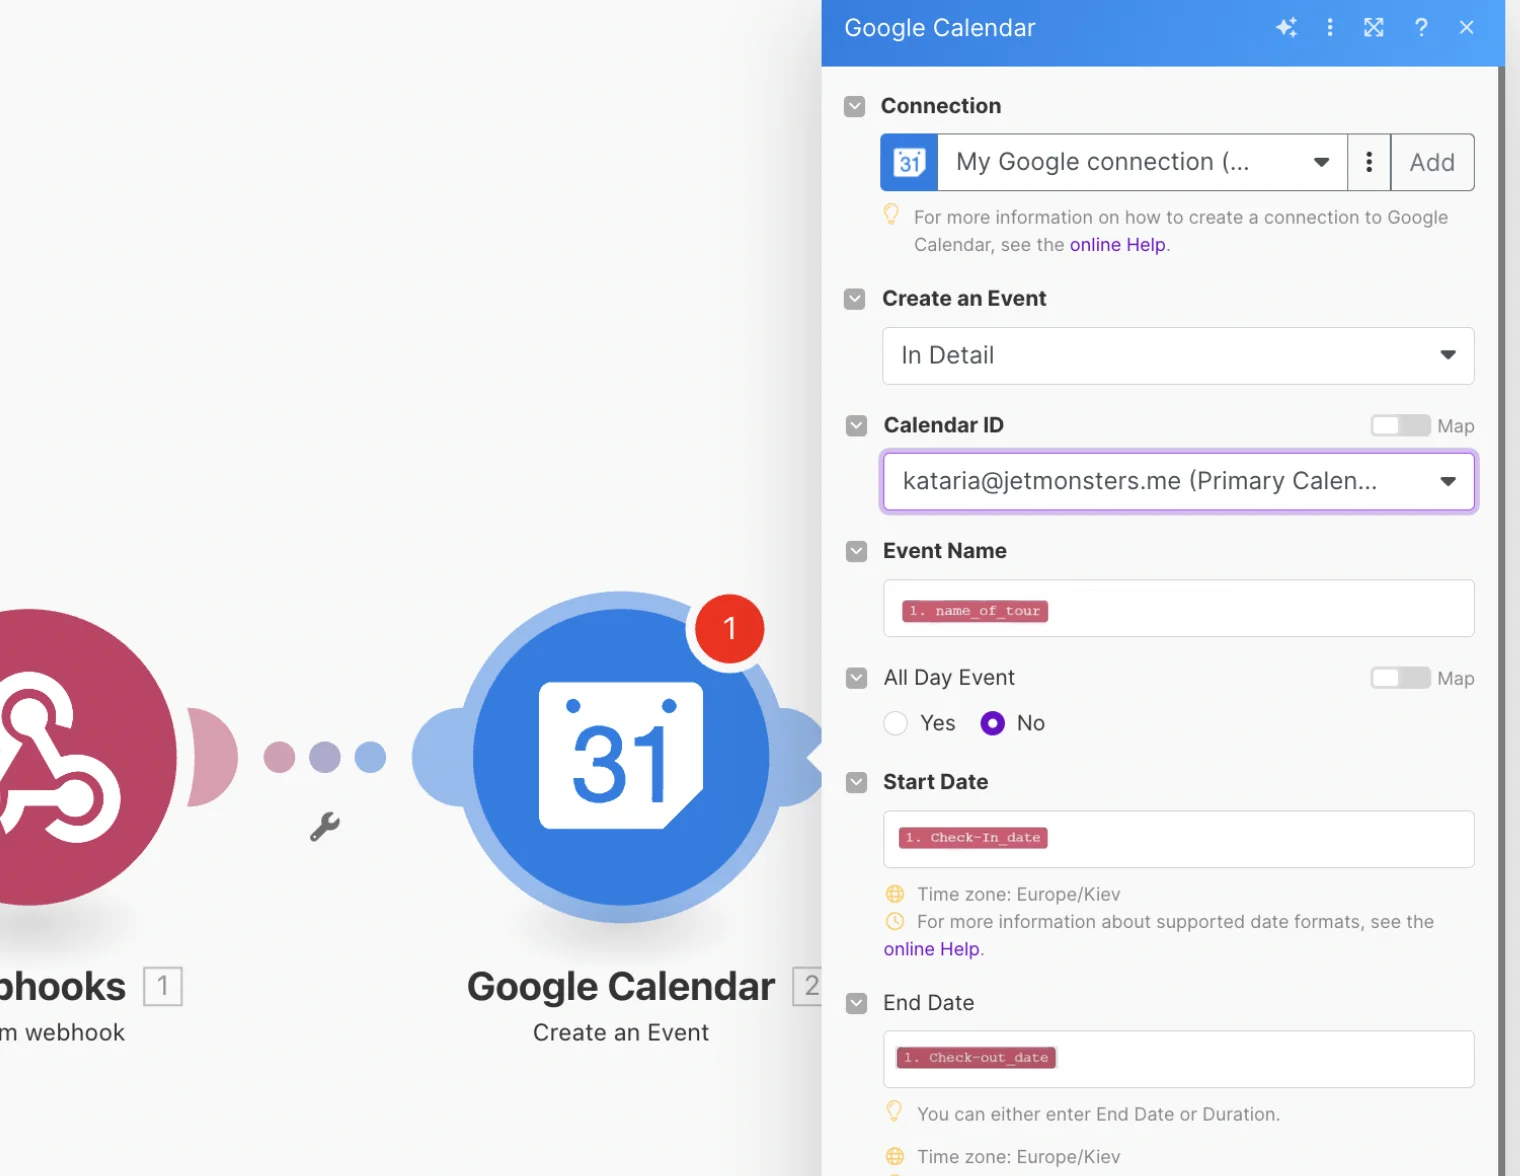
1. To schedule appointments, add another module to the Webhook. Select “Google Calendar” from the list and choose “Create an Event.”

2. Give a name to your connection, sign in to your Google account, and select your Google Calendar from the list. Fill in the Event Name, ‘check_in_date’ for the Start Date, and ‘check_out_date’ for the End Date.
3. Tick the “Send Notification” option and advanced settings if needed. Customize the Description as you want and press “OK.”
4. Toggle on the Scheduling switcher to save the changes.
Submit your appointment booking form on the front end and check your Google Calendar to make sure that everything is working.
Sum Up
In just a few clicks, you’ve seen how JetFormBuilder and Make can streamline your WordPress site’s automation. By leveraging these powerful tools together, you can free yourself from repetitive tasks, improve efficiency, and provide a superior user experience. The possibilities for automation with this duo are virtually limitless. Imagine automatically generating personalized content, streamlining the onboarding process for new users, or creating powerful custom notifications.
So, what are you waiting for? Unleash the automation potential of your WordPress site and take it to the next level with JetFormBuilder and Make. With a little creativity and these robust tools at your disposal, there’s no telling what you can achieve!
Still have some questions?
The possibilities are vast, but depending on Make's specific integrations and the functionalities of connected services, some limitations might exist.
Yes, both JetFormBuilder and Make offer free plans with limitations. Upgraded plans offer more features and functionalities.
The Make platform allows you to create simple or complex workflows with multiple steps and conditional logic.

Written bу
Related articles
Created with JetFormBuilder
WordPress Form Submission: JetFormBuilder Scenarios
Created with JetFormBuilder
6 Free Contact Form Plugins for Any WordPress Website (2026)