Sell physical/digital products
Combine JetFormBuilder and Stripe checkout to create a secure payment flow and sell products and fixed-price services without the need for a digital store.
A supplementary software to carry out one-time and recurring payments via Stripe.
Buy from $49
Combine JetFormBuilder and Stripe checkout to create a secure payment flow and sell products and fixed-price services without the need for a digital store.
Add Stripe checkout to membership websites to charge monthly/yearly for courses, gated content, community access, etc., and manage subscriptions from WordPress UI.
Accept donations repeatedly, giving way to monthly/annual gifts and steady support. Test the payment flow before going live.
Stripe Payments & Subscriptions is a JetFormBuilder PRO add-on. It links JetFormBuilder forms to Stripe software, enabling one-time and recurring online payments via Stripe Gateway. Using Stripe’s secure hosted Checkout and webhook syncing back to WordPress, the add-on allows you to create monthly, yearly, and custom-interval subscriptions.
Stripe-powered add-on is best for those who sell products, tickets, and memberships; offer booking, rental, and other specialty services; accept donations, and more.

Activate the Gateway option to connect the payment system and the form.
Use the Stripe-approved Currency Codes and choose which one will be used for financial operations on the site.
The form field type can be Calculated/Hidden, and it should be set in digits only.
The %gateway_amount%, %gateway_status%, and %field_name% macros will let you create custom payment success/failure messages.
Schedule the billing and charge customers monthly, yearly, or at a custom interval.

Configure the form to sell different pricing tiers by letting users select their preferred plan.
Cancel/suspend a subscription in WordPress; the renewal is done in Stripe, and the status is automatically synced back to WordPress.
Refunds initiated in WordPress are immediately sent to Stripe, and the data shows in both systems.
Connect Stripe keys either globally for the site or separately for each form – it is convenient for multi-brands/staging.
It is Stripe’s official test mode; you can use test keys and cards to test all scenarios without actual charges.
To install the addon, go to WordPress Dashboard > JetFormBuilder > Addons and find the “Stripe Payment Gateway” addon in the All Available Addons section. Press the “Install Addon” button and, once installed, it will appear in Your Installed Addons. Next, click “Activate Addon” to get it ready for further work.
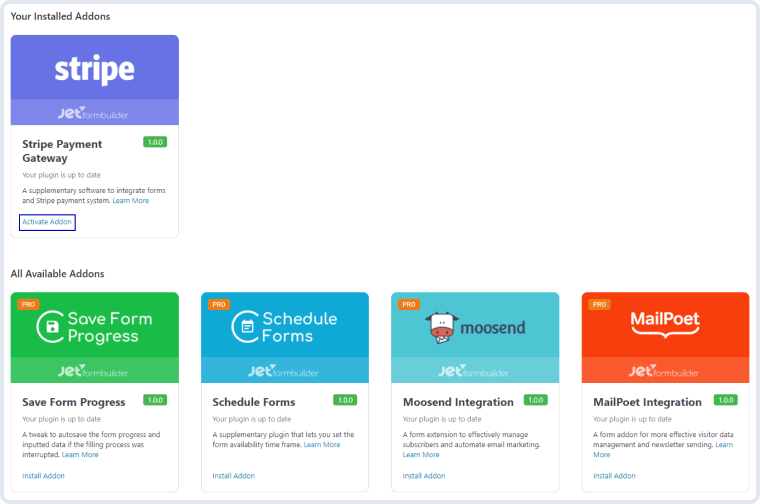
As you can see, all PRO version addons can be easily installed and activated via JetFormBuilder Dashboard.
Go to the Stripe website and create a new account. If you already have a Stripe account, log into it.

A confirmation letter will be sent to your email address. Proceed to the inbox and click the link in the email to pass the verification. Afterward, you’ll be redirected to Stripe’s dashboard page.
First, ensure that you work in the Sandbox test environment, as indicated by the “Sandbox” text in the upper left corner and the “Switch to live account” button in the upper right corner.
If you are on your live account, press the “Viewing test data” button in the upper right corner to switch to Sandbox mode.
On the page, you’ll see the API keys: the Secret key is required, and the Publishable key is needed only if you are connecting Stripe Elements or Checkout on the frontend.

To learn more details on how to set up the Stripe dashboard, proceed to the How to Set Recurring Stripe Payments in WordPress Form tutorial.
Please refer to the Payment Gateways setup tutorial for more details on form creation with the Stripe Gateway.
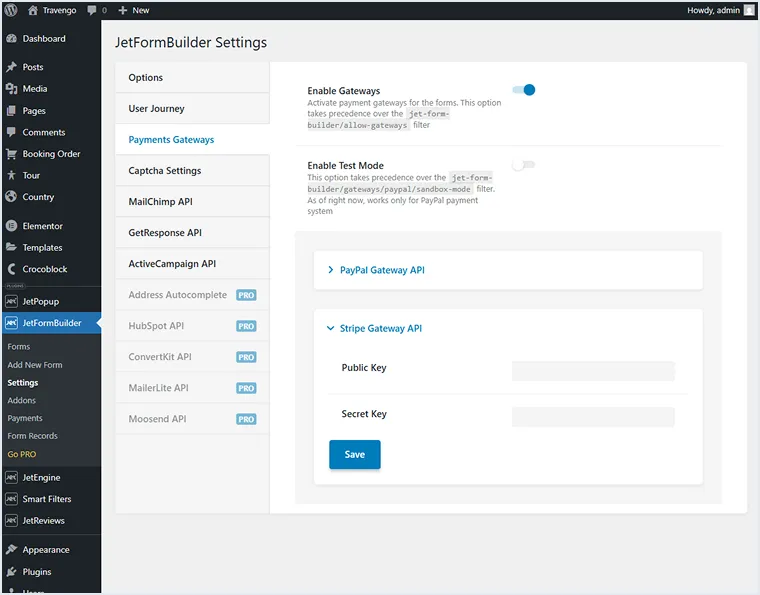
Navigate to the WordPress Dashboard > JetFormBuilder > Settings > Payments Gateways tab and turn the Enable Gateways toggle on.
Unfold the Stripe Gateway API tab. Here, you can enter the Public Key and Secret Key copied from the Stripe website and “Save” them to use in the JetFormBuilder forms further.
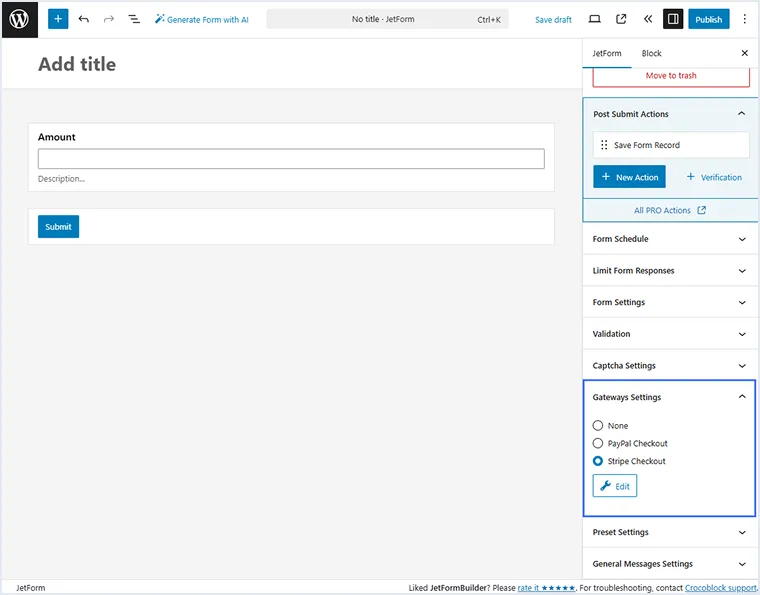
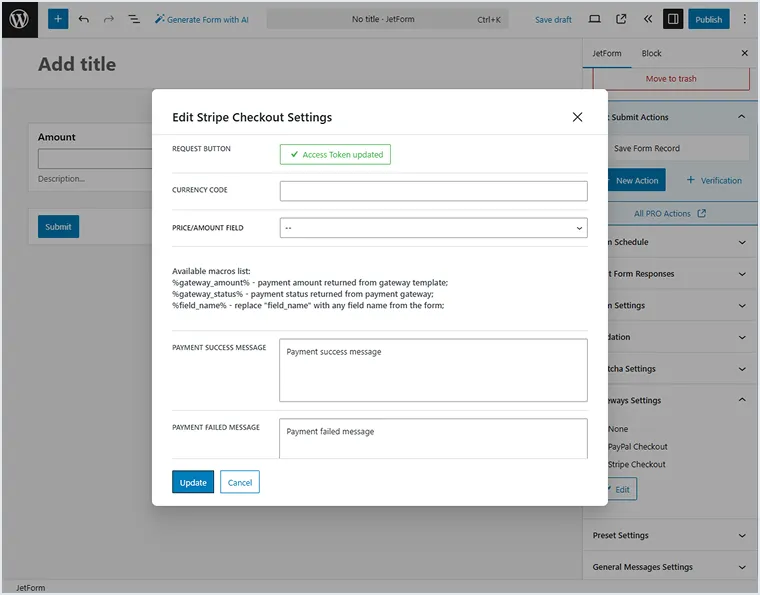
Go to WordPress Dashboard > JetFormBuilder > Forms and open one of the created forms. In the right-side JetForm section, you will see the Gateways Settings section. Select the “Stripe Checkout” option and hit the “Edit” button.
Let’s go over the settings in the Edit Stripe Checkout Settings window:
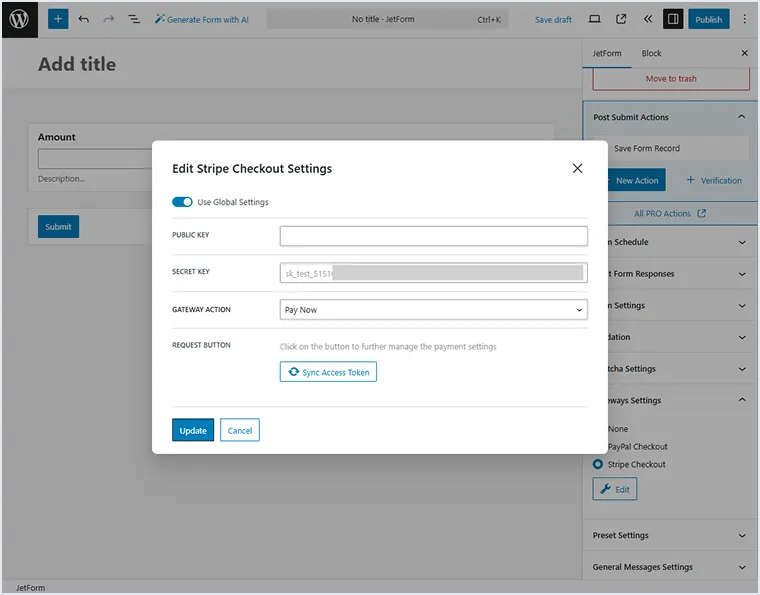
To further manage the Stripe payment settings, click the “Sync Access Token” button. Once the access token is updated, you can access more gateway settings.
Buy JetFormBuilder Pro – get all Addons at once
A tweak that allows creating subscriptions and accept recurring payments via PayPal forms
Learn moreproAn extra plugin to integrate Gutenberg-built forms and WooCommerce checkout.
Learn morepro
