Post-Submit Action Controls Overview
This overview is about the Post Submit Actions, its controls, and settings.
The Post Submit Actions tab is a vital feature of the form creation. One should adjust the post-submit actions in order to activate needed actions after the form submission.
With this feature, various actions can be adjusted and combined. For instance, the form submission can be saved in the JetFormBuilder directory, or an automatic email can be sent to the admin/customer.
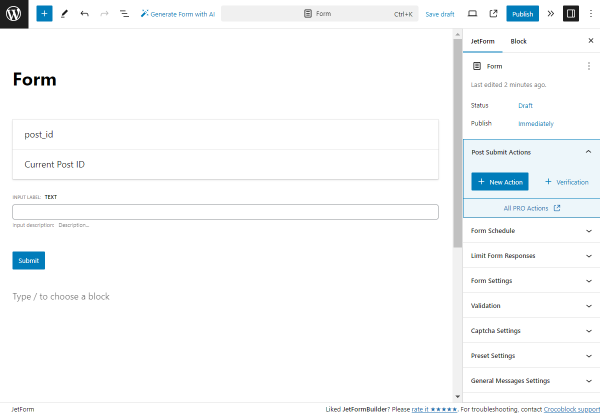
Post Submit Actions Tab
The Post Submit Actions tab can be found in the JetForm tab of the form settings.
It includes two buttons: a “New Action” that allows adding and adjusting the new post-submit action and a “Verification” to add a “Verification” action right away.
Also, if the PRO license of JetFormBuilder is not activated, the “All PRO Actions” link will be available.
New actions can be added by pressing the “New Action” button. All of them will be performed at the same time after the user submits the form. It is also true for the actions that have some conditional rules set. They will be performed after the form’s submission if the requirements are met.
Once the “New Action” button is clicked, the pop-up with presented actions appears.
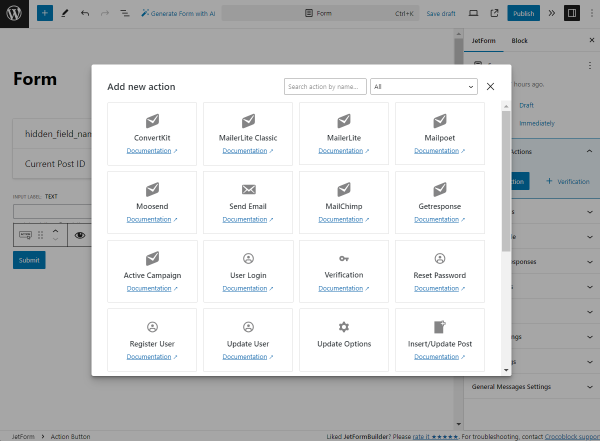
- ConvertKit (available when the ConvertKit Action PRO addon is installed and activated);
- MailerLite Classic (available when the MailerLite Action PRO addon is installed and activated);
- MailerLite (available when the MailerLite Action PRO addon is installed and activated);
- Mailpoet (available when the MailPoet Action PRO addon is installed and activated);
- Moosend (available when the Moosend PRO addon is installed and activated);
- Send Email;
- MailChimp;
- Getresponse;
- Active Campaign;
- User Login (available when the User Login Action PRO addon is installed and activated);
- Verification;
- Reset Password (available when the User Login Action PRO addon is installed and activated);
- Register User;
- Update User;
- Update Options;
- Insert/Update Post;
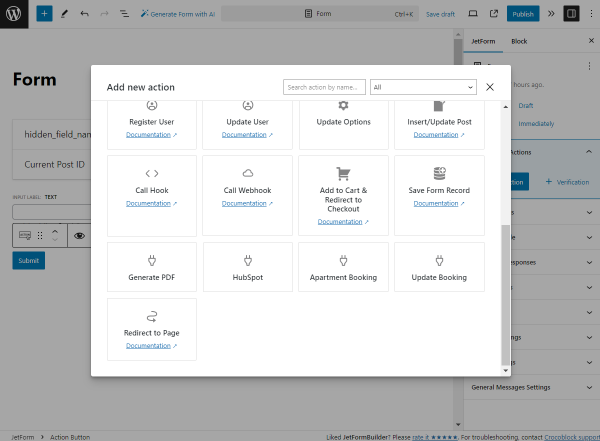
- Call Hook;
- Call Webhook;
- Add to Cart & Redirect to Checkout (available when the WooCommerce Cart & Checkout Action PRO addon is installed and activated);
- Save Form Record;
- Generate PDF (available when the PDF Attachment Addon PRO addon is installed and activated);
- HubSpot (available when the HubSpot PRO addon is installed and activated);
- Apartment Booking (available when the JetBooking plugin is installed and activated);
- Update Booking (available when the JetBooking plugin is installed and activated);
- Redirect to Page.
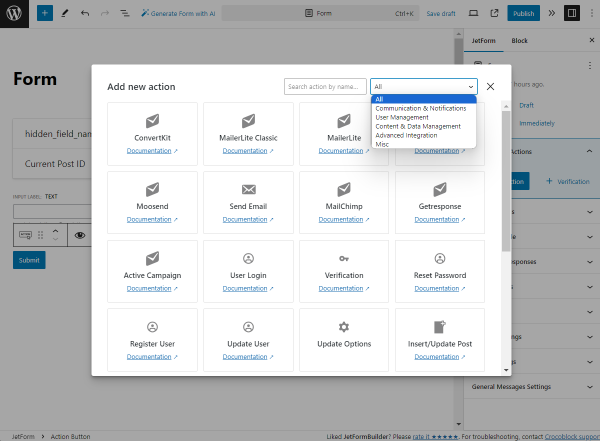
If desired, the actions can be filtered by category. The filter is presented right in the pop-up.
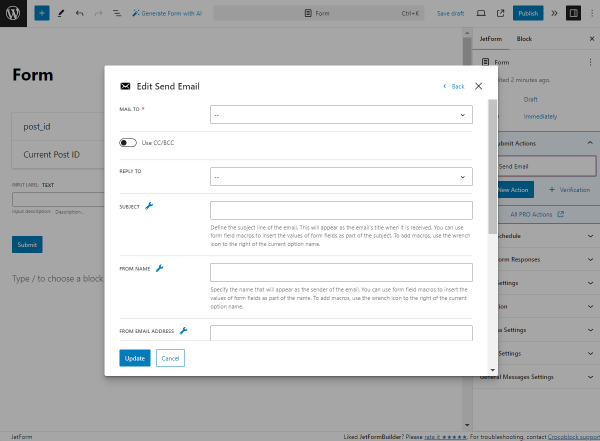
For every type of action selected, there is a separate list of settings. When one of the options is clicked, the settings pop-up is opened.
Here, one can adjust the action and save it, return to the list of actions, or cancel the pop-up editing window.
When the action is added and one hovers over it, several buttons are displayed next to the action name.
The first is the “Edit” button that allows returning to the post-submit action editor pop-up.
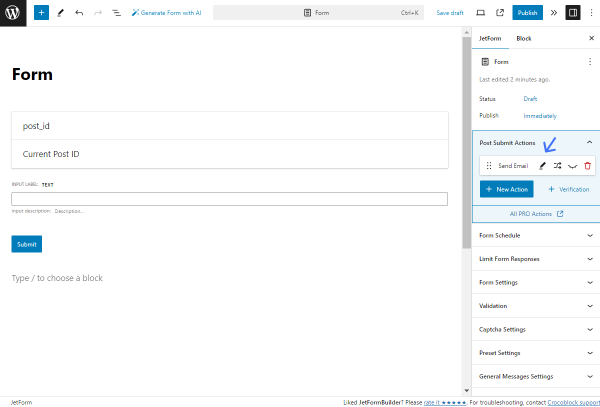
When the second “Conditions” (with a crisscrossed arrows icon on it) button is clicked, one can set when the form will perform a selected action. If no conditions are set, the action will be automatically done right after the form submission. However, one can choose to do some additional actions if some requirements are met. For example, the confirmation email can be only sent in case the user ticks a special checkbox.
The Conditions overview includes more details about the conditions customization.
The next button is “Turn off/Turn on.” It can turn off/on the action if needed. It doesn’t delete the action — just deactivates it till not activated with this button again.

The following button is “Delete Action.” It deletes the action correspondingly and can’t be undone.

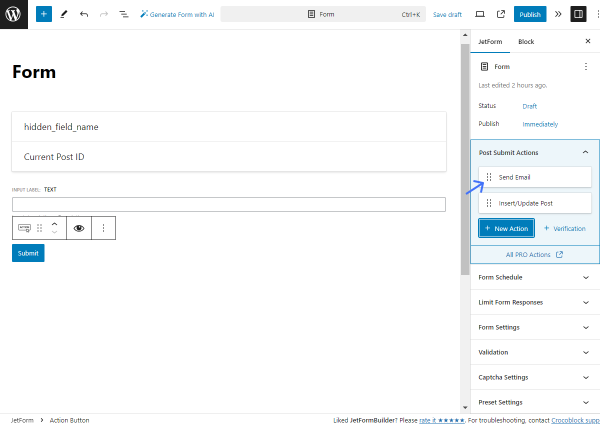
Also, if several actions are added, their order can be changed by dragging the icon before the action name up or down.
This doesn’t affect the efficiency of the actions — it is useful only for navigation and organization purposes.
That’s all about the Post Submit Actions feature directory available with the JetFormBuilder plugin for WordPress.