WordPress Login Form Customization
There are two main groups of WordPress users who need to interact with the login form: site administrators (or editors) and end users, especially if the site offers membership functionality. For administrators or contributors working in small teams, the default WordPress login form might be sufficient.
However, when you’re dealing with a broader audience – such as paid members or users accessing a corporate or affiliate portal – a custom login form becomes essential. Not only does it help represent the brand more effectively, but it also provides a smoother, more professional login page. A custom form also allows you to add extra fields or specific functionality, enhancing the user experience.
In this article, I will discuss two approaches to login form customization: editing the look of the default login form and replacing it with a fully custom form made from scratch.
Custom Login Form Examples
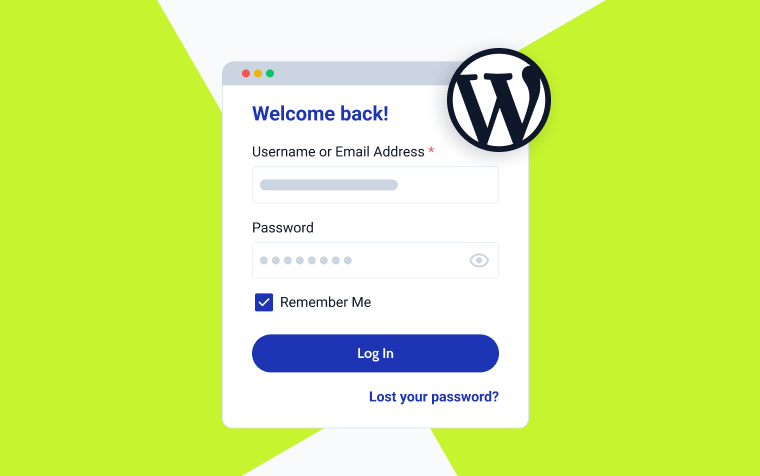
The default WordPress login form looks very… well, WordPress-y, wouldn’t you say?
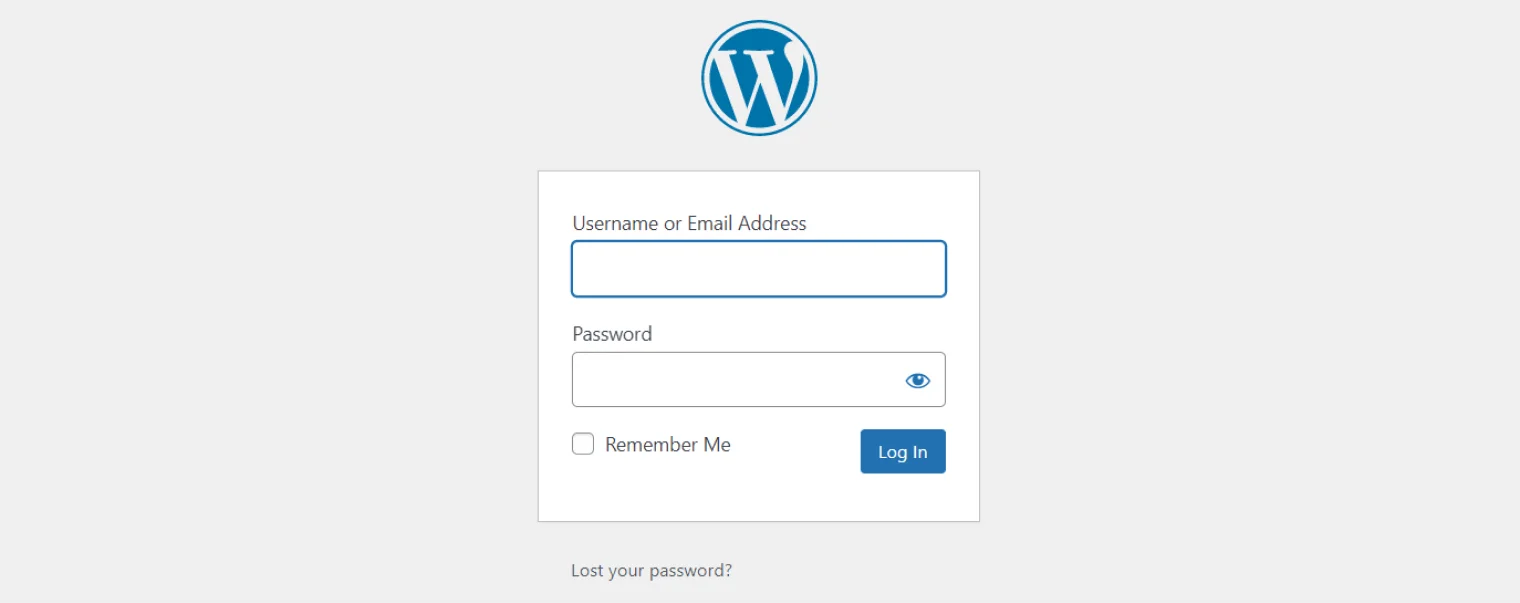
With the logo and default colors, it doesn’t say anything about your company. And this is one of the most important elements to be fixed here.
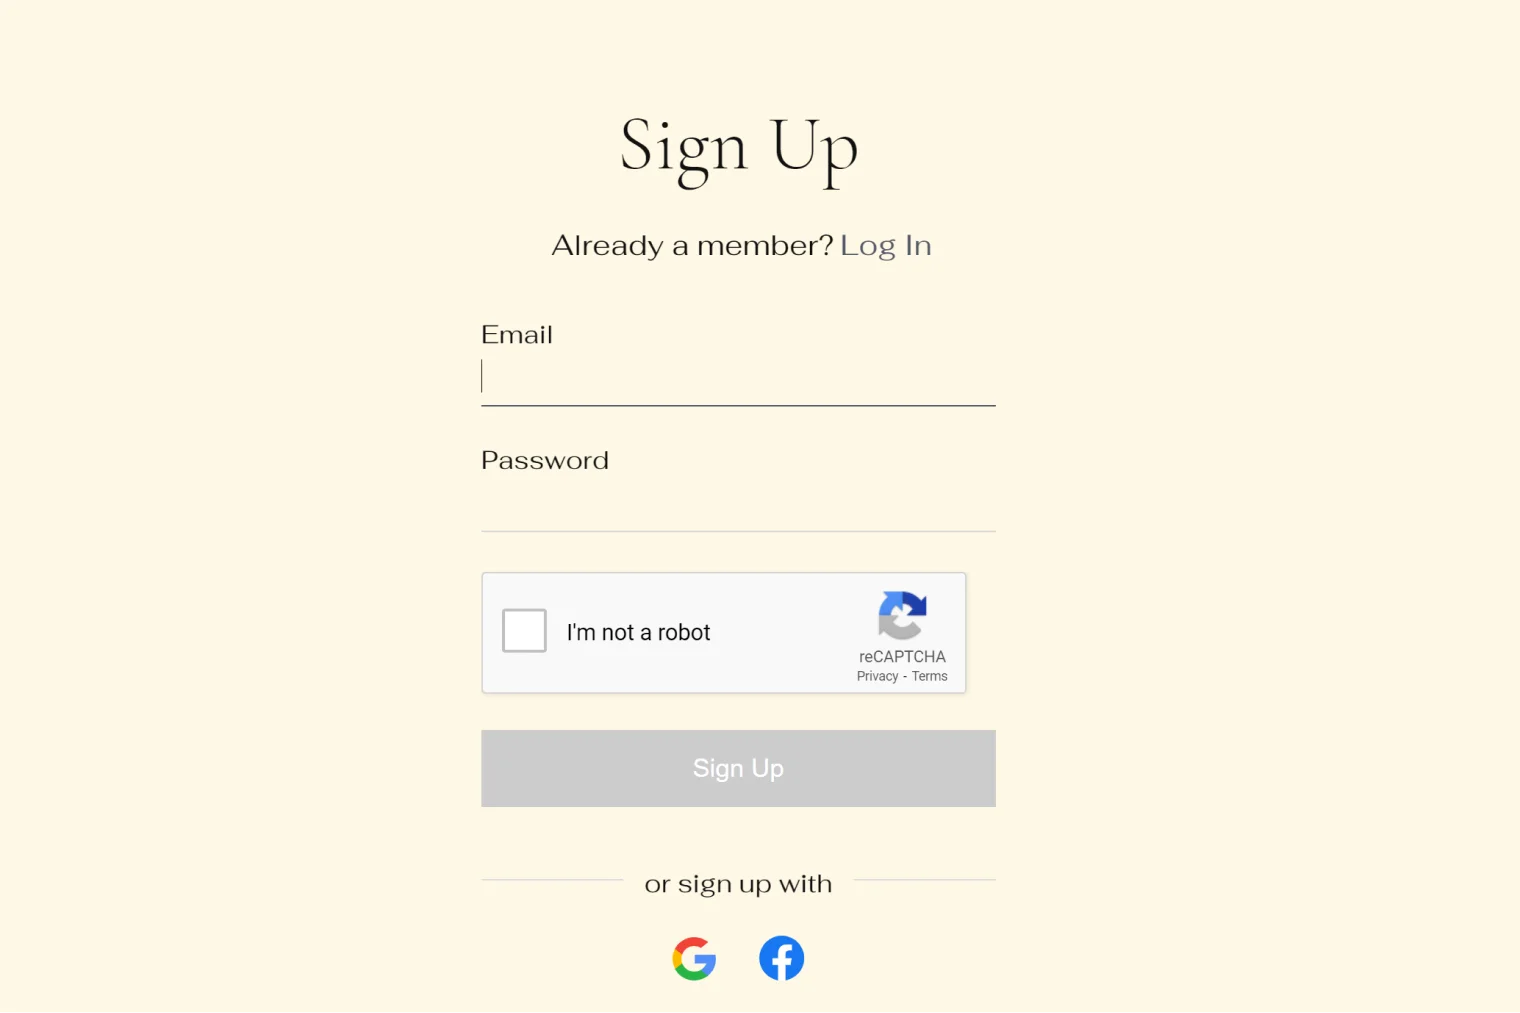
You can make it minimalistic and elegant using your brand fonts and colors and add CAPTCHA and social login functionality:
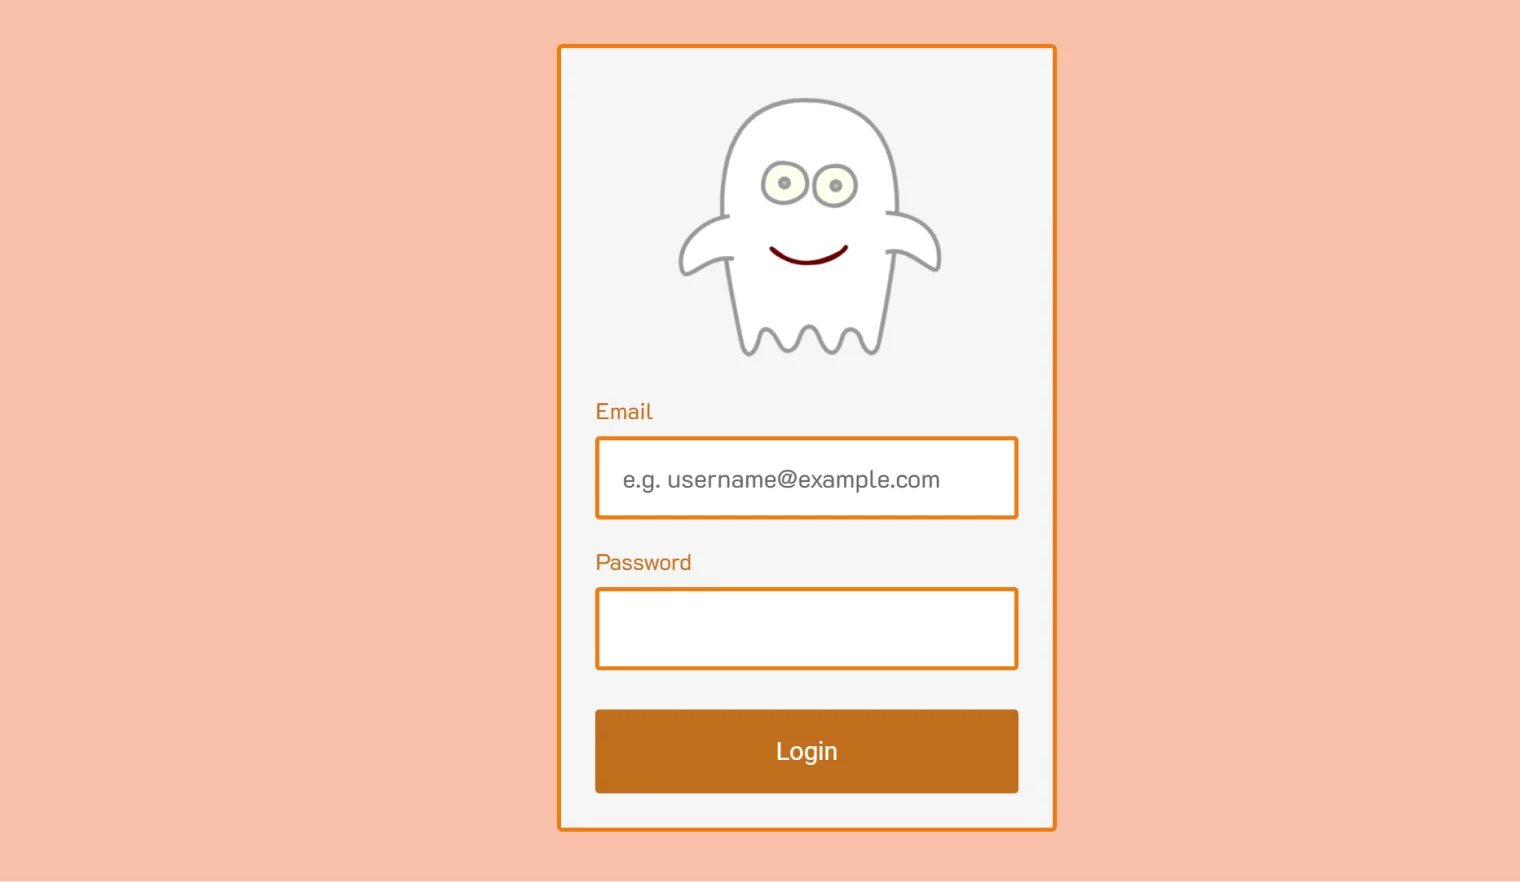
You can create a spooky animated one for Halloween time and then change the animation according to the current season or event:
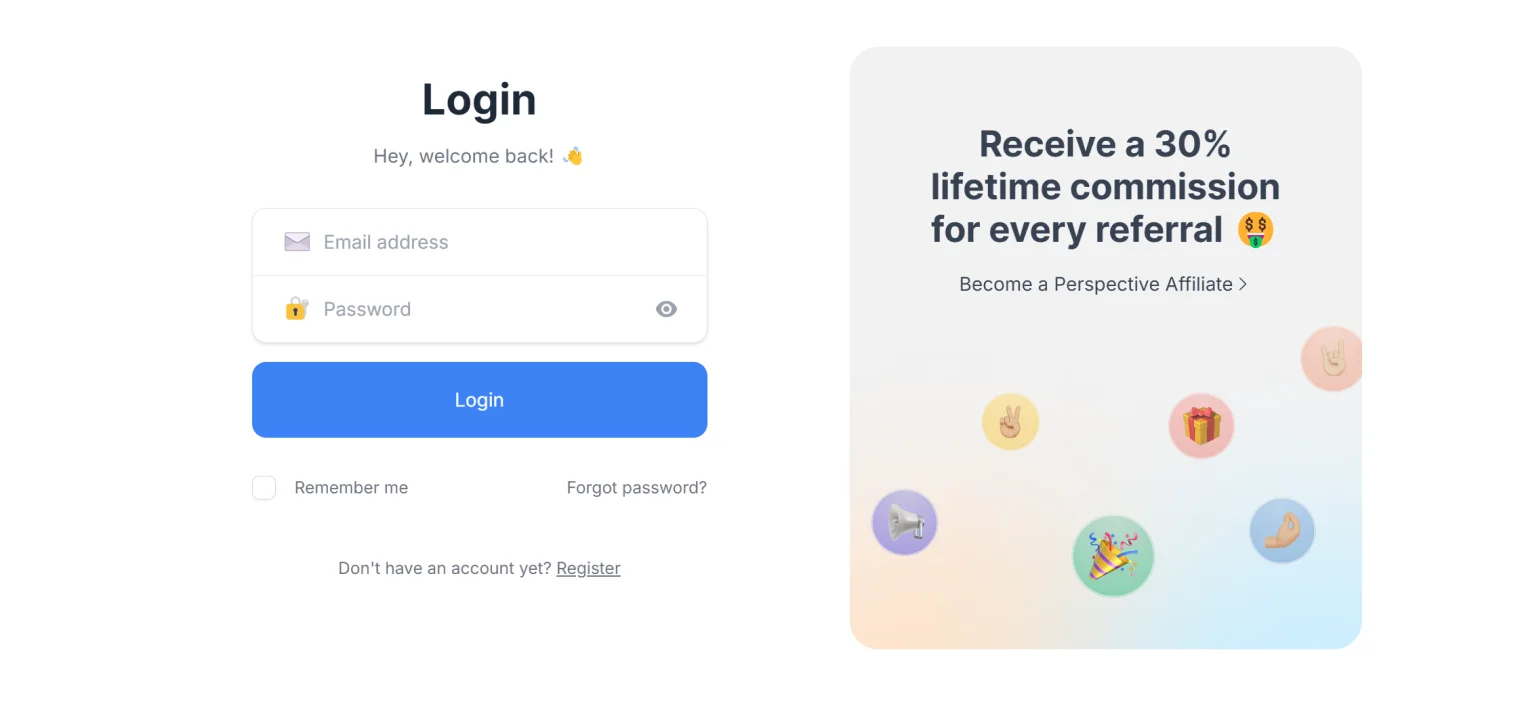
This page can also show exclusive offers and other marketing information on the same page, or just leave a message to your customers:
Modifying Default WordPress Login Form
This method works well if you just want to adjust the styling of the default form without adding extra fields or changing the interaction logic. Depending on your needs and preferences, you can do it using custom code or a plugin.
Custom code to modify the WordPress login page
The first element that obviously should be hidden is the WordPress logo. To hide it, go to Customization > Custom CSS and add this line of CSS:
.login h1 {display: none;}I assume you might want to not just hide but replace the WordPress logo with yours. To do it, upload your logo to the media library, go to Appearance > Theme File Editor, and open the functions.php file. Add this code, but replace the link with the link to your logo file. You can also adjust the size (width and height in the code here):
function my_login_logo() { ?>

    <style type="text/css">

        #login h1 a, .login h1 a {

            background-image: url(http://mysite.com/wp-content/uploads/2024/10/example-logo.svg);

height:120px;

width:320px;

background-size: 320px 120px;

background-repeat: no-repeat;

         padding-bottom: 30px;

        }

    </style>

<?php }

add_action( 'login_enqueue_scripts', 'my_login_logo' );
The only issue now is that the link on the logo still leads to WordPress.org. To replace it with the link to your website, insert this code to the same functions.php file. You can change the text in the “My-slogan.”
function my_login_logo_url() {

    return home_url();

}

add_filter( 'login_headerurl', 'my_login_logo_url' );

function my_login_logo_url_title() {

    return 'My-slogan';

}

add_filter( 'login_headertext', 'my_login_logo_url_title' );
Finally, let’s change the font to Montserrat, as well as the background and login button colors. I used green shades; you can customize colors and the font as you see fit:
function custom_login_styles() {
wp_enqueue_style('custom-google-fonts', 'https://fonts.googleapis.com/css2?family=Montserrat:wght@400;700&display=swap', false);
?>
<style type="text/css">
body.login {
background-color: #c0d697 !important;
}
body.login * {
font-family: 'Montserrat', sans-serif !important;
}
/* login button color */
.wp-core-ui .button-primary {
background-color: #3a6003 !important;
border-color: #3a6003 !important;
}
/* login button color on hover */
.wp-core-ui .button-primary:hover {
background-color: #315002 !important;
border-color: #315002 !important;
}
</style>
<?php
}
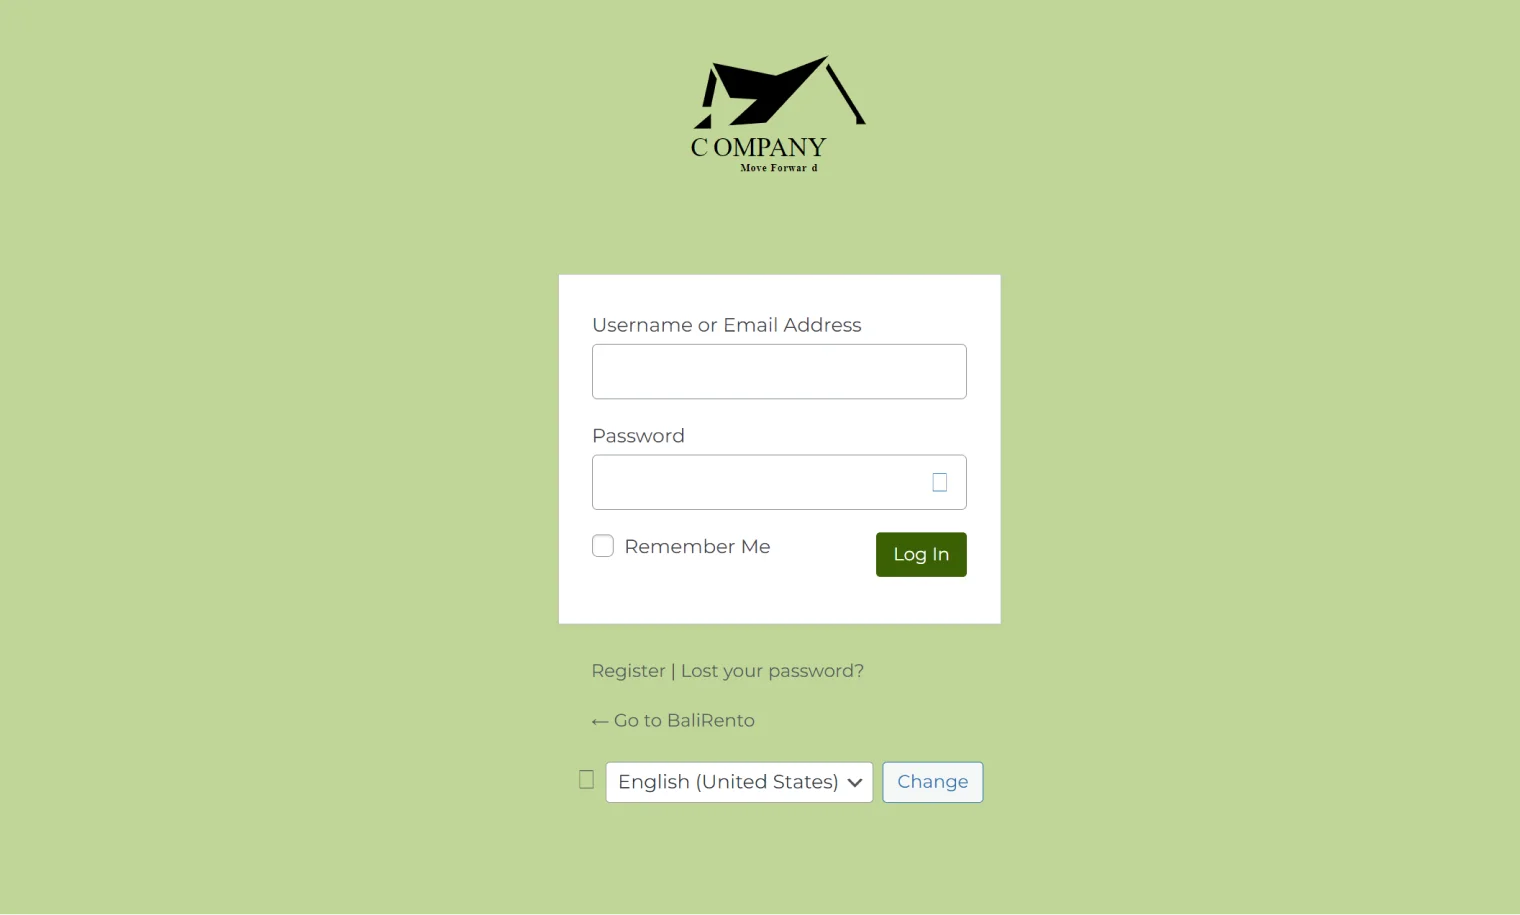
add_action('login_enqueue_scripts', 'custom_login_styles');As a result, I have a customized login page:
Plugins for login form customization
If you’re looking to make your login page more refined, using a plugin can be a great option. There are plenty of choices out there, and I’ll mention a few of them.
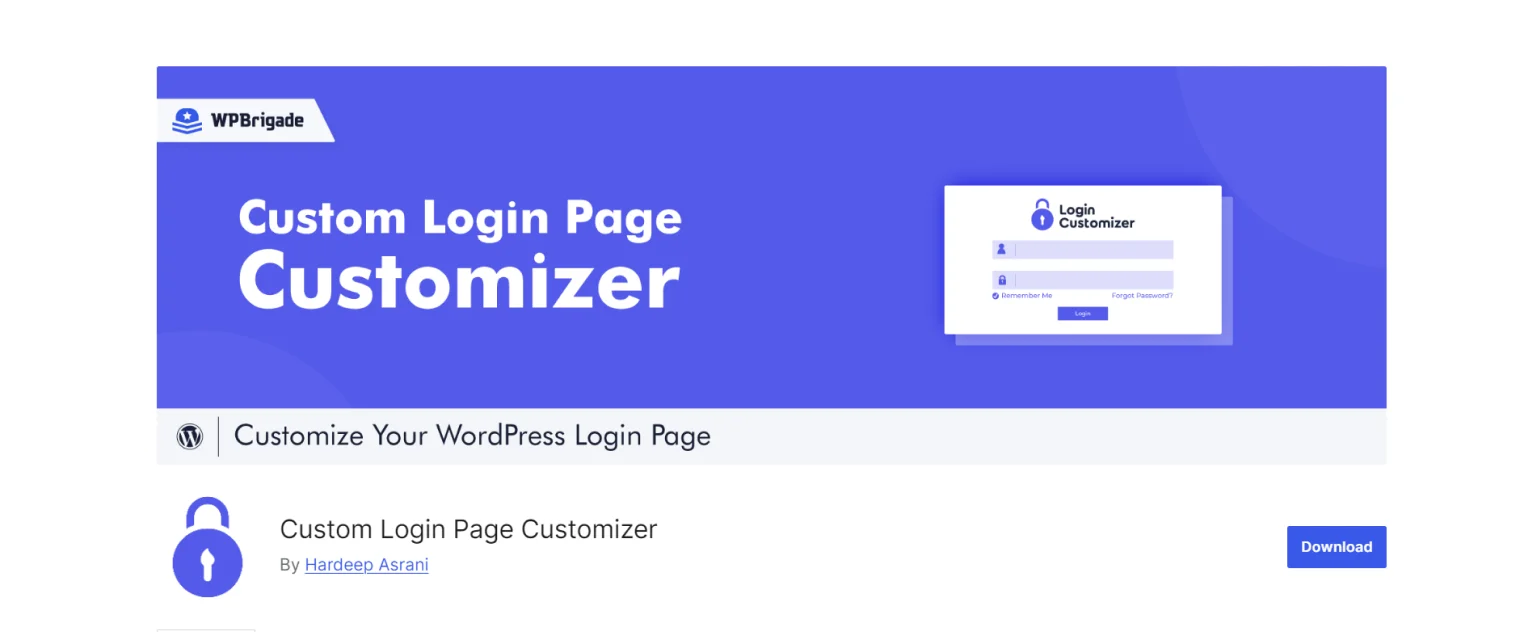
Custom Login Page Customizer (Free)
🏆 Best for easy and fast WordPress login page styling.
This plugin is free and intuitive and lets you customize each element of the login form visually, as well as disable elements like language switcher, lost password, or privacy policy links.
Pricing: free.
Pros:
- intuitive interface and many options for customization;
- multisite support;
- custom CSS and JavaScript fields.
Cons:
- you can’t change a font family;
- only two pre-made templates.
Branda (Freemium)
🏆 Best for white labeling and advanced login page customization.
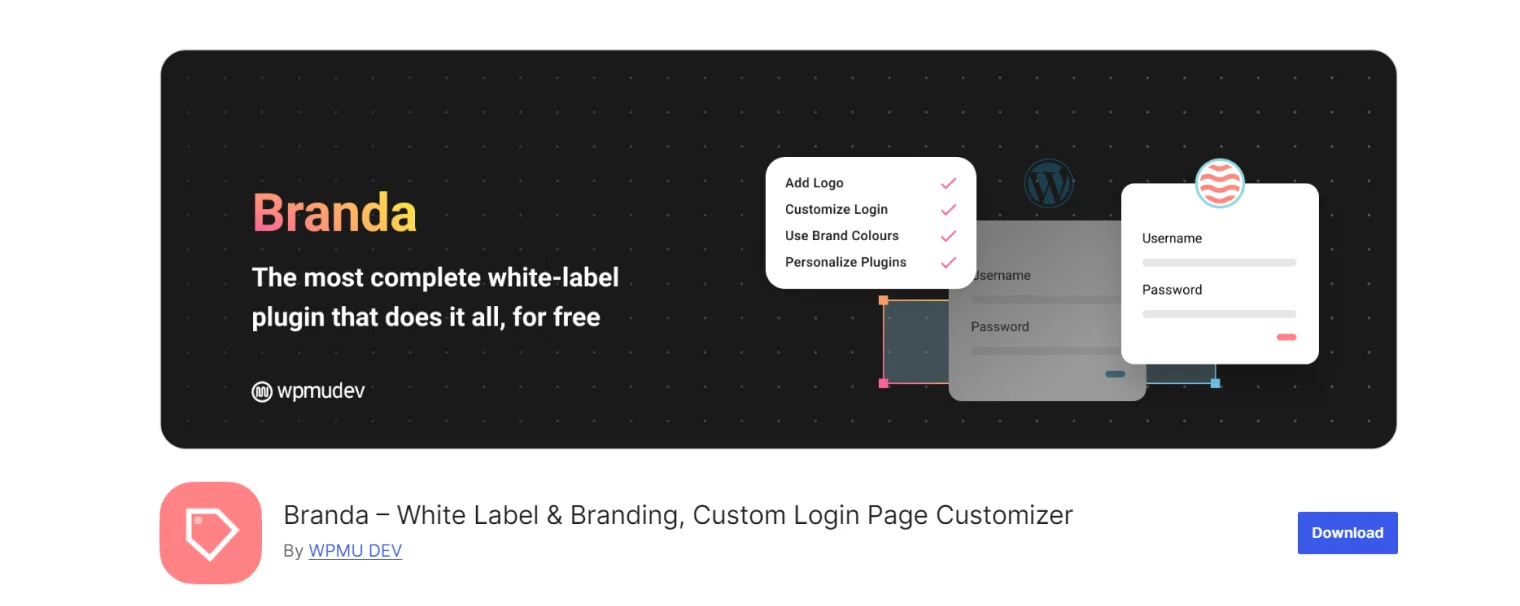
This plugin has many modules for Dashboard customization and white labeling, one of which is a login page editor. It’s intuitive and has plenty of settings and templates.
Pricing: most of the functionality is available in the free version. The Pro comes with the WPMU DEV subscription and starts at $36 a year.
Pros:
- powerful functionality;
- many premade templates;
- every detail can be customized;
- a custom registration form module to sign up using a code.
Cons:
- the plugin may be overwhelming and load unnecessary scripts for all of its modules if you only want to customize the login page.
LoginPress (Freemium)
🏆 Best for creating beautiful and secure login pages.
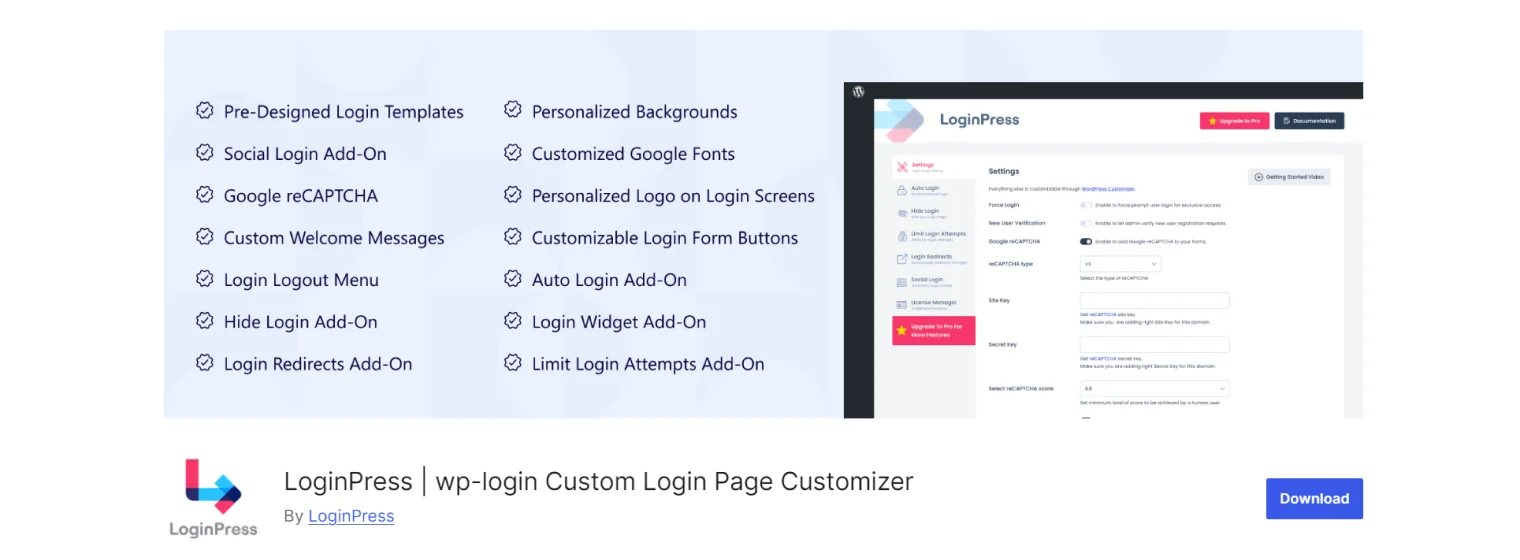
LoginPress has a long list of tools for customizing the way the login page looks, even in its free version, and premium modules for adding redirects, custom login URLs, social login, and limiting login attempts.
Pricing: free and Pro, which starts at $99 a year for all the add-ons.
Pros:
- a full list of customization settings;
- you can hide various elements of the form;
- video background is available even in a free version;
- you can add a login-logout menu element even in a free version;
- add-ons for the generation of custom login URLs, limiting login attempts and redirects depending on user roles.
Cons:
- Google Fonts are available only in a Pro version.
Creating a Custom WordPress Login and Reset Password Forms with JetFormBuilder
With JetFormBuilder and its User Login Action add-on, you can create a custom login form with a password recovery functionality and add extra fields if needed.
To build the “two-in-one” form for login and password recovery, I will use a cool and often overlooked JetFormBuilder feature called Render states.
Here is a detailed tutorial on how to create such a form.
And this is the video tutorial:
However, I will go through the process as well.
Adding blocks and fields
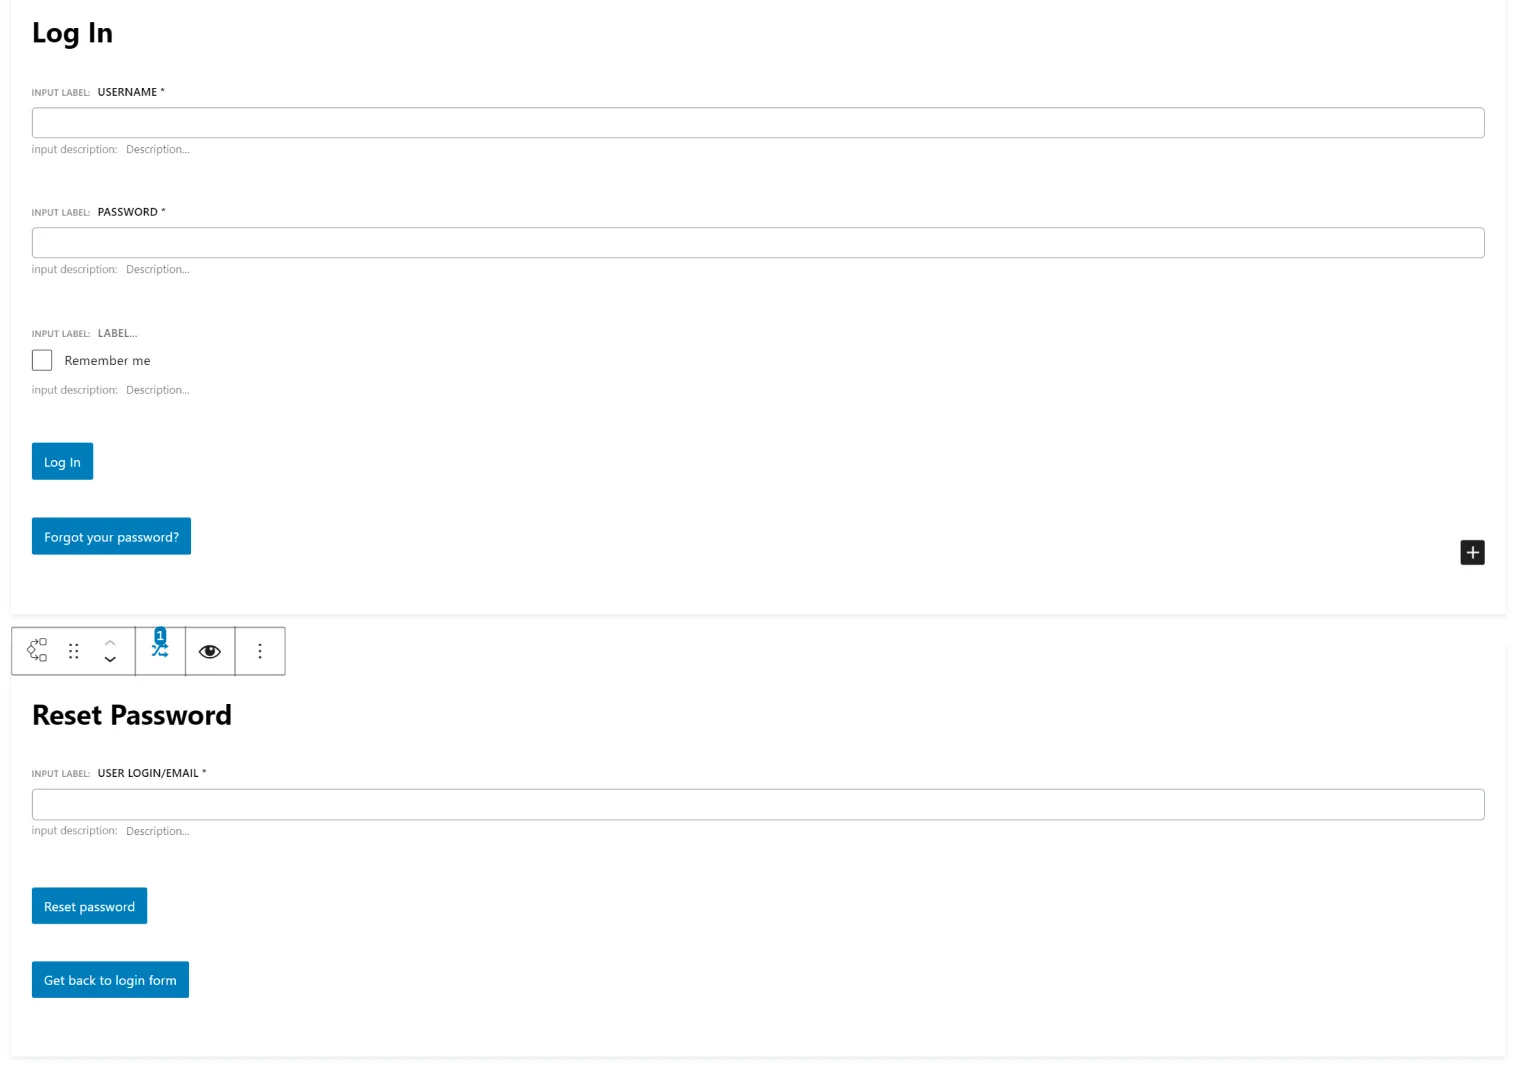
First, let’s create two Conditional blocks; each of them will have a form inside. The first one will wrap up a login form, and the second will be a password recovery form.
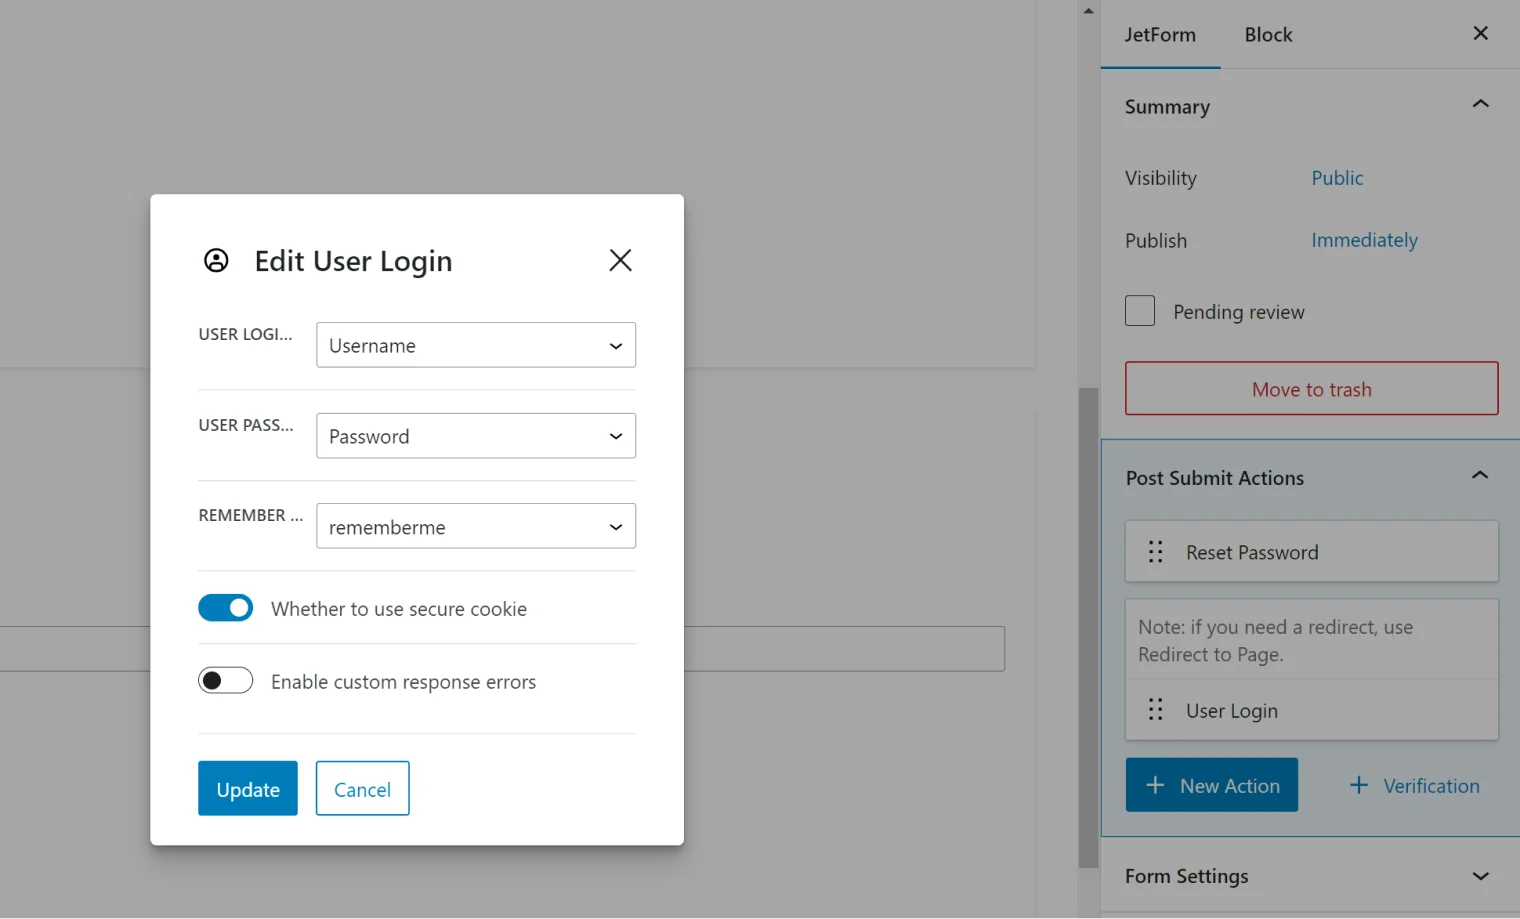
So, the first “Log In” Conditional block will include such fields:
- Heading (Heading block) – Log In;
- Username field – Text Field type, marked as required;
- Password field – Text Field type, marked as required; on the right panel, choose the “password” field subtype, and you can add an eye icon;
- The “Remember me” field – Checkbox Field type with manual input;
- The “Log In” Button block;
- The “Forgot your password” Button block.
The second “Reset Password” Conditional field includes:
- Heading (heading block) – Reset Password;
- User login/email field – Reset Password field type;
- The “Reset password” – Reset Password Button field type;
- The “Get back to the login form” Button block.
Render states
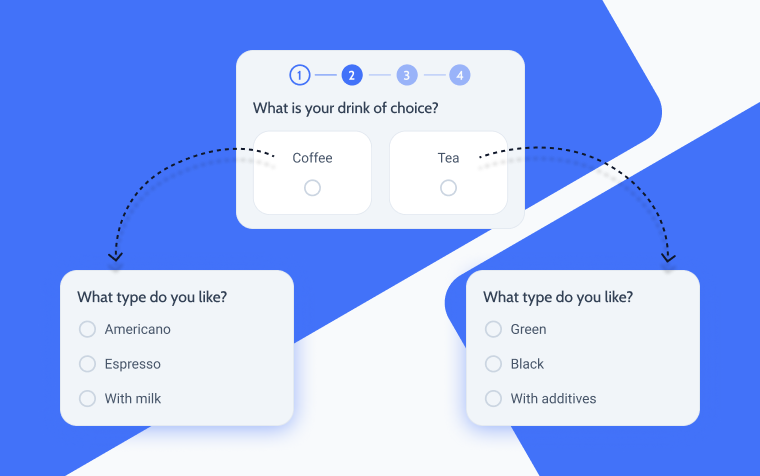
Now, it’s time to set visibility conditions for each Conditional block. And the option will be “Is render state.” But I need to say a few words about the render state and what it is. In simple terms, it’s how, based on a user action or other events, the interface changes. In our case, there are two forms, but the user will see only one, depending on their actions. If the user wants to reset the password, the Reset Password block will appear, and the Log In block will disappear, and vice versa.
You can create your own render state by pressing the “+” button and typing a custom name.
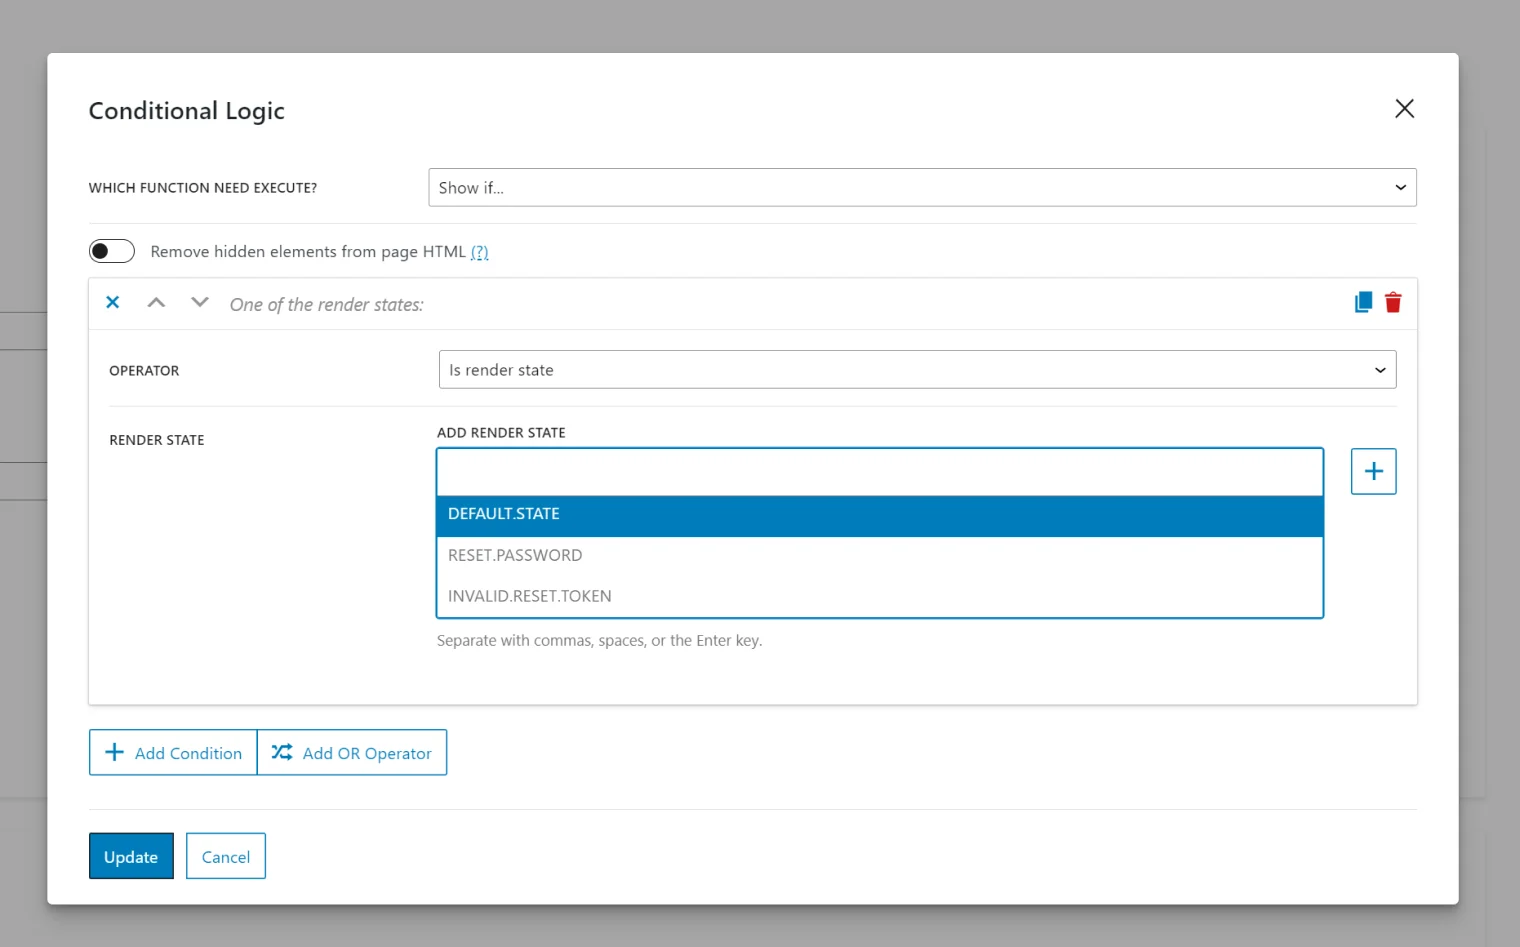
Go to the first Log In Conditional block and choose “Show if…” in the “Conditional Logic” dialog. Don’t select any field, but go directly to Operator and select “Is render state.” Then, choose DEFAULT.STATE.
Then, go to the first Reset Password Conditional block, and in the “Conditional Logic” dialog, choose “Show if…”. Don’t select any field, but go directly to Operator and select “Is render state.” There, press the “+” button to add a custom state. Let’s name it DEFAULT.STATE2 and add it. Here, we should also add the RESET.PASSWORD – so the user will be able to get back to the form after following the recovery link in the email.
Now, it’s time to make buttons switch between the render states. This is a simple scheme of the logic:

Go to the “Forgot your password?” button, and in the settings on the right panel, choose the “Change Render State” behavior and select DEFAULT.STATE2 state, so it will switch us to the Reset Password block.
Now, go to the “Get back to login form” button, and in the settings on the right panel, choose the “Change Render State” behavior and select DEFAULT.STATE state, so it will switch us to the Log In block.
Post-Submit actions
Finally, it’s time to set up behavior for the form.
Remember, we’ve added the Reset Password field type and Reset Password Button field type. They’ve already created the functionality for the password reset and the fields to create a new password. However, you can edit or translate the form labels. Click on the User Login/Email field, and on the right panel, you will see a switcher between Default and Reset, as well as the “Edit Reset Password action” button. After hitting it, you will see the dialog window with all the labels and messages. There, you can even edit the email the user receives.
This is actually the “Reset Password action” that was added automatically. If you switch to JetForm on the right panel, you will see the full list of actions. In addition to the “Reset Password,” we should add the “User Login” action. Add it and map the fields that are required for this action.
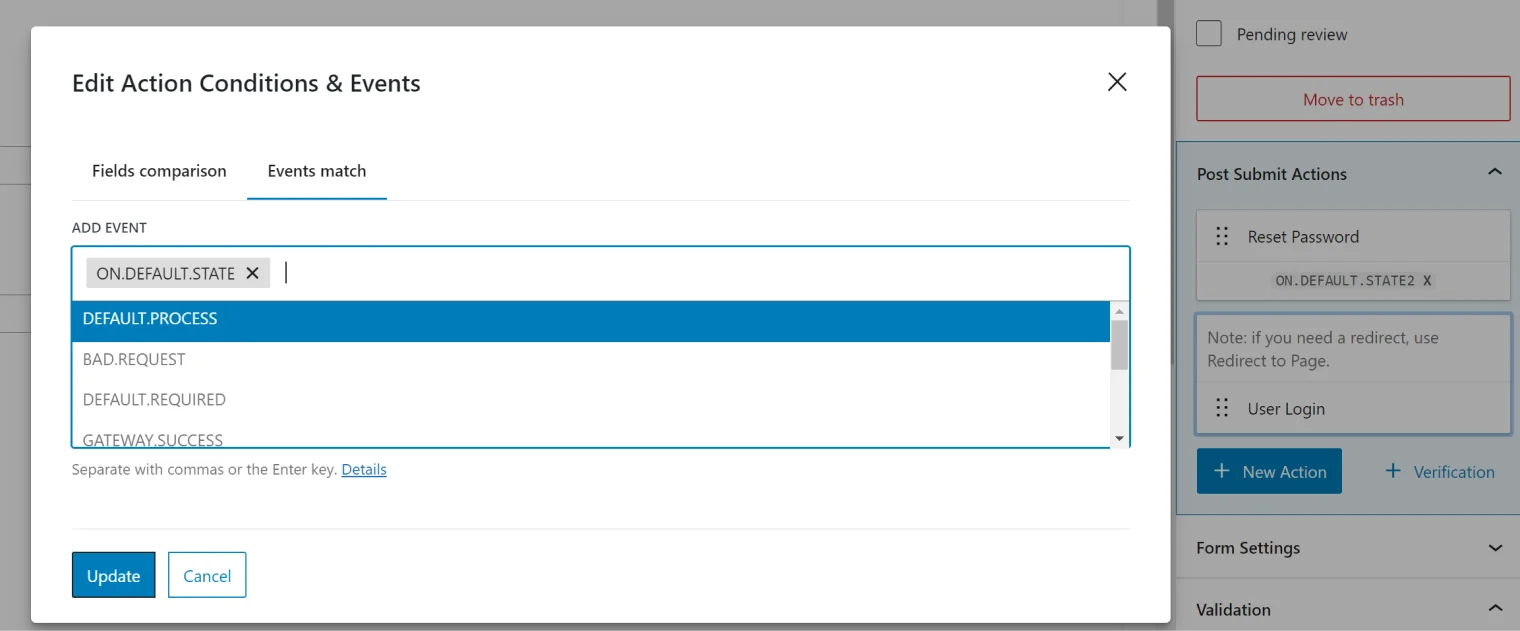
We are almost done. The only issue here is that we have two post-submit actions for login and password recovery. The form will try to perform two at once, which will lead to an error.
The “User Login” action should be performed only if the render state is DEFAULT.PROCESS, and “Reset Password” only if the render state is DEFAULT PROCESS2. To set it up, click on the crossed lines icon “Conditions and Events,” which appears if you hover over the action element.
Choose the required event from the list.
That’s it, and now you have your custom login form. Now, place it on the custom login page, where you will redirect your user to log in. To style the page, use the JetForm widget if you use Elementor or Bricks. If you work with Block Editor to edit your pages, the JetStyleManager free add-on will help you style it better right in the form editor. On that page, you can add any kind of branding, animations, or any blocks you want.
Thanks to the fact that JetFormBuilder uses Block Editor as a form editor, you can combine blocks of other fields or use some WordPress shortcodes. For example, you can use a social login plugin and play with such functionality. However, avoid mistakes such as trying to embed another form in the existing one.
Wrapping Up
A custom login page can really make a difference, especially if your site has a lot of users logging in regularly. It not only improves the look and feel of the page but also ties it into the overall branding of the site, making it feel more cohesive.
You can either edit the default WordPress login page using either some code or plugins or create a new form with more fields (if needed) and place it on any page, so you will have total freedom over what that page looks like and the elements it has. Using JetFormBuilder, you can also set up various actions and behaviors on form submission and customize the password reset emails, which is really good for your customers’ satisfaction.
Still have some questions?

Written bу
Related articles
Created with JetFormBuilder
Dynamic Form on WordPress Without Coding
Created with JetFormBuilder
Event Registration Form: Best Practices & Structural Elements