JetEngine Query Actions for JetFormBuilder
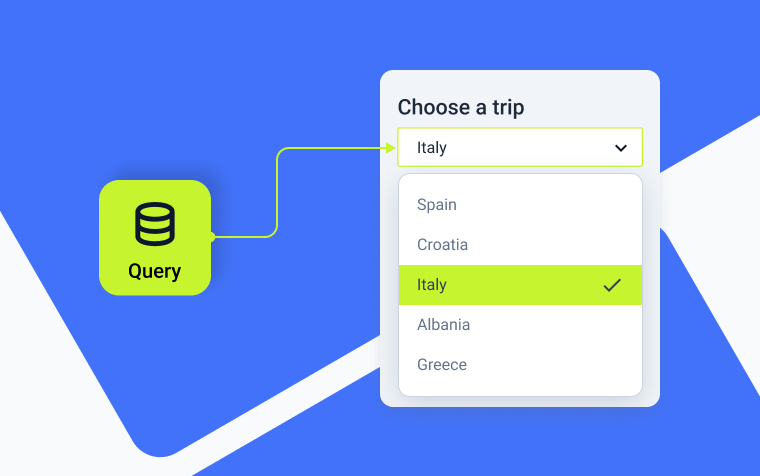
The JetFormBuilder plugin definitely offers many ways to fetch, display, and submit dynamic data on your WordPress site. But what if I say it can offer even more dynamic functionality if it’s combined with JetEngine? In this case, you can create or update relations on form submission, use Glossaries and Options pages, and, of course, work with custom queries.
Other than this, developers have a big room for creating custom solutions, and this is a great example: a custom add-on for checking custom query results and getting the values from there. Let’s see how it works and a couple of use cases.
Getting Started
First, download this add-on from GitHub.
Pay attention to the fact that it requires JetEngine to work. However, when it comes to custom queries and building them, JetEngine’s Query Builder is a one-of-a-kind tool that is very hard to beat in flexibility, efficiency, and simplicity in terms of creating queries and fetching basically any data from the WordPress database.
This add-on adds two post-submit actions to JetFormBuilder forms:
- Check Query Results. It checks the results of the queries that exist and are being fetched on the current page, and depending on these queries, it shows an error message.
- Get Values From Query. Using it, you can get some values from the existing query.
Let’s see how it works using practical examples.
Check query results
Imagine you run a WooCommerce store and offer bonuses to customers who buy more than three different products. These customers can apply for these bonuses via a JetFormBuilder form. So, you need to check the number of products in their cart, and depending on it, you can send them a promo code or something else.
First, we need a query.
Go to JetEngine > Query Builder and create a new query. Set the Query Type to “Posts Query.” In the General tab, choose the post type “Product” and status “Published.”
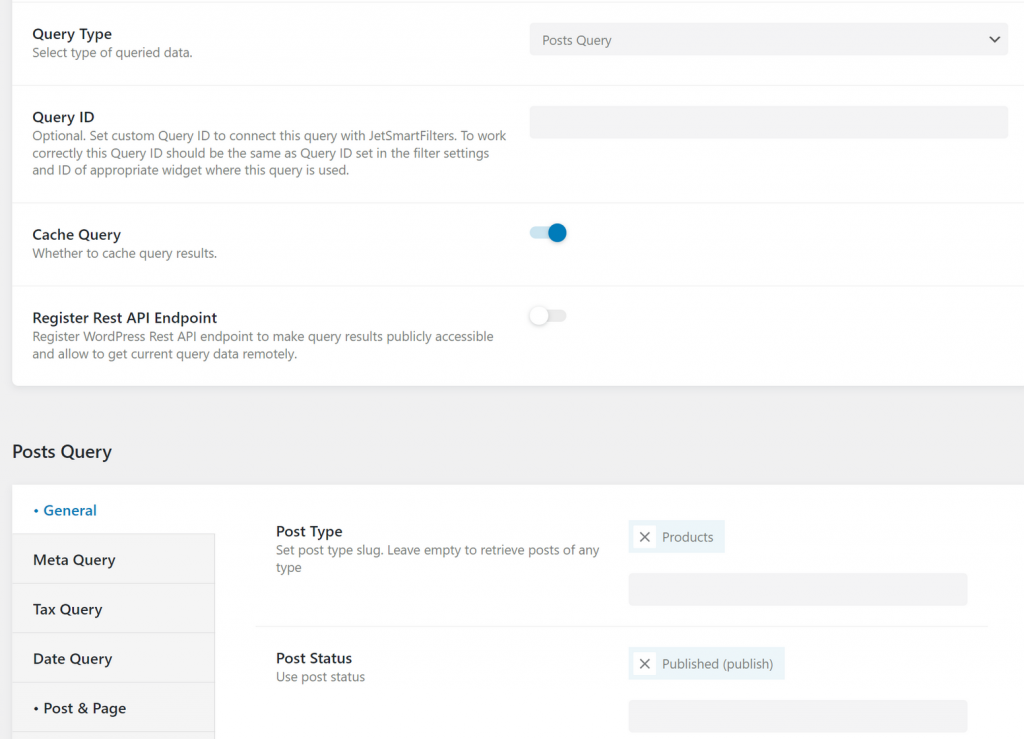
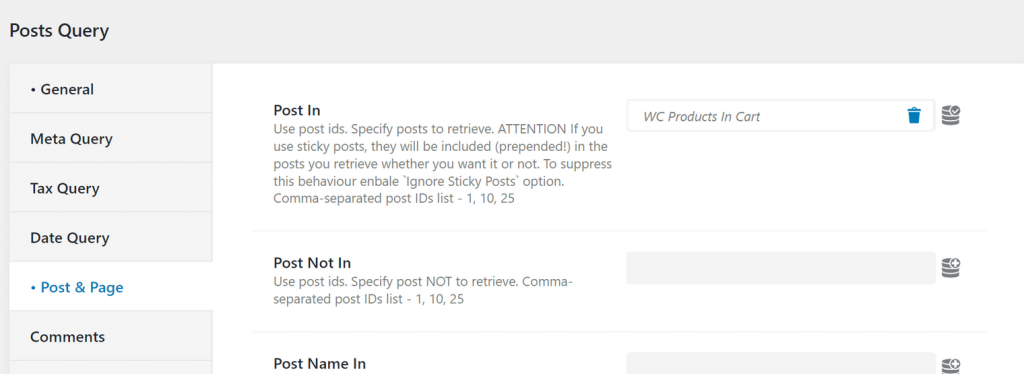
Then open the Post & Page tab. In the Post In section, click on the database icon and choose the WC Products In Cart value from the list.
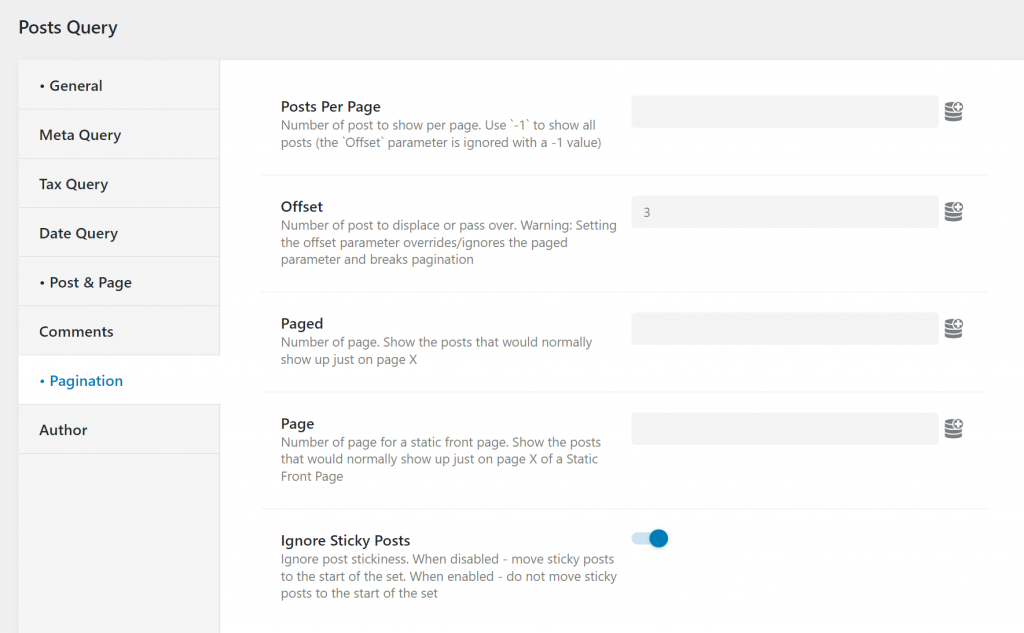
Now, open the Pagination tab and type “3” in the Offset field (because we need at least three products in the Cart). If it’s 3, the query will be considered empty, which will affect the next step.
Save the query.
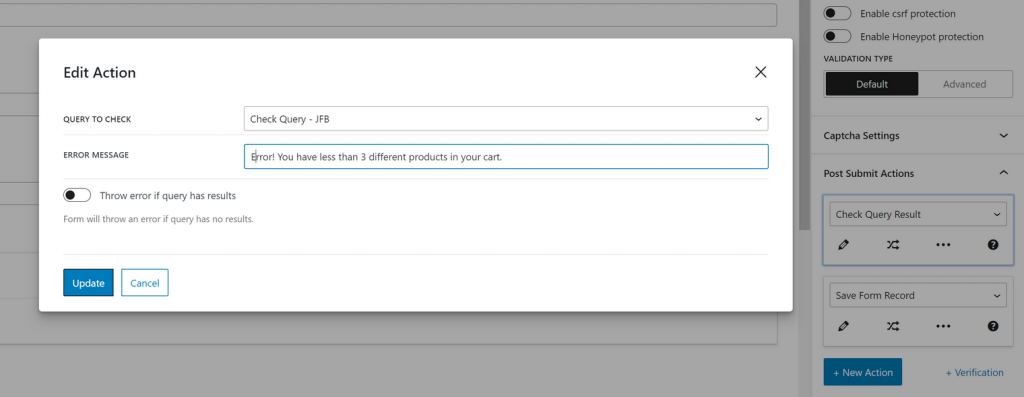
Now, go to your form. In the JetForm tab on the right, find the Post Submit Actions section and select the “Check Query Results” action. Click on the pencil icon for setting.
There, choose the query you’ve just created and type the error message.
Pay attention to the fact that I didn’t activate the “Throw error if query has results” message because I need to have more than three different products in the Cart. But if you want the opposite (to have less than 3), activate that toggle, so the error message will be shown if customers have less than three products.
Using the same principle, you can get creative with your queries built with Query Builder, add different values and conditions to them, and then verify and check whether these queries return something or not. Depending on the result, your JetFormBuilder forms may be either successfully submitted or show error messages.
Get values from query
This is another after-submit action available with the add-on I mentioned above. You can populate a particular field with data from a chosen query. What you need to do is to create a query and then add a “Get Values From Query” action. In its settings, choose the query and the input field where the query results will be passed.
I assume that in most cases, you will need to activate the Get single value toggle to specify which field’s value you want to fetch. If you are not sure about the field name you need, first, use the query without this toggle activated and submit the form. You will see all the fields the query can offer and copy the name you need to specify in the Get single value section.
For example, I have a form where a user applies to participate in a private event, and I want to know for how long they have been registered on the website. So, what I need is the registration data of the user who filled out the form.
To do so, I’ve created a query that gets data about the current user. To learn all the details about this type of query, read this article.
Now, I will create a hidden field and leave it empty. I want to use it to pass the user’s registration data, which will be saved in form records.
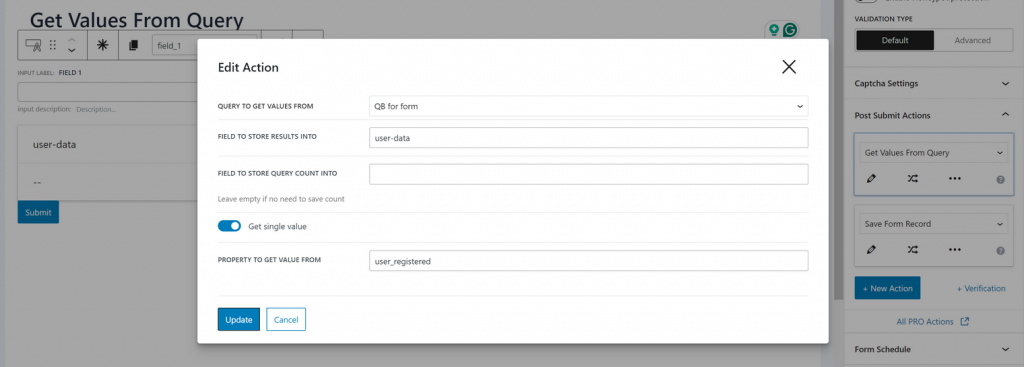
Open the Get Values From Query action settings, and choose this hidden field, activate the Get single value toggle, and type the field name you want to fetch. In my case, it’s the “user_registered” value.
Using this method, you can pass a lot of different data and combine it with other post-submit actions.
Bottom Line
In this article, I’ve presented a free add-on that connects custom queries made with JetEngine’s Query Builder with forms. Form fields can either fetch data from the query or check a result on the form submission and, depending on the outcome, they can show an error. You can experiment with your own variations on use cases for this instrument, taking the examples from this article as a reference.
Please don’t forget to share your ideas in the comments below or in our Facebook Community.

