Enable Gateways
Activate the Gateway option to connect the payment system and your form. Learn more
A supplementary software to integrate your forms and Stripe payment system.
Buy from $49
Stripe Payments is a JetFormBuilder addon that links JetFormBuilder and JetEngine forms to Stripe’s software, allowing you to carry out any payments online via Stripe Gateway.
Enable clients to pay for product orders, food deliveries, all sorts of specialty services. Let them purchase memberships, tickets to various events, and courses. Stripe Payments will also come in handy if you offer booking & rental services.

Activate the Gateway option to connect the payment system and your form. Learn more
The “Insert/Update Post” action is crucial. If you do not configure it, the form will not pass the Gateway and the “Edit” button will be unavailable.
A field where you are supposed to insert the Stripe Publishable key obtained during the API key generation.
A field where you are supposed to insert the Stripe Secret key obtained during the API key generation.
Use the Stripe-approved Currency Codes and stick with one to be used for financial operations on your website.

This form field can be either Calculated or Hidden type. Should be set in digits only.
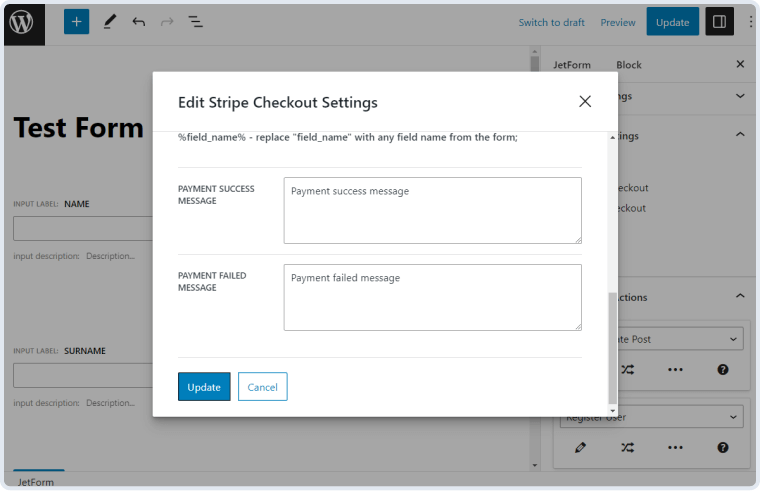
The %gateway_amount%, %gateway_status%, and %field_name% macros will let you create custom payment success/failed messages.
A message confirming the payment was successful.
A message indicating the payment error occurred.
To install the addon, go to JetFormBuilder > Addons and find the “Stripe Payment Gateway” addon in the All Available Addons section. Press the “Install Addon” button and, once installed, it will appear on Your Installed Addons. Next, click “Activate Addon” to get it ready for further work.
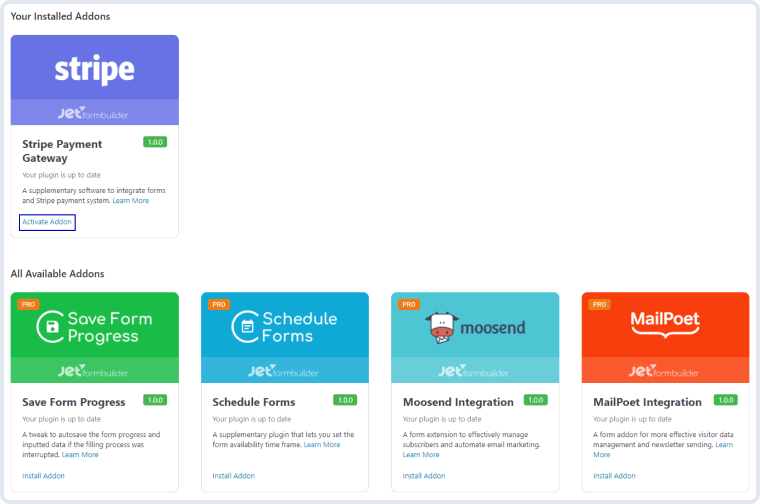
As you can see, all PRO version addons can be easily installed and activated via JetFormBuilder Dashboard.
Go to the Stripe website and create a new account. If you already have a Stripe account, log into it.

A confirmation letter will be sent to your email address. Proceed to the inbox and click the link in the email to pass the verification. Afterward, you’ll be redirected to Stripe’s dashboard page. Click on the New Business bar in the upper left corner of the sidebar, enter the account name and press the “Add name” button.

Good. Now, you will be able to locate two Stripe API keys – the first is Publishable key and the second is Secret key. Cope them someplace safe because you are going to need them later.

Please check out the Payment Gateways setup tutorial for more details about form creation with the Stripe Gateway.
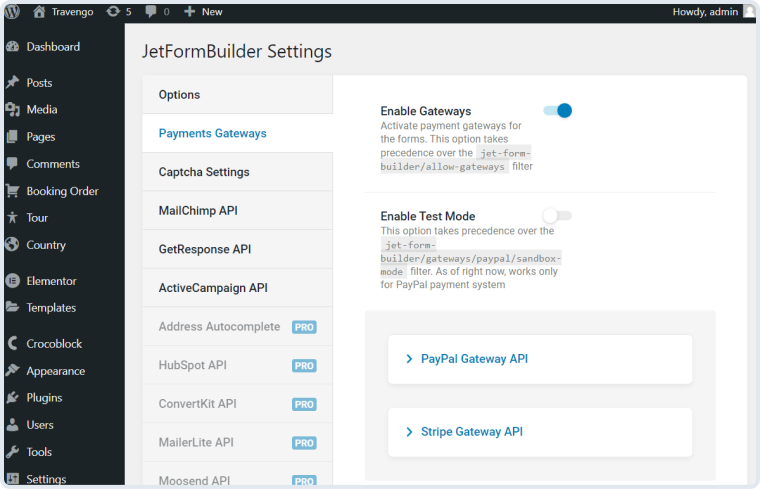
Navigate to the JetFormBuilder > Settings tab on the WordPress Dashboard and turn the Enable Gateways toggle on.
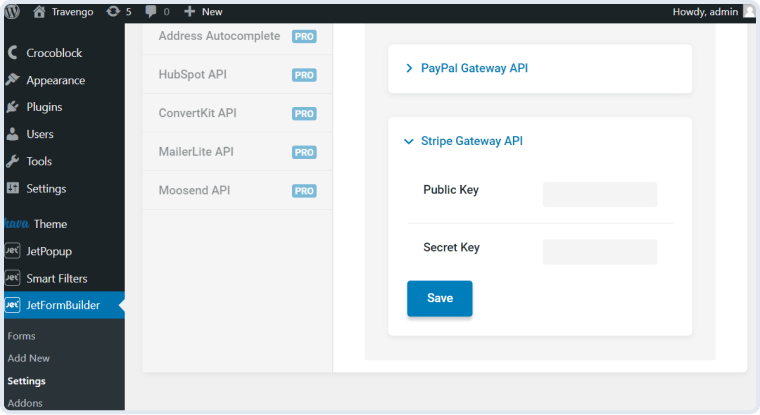
Unfold the Stripe Gateway API tab. Here, you can enter the Public Key and Secret Key copied from the Stripe website to use them in the JetFormBuilder forms further.
Go to JetForms > Forms and open one of the created forms. In the right-side menu, you will see the Gateways Settings section. Select the “Stripe Checkout” option and hit the “Edit” button.
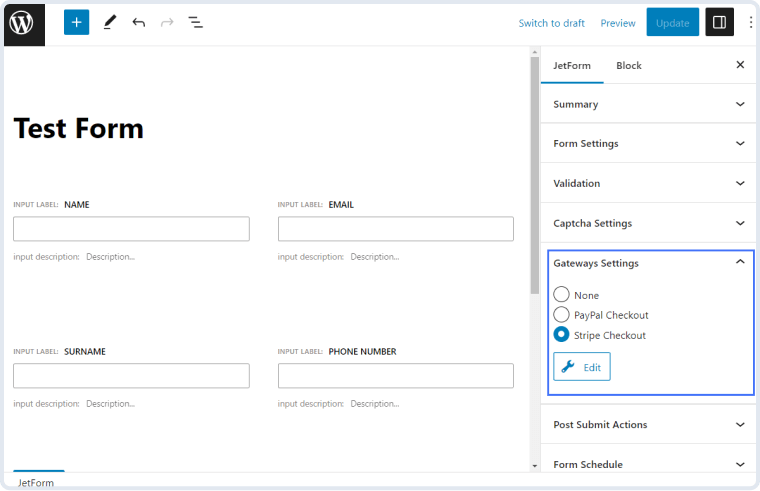
Let’s go over the settings in the Edit Stripe Checkout Settings window.
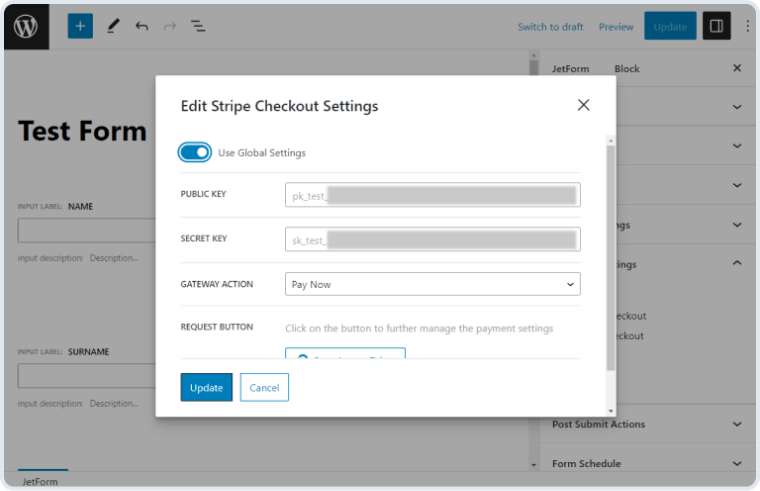
To further manage the Stripe payment settings, click the “Sync Access Token” button. Once the Access Token is updated, you can access more gateway settings.

Buy JetFormBuilder Pro – get all Addons at once
A tweak that allows creating subscriptions and accept recurring payments via PayPal forms
Learn moreproAn extra plugin to integrate Gutenberg-built forms and WooCommerce checkout.
Learn morepro


