How to Configure Payment Gateways
Learn how to use the PayPal and Stripe functionality with the JetFormBuilder plugin for WordPress: how to obtain the API keys, configure the JetFormBuilder payment gateway settings, display multiple gateways via the JetFormBuilder payment methods block, and add the gateway functionality to a specific form.
Table of Contents:
- Configure the PayPal and Stripe Gateway Settings
- Enable the JetFormBuilder Payment Gateways Settings
- Adjust the Form’s Settings
- Action Events Settings
- FAQ
Configure the PayPal and Stripe Gateway Settings
In this section, we explain how to obtain the API keys generated in your accounts. Providing the one-time PayPal payments does not require installing additional plugins (except for the recurring payments), as it is the default JetFormBuilder functionality, unlike the Stripe Payments add-on, which is needed for any payments. Read the How to Create a Stripe Payment Form Using Pro Addon tutorial to learn more about the Stripe gateway setup.
Also, more details about configuring a custom recurring subscription plan for PayPal can be found in the How to Configure a Custom Recurring Subscription Form tutorial, and for Stripe 一 in the How to Set Recurring Stripe Payments in a WordPress Form tutorial.
Finally, you can expand the form’s functionality by adding additional payment methods, as the How to Enable Klarna, SEPA, Sofort, and Other Extra Payment Methods in Stripe tutorial explains.
Obtain the PayPal API Key
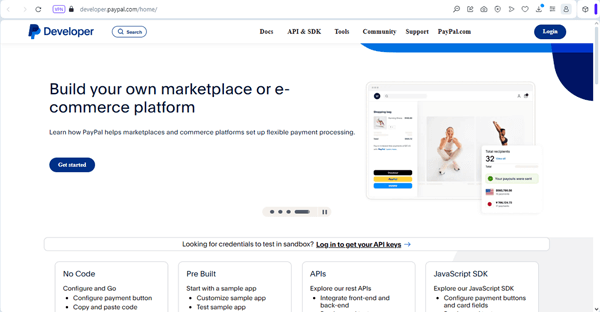
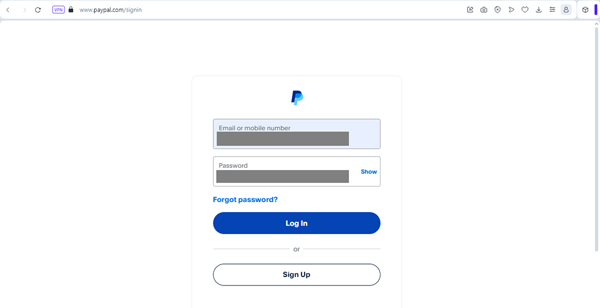
Go to the PayPal Developer website and hit the “Login” button if you already have an account, and log in to it. Otherwise, create a new one by pressing the “Get started” button.
Then, enter your account.
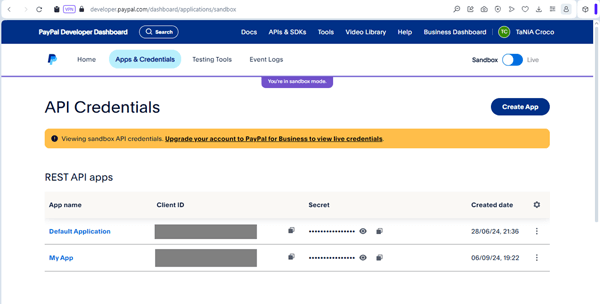
Unroll the App & Credentials tab and navigate to the REST API apps section. The Default Application is generated by default.
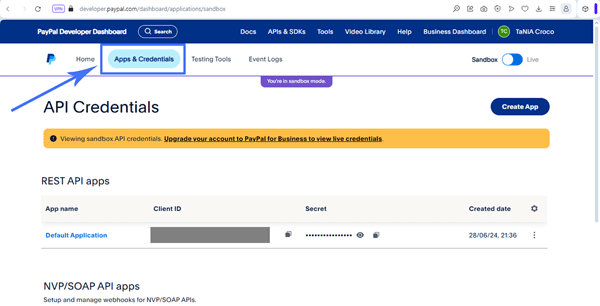
For a form to work correctly in a live environment, set up the appropriate API credentials (the “Live” or “Sandbox” mode; the instructions are in the Get Started with PayPal Developer tutorial) and indicate a proper currency code (the list of codes can be found on the Country Currency Codes page).
If you need another API Key, press the “Create App” button and fill in the fields of the newly appeared “Create App” pop-up.
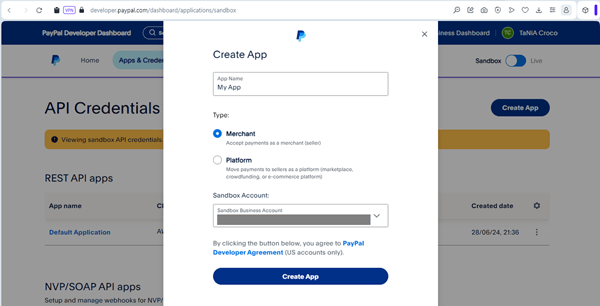
Once created, the new REST API will be displayed on the app’s page.
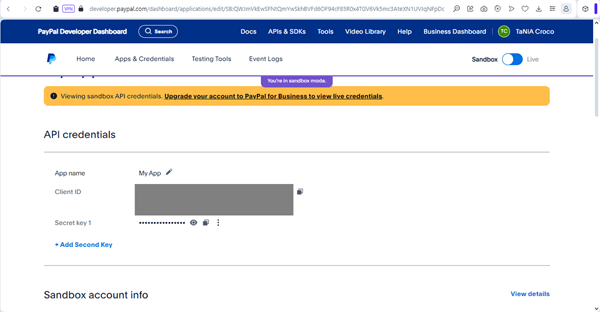
Return to the API Credentials tab that enlists all created REST API apps. Copy the Client ID and Secret Key of the needed REST API apps.
Obtain the Stripe API Key
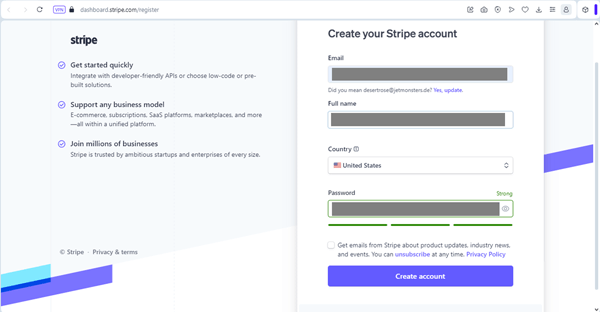
Go to the Stripe website and enter your account or create a new one.
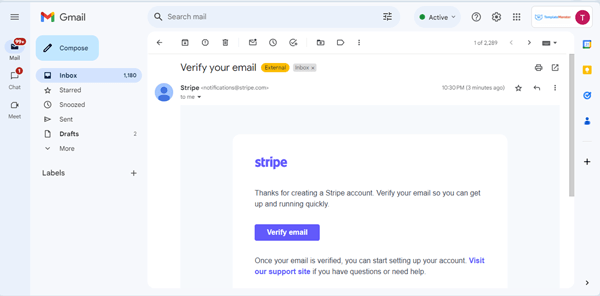
A confirmation letter will be sent to your email. Proceed to the inbox and click the “Verify email” link in the email to pass verification.
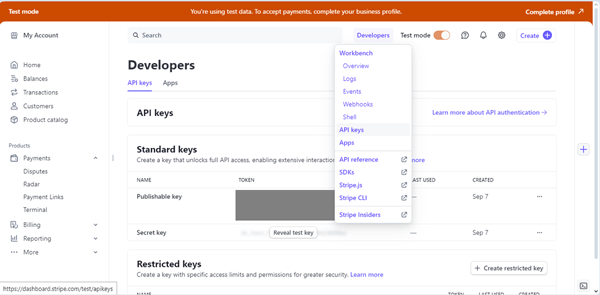
Afterward, you’ll be redirected to the Stripe dashboard page. In your Stripe account, move to the Developers > API keys tab and copy the Publishable key and the Secret key.
Enable the JetFormBuilder Payment Gateways Settings
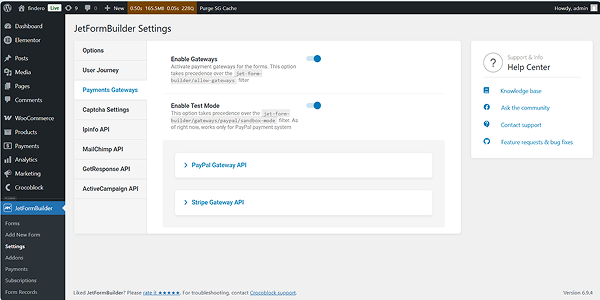
Proceed to the WordPress Dashboard > JetFormBuilder > Settings > Payments Gateways page. Here, activate the Enable Gateways toggle to allow payment operations. In addition, if you set the “Sandbox” mode in the PayPal and/or Stripe accounts, activate the Enable Test Mode toggle.
Since we intend to use the PayPal and Stripe functionality and have activated the Stripe Payments add-on, the Payments Gateways tab displays two tabs to insert the corresponding APIs: once the Stripe add-on is activated, the Stripe Gateway API drop-down will be added to the Payments Gateways tab.
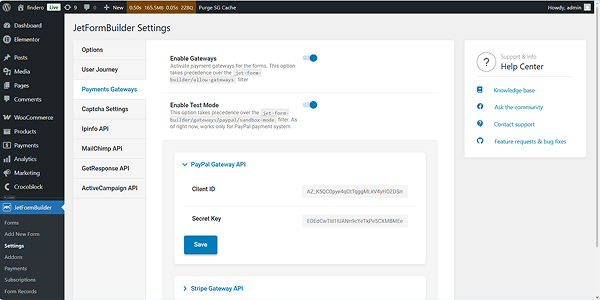
In the Payments Gateways tab, find the PayPal Gateway API drop-down list and click on it. Paste the obtained Client ID and Secret Key into the corresponding fields and press the “Save” button.
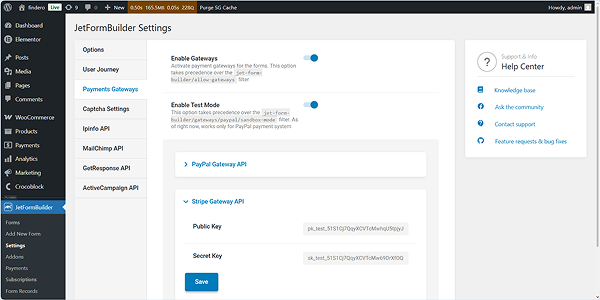
Next, unroll the Stripe Payments Gateways tab, paste the copied Publishable key and Secret key into the corresponding fields, and press the “Save” button.
Adjust the Form’s Settings
Now, go to WordPress Dashboard > JetFormBuilder > Forms and open one of the created forms. Here, we assume that the form is previously created and all necessary fields are inserted.
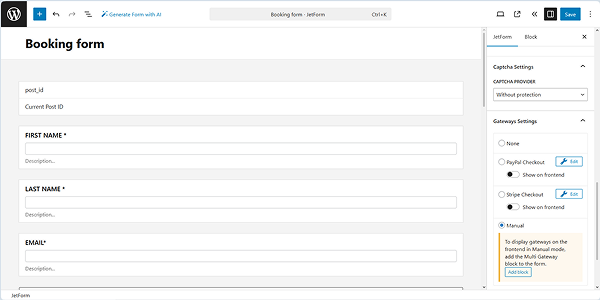
In the right-side menu, you will see the Gateways Settings section. Here, the following options are available:
- Manual 一 an option that allows users to select the preferred gateway;
- None 一 an option that prohibits the usage of the gateways in this form;
- PayPal Checkout and Stripe Checkout 一 options that, if enabled, allow configuring the corresponding gateway settings. If you select one of these options, the PayPal Checkout or Stripe Checkout sub-menus will be unrolled. Here, only one option can be selected 一 the PayPal Checkout or Stripe Checkout.

PayPal checkout settings
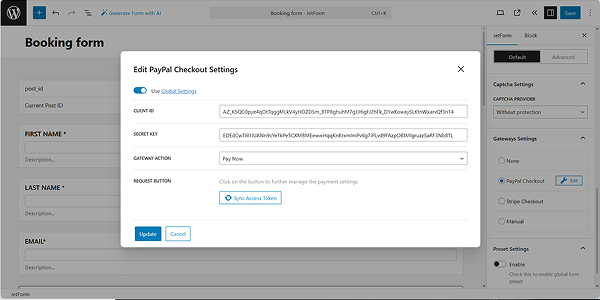
Once the “Edit PayPal Checkout Settings” option is selected, the “Edit” button to open its settings will appear. Here, you can configure the following settings:
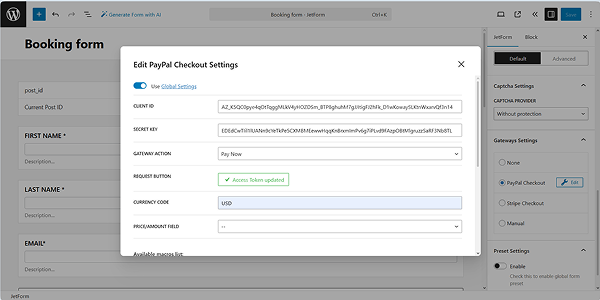
- Use Global Settings — a toggle that pulls the data from the PayPal Gateway API’s settings and pre-fills the Client ID and Secret Key fields;
- Client ID and Secret Key — automatically filled-in text fields that take data from the Client ID and Secret Key fields of the WordPress Dashboard > JetFormBuilder > Settings > Payments Gateways tab. Moreover, you can paste the corresponding data here manually;
- Gateway Action — a drop-down list that allows picking a payment scenario that will perform once the form is submitted;
- Request Button — press the “Sync Access Token” button to work on the payment settings.
After that, the following fields will be added to this pop-up:
- Currency Code — a text field for typing a three-letter code that represents the currency used in your form. More details on getting payments in different currencies can be found in the Currency codes tutorial;
- Price/amount field — a drop-down list for selecting the corresponding price field within your form;

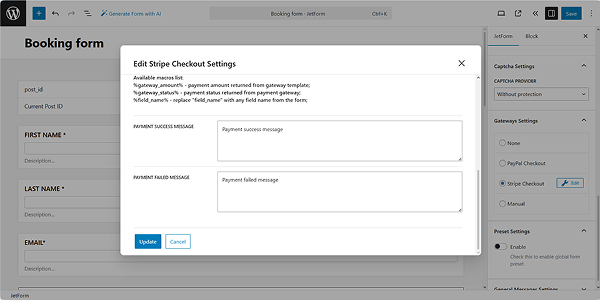
- Available macros list — a text block enlisting the macros that can be used in the Payment success message and Payment failed message fields. The following macros are available:
- %gateway_amount% — a macro that will provide the payment amount returned from the gateway template;
- %gateway_status% — a macro that will give the payment status returned from the payment gateway;
- %field_name% — a macro that will provide any necessary details from the form field, the name of which you write instead of the “field_name”;
- Payment success message — a text field to add the message that will be shown to the user after their payment is confirmed to be successful;
- Payment failed message — a text field to add the message that will be directed to the user if their payment does not come through.
Finally, scroll down the pop-up and press the “Update” button. Then, “Save” the form.
Stripe checkout settings
Once the “Edit Stripe Checkout Settings” option is selected, the “Edit” button to open its settings will appear.
The Stripe Checkout Settings are similar to PayPal Checkout. Instead of the Client ID field, there is the PUBLIC KEY field. You are supposed to input the Publishable Key obtained from Stripe here.
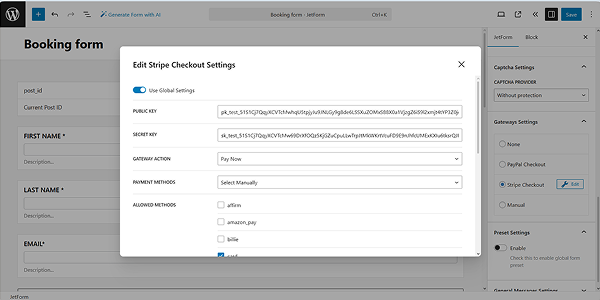
However, if you enable the Use Global Settings toggle, both fields with the keys will be pre-filled automatically. After that, press the “Sync Access Token” button for synchronization.
Other available settings are:
- GATEWAY ACTION — a drop-down list that allows picking a payment scenario that will be performed once the form is submitted. The following options are included:
- Pay Now — an option that activates the CURRENCY CODE and PRICE/AMOUNT FIELD fields with similar functionality to the PayPal corresponding field(s);
- Subscription — an option that activates the SUBSCRIPTION PLAN field with similar functionality to the PayPal corresponding field(s);
- PAYMENT METHOD — a drop-down list that allows picking the needed one(s) from the list (the “Select Manually” option) or enabling all of them (the “Auto” option).
The last section is the Available macros list, PAYMENT SUCCESS MESSAGE, and PAYMENT FAILED MESSAGE fields, with functionality similar to the PayPal fields.
Manual
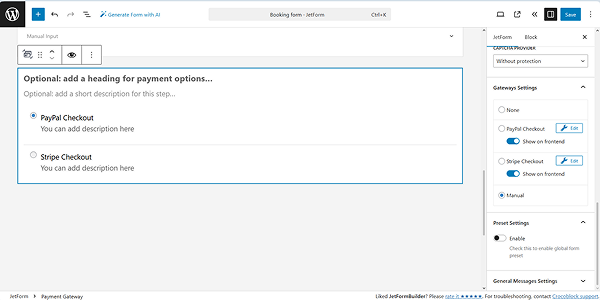
If this option is selected in the Gateways Settings section, the PayPal Checkout and Stripe Checkout sub-menus will be unrolled. Here, enable both Show on frontend toggles and click the “Edit” buttons to open the corresponding settings if they are not configured previously.
Once the settings for both gateways are configured, press the “Add block” button below the “Manual” option to add the Payment Gateway field block to the form automatically to add the Stripe and PayPal checkout in a single form.
Also, you can find this JetFormBuilder payment methods block in the search bar and drag-and-drop where needed.
In addition, you can find more information on how to combine the JetFormBuilder multiple payment gateways in a form to let users select the preferred payment method (PayPal and Stripe in one form) before submitting in the How to Use Both Paypal and Stripe Payment Methods in a Form tutorial.
Action Events Settings
The Event logic for the Submit Actions is available after the 2.1.0 version of the JetFormBuilder plugin.
With this feature, you can set the time and condition for every action in the form when it should be performed. If you use the PayPal or Stripe payment method in the form, you can also set what action should be executed after a successful or failed payment.
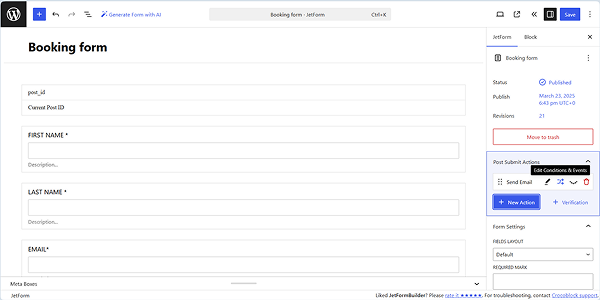
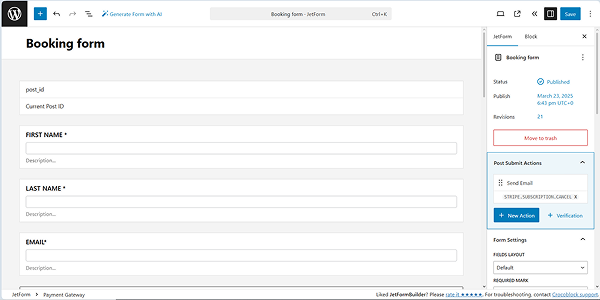
To set an action event, proceed to the Post Submit Actions tab of the form and hit the “Edit Conditions & Events” button.
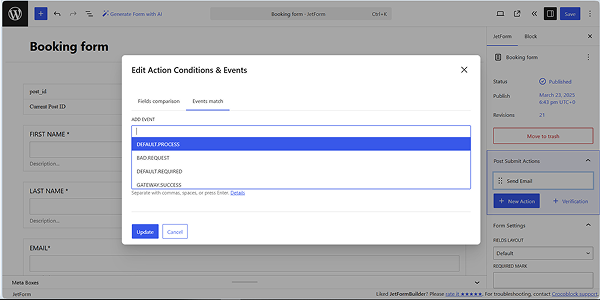
In the Events match tab, you can add such events:
- DEFAULT.PROCESS — an event that defines the time of action performance. This event is needed when the payment (PayPal/Stripe) function is included in the form so that the JetFormBuilder plugin can complete the submit actions with such an event before a user is redirected to the checkout page;
- BAD.REQUEST — an event that is executed after processing the request if there are errors in the form fields (for example, when you filled out a Media Field with the wrong file format or exceeded the file limit). It overtakes the DEFAULT.PROCESS event;
- DEFAULT.REQUIRED — an event that is executed in any case, even if the form fields contain some errors or if actions are unsuccessfully performed. This event runs before the form response is sent. By default, this event is used by the Save Form Record action and cannot be added to other events through the form editor;
- GATEWAY.SUCCESS — an event that replaces the former “On success payment” option for actions. It is executed after passing the checkout page on the side of the payment system if a payment or a subscription has been made;
- GATEWAY.FAILED — an event that replaces the former “On failed payment” option for actions. It is performed when the user returns from the checkout page of the payment system without making a payment or subscribing;
- GATEWAY.EXPIRED — an event that is performed if the gateway sessions expire due to the configured idle time;
- GATAWEY.SUSPENDED — an event that is performed if the gateway sessions are suspended;
- GATEWAY.RENEW — an event that is performed if the gateway sessions are renewed;
- GATEWAY.SUBSCRIPTION.CANCELLED ー an event that is performed if users have canceled the subscriptions;
- GATEWAY.SUBSCRIPTION.EXPIRED ー an event that is performed if the subscription expires;
- GATEWAY.SUBSCRIPTION.SUSPENDED ーan event that is performed if the subscription is suspended.
If the PayPal Recurring Payments add-on for JetFormBuilder is installed and activated, and the PayPal Subscription plan is created, the RENEWAL.PAYMENT event will be added to all Post Submit Actions, except the “Save Form Record” action.
- RENEWAL.PAYMENT — performs the specified Post Submit Action if the subscription is renewed and paid again.

Also, the JetFormBuilder plugin allows for setting the Events associated with the Render States. Read the How to Combine Registration and Login in One Form Using Render States tutorial for more details.
After you select one or several events, hit the “Update” button. The Post Submit Action will have the text that refers to the set Event.
Don’t forget to “Update” the form to save changes.
FAQ
The JetFormBuilder plugin operates in the mode set in the PayPal and/or Stripe accounts; if you set the “Sandbox” mode to simulate transactions, you should activate the corresponding mode in the WordPress Dashboard > JetFormBuilder > Settings > Payments Gateways page or deactivate this toggle if you work in the “Live” mode.
To enable payment gateways, activate the Enable Gateways toggle in the WordPress Dashboard > JetFormBuilder > Settings > Payments Gateways page.
Then, connect your form to PayPal and Stripe via the global or specific settings.
To configure the global settings, unroll the PayPal Gateway API and/or Stripe Gateway API tabs of the Payments Gateways page and insert the corresponding data: the Client ID and Secret Key for PayPal and the Publishable key and Secret key for Stripe. Also, to activate these settings for a specific form, enable the Use Global Settings toggle in the Edit PayPal (Stripe) Checkout Settings pop-up and synchronize tokens.
To use individual APIs, insert the corresponding data (Client ID and Secret Key for PayPal and Publishable key and Secret key for Stripe) into the Edit PayPal (Stripe) Checkout Settings pop-up of your form, and do not activate the global settings.
This block can be inserted as any other block into your form: by finding it in the search bar and dragging and dropping it where needed. Also, you can insert this block automatically by pressing the “Add block” button below the activated “Manual” option of the Gateway Settings of your form.
That’s it. Now you know how to configure WordPress Payment Gateways and use them in JetFormBuilder forms.