Conditional block
It allows you to render some parts of the HTML depending on other fields’ values.
A form addon to convert user-submitted data from a WordPress form to PDF attachments.
Buy from $49
PDF Attachment Addon provides functionality for interactive PDF forms. It generates a PDF file automatically each time a form is submitted, saves the record in the Uploads folder, and offers two possible after-submit actions: attach a PDF to the email confirmation and open it for further downloading.
Such a PDF form generator boasts multiple uses. It can help you save PDF application form entries, medical reports, tickets, receipts, customer trip plans, vacation requests, and more.

It allows you to render some parts of the HTML depending on other fields’ values.
Using the JetEngine toolkit, show different template content to certain user roles.
Save generated PDF files to the Uploads folder, protected from public access via .htaccess.
Add a Hidden Field to the form and pull the date and time it was submitted for the PDF.

Build custom templates for generated PDF files and customize their layouts and content.
Use form field macros to output form data to the PDF template.
Edit content within the Heading, Paragraph, Image, Columns, Custom HTML, and Table blocks.
Adjust the template content, including font style, text color, background color, etc.
To install the addon, go to WordPress Dashboard > JetFormBuilder > Addons and find the “PDF Attachment” addon in the All Available Addons section. Press the “Install Addon” button, and once installed, it will appear in Your Installed Addons. Next, click “Activate Addon” to prepare it for further work.
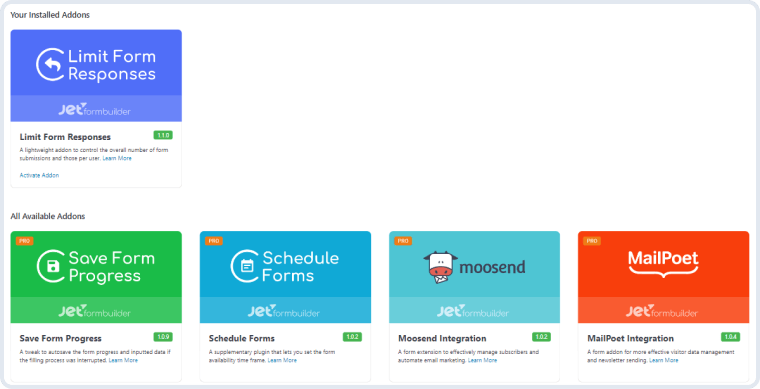
As you can see, all PRO version addons can be installed and activated via the JetFormBuilder dashboard.
After installing and activating the plugin, go to the WordPress Dashboard > JetFormBuilder > Forms and open one of the created forms or create a new one.
For example, we opened the Contact Form with “Email” and “Subject” Text Fields, “Message” Wysiwyg Field, Media Field for images, and Action Button blocks. Also, the form contains the “Send Email” and Save Form Record” post submit actions.
Switch to the JetForm settings tab in the right sidebar, unfold the Post Submit Actions> tab, push the “+ New Action” button, and pick the “Generate PDF” action from the drop-down list.
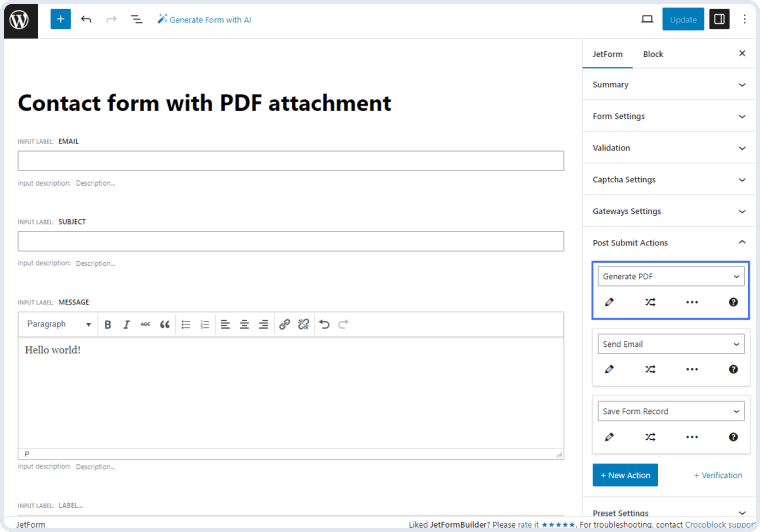
Hit the “pencil” icon to observe its settings in the Edit Action pop-up:
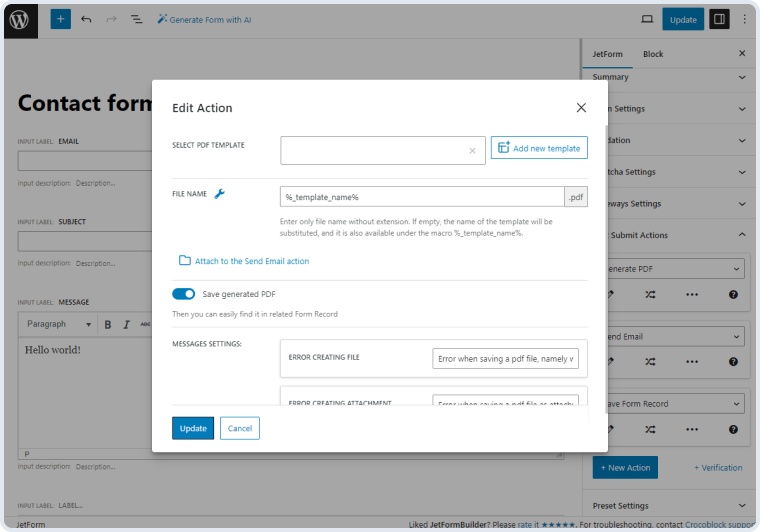
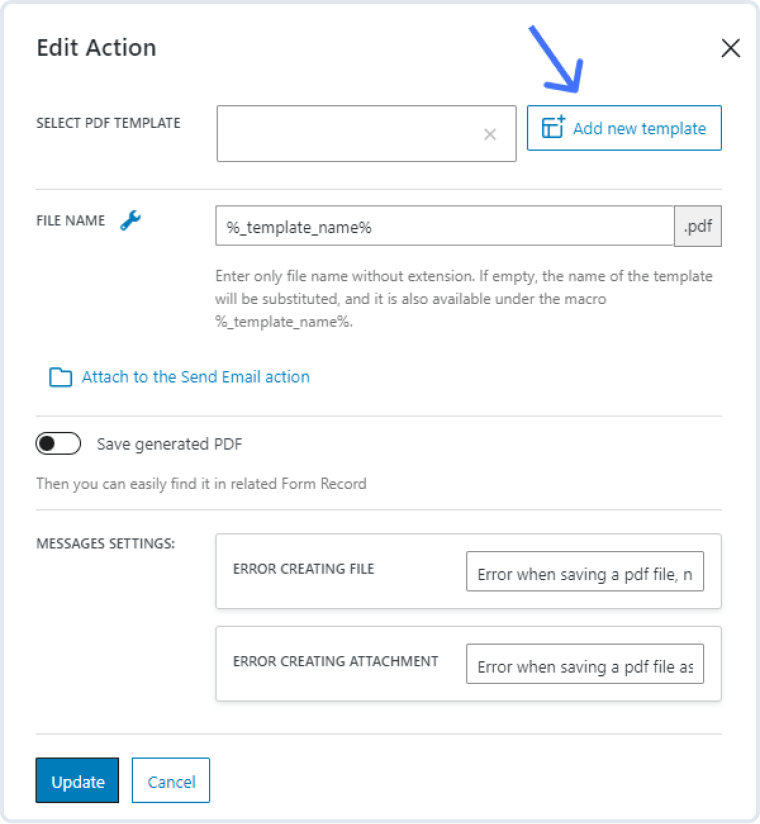
The SELECT PDF TEMPLATE is a drop-down menu that allows selecting templates for the PDF document with the submitted information. To create a new template, click the “Add new template” button.
It creates a new template with the “Samle template [locale time]” name and opens it in a new window.
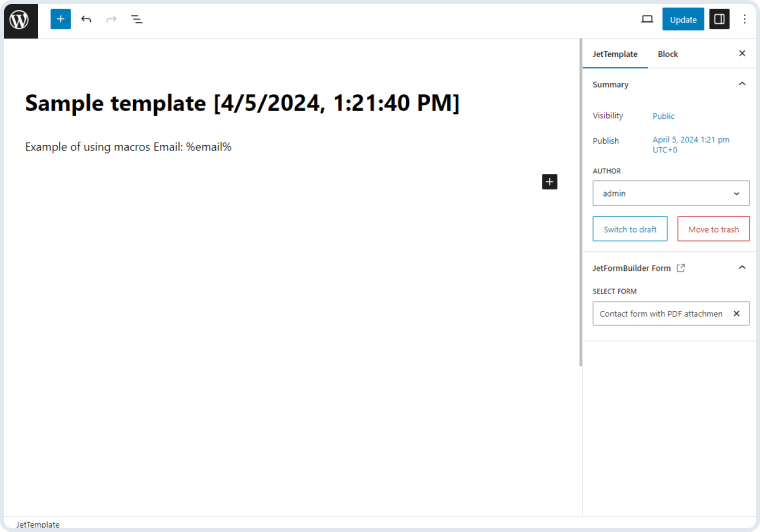
The title can be edited according to your preferences.
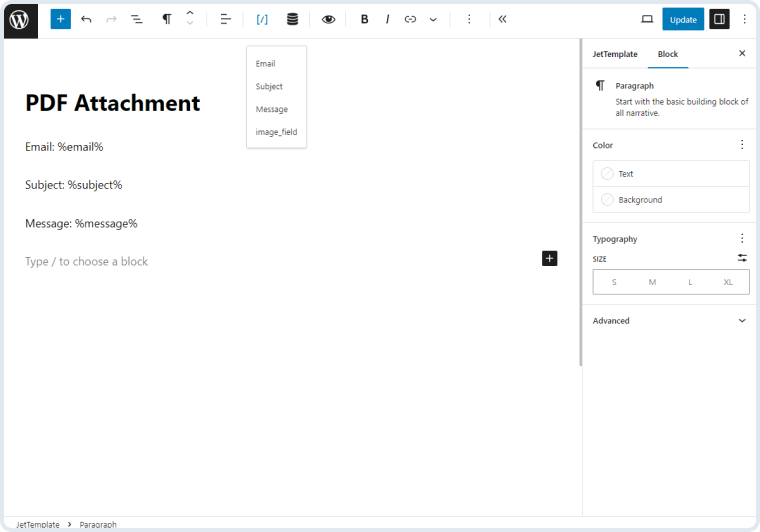
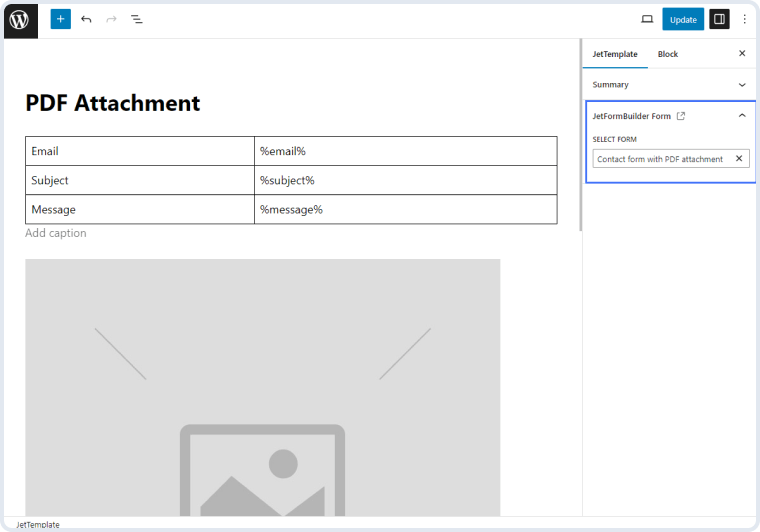
You can customize the template content by entering the field label and name in the ‘[field label]: %[field name]%’ format (remove square brackets after filling), specifying the submitted values that you wish to display in the PDF attachment (e.g., “Email: %email%”).
The ‘%field name%’ macro with the field name can be used in the Paragraph, Heading, Custom HTML, Table, and Image blocks.
To insert [%field name%] macros more conveniently, click the needed block and hit the “[/]” button from the block toolbar to activate the drop-down list and pick the required field.
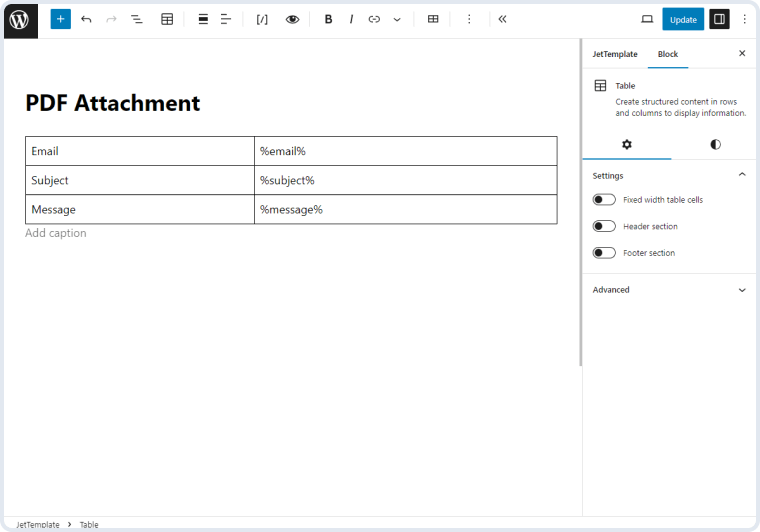
In the Table block, you can insert the field label in the first column and the macro with the field name in the second.
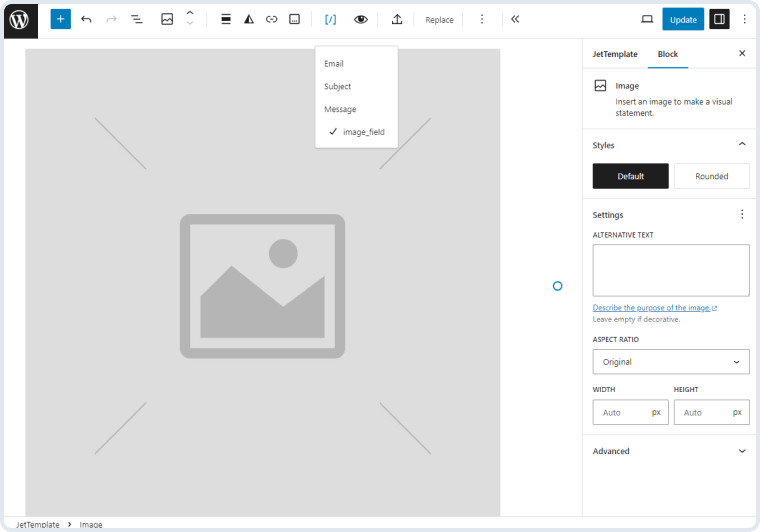
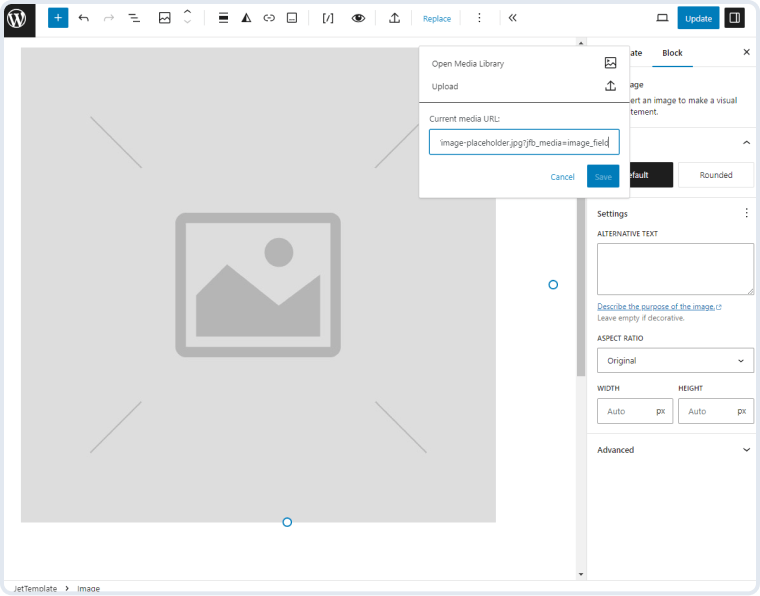
To insert an image from the Media Field to the PDF file, place the Image block, hit the “[/]” button, and pick the Media Field from the drop-down.
If you hit the “Replace” button from the block toolbar, as the Current media URL, you’ll get a URL with such a pattern:
http://<site>/wp-content/uploads/<image_path>?jfb_media=<field_name>
In our case, ‘<field_name>’ is replaced with the Media Field name — ‘image_field.’
You can use a Conditional Block in the template as well.
In the SELECT FORM field in the JetTemplate tab, you can set the form for the current template. If you assign a form here, the “[/]” button will be available in the block toolbar to insert macros with the field names from the certain form. Even if you don’t assign a form to the template, it will still work correctly.
When you finish customizing the template, hit the “Update” button.
After creating the PDF template will be attached to the action, and the “Add new template” button will be changed to “Edit template.”
All created templates can be found in the WordPress Dashboard > JetFormBuilder > Templates tab.
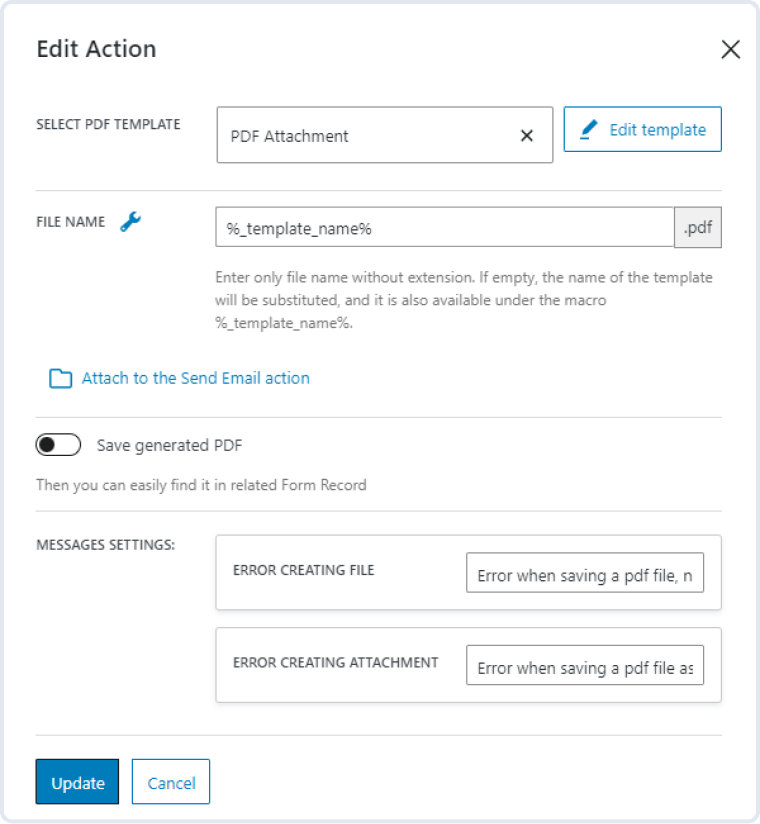
Here, you can type static text or use macros. To use the template name, keep the ‘%_template_name%’ macro or leave the field empty. By clicking the “wrench” icon, you can insert a macro with a field name to use the field submitted value as the file name.
When this button is pressed, it opens a tooltip with a “Confirm” button. When clicked, a new “Send Email” action is created, or an existing one is modified, following the current “Generate PDF” action.
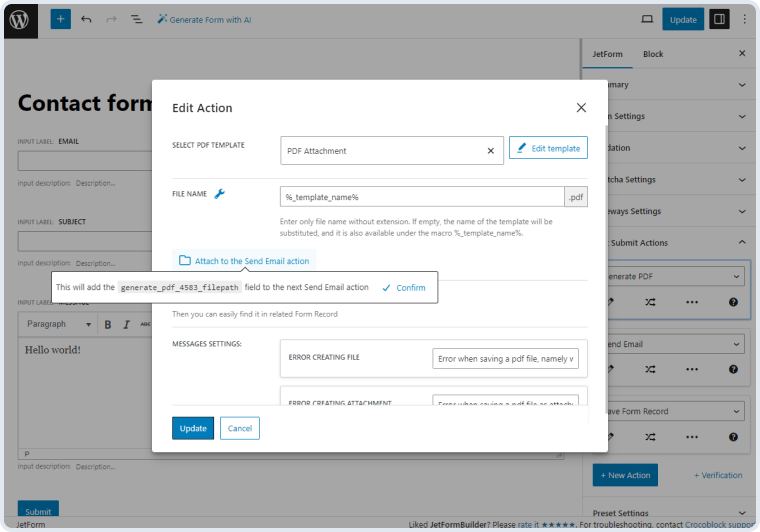
Afterward, you can hit the “Go to the action” link to open the “Send Email” action settings and scroll to the ATTACHMENTS option.
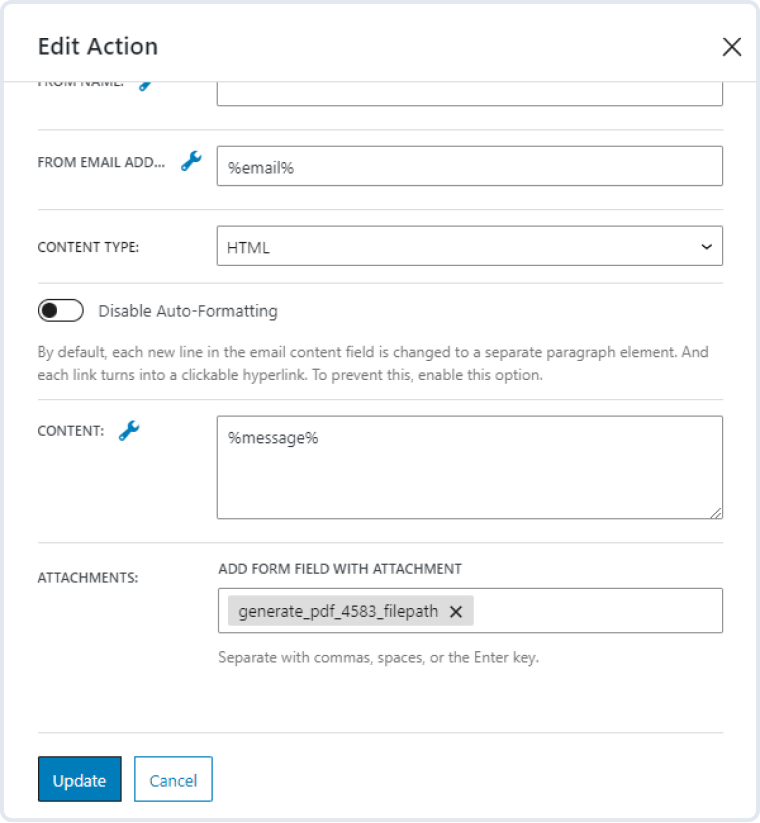
The option determines whether the generated file should be saved on the server after all actions are completed.
If it is disabled, the file that was generated during the execution of the action will be deleted already after the execution of all actions.
If enabled, the generated file will be uploaded as an attachment to the Media Library; it can also be found on the Form Records Page if the “Save Form Record” action is added to the form.
For this tutorial, we activated this toggle.
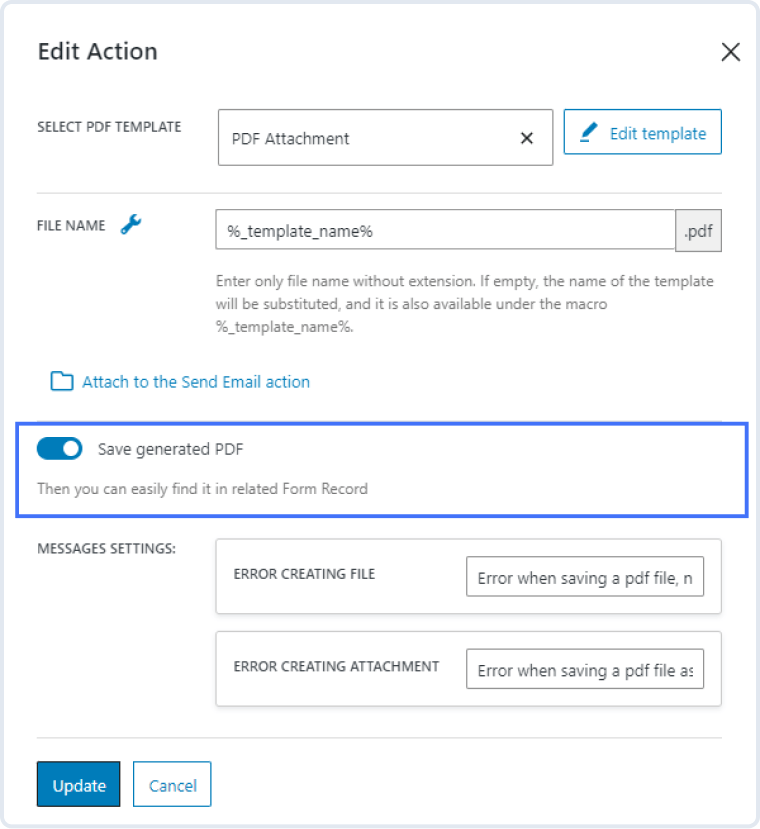
Here, you can set messages for ERROR CREATING FILE and ERROR CREATING ATTACHMENT.
After managing the action settings, press the “Update” button.
To set the form style settings, you can install the free JetStyleManager plugin. Customize the form and hit the “Publish/Update” button.
Open the page or template where the form should be located and place it using the JetForm widget (in Elementor), JetForm block (in Block Editor), or JetForm element (in Bricks). From the CHOOSE FORM drop-down list, select the built form. Learn about other settings from the JetForm Overview.
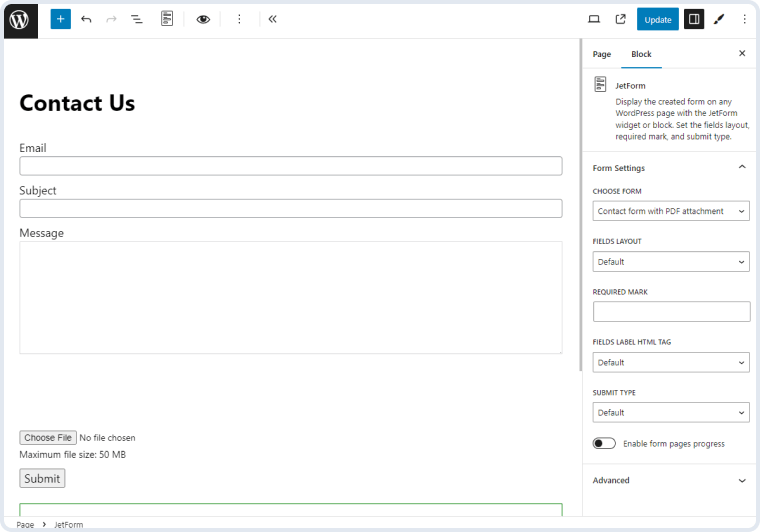
We placed our form on the page edited in the WordPress block editor. To display the form on other page builders, check our guide on How to Display a Form on the Front End.
Open the page where the form is located on the front end, fill in the fields, and submit the form.

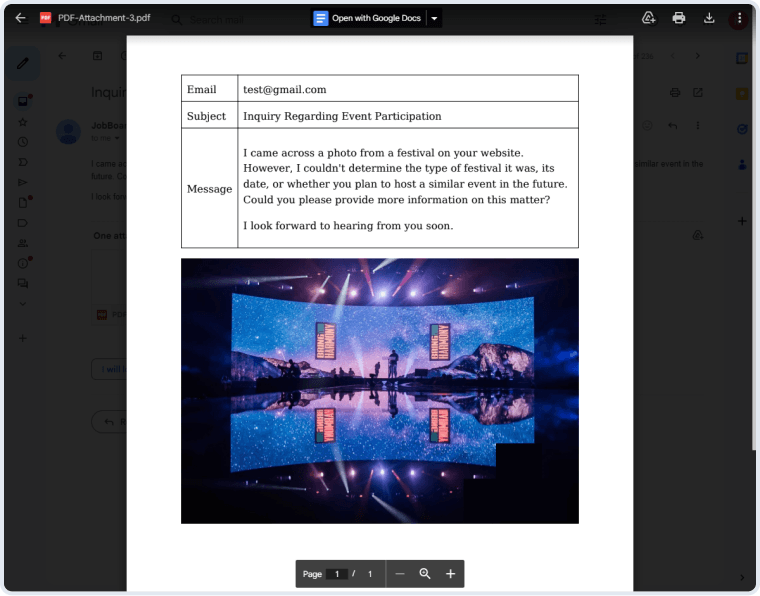
With the “Send Email” action performed, we got an email with a PDF attachment.
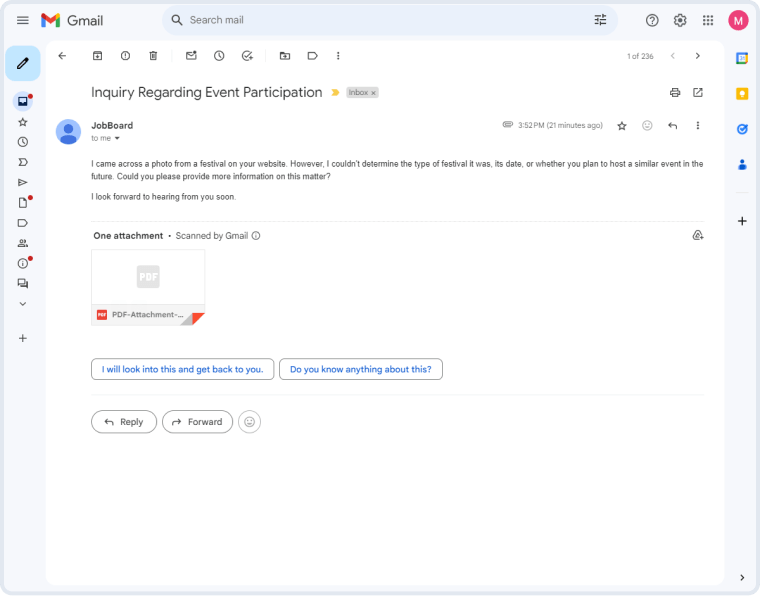
If we open the attachment, we can observe information from the submitted form fields.
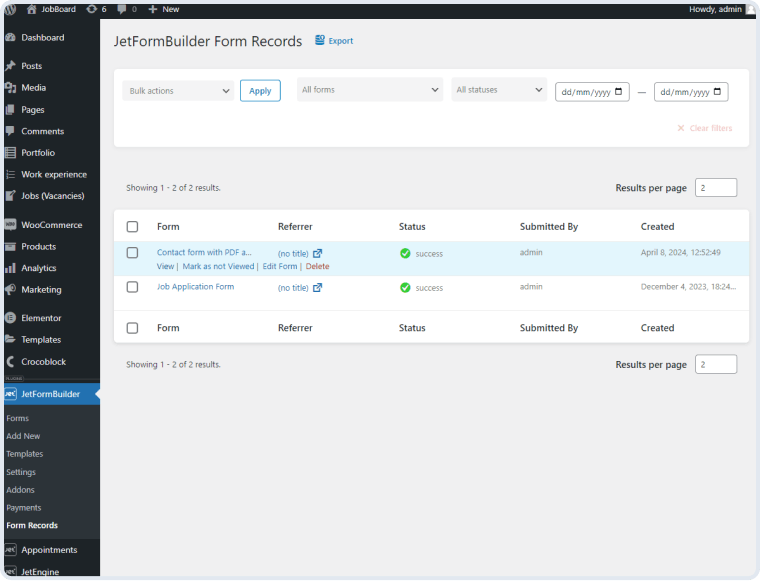
With the “Save Form Record” action, the submitted form details are stored in the WordPress Dashboard > JetFormBuilder > Form Records tab.
Find the needed form record and click on “View.”
In the bottom right corner, you can find the Generated PDF.
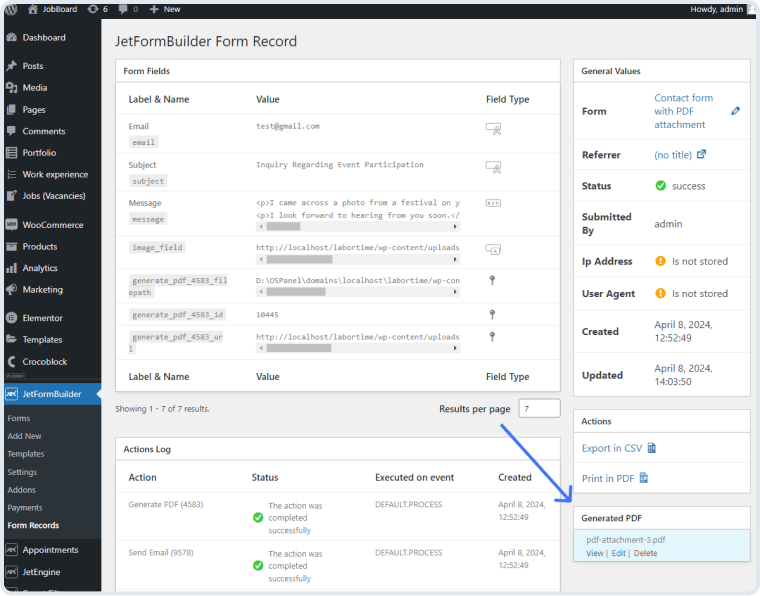
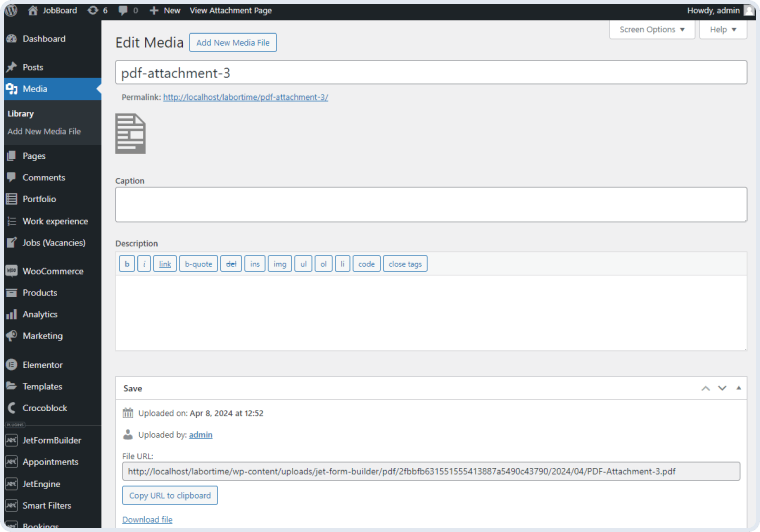
If you hit the “View” button, you can observe the PDF file. If you push the “Edit” button, you’ll open the attachment in the Media Library.
Buy JetFormBuilder Pro – get all Addons at once
A drag-and-drop interface for uploading multiple media files to the site via a form.
Learn moreproA form-enriching extension to add signature functionality to different form types online.
Learn moreproA tweak to execute specific after-submit actions without front-end forms.
Learn morepro


