API Key field
A field where you need to paste the Moosend API key.
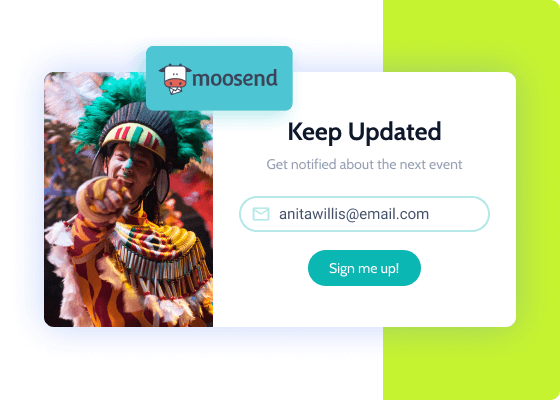
Moosend is a JetFormBuilder addon that creates a connection between the Moosend account and JetFormBuilder/JetEngine forms.
Collect leads from landing pages and subscription forms, create mailing lists and custom segments, as well as oversee marketing campaigns. Add custom fields and prevent registered user data from overwriting thanks to Moosend Addon.

A field where you need to paste the Moosend API key.
Press it once to pass the API key verification. Press it twice to check the key’s validity.
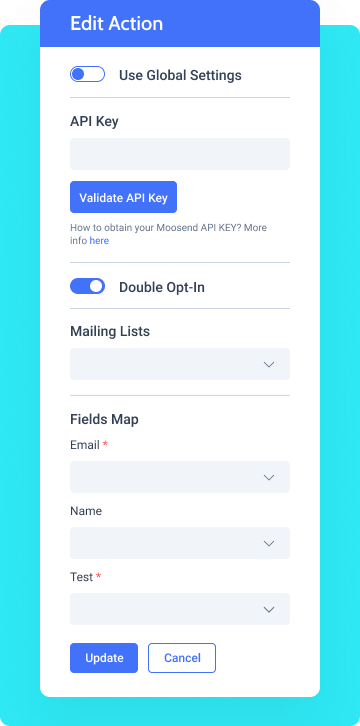
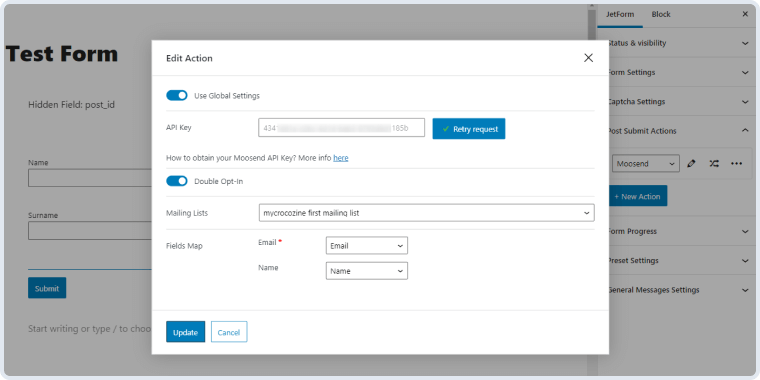
To avoid the risk of having invalid email addresses, enable a double opt-in toggle and make your recipients undergo a subscription confirmation.
Here are stored the mailing lists you created through Moosend Dashboard.
Fields Map represents a set of fields to be displayed in your form. Make sure to pick corresponding meta fields from the Select drop-down.
To install the addon, go to JetFormBuilder > Addons and find the “Moosend Integration” addon in the All Available Addons section. Press the “Install Addon” button and, once installed, it will appear on Your Installed Addons. Next, click “Activate Addon” to get it ready for further work.

As you can see, all PRO version addons can be installed and activated through JetFormBuilder Dashboard.
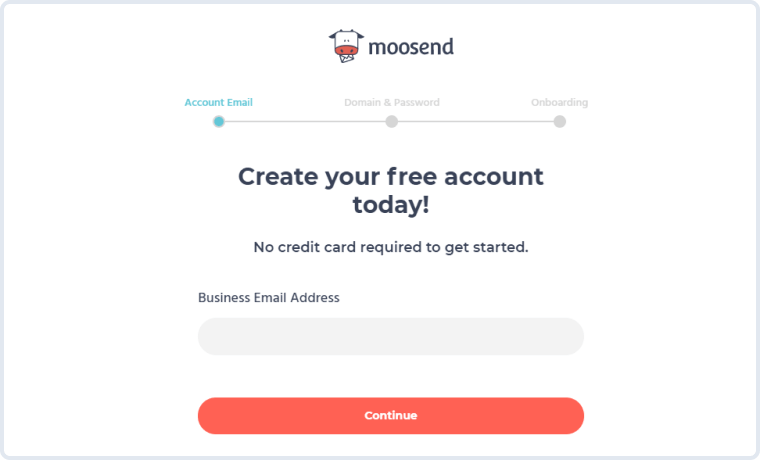
Go to the Moosend website and create an account. If you already have an account, enter it.
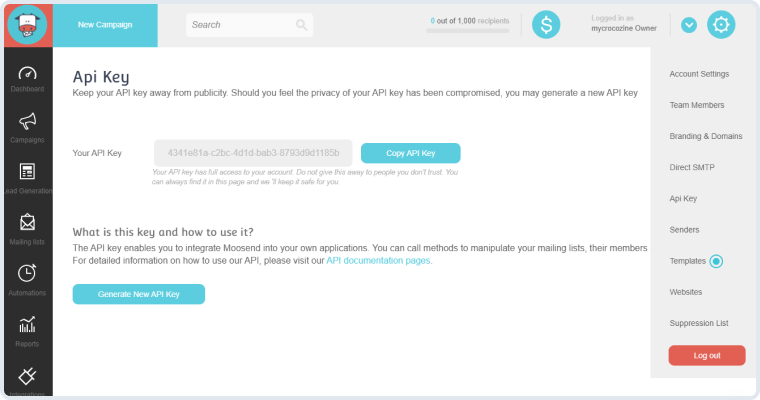
Click on the cog-shaped button in the upper right corner of the top toolbar. Proceed to Account Settings > Api Key. Copy the key by clicking the corresponding button.
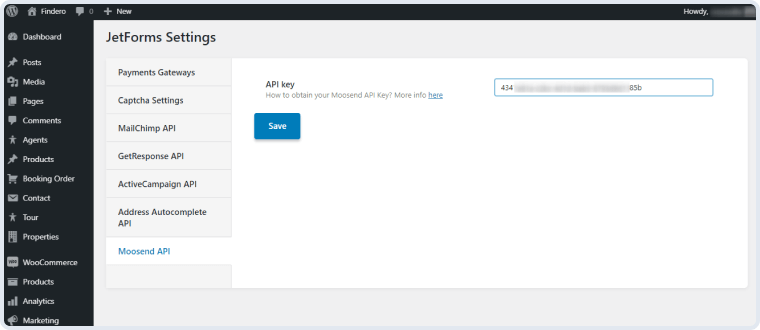
Open your website’s dashboard and go to JetForms > Settings. Find the Moosend API tab and open it. You will see a dedicated API key bar. Paste the copied key here and hit the “Save” button.
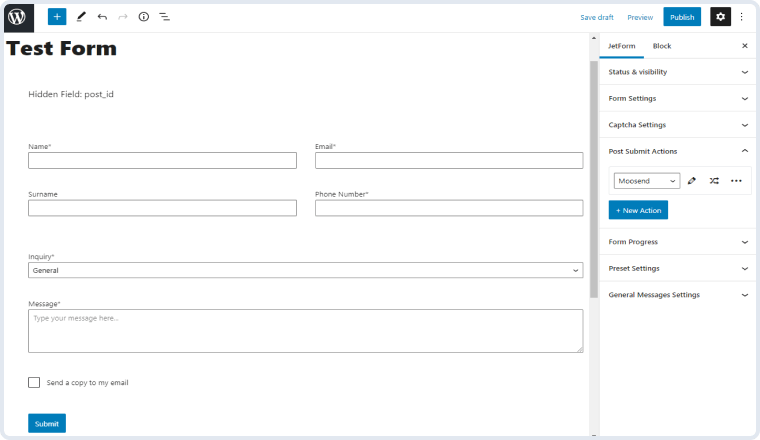
Next, proceed to JetForms > Forms. If you already have a form you would like to link with Moosend, open it. If not, click on the “Add New” button.
In the right-side menu, open the Post Submit Actions section, press the “New Action” button, and choose the “Moosend” option from the drop-down list.

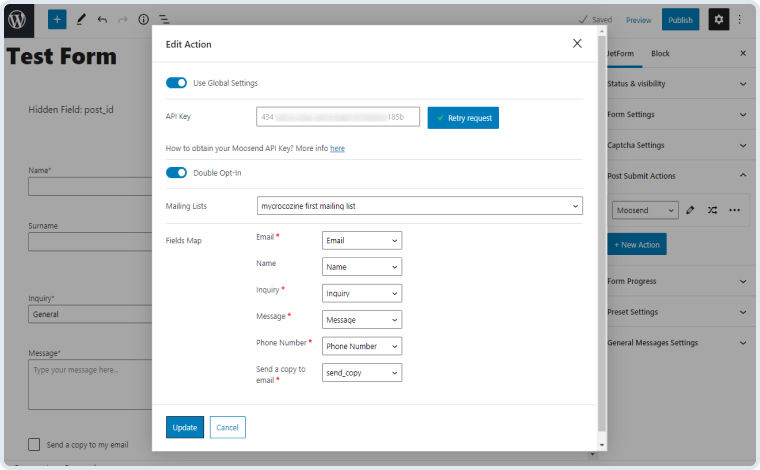
Press the edit button with a pencil-shaped icon on it and you will see the Edit Action window. Paste the API key you copied to the API Key bar manually or enable the Use Global Settings toggle – it will pre-fill the API Key field.
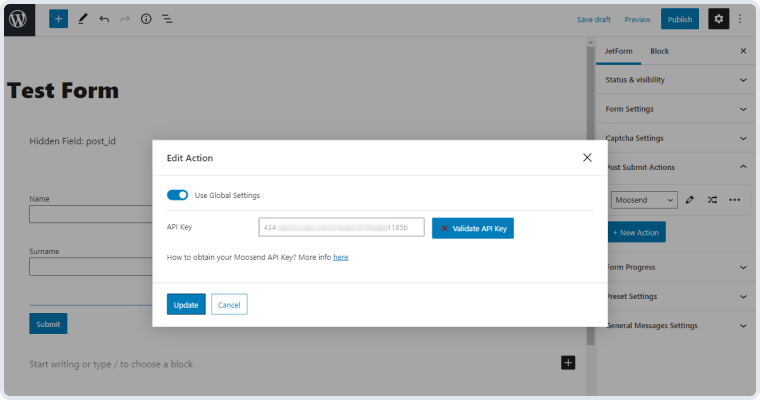
Press the edit button with a pencil-shaped icon on it and you will see the Edit Action window. Paste the API key you copied to the API Key bar manually or enable the Use Global Settings toggle – it will pre-fill the API Key field.
NOTE. Moosend addon allows you to add custom fields to the form and even make them required. If you want these fields to be verified by the API system, you will have to make them required manually.
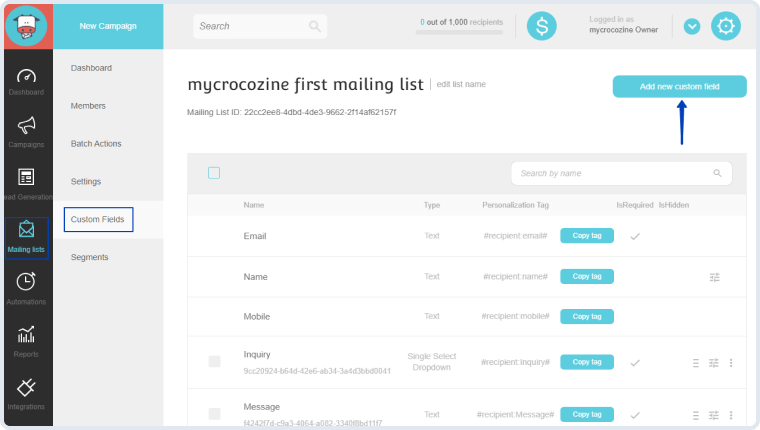
Go to your Moosend account page, click on the Mailing lists menu item, and then pick one of the created mailing lists. In the left-side admin panel, locate the Custom Fields tab and press it. In the upper right corner, there is an “Add new custom field” button. Click it.
You will see the field editing page. Enter the Field Name, then select the desired Data Type from the drop-down list – it can be “Text”, “DateTime”, “Number”, “Single Select Dropdown”, or “Checkbox”. Provide a Default Fallback Value if necessary and tick the “Required” checkbox option. Afterward, press the “Save custom field” button.
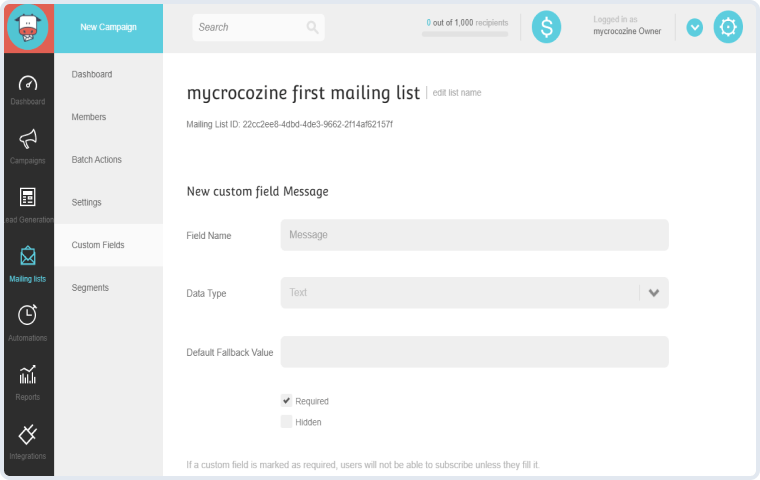
Note. If you mark some fields as required, the user will be unable to submit the form until these fields are filled in. Also, make sure to indicate which fields are required in your JetFormBuilder form.
The field you have just added will appear on the Custom Fields list within your Moosend mailing list. For proper operation of custom fields, remember to edit your form’s content according to the changes you made to the mailing list in your Moosend account.
Now, click to edit the Moosend post-submit action once again and hit the “Retry request” button. All custom fields that you added on Moosend’s end will appear in the Fields Map section. To create a connection between the form field and the user’s field in Moosend, choose the corresponding form field in the drop-down list near the newly-appeared positions.
After you finish the Moosend action setup, click the “Update” button. Now, as soon as the user submits the form, the new subscriber will appear in the Members list of your Moosend account.
A lightweight addon to control the overall number of form submissions and those per user.
Learn moreproAn email marketing addon to ensure higher audience reach and income from mailing lists.
Learn morepro


