
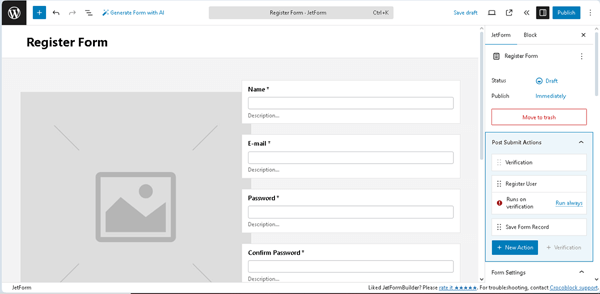
Register User
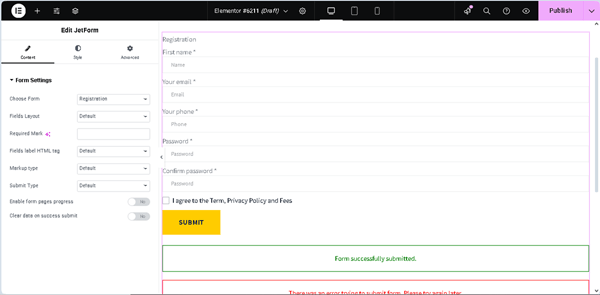
The “Register User” Post-Submit Action is intended to add a new WordPress user, a list of which can be found in the WordPress Dashboard > Users directory. Due to the “Register User” functionality, the applied form should contain Text Fields to fill out the user’s data.
Also, the pre-made Register Form Pattern is available.
In addition, you can combine both login and register forms using the User Login Action add-on from JetFormBuilder. More details are presented in the How to Combine Registration and Login in One Form Using Render States tutorial.
Inserting the “Register User” Post-Submit Action
The “Register User” Post-Submit Action can be added to any form by navigating to the JetForm settings and pressing the “+New action” button. After that, in the newly appeared Add new action window, the “Register User” button should be pressed.
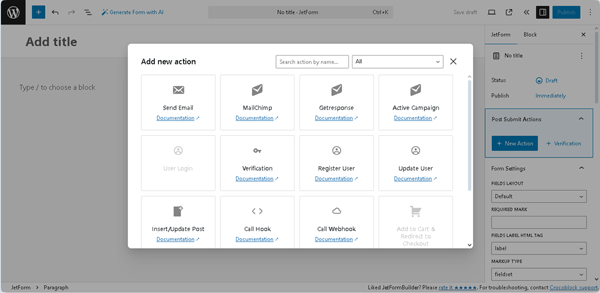
Next, the editing window opens.
Configuring the Settings
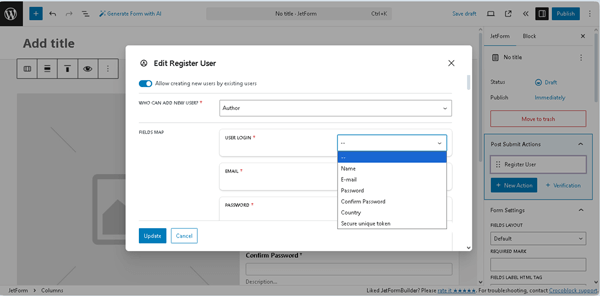
The Edit Register User window has the following settings:

- Allow creating new users by existing users 一 a toggle that, if enabled, activates the WHO CAN ADD NEW USER? drop-down list to pick the user role allowed to register new users;
- FIELDS MAP 一 a group of fields that allows filling out the corresponding fields in the WordPress User Profile (e.g., USER LOGIN, EMAIL, PASSWORD, and more). The group contains both the necessary fields (marked with a red star) and non-required ones (these fields can be left empty). For every field in this group, a drop-down menu with a list of form fields is available. By choosing a form field, the link between the form field and the user account field will be set.
Also, except for the form’s fields presented as options in the corresponding drop-down lists, the “Secure unique token” is added to every field in this section. This option is often used for the Password and Confirm Password fields since it is intended to automatically generate a password until the user creates a new password manually. This token can be sent via email using the Post Submit Action. If the “Verification” Post Submit Action is inserted, the “ID of the secure unique token” (allows saving a reference to each token in the “jet_fb_tokens” database table) and “Verification URL” (allows a verification link the user has to click to complete the verification process) options are added to the FIELDS MAP field drop-down lists.
More details can be found in the Create Registration Form with Email Verification video.
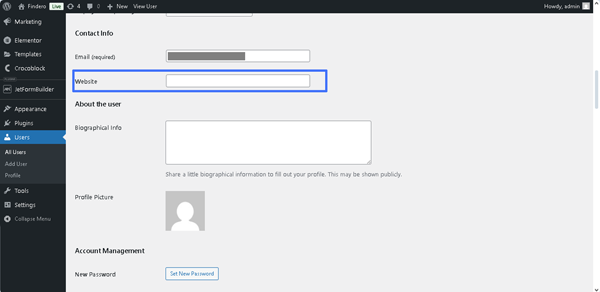
In addition, the User URL field in the FIELDS MAP section allows inserting a URL that will be saved in the wp_users table of the site’s database and displayed in the Website field of the User Profile.
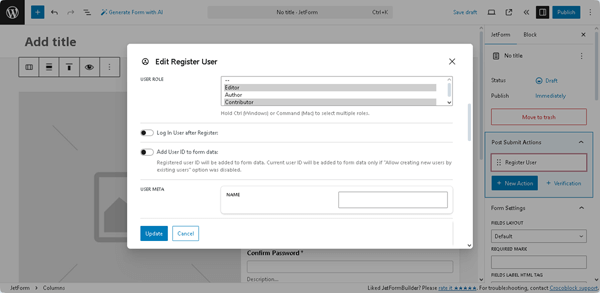
- USER ROLE 一 a drop-down list that allows the specification of people who have a profile on your site to perform this action. More details about user roles can be found in the WordPress User Roles and Permissions for the Website article. Here, some user roles can be added by holding the “Ctrl“ key (Windows) or “Command” key (Mac) to select multiple roles. Also, the JetFormBuilder Plugin: Changing User Roles via Forms tutorial should be looked through to learn how to configure a form to change roles using different Post Submit Actions.
- Log In User after Register 一 a toggle that, if enabled, activates the “REMEMBER ME“ FIELD drop-down list that allows specification of the corresponding form’s field;
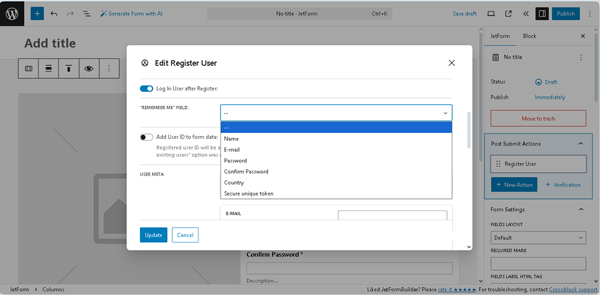
- Add User ID to form data 一 a toggle that, if enabled, allows keeping the user ID in form data. Or, if the form is completed by a user already logged in, the current user ID will be added to the form data;
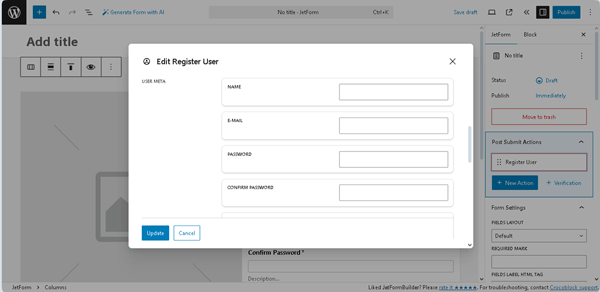
- USER META 一 a group of fields that allows linking the form’s custom fields to the user account. Additionally, the User Profile functionality can be enhanced by utilizing Meta Boxes.
The JetFormBuilder plugin does not create custom meta fields, but it allows inserting data from forms to Custom Post Types or Custom Content Types using the “Insert/Update Post” Post Submit Action. In this case, the specific plugins should be applied (e.g., JetEngine (recommended), ACF, Meta Box, Pods, etc.).
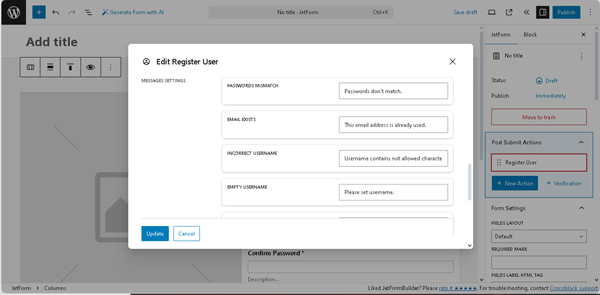
- MESSAGES SETTINGS 一 a group of fields that refers to notifications shown to the user in corresponding cases.
Pressing the “Update” button saves the “Register User” Post Submit Action settings.
Testing the Workflow
After creating the form with the necessary fields and settings mentioned above, it should be added to a page in your preferred editor via the JetForm widget/block/element.
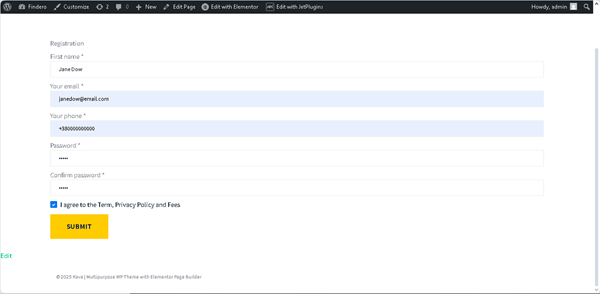
By filling out the form’s fields and submitting the form on the front end, a new user will be created.
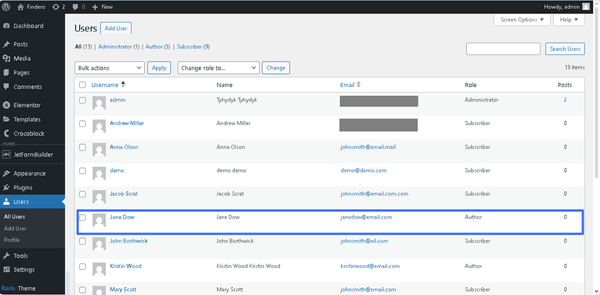
To check a user’s credentials, one should navigate to the WordPress Dashboard > Users tab and check if the new user is already listed here.
To change the specific user data or check if the completed information is saved in the database, a cursor should be hovered over the user’s name, and the “Edit User” button should be pressed to check if the completed information is saved in the database.
More information on User Profile creation using forms can be found in the JetFormBuilder Plugin: WordPress Profile Form Creation tutorial.
That’s all about the “Register User” Post Submit Action and building workings form with the JetFormBuilder plugin for WordPress.