Drag and Drop File Upload
A drag-and-drop interface for uploading multiple media files to the site via a form.
Learn moreproA form-enriching extension to add signature functionality to different form types online.


Enable clients and users to sign legally binding contracts online using e-signatures.
Benefit: Streamline the agreement process and eliminate the need for paper-based workflows.
Use digital signatures for collecting permissions, approvals, authorizations, etc.
Benefit: Secure, timestamped signatures will save time and ensure clarity.
Add signature fields to forms to confirm product/service orders.
Benefit: A signed confirmation will increase brand trust and accountability.
Collect and store signatures for custom workflows such as identity/consent confirmation.
Benefit: Ensure verification processes are compliant and secure.
Allow patients to sign consent forms digitally for faster processing.
Benefit: Reduce waiting times and enhance user convenience.
Enable job applicants to sign employment forms directly during the application process.
Benefit: Simplify recruitment workflows and ensure accurate documentation.
Save signatures to specific user meta fields.
Adjust the canvas background, its size, and color.
You can save a signature as a file in the Uploads folder, a WP Attachment, or a data URL.
Show/hide content depending on whether the signature field is filled or not.

Specify the needed image format for the created signature.
Benefit from unique, non-indexable hashed folders for privacy.
Signature Field is subject to standard browser validation and can be made required.
If form submission fails, the generated signature file will not be saved.
Go to the WordPress Dashboard > JetFormBuilder > Addons tab and find the Signature Field Addon in the All Available Addons section to install the add-on. Press the “Install Addon” button, and once installed, it will appear in Your Installed Addons. Next, click the “Activate Addon” link to get it ready for further work.
Also, you can install and activate this add-on as any other WordPress plugin. Read the JetFormBuilder WordPress Plugin Installation tutorial to know how to do it.
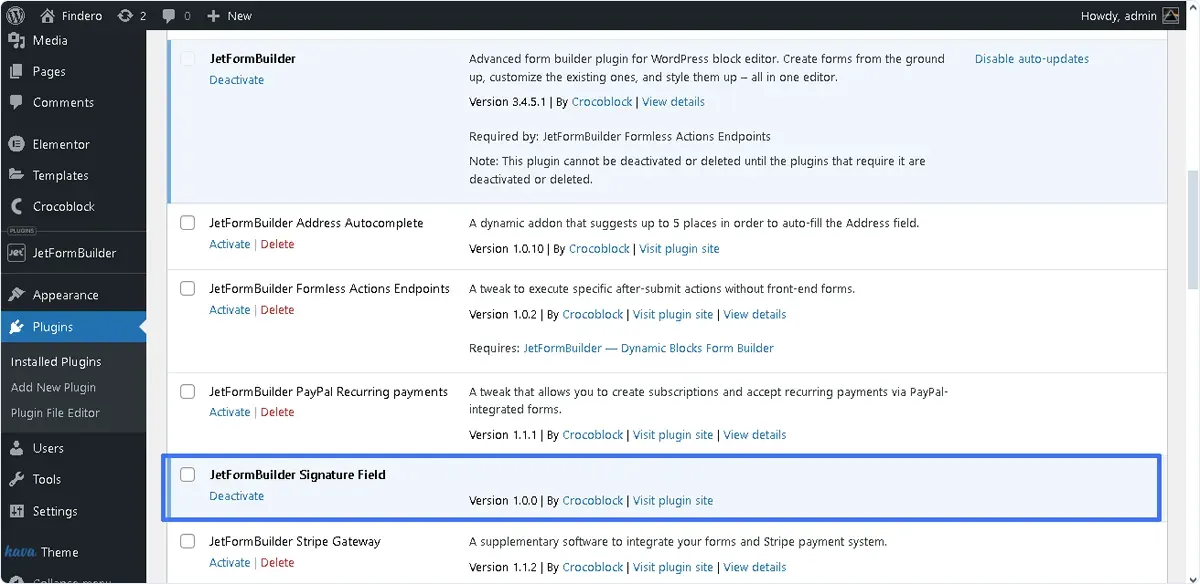
Navigate to WordPress Dashboard > JetFormBuilder > Forms tab and open the needed form or, if you do not have any, create one.
In this case, we pressed the “Contact” button in the Welcome block to use the embedded Contact Form with the “Email” and “Subject” Text Fields, “Message” Wysiwyg Field, Action Button block, and the “Send Email” and “Save Form Record” Post Submit actions.
This form creation tutorial explains how to build forms from scratch.
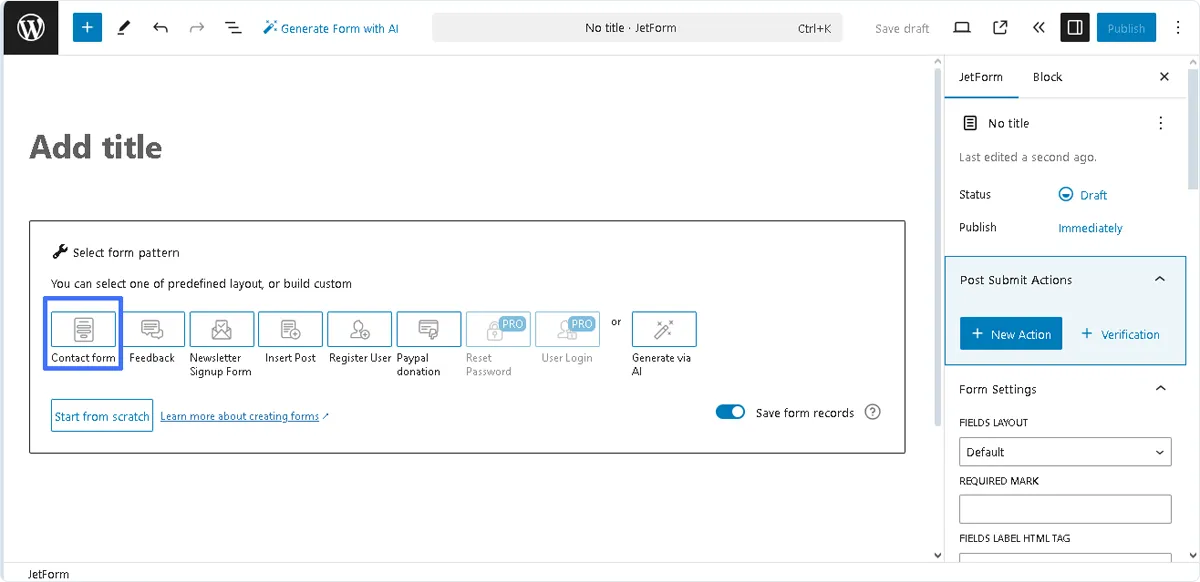
Then, we typed the form’s name (“Contact Form with Signature” for this case) instead of the “Add title” placeholder.
Click the “Add block” button and find the Signature Field in the search bar. Add the field where needed.
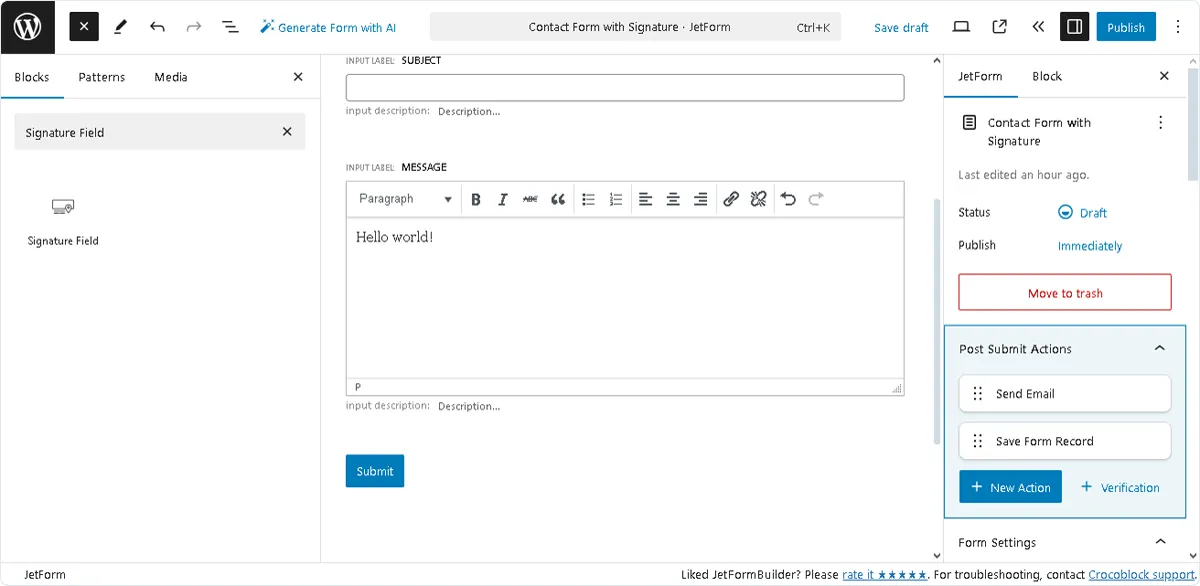
In this case, we placed the Signature Field at the end of the form above the Action Button.
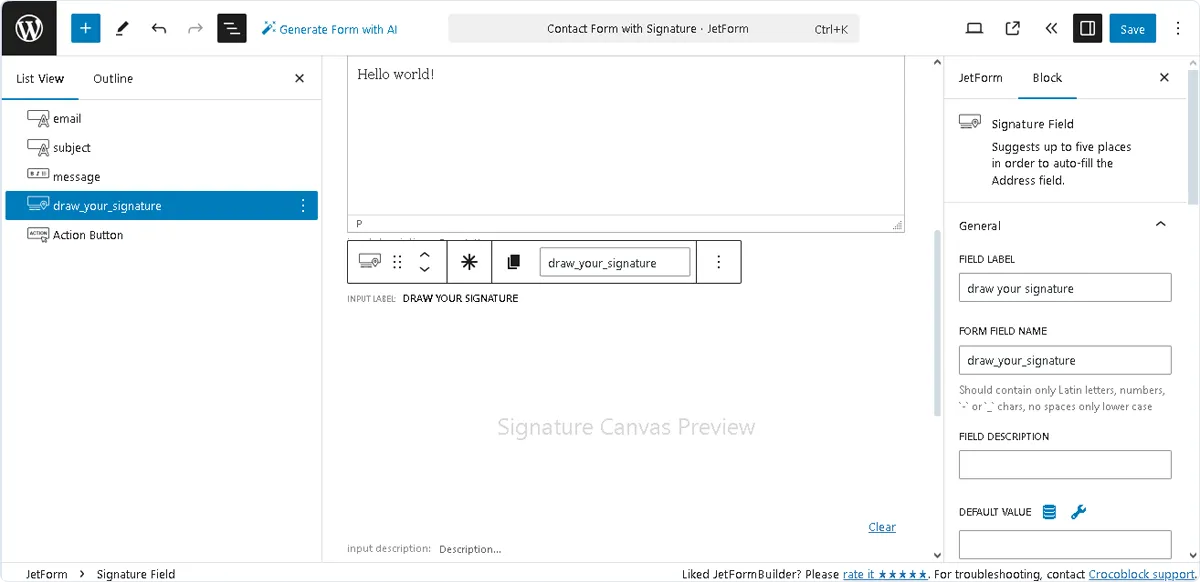
First, unroll the Signature Field settings and configure the General settings section: insert the block field’s name in the FIELD NAME field (in this case, “draw your signature”), and the FORM FIELD NAME will be filled automatically (here, the ”draw_your_signature” text.)

Then, scroll down the settings and configure the Saved Image Settings section with settings intended to configure images generated when submitting the form.
Here, you can select the IMAGE FORMAT that specifies in what format to generate the final image: “PNG,” “PNG with Background,” “JPG,” and “SVG”:
Since some email clients may block SVG content, we do not recommend using SVG files with the “Send Email” Post Submit action.
In the following step, adjust the STORAGE TYPE settings that specify how to save the generated image: “File in a hashed folder without WP attachment,” “File in a hashed folder without WP attachment,” and “Data URL string.” Here, we selected the “File in a hashed folder without WP attachment” option.
The submitted images are stored in a separate folder unique to each site with a unique hash for each user and form pair; the folders are closed to indexing by Google. Therefore, the user signatures are protected from downloading because the files’ URLs are almost impossible to pick up unless users get them directly from someone. In this case, users only need to be careful with the “File in a hashed folder without WP attachment” option because, in some cases, attachment pages can be indexed by Google.
If the “File in a hashed folder without WP attachment” and “File in a hashed folder without WP attachment” options are selected, the Delete created file on form error toggle will appear. If this toggle is activated and the “Save Form Record” Post Submit action is added to the form, the JetFormBuilder will save record data on the forms submitted successfully and store them in the WordPress Dashboard > JetFormBuilder > Form Records tab. Otherwise, the form will be saved regardless of the result of its submission.
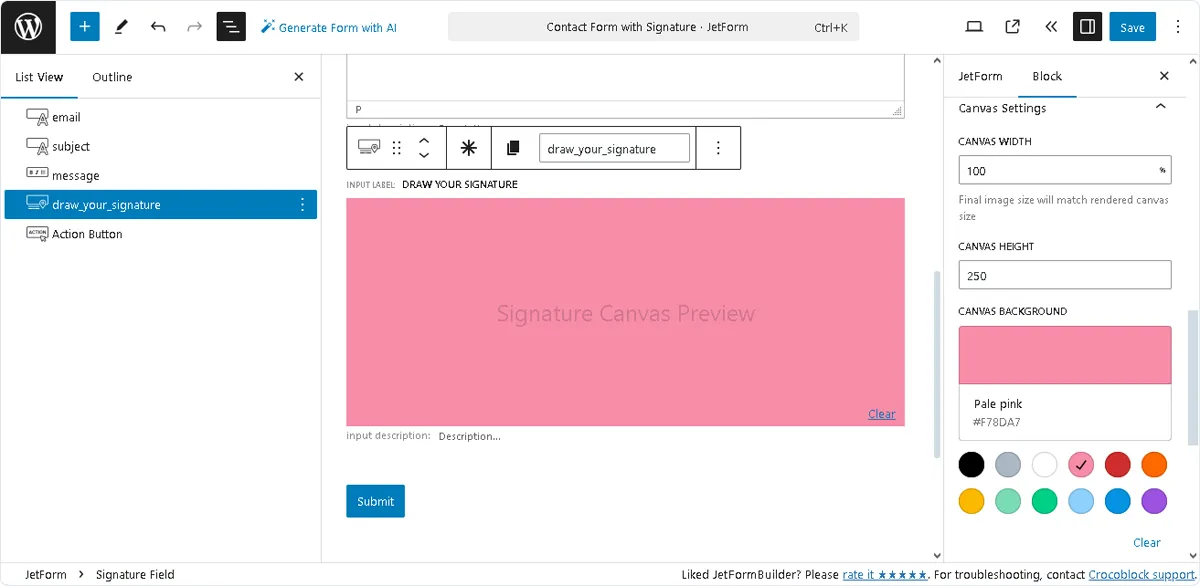
In the Canvas Settings section, specify the needed CANVAS WIDTH and CANVAS HEIGHT numerical values to set the final image size. Also, you can pick the canvas background’s color in the corresponding field.
In this case, we kept the default values in the CANVAS WIDTH and CANVAS HEIGHT fields and selected the pink color for the background.
Next, scroll up the Signature Field settings to the Usage Instructions section and copy the contents below the Code snippet to use in Send Email or Generate PDF actions field.
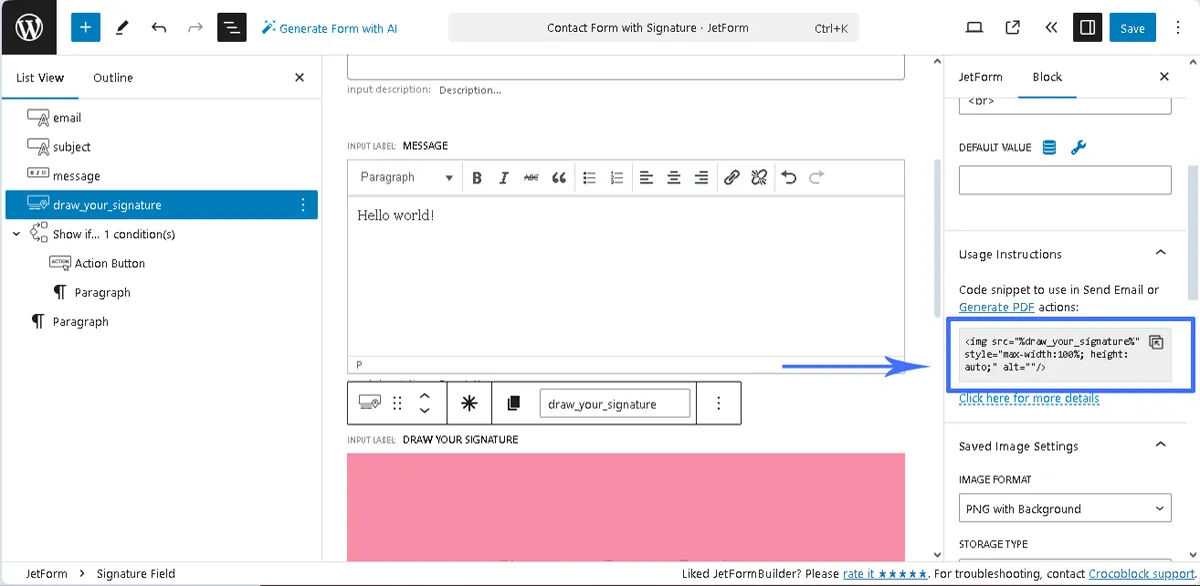
Users can specify the image size by typing the necessary text in the code snippet. In particular, they can type the needed attribute values instead of the “max-width:” and “height:code” values.
In this case, we use conditional logic to display the Action Button if the Signature Field is filled out. To do this, we added a Conditional Block to the form and transferred the form’s Action Button into it.
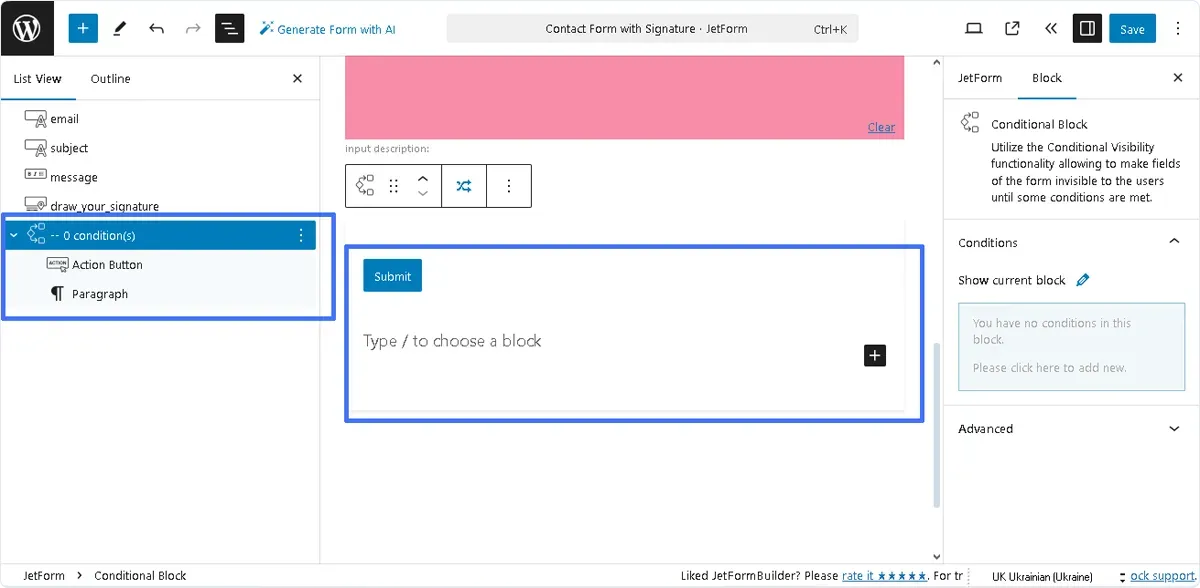
After that, to unroll the Conditional Block settings window, press the button with the “crossed arrows” icon (on the top tool panel to the left of the “Options” button.)
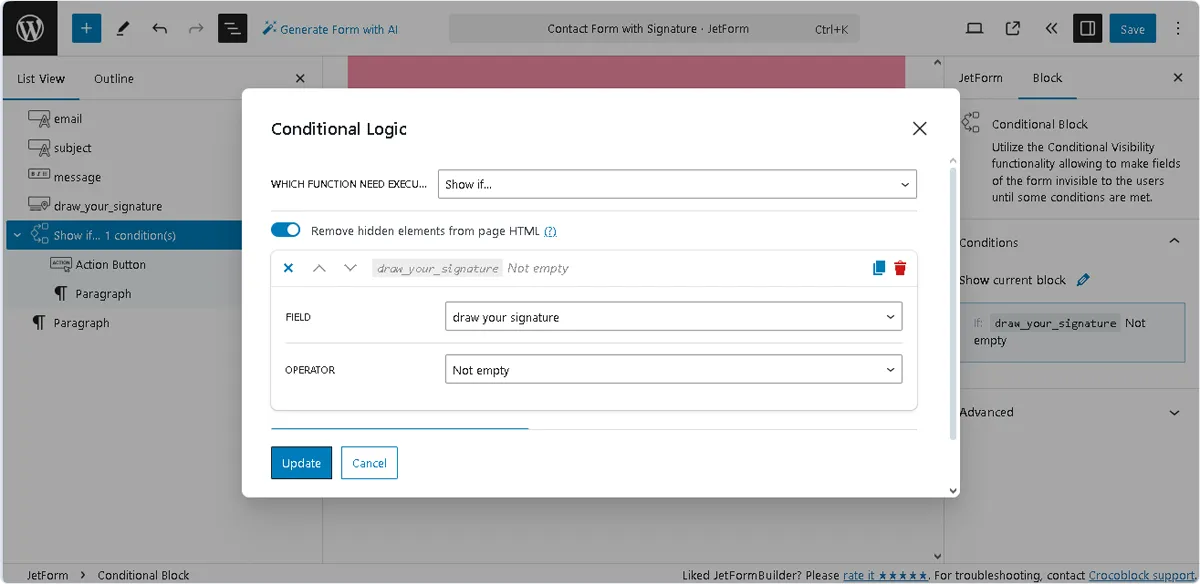
In the newly-appeared Conditional Logic pop-up, select the “Show if …” option in the Which Function Need Execute? drop-down list. Next, enable the Remove hidden elements from page HTML toggle and press the “+Add Condition” button to observe all settings.
After that, select the Signature Field name (in this case, the “draw your signature” field) in the TITLE drop-down list and the “Not Empty” option from the OPERATOR drop-down list.
Finally, press the “Update” button to save the condition.
Use the PDF Attachment add-on from JetFormBuilder to insert the submitted signature to a PDF file with a predefined design. Users can then open the PDF file in a browser or receive it in a specific email. Read the How to Generate PDF on Form Submission tutorial to know how to do it.
Navigate to the JetForm settings tab and unroll the Post Submit Actions. The “Send Email” and “Save Form Record” Post Submit actions are set by default.
Press the “pencil-shaped” icon and open the “Send Email” setting pop-up.
In the newly-appeared Edit Send Email pop-up, we selected the “Email from submitted form field” option in the MAIL TO drop-down list and specified the needed form’s field in the FORM FIELD (the “Email” form’s field in this case).
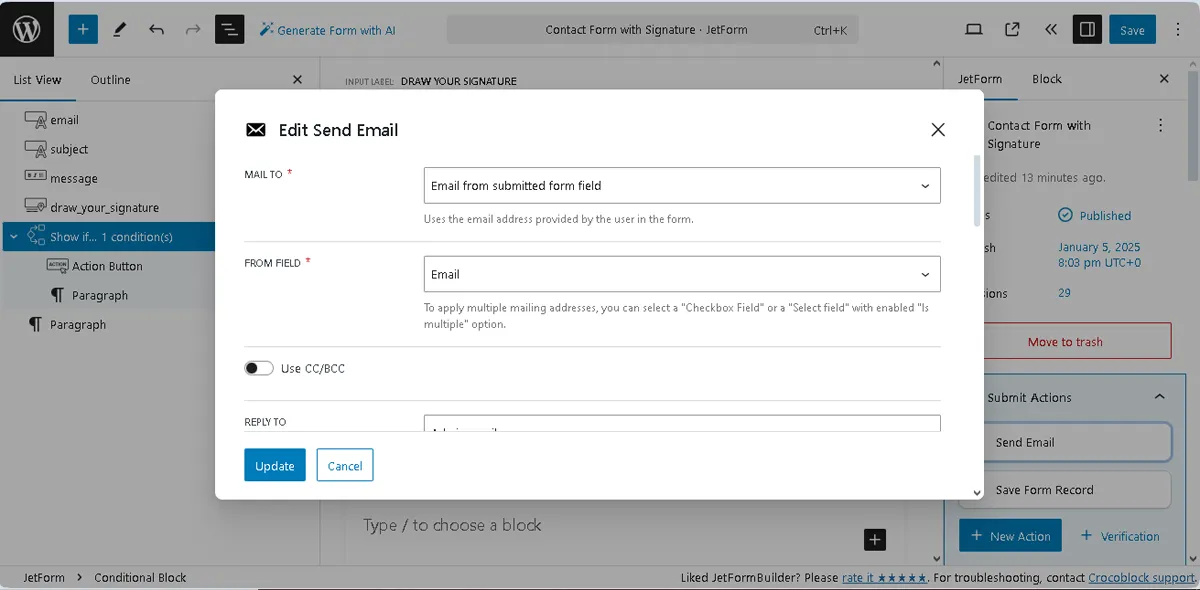
Next, scroll the pop-up and select the “HTML” option in the CONTENT TYPE drop-down list. Then, paste the copied code snippet onto the CONTENT field.
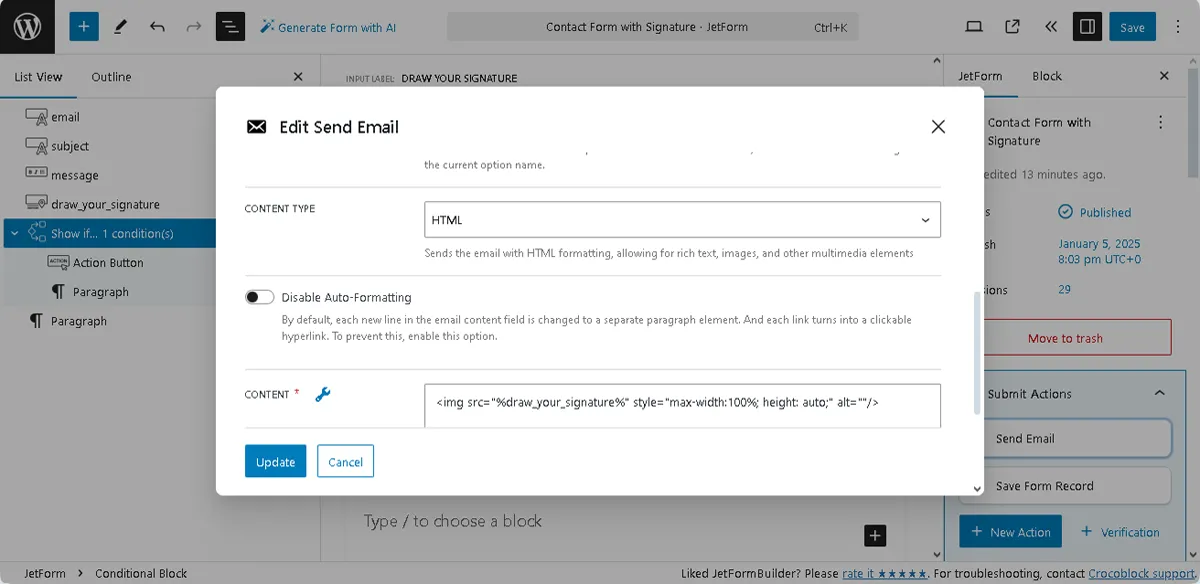
If needed, fill out other pop-up fields and click the “Update” button.
Finally, move to the top left corner of the form and press the “Save” button.
Open an editor you prefer and find the JetForm widget/block/element. In this tutorial, we use Elementor.
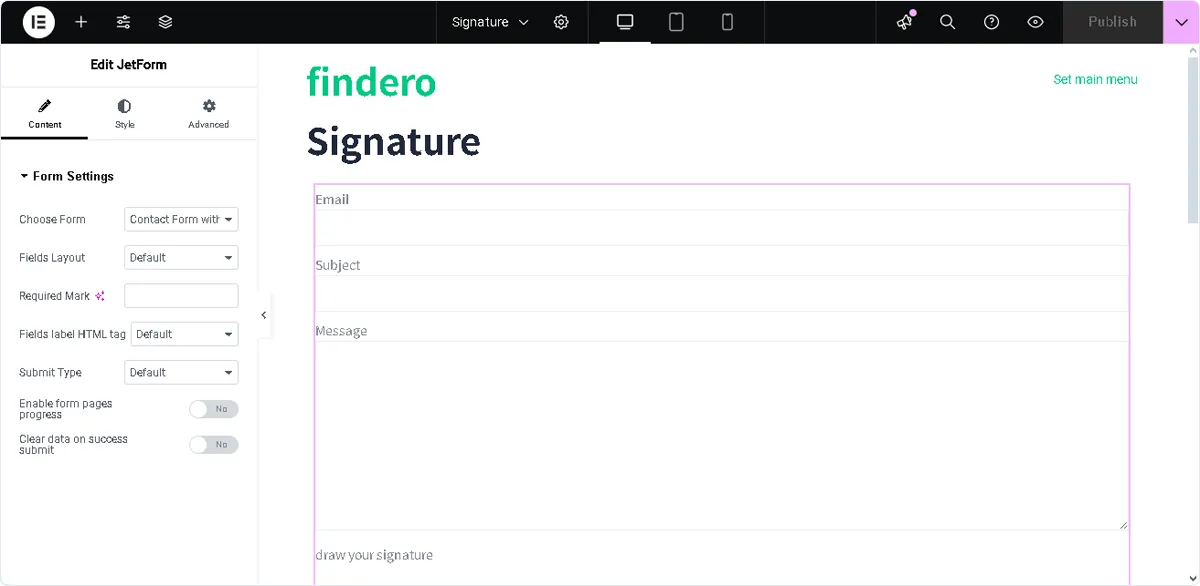
Read the Displaying a JetFormBuilder Form in Any Page Builder tutorial to know how to add the JetForm widget/block/element in Elementor, Block Editor, and the Bricks theme.
Press the “Publish” button to save the page.
Move to the front end to fill out the form.
First, if the Signature Field is empty, the “SUBMIT” button is not shown.
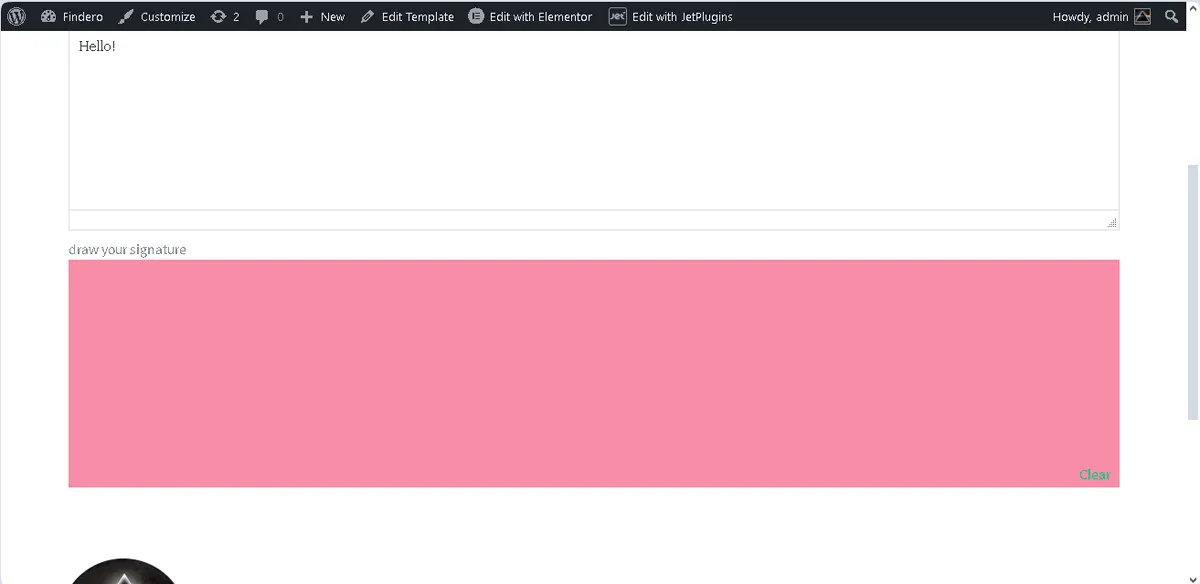
After completing this field, this button will appear.
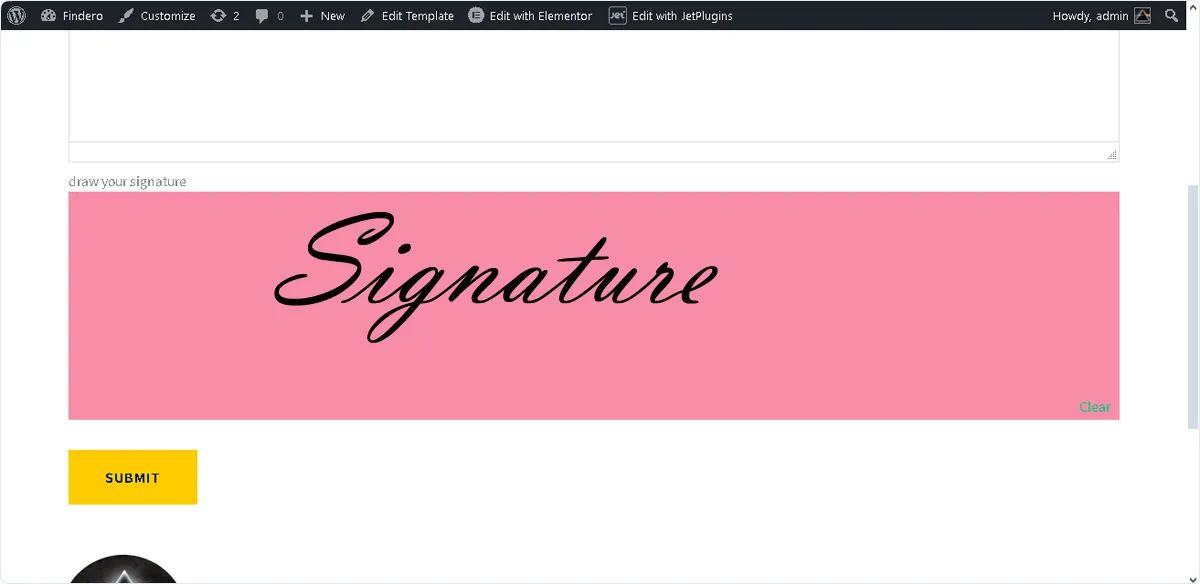
If the form was submitted successfully, the “Form successfully submitted.” text will be shown.
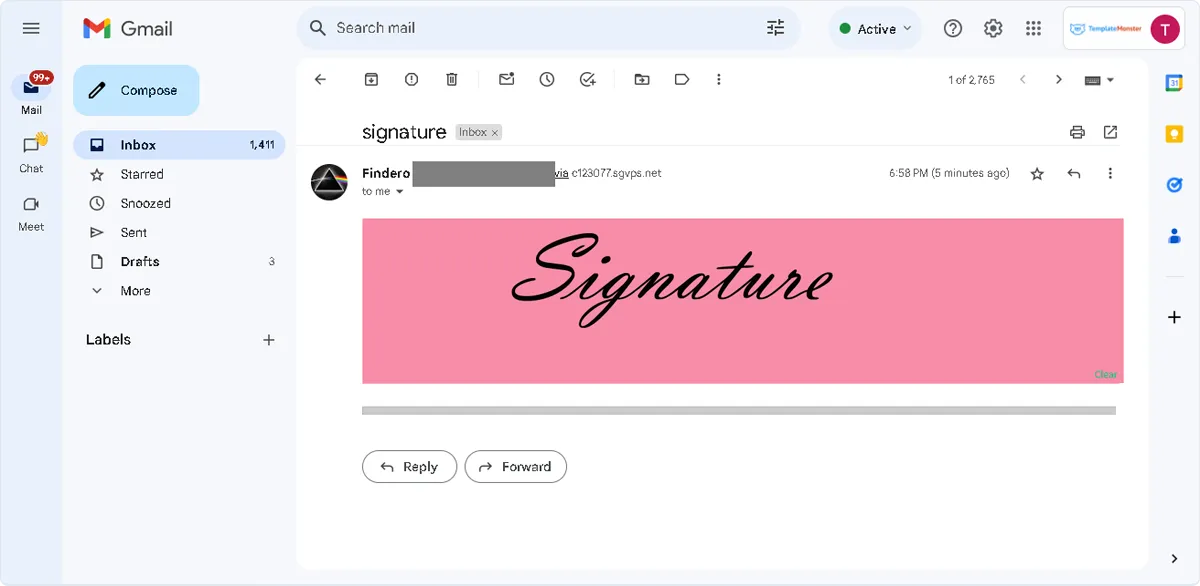
Open the mailbox you entered in the form and check if you received the email. The image will be inserted into the email.
Since we set the “Save Form Record” Post Submit Action, the JetFormBuilder plugin saves the submitted form data in the WordPress Dashboard > JetFormBuilder > Form Records tab. This tab displays all submitted forms and their status.
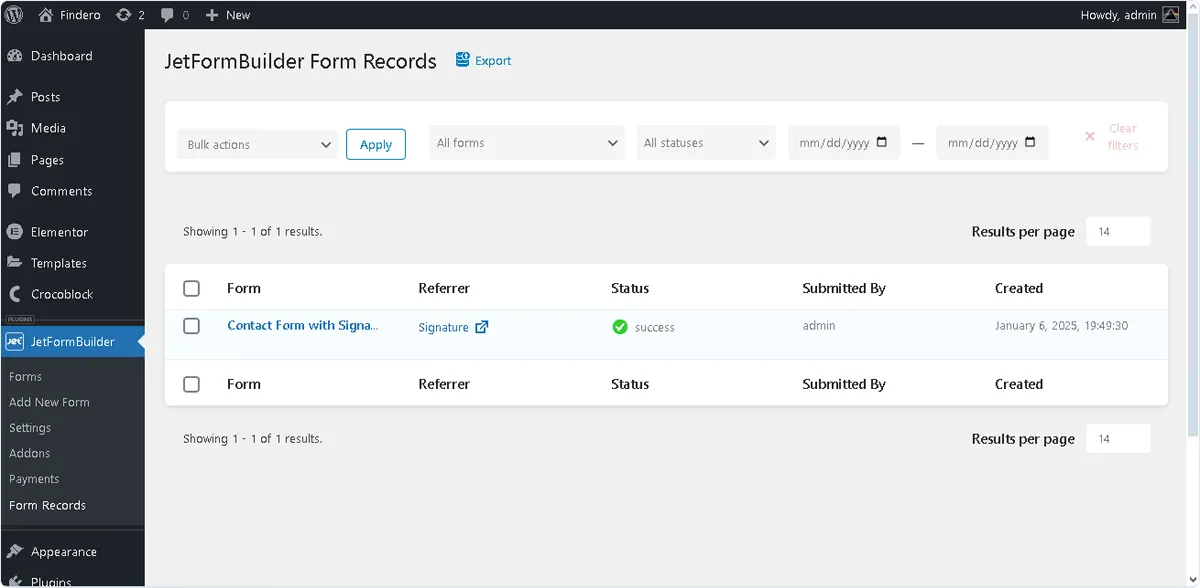
To view more details about a specific form submission, hover the cursor under the form’s name and press the “Edit” link below it.
Unroll the form record to observe if the image was added to the form record.
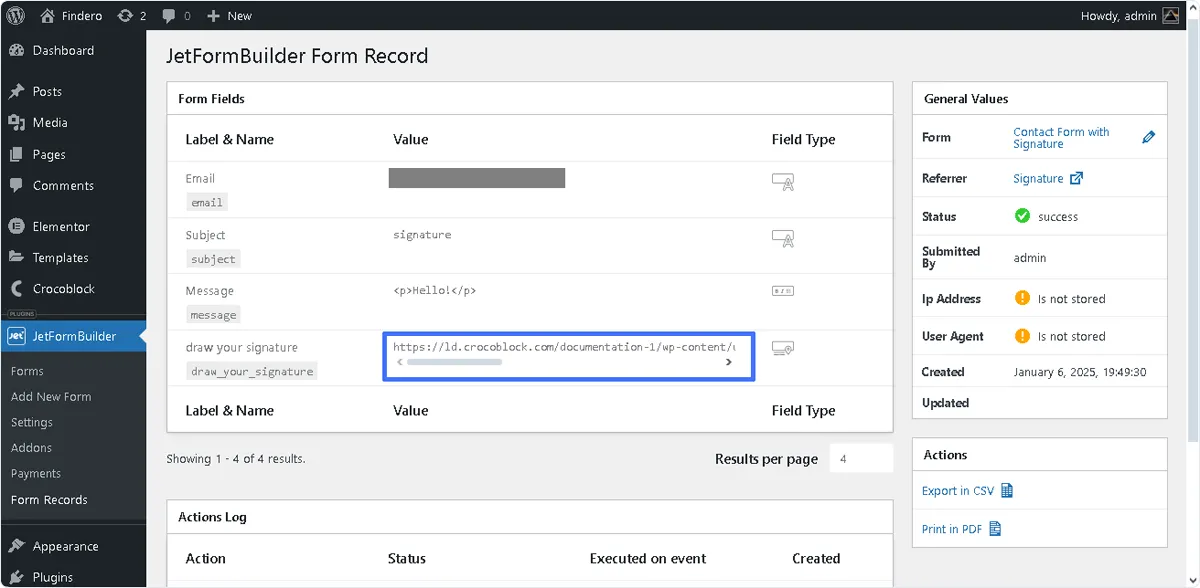
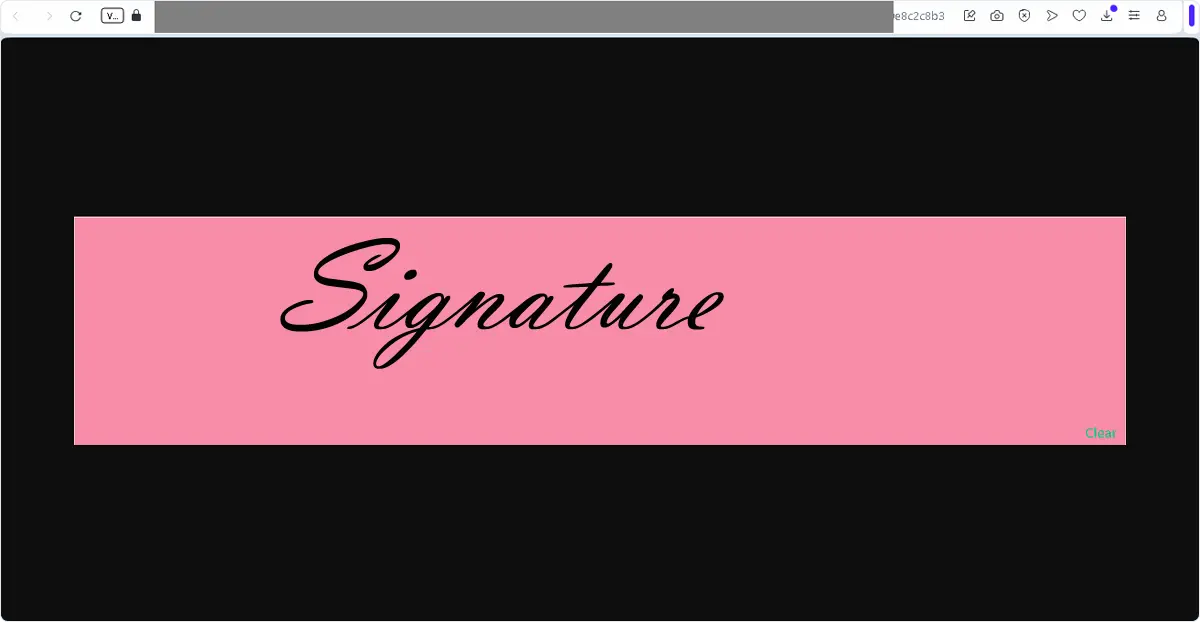
If you go to the web address, your browser will open the signature image.
That’s all about the Signature Field Addon usage from JetFormBuilder for WordPress websites.
A drag-and-drop interface for uploading multiple media files to the site via a form.
Learn moreproA form addon to convert user-submitted data from a WordPress form to PDF attachments.
Learn moreproA tweak to execute specific after-submit actions without front-end forms.
Learn morepro