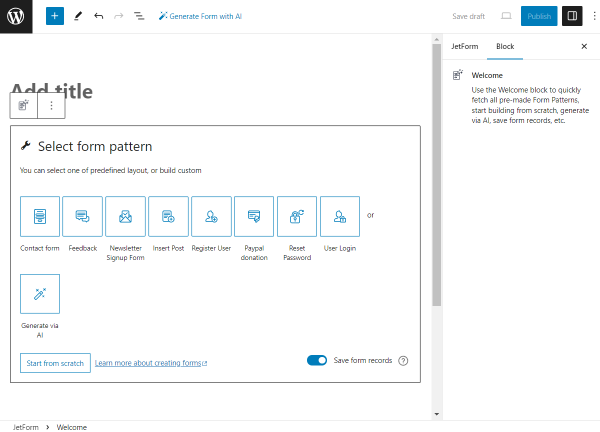
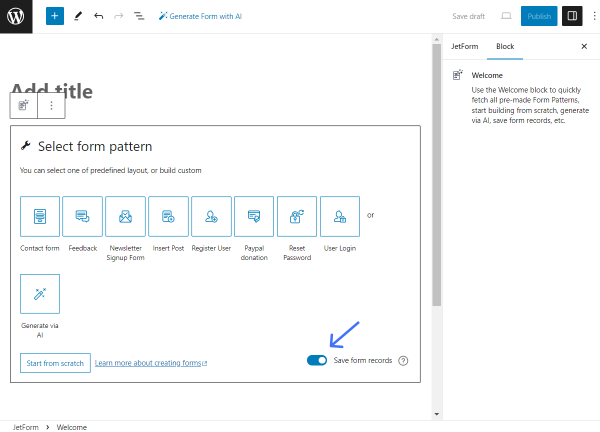
Welcome Block Overview
This overview is about the Welcome block available with the JetFormBuilder plugin.
- Contact Form
- Feedback
- Newsletter Signup Form
- Insert Post
- Register User
- Paypal Donation
- Reset Password
- User Login
- Generate via AI
The Welcome block is displayed by default whenever a new form builder is opened in the WordPress Dashboard > JetFormBuilder > Add New directory.
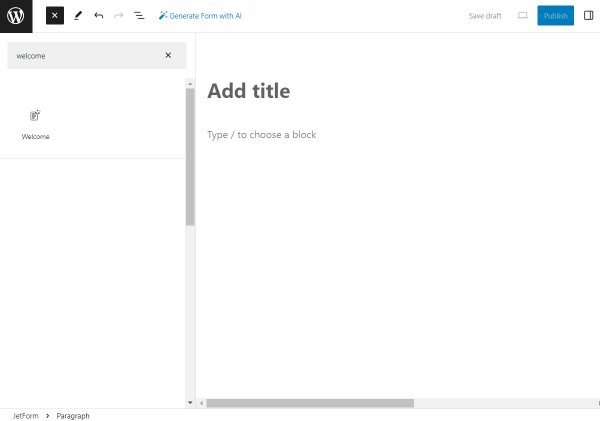
The Welcome block can also be added with the help of the block inserter. It can be accessed by pushing the plus-shaped button at the top of the form.
Here, it can be found by typing “Welcome” in the search bar.
There are the following patterns in the block:
- Contact form;
- Feedback;
- Newsletter Signup Form;
- Insert Post;
- Register User;
- Paypal donation;
- Reset Password;
- User Login;
- Generate via AI.
These patterns are fully customizable, which means that the fields can be added, edited, and deleted freely within any selected preset.
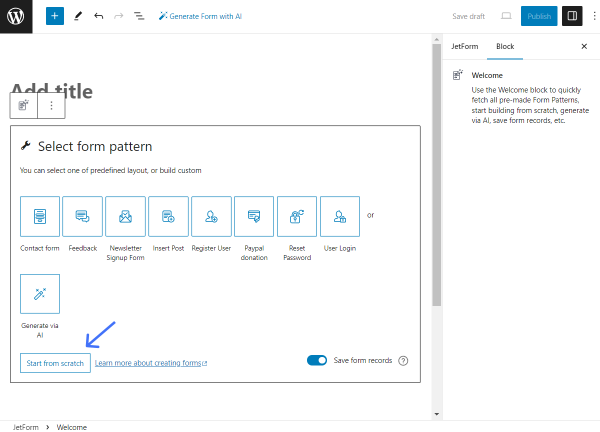
The form can also be set manually. To create a fully custom form, one should press the “Start from scratch” button.
In the Welcome block, there is also the Save form records toggle available; it is activated by default.
This toggle adds the “Save Form Record” Post Submit Action to the form to store all the form submissions in the database.
Now, we will look through all the presented patterns.
Contact Form
This pattern creates a simple contact form, allowing users to provide their email address, clarify the subject, and attach their message with the help of two Text Fields (“Email” and “Subject”), one Wysiwyg Field (“Message”), and an Action Button.
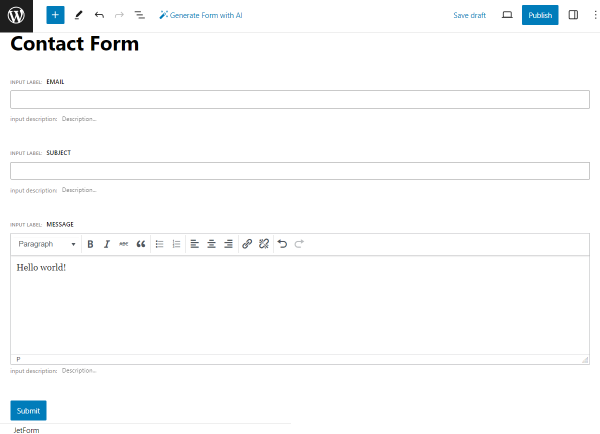
With the Contact Form pattern, the “Send Email” Post Submit Action is also added. It can be checked in the Post Submit Actions tab of the JetForm settings tab.
After pushing the pencil-shaped “Edit” button, one can see that the action is already configured.

The MAIL TO field is set to the “Email from submitted form field” option, and the FROM FIELD is already connected to the “Email” field of the form.
The SUBJECT field contains the “%subject%” macro. It is generated from the “Subject” field and will include the value the user will type in this field.
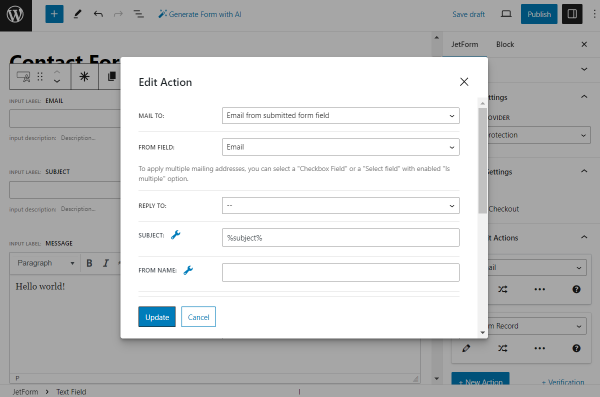
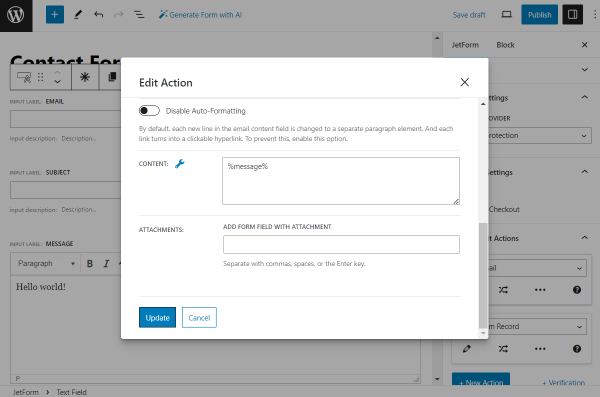
Also, the CONTENT field is completed with the “%message%” macro, which means that the body of the email will be taken from the “Message” field.
If there are some changes made to the action, they can be saved by pushing the “Update” button.
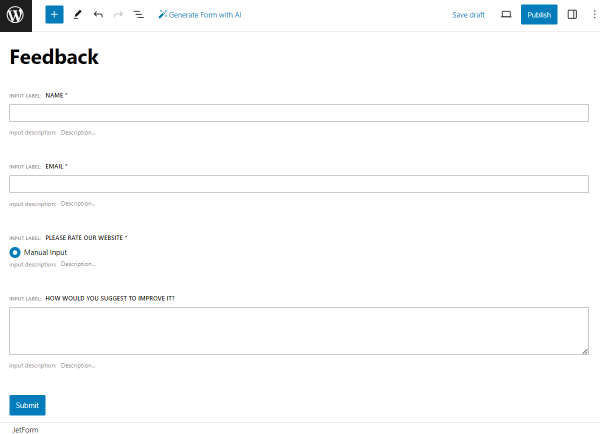
Feedback
With the Feedback pattern, the admin can get valuable information about the website work based on the users’ feedback.
This pattern contains the “Name” and “Email” Text Fields, “Please rate our website” Radio Field, “How would you suggest to improve it?” Textarea Field, and an Action Button.
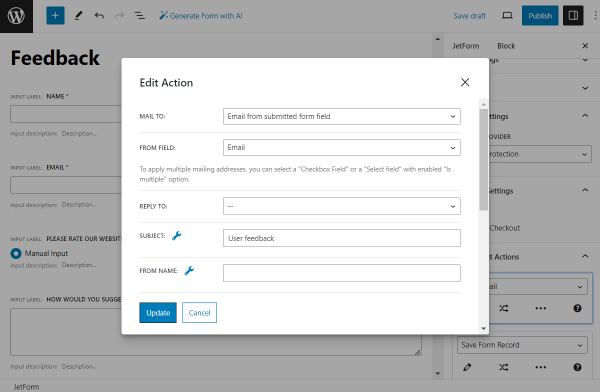
The Post Submit Action is set to “Send Email” in this case.
In the Edit Action pop-up, one can notice that the MAIL TO field is completed with the “Email from submitted form field” option and the FROM FIELD is assigned to the “Email” field of the form.
The SUBJECT is set to the static “User feedback” text.
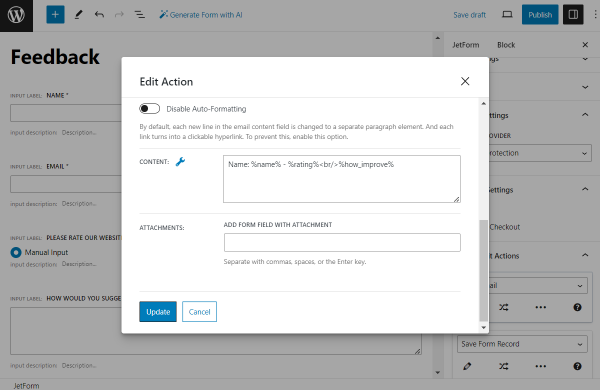
The CONTENT of the email is set to be in the following format:
Name: %name% – %rating%<br/>%how_improve
where %name% is the “Name” Text Field value, %rating% is the “Please rate our website” Radio Field value and %how_improve% is the “How would you suggest to improve it?” Textarea Field value.
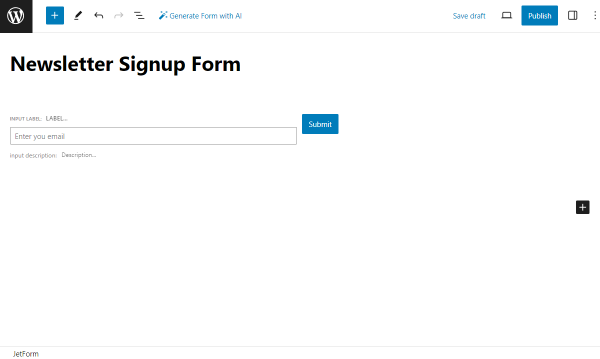
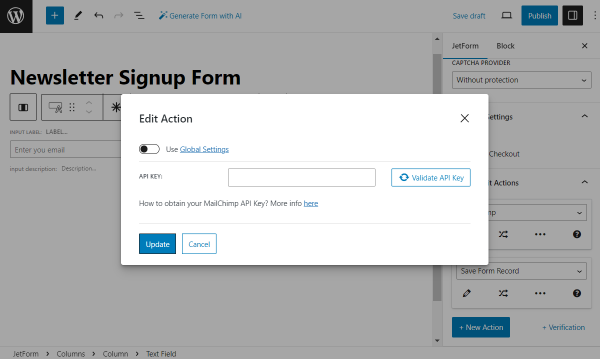
Newsletter Signup Form
This pattern consists of one Text Field and an Action Button letting users provide their e-mail addresses to subscribe to newsletters.
The Post Submit Action added in this case is “MailChimp.” In its Edit Action window, the API KEY can be pasted.
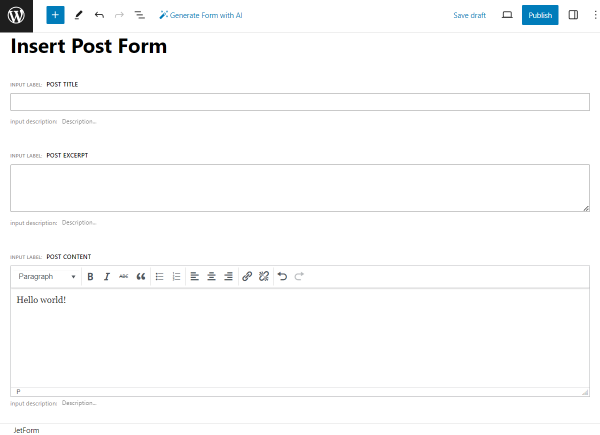
Insert Post
The pattern that allows creating posts includes the following fields: “Post Title” Text Field, “Post Excerpt” Textarea Field, “Post Content” Wysiwyg Field, and an Action Button.
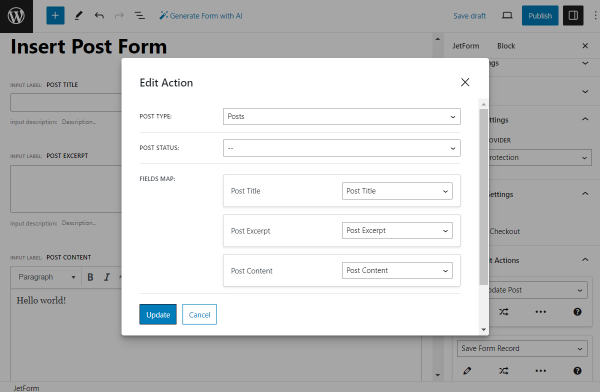
Also, the “Insert/Update Post” Post Submit Action is attached to this pattern.
It has the prefilled settings, which can be changed.
The POST TYPE is set to the default WordPress “Posts.”
The FIELDS MAP is also completed and includes the form fields connections with the corresponding drop-down list options.
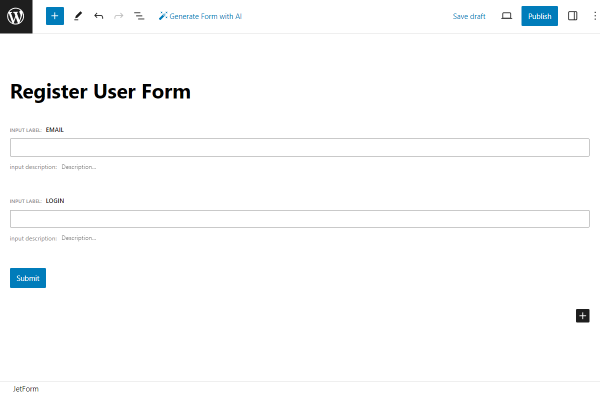
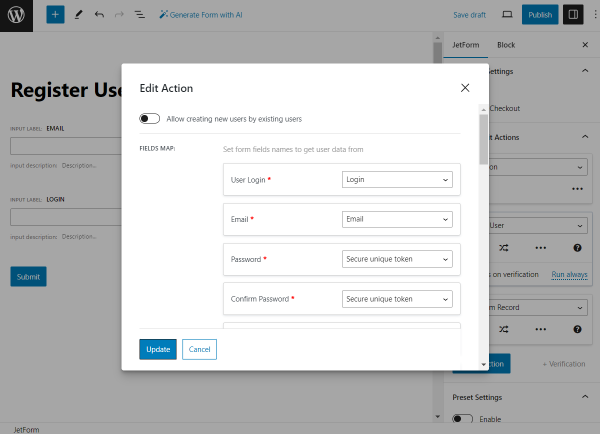
Register User
This pattern is for user registration; it consists of two Text Fields indicating “Email” and “Login” and an Action Button.
With this pattern, the “Verification” and “Register User” Post Submit Actions are added to the form.
For the “Verification” action, the following settings are preset: the WHO CAN VERIFY THE SUBMISSION is set to “User & Administrator” and LINK LIFESPAN to “4.”
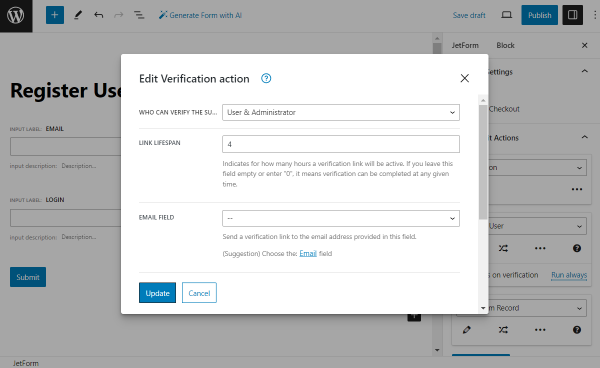
The “Register User” action also has the FIELDS MAP set with the fields to get user data from.
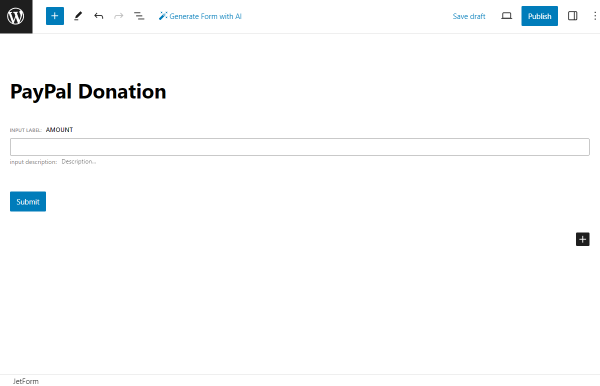
Paypal Donation
This pattern allows website users to make a donation via PayPal with the help of one Text Field and an Action Button.
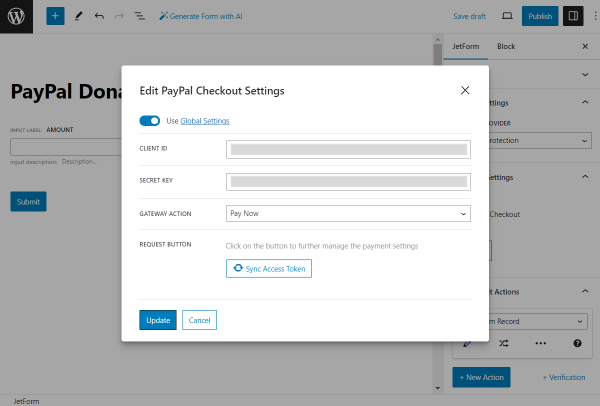
With this pattern, the “PayPal Checkout” option is set in the Gateways Settings tab.
Its settings can be checked by clicking the “Edit” button below.

In the PayPal Checkout Settings pop-up, the current form can be linked to the PayPal account.
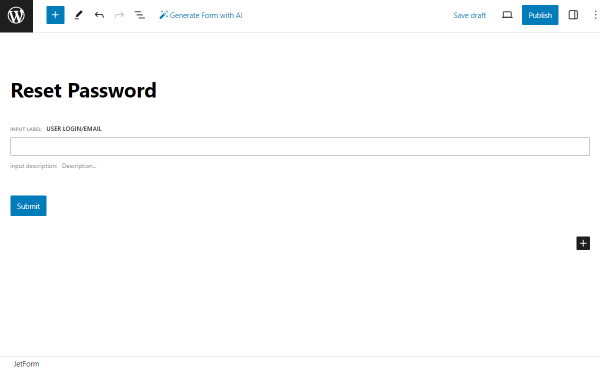
Reset Password
The Reset Password form pattern allows already registered users to reset their password with Reset Password Fields and an Action Button.
This pattern consists of two parts. The first one includes the “User login/email” Text Field.
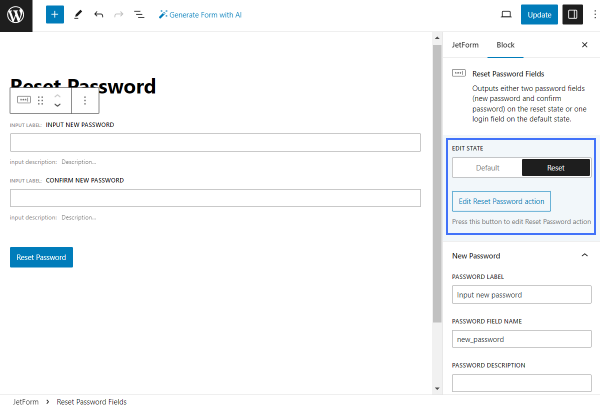
One can switch to the second part by clicking the needed state’s name (“Reset”) in the EDIT STATE section of the Reset Password Fields block.
In the “Reset” state, there are two more fields that can be edited: “Input new password” and “Confirm new password.”
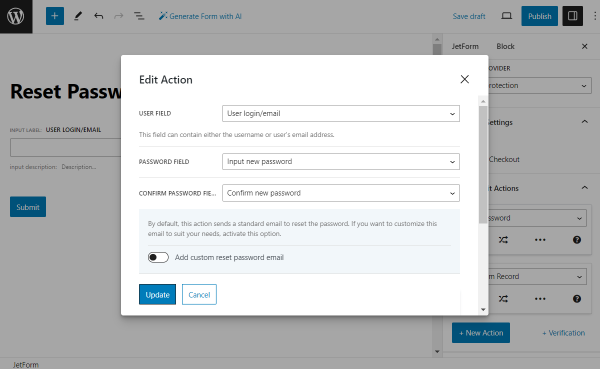
With this pattern, the “Reset Password” Post Submit Action becomes active.
In its editing pop-up, the USER FIELD is connected to the “User login/email” field, the PASSWORD FIELD – to the “Input new password” field, and the CONFIRM PASSWORD FIELD – to the “Confirm new password” field.
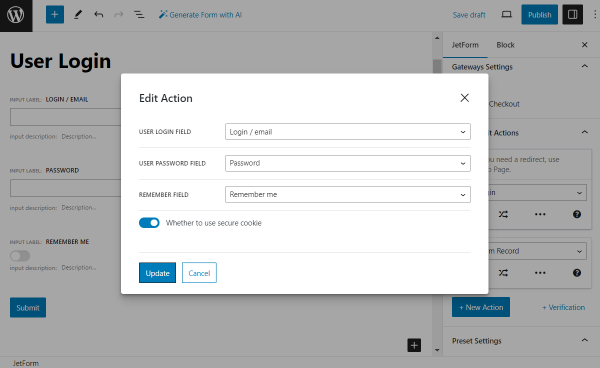
User Login
The User Login pattern is a form that can be used for user login with their credentials.
This form pattern includes the following fields: “Login / Email” and “Password” Text Fields, a “Remember me” Switcher Field, and an Action Button.
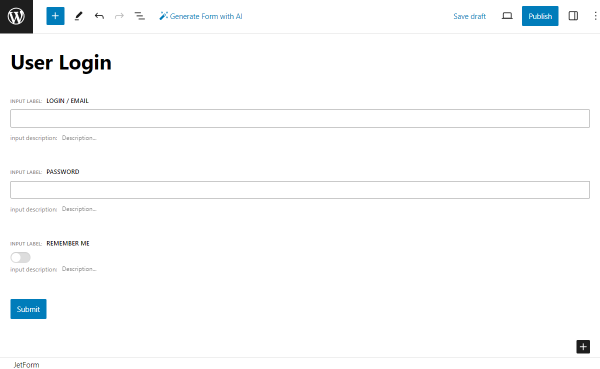
With this pattern, the “User Login” Post Submit Action is also added.
All the form fields there are connected to the needed fields for action: “Login / email” to USER LOGIN FIELD, “Password” to USER PASSWORD FIELD, and “Remember me” to REMEMBER FIELD.
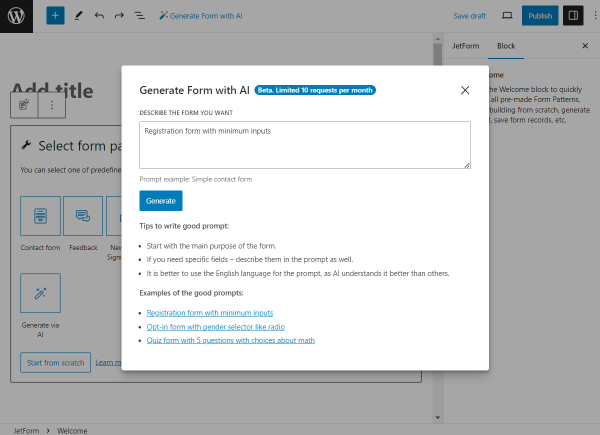
Generate via AI
The button that allows one to generate a form pattern based on the AI prompt.
Once clicked, the Generate Form with AI pop-up opens.
In this pop-up, one can write the needed prompt in the DESCRIBE THE FORM YOU WANT field.
Also, there are Tips to write good prompt and Examples of good prompts available. The last mentioned examples can be clicked to fill in the DESCRIBE THE FORM YOU WANT field automatically.
Whenever the request is filled in, the “Generate” button will be visible.
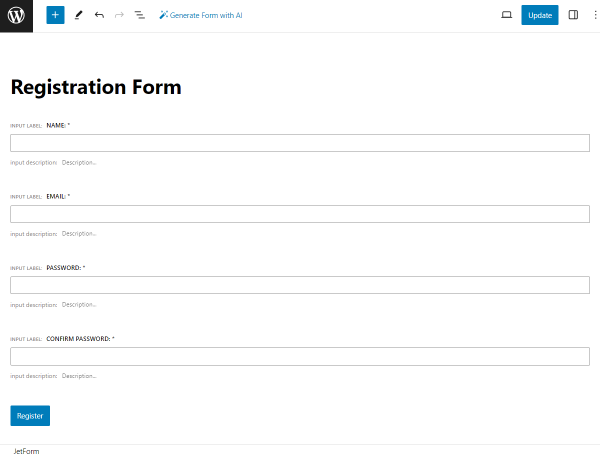
Once the “Generate” button is clicked, the pattern will be created.
Here, the fields will appear the way they will be later displayed in the form.
To save the result and add it to the page, the “Use this form” button should be pressed, and to regenerate the content, one should push the “Change generation prompt” button.
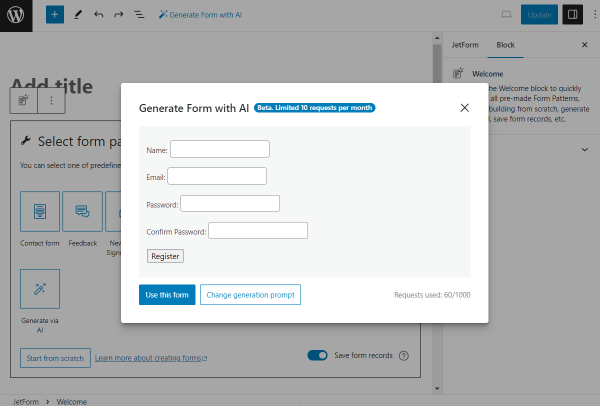
The generated form can be edited as the usual form: one can edit fields, delete them, or add new content.
That’s all about the Welcome Block available with the JetFormBuilder plugin for your WordPress website.