API Key field
Paste here the API key you obtained from HubSpot.
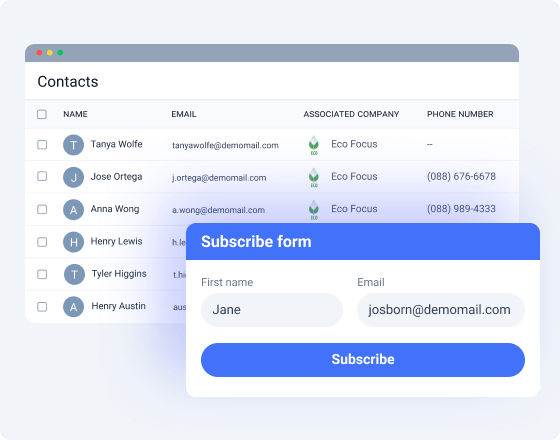
A mailing list addon that lets you alter the existing contacts and easily add new ones.
Buy from $49
HubSpot is a JetFormBuilder addon that lets you connect to HubSpot’s free CRM platform. Add new and manage the existing contacts, monitor companies, leads, and contact owners. HubSpot Addon is indispensable when it comes to event registrations, subscriptions to the fanbase, paid offers promotion, newsletters with exclusive content, ordering goods online, and so on. You can achieve any business objectives through wise email marketing.
Paste here the API key you obtained from HubSpot.
Press it to validate the API key. Hit “Retry request” to make sure the key is relevant.
These fields – email, first/last name, phone, website, etc. – will be displayed on HubSpot’s end and need to be linked with the corresponding meta fields.
A drop-down Select field type where you need to pick the company registered at HubSpot. Can store multiple companies.
A Select drop-down field where you are supposed to pick the owner associated with the company registered at HubSpot.
A drop-down Select field storing a static set of HubSpot’s user roles.
The HubSpot Addon for JetFormBuilder supports both an API Key and OAuth 2.0. However, the API Key is legacy for HubSpot; therefore, for newly created connections, OAuth 2.0 should be used.
Given this, this tutorial primarily focuses on configuring OAuth 2.0 and utilizing it through the HubSpot Addon.
Navigate to the WordPress Dashboard > JetFormBuilder > Addons tab, select the HubSpot Integration add-on, and activate its license.

Also, you can install and activate this add-on as any WordPress plugin. For more details, read the JetFormBuilder WordPress Plugin Installation tutorial.
After the plugin is activated, a new settings section titled HubSpot API will appear in JetForms > Settings.
Go to the HubSpot website and either press the “Create developer account” button or log in.


Next, you will be redirected to the MyHubSpotApp tab, where you should insert the app’s title in the Public app name text field.

Return to your site and proceed to WordPress Dashboard > JetForms > Settings > HubSpot API tab and enable the Enable OAuth 2.0 toggle.

Then, the fields associated with the OAuth keys will appear.Next, copy the Your Redirect URL link from the JetFormBuilder > Settings > HubSpot API tab of your site (here, https://*****************************=jet_fb_hubspot_oauth).

After that, go back to the MyHubSpotApp tab of your HubSpot Developers account and switch to the Auth tab.
Here, scroll it down and insert the copied link into the Redirect URLs field.

Scroll down to the Scopes section. Here, press the “+ Add new scope” button and select the Required scopes in addition to the “oauth” scope set by default.

This way, we add the following Required scopes:
crm.objects.companies.read
crm.objects.companies.write
crm.objects.contacts.read
crm.objects.contacts.write
crm.objects.owners.read
oauth

Press the “Create app” button.
After that, the fields in the Auth tab will be automatically filled in. Now, copy the data from the Client secret field and Sample install URL (OAuth) fields.

Then, paste the copied data into the corresponding fields of the JetFormBuilder Settings: the Client Secret and Install URL (OAuth) fields.

Finally, press the “Save” button.
To retrieve the API Key from the HubSpot CRM, go to the HubSpot website and log in. Here, choose the needed developer’s test account.

Once you’ve entered the required test account, click the cog-shaped button next to your profile name in the top-right corner of the top toolbar to open the Settings tab.

In the Settings tab, unfold the Account Manager > Integrations section.

Then, unroll the Legacy Apps tab and move to the Keys > Developer API Keys section.

Here, copy the Active API Key.

In the final step, return to your site, navigate to WordPress Dashboard > JetForms > Settings > HubSpot API tab, and enter the copied API Key in the API key field.

Finally, press the “Save” button.
Create a form, add the necessary fields, and set the required Post Submit Actions. Click the “New Action” button.
Then, in the newly appeared Add new action pop-up, choose the “HubSpot” action and click the corresponding button.

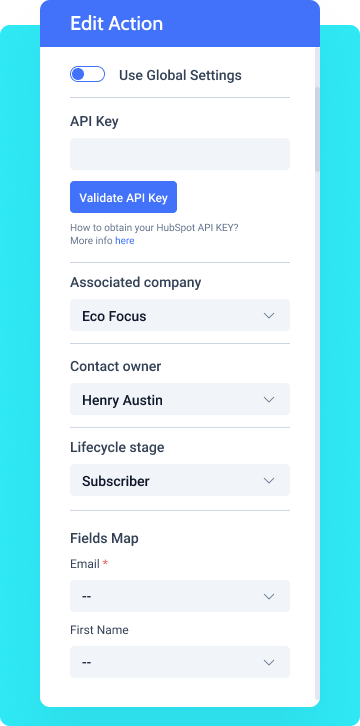
After that, the Edit HubSpot pop-up will appear. The following settings are available:

If the Use Global Settings toggle is enabled, the AUTHORIZATION TYPE drop-down list will display the “API Key” and “Oath 2.0” options, along with the “Send Request” button.

If the needed option is selected and if the authorization request was successful, the following fields are available:

To save the “HubSpot” Post Submit Actions, move to the end of the pop-up and press the “Update” button. Now, when the user submits the form, the new subscriber will appear in the Contacts list of your HubSpot account.
That’s it. Now you know how to connect the HubSpotPro add-on for JetFormBuilder with the free HubSpot CRM platform and manage user contacts via the Post Submit Actions of the JetFormBuilder forms for WordPress.
Buy JetFormBuilder Pro – get all Addons at once
A form extension to effectively manage subscribers and automate email marketing.
Learn morepro


