Email Verification
The “Verification” action allows verifying the user’s email before processing other Post Submit Actions. The form will send an email with a confirmation link to the address entered by the user. After the user follows the confirmation link, the verification is completed, and the form is submitted successfully.
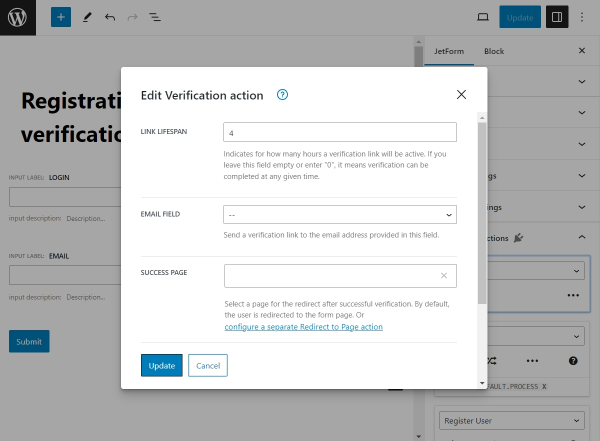
Table of contents:
Verification Action Settings
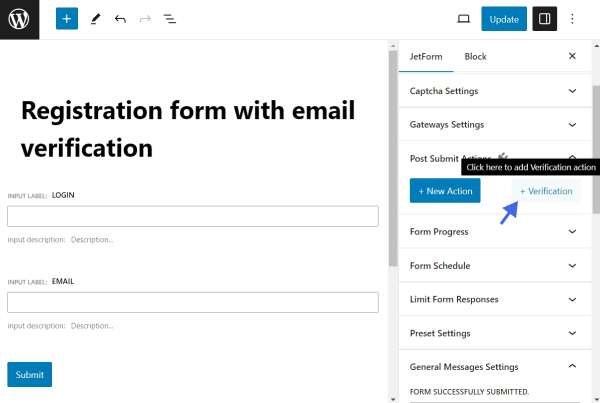
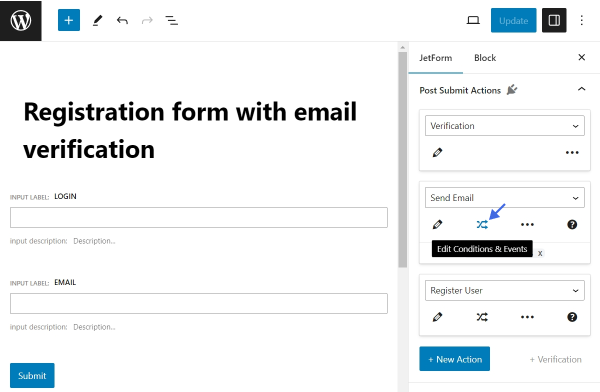
The “Verification” action can be found by opening the Post Submit Actions tab of the form. To add a “Verification” action, the “+ Verification” button should be pressed.
Each form can have only one “Verification” action.
To edit the action, one should click the pencil-shaped button.
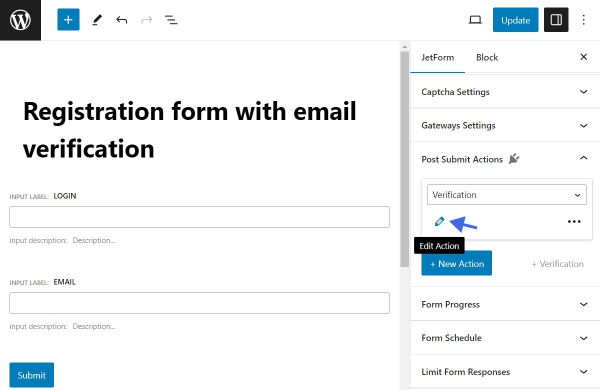
Pressing the button activates the customization pop-up.
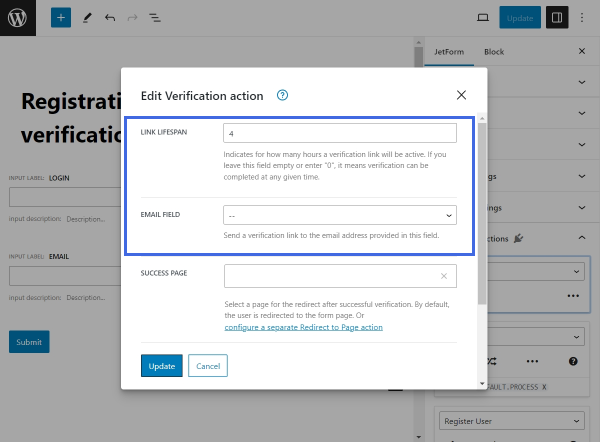
- LINK LIFESPAN — after submitting the form, the user receives an email containing a verification link. The LINK LIFESPAN setting indicates the expiration time of this verification link. Here, one can specify the number of hours during which the link stays active. If this field is left empty or contains the “0” value, the link will have no expiration time;
- EMAIL FIELD — a drop-down list to select a form field in which the user should enter the email address. A verification email will be sent to the address entered into the selected field. If one of the Text Fields in the form has the “Email” Field Type chosen, this Text Field will appear in suggestions.

- Create custom verification email — the toggle appears after selecting an EMAIL FIELD option. If the switcher is disabled, a standard verification email will be sent. If enabled, an “Add Send Email action” button will appear, encouraging one to create a custom “Send Email” action with complete control over the email settings.
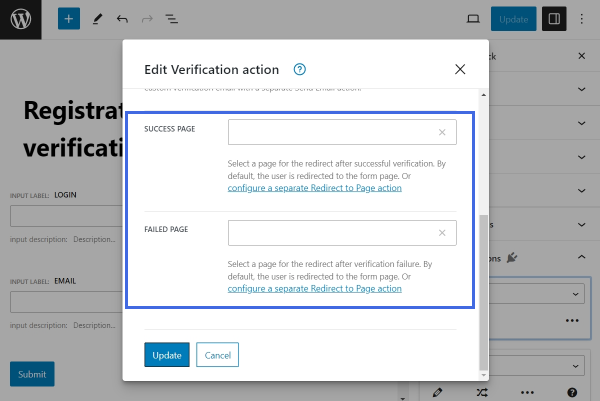
- SUCCESS PAGE — here, one of the existing pages can be selected to redirect the user after a successful verification. If no page is set, the user will be redirected to the page where the form was submitted. It is possible to configure a separate “Redirect to Page” action for the same purpose by clicking on the “configure a separate Redirect to Page action” link;
- FAILED PAGE — here, one of the existing pages can be selected to redirect the user in case of a verification failure. If no page is selected, the user will be redirected to the page where the form was submitted. By clicking the “configure a separate Redirect to Page action” link, a fully customizable “Redirect to Page” action can be created.
Events
Events define the time and condition under which a specific Post Submit Action should be performed. Usually, events are used with the Payment Gateways to control when the action should be executed — after or before the payment is completed.
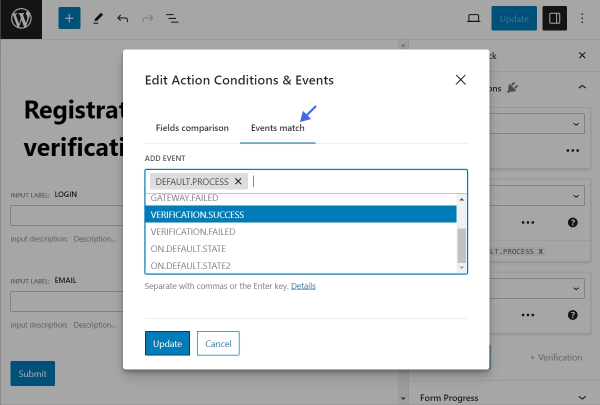
The “Verification” action adds two new Events — “VERIFICATION.SUCCESS” and “VERIFICATION.FAILED.” These events can be added to Post Submit Actions to define which action to perform in case of a successful or unsuccessful verification.
In a form where the “Verification” action is present, and the Payment Gateways are disabled, three events can be used:
- DEFAULT.PROCESS — actions with the “DEFAULT.PROCESS” Event will be executed right after the form submission and before the user completes the email verification. For example, if a custom verification email is created through the “Send Email” action, the “Send Email” action is automatically assigned the “DEFAULT.PROCESS” Event;
- VERIFICATION.SUCCESS — this event fires after the email verification is completed successfully. Therefore, actions with the “VERIFICATION.SUCCESS” Event will be performed once the user clicks the confirmation link in the mailbox and the verification is successful;
- VERIFICATION.FAILED — this event is triggered when the user fails to complete the email verification. Actions with the “VERIFICATION.FAILED” Event will run if the user follows a verification link that was already used or if the link contains an incorrect token.
To assign a new Event to a Post Submit Action, one should click the “Edit Conditions & Events” button under the name of the specific action.
Then, one should switch to the Events match tab in the Edit Action Conditions & Events pop-up to add a new Event.
Additional Settings for Register User Action
The “Verification” action adds new field options to the settings of the “Register User” action:
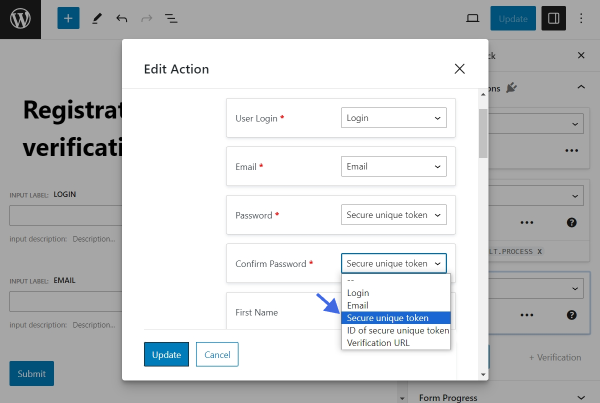
- Secure unique token — this option is usually selected for the Password and Confirm Password fields. The “Secure unique token” allows automatically generating a password for the user until the user creates a new password manually. This token can be sent to the user in the “Send Email” action using the %_jfb_verification_token% macro;
- ID of the secure unique token — a reference to each token is saved in the “jet_fb_tokens” database table, and the “ID of the secure unique token” option represents the ID of that record in the database. The token itself is not stored in the database;
- Verification URL — a verification link the user clicks to complete the verification process. The link contains the token and its ID.
Follow a related step-by-step guide to learn How to Create Registration Form With Email Verification from scratch.
That’s all about the “Verification” Post Submit Action available as part of the JetFormBuilder functionality for your WordPress-built forms.