How to Connect JetFormBuilder Form to Any App with Uncanny Automator
Uncanny Automator is a plugin designed to facilitate the connection of plugins and apps, enabling the automation of WordPress website activity without coding. This plugin enables the seamless integration of JetFormBuilder forms with various apps, including Airtable, Google Sheets, Google Calendar, Instagram, Facebook, and more. A complete list of available integrations is on the Automator WordPress Plugin Integrations page.
Use cases include sending form data to Airtable and Google Sheets, registering users, setting CRM tags, and setting up notifications and email campaigns.
In this tutorial, we will show how to connect a JetFormBuilder form to any app with the Uncanny Automator (free version) using the example of Google Sheets.
Table of Contents:
- Build a Form
- Set Up a Google Sheet
- Create a Recipe in Uncanny Automator
- Place the Form on the Page
- Test the Form
Build a Form
For our use case, we will build a Contact Form allowing users to leave feedback about the website.
To create a new form, go to WordPress Dashboard > JetFormBuilder > Add New. Insert one of the ready-to-use Patterns to save time and effort.
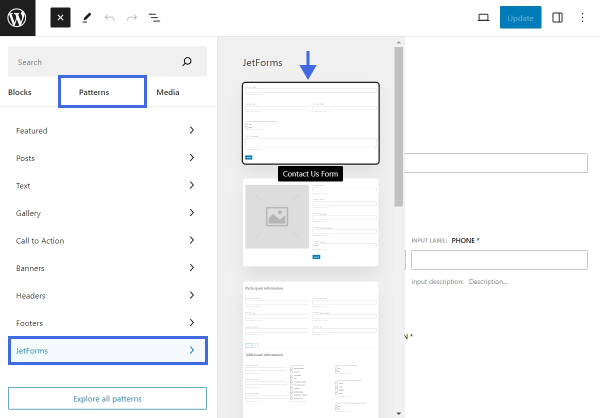
Now, the only thing left is customizing the existing form fields, and the “Send Email” post submit action.
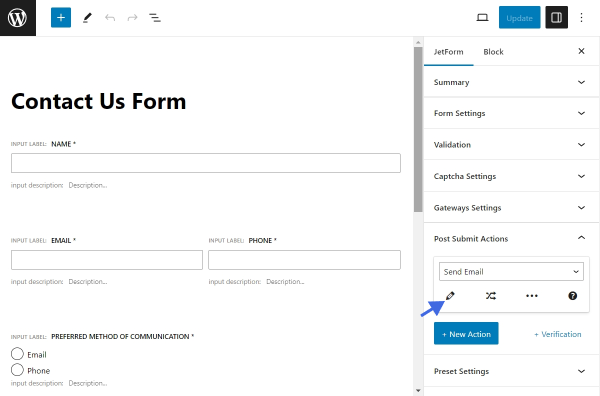
Once ready, click the “Publish” button to save the form.The goal is to connect the form to Google Sheets to store all the submitted messages in one place.
The next step is to create a new spreadsheet, Google Sheets.
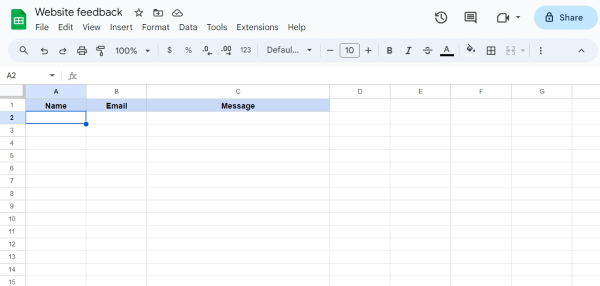
Set Up a Google Sheet
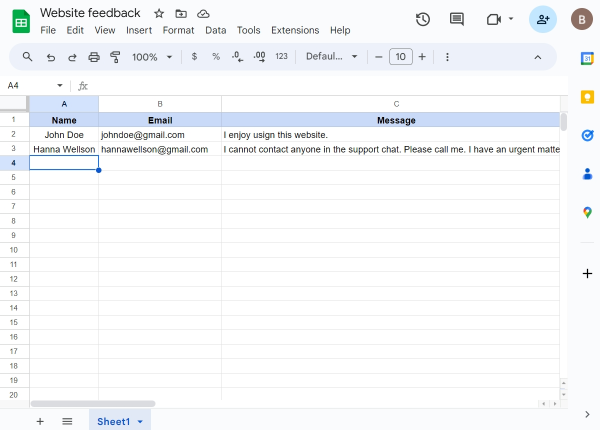
Set up a new spreadsheet in Google Sheets. In the spreadsheet, add all the necessary columns for storing user data, such as the user’s name, email, and message.
Create a Recipe In Uncanny Automator
Return to the WordPress Dashboard and move to the Automator > Add new tab.
Choose a recipe type
The fundamental unit of the Uncanny Automator WordPress plugin is a recipe. At the beginning of the recipe creation, there is a possibility to select one of the two types:
- Logged-in users — the recipe will be triggered by WordPress users who are logged in;
- Everyone — the recipe will be triggered by logged-in WordPress users and logged-out guests.
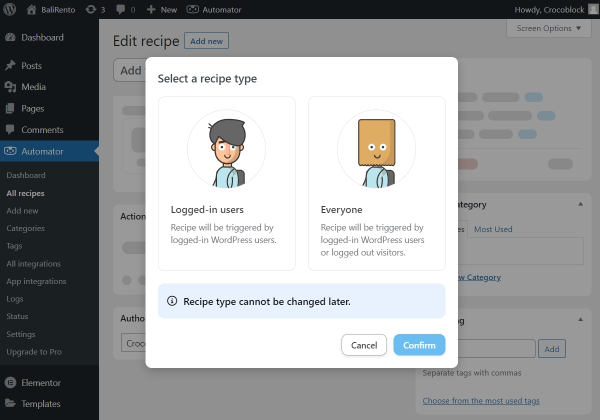
Select the “Everyone” option so any user can leave feedback.
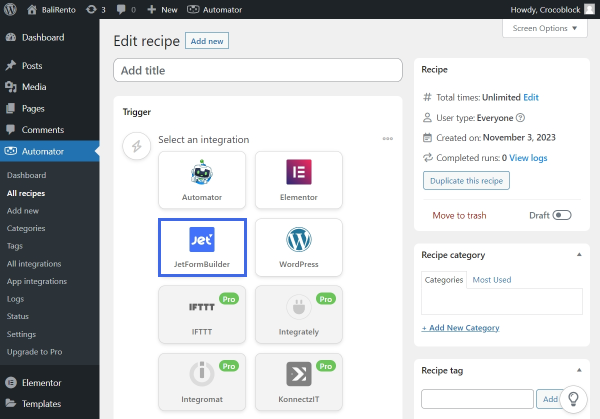
After that, name the recipe and select the “JetFormBuilder” integration.
Select a trigger
In the Uncanny Automator plugin, a trigger defines when a recipe and its actions are executed. Triggers encompass a wide range of actions on a WordPress site, such as logging in, making a purchase, submitting a form with specific entries, and more. Every recipe in Uncanny Automator must have at least one trigger to function.
Uncanny Automator provides such Triggers for JetFormBuilder:
- Triggers for logged-in users:
- a user submits a form;
- a user submits a form with a specific value in a specific field (Uncanny Automator Pro).
- Triggers for everyone:
- a form is submitted;
- a form is submitted with a specific value in a specific field (Uncanny Automator Pro).
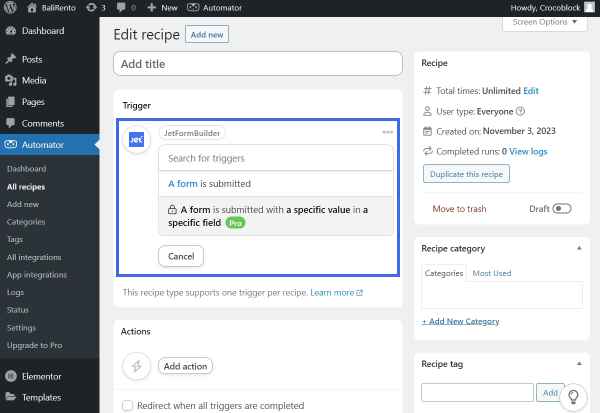
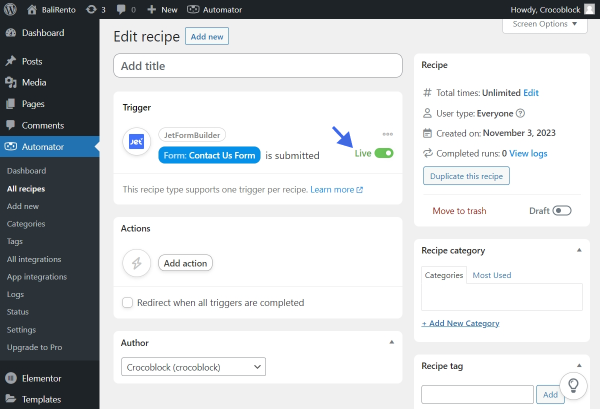
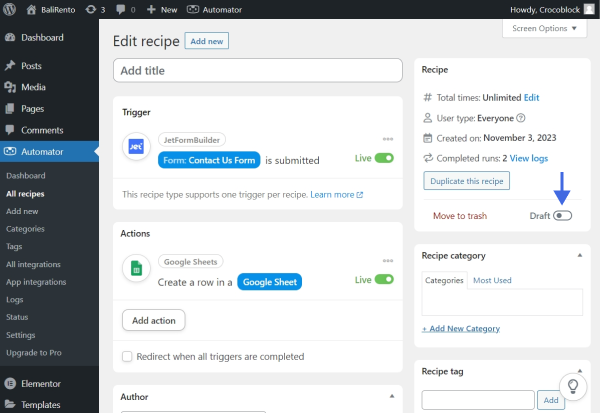
Select the “A form is submitted” trigger. Then, choose the needed form from the drop-down list and hit the “Save” button.
After that, the trigger should automatically change its status from “Draft” to “Live.”
Add an action
An “action” in Uncanny Automator is the result of a recipe once the specified trigger conditions have been met. It represents what the plugin accomplishes after the triggering events occur.
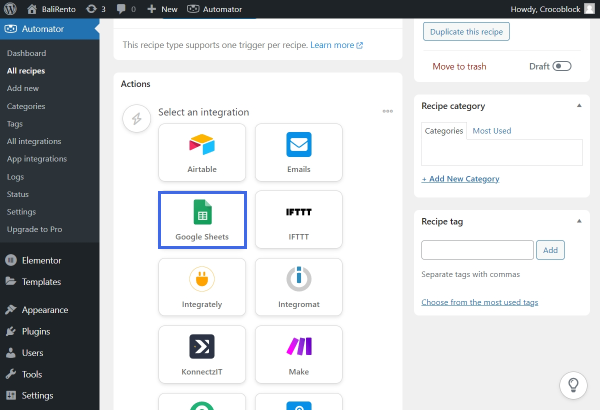
In the Actions section, push the “Add action” button and select the “Google Sheets” integration. Be aware that it is necessary to connect the Google Sheets account if it hasn’t been done before.
With the Google Sheets integration, there are two actions available:
- Create a row in a Google Sheet — select this option to save each form submission in a new row;
- Update a row in a Google Sheet — select this option to update information in an existing row. This option is useful for the “Update post” or “Update user” types of forms.
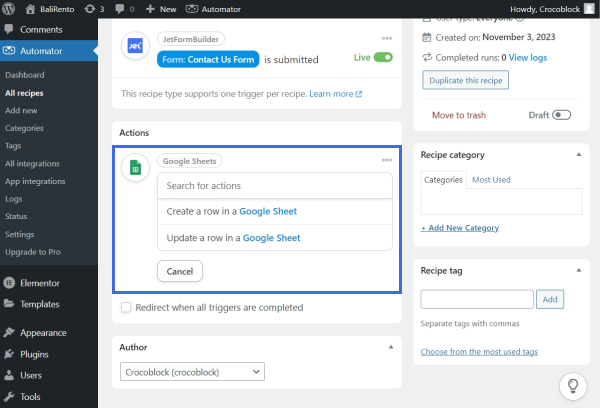
Pick the “Create a row in a Google Sheet” option to save the values of every newly submitted entry in a new row.
After that, select the needed Drive, Spreadsheet, and Worksheet and hit the “Get columns” button to see the columns from the spreadsheet.

Use tokens
Certain actions in Uncanny Automator involve retrieving personal details and other variables from the WordPress database. These variables are referred to as “tokens.”
The availability of tokens depends on the triggers used in a recipe. For instance, if a recipe has a form submission as a trigger, corresponding tokens are generated, such as the form name and the content of the form fields. This functionality allows transferring data from the form entry to a different application.
The Uncanny Automator plugin provides three types of tokens:
- Universal tokens — these tokens are universally accessible in every recipe and can be used to pass information about a user, a post, a date, and more;
- Trigger tokens — these are tokens that are specific to a particular trigger. For example, JetFormBuilder provides tokens that can fetch the data from the form fields;
- Action tokens — when an action is integrated into a recipe, tokens linked to its output become accessible for subsequent actions. For example, if an action generates a new post, the new post ID can be passed as a token to another action in the recipe.
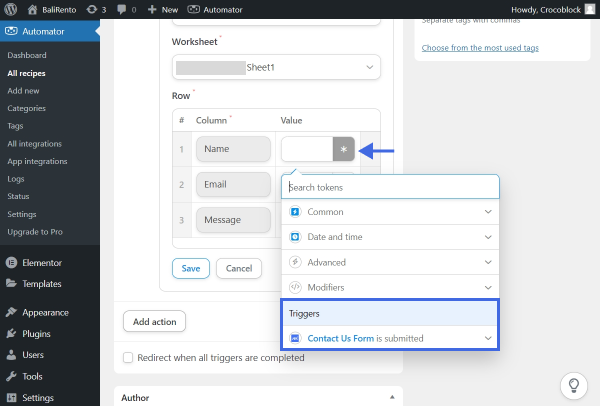
Whenever there is a possibility of using a token in a field, an asterisk (*) icon appears to the right of that field. Clicking this icon will expand a menu displaying all the available tokens.
Press the asterisk icon near the column value and click the “Contact Us Form is submitted” trigger.
Next, choose the corresponding form field, the value from which will be saved in the Google Sheets row.
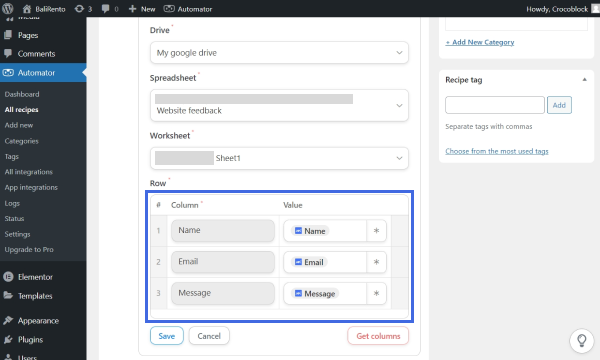
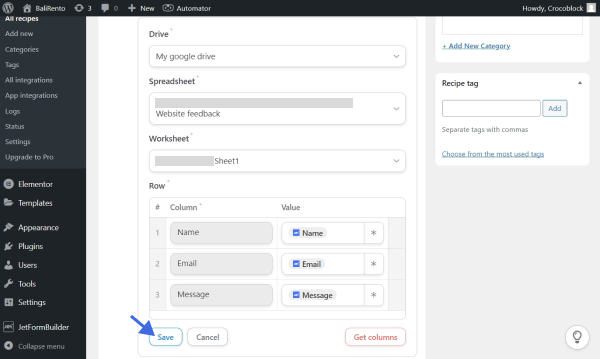
After mapping all the needed values, push the “Save” button. The action status will change automatically from “Draft” to “Live.”
In the Recipe section, enable the toggle to change the recipe’s status from “Draft” to “Live.”
Now, the automation setup is completed, and we can proceed to testing.
Place the Form on the Page
Open the page where the form should be located in the Elementor editor and place the JetForm widget in the needed part of the layout.
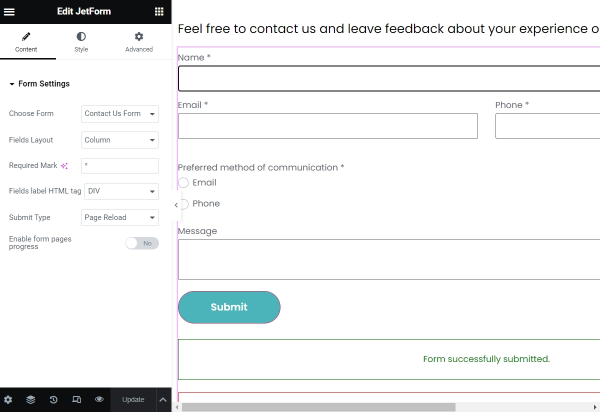
If you use the Block Editor, repeat the same steps with the JetForm block.
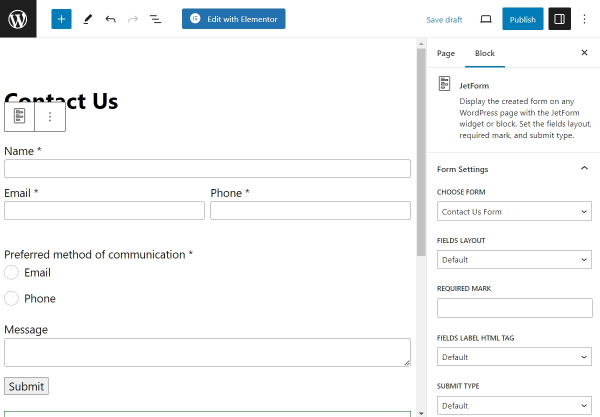
For more information on how to add a JetFormBuilder form in any page builder, check our related “Adding the Form Block” article.
Test the Form
Navigate to the page where the “Contact Us” form was placed and submit it several times.
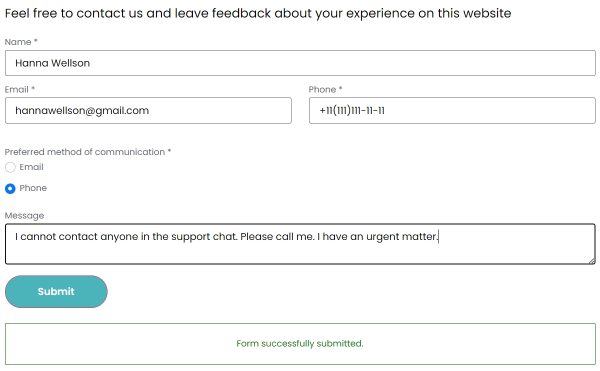
Check the Google Sheets. The form entries should be recorded in the appropriate columns.
That’s all. Now you know how to connect the JetFormBuilder form to Google Sheets and other apps using the free version of Uncanny Automator.