Subscribe Form
Create a custom WordPress Subscription Form to collect subscription requests and build a loyal following.
Contents
- Why You Need a WordPress Subscribe Form
- Top WordPress Subscribe Form Features
- WordPress Form Pattern Structure
- How to Create a WordPress Subscription Form
- WordPress Subscribe Form Pro Features
Why You Need a WordPress Subscribe Form
Subscribe forms are a must when it comes to collecting email addresses and getting new leads. Blog and business owners can send out exclusive deals and quality content to those interested subscribers. Moreover, the obtained data can be used for mailing list creation.
To create a Subscribe Form for WordPress websites, you’ll need a JetFormBuilder pattern. It is a ready-made WordPress Form Pattern that you are free to customize anyhow you like. Style the form blocks, configure post-submit actions, and add as many new fields as necessary.
Top WordPress Subscribe Form Features
- Use a shortcode to add the free WordPress subscription form to posts, pages, widgets;
- Receive form submissions to the default admin email or custom email address;
- Embed additional sender’s details into a notification by email;
- Use reCAPTCHA v3 validation to protect the subscription form from spam;
- Decide which form fields you want to make Required;
- Provide the Success, Validation, and Error Messages during form submission;
- Apply custom style settings to contact form fields;
- Collect user data and sync them to MailChimp, GetResponse, Active Campaign, Zapier, and Integromat systems.
WordPress Form Pattern Structure
- Image. An Image block for adding visuals to the form;
- First Name. A required Text field for filling in the user name;
- Email. A required Text field for filling in the user email;
- Subscribe button. A Submit field to submit a WordPress subscription form.
How to Create a WordPress Subscription Form
Add a new form
To create a Subscribe Form in WordPress, head to JetFormBuilder > Add New. Give a name to the form.
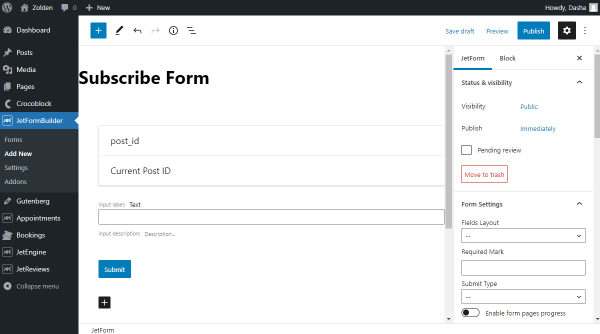
As you may notice, there are default fields, namely Hidden, Text, and Submit fields. For now, we can delete them to implement the pattern.
Apply a Subscribe form pattern
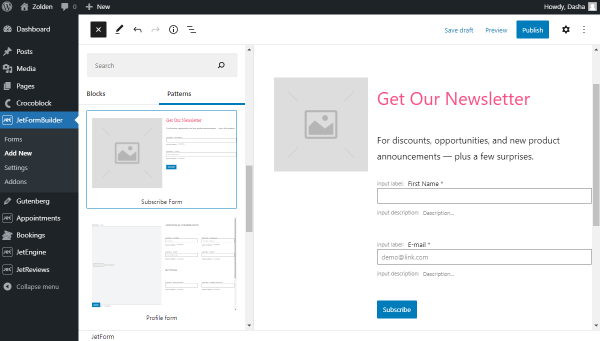
Patterns are pre-set layouts created for specific purposes. Let’s add a Subscribe Form Pattern. You can delete existing form fields, edit them or put other ones that you can customize freely.
Push the “Plus” icon in the editor to navigate to Patterns. Open the drop-down menu and pick the “JetForms” option. Scroll down to find a Subscribe Form and click on it.
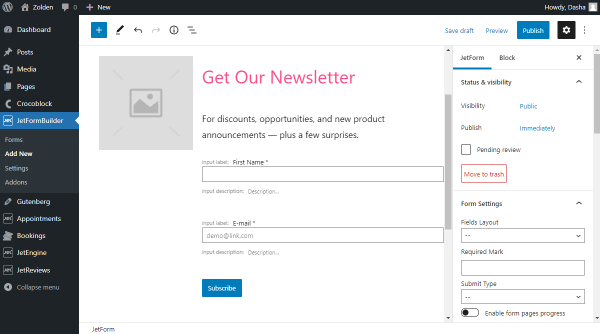
The pattern is pretty short and quick to fill in. It includes the following fields:
- Paragraphs to tell the user about the purpose of the form;
- An Image that can be an addition to the form;
- Text Fields are used for typing different kinds of information. In this case, two fields represent First Name and E-Mail; they are required. You can enable this option to other added fields by clicking on the block and toggling the Is Required option;
- Submit Field is the button that allows the user to confirm the information they have typed in. In such circumstances, the button represents subscription confirmation.
Place other desired fields or delete the ones already embedded in the Subscribe Form Pattern and listed above.
Personalize JetForm settings
If you want to change the default layout, remember to make it in the JetForm Settings.
- Fields Layout allows you to pick between “Column” and “Row” options. The first one places the field bar under the label, and the second puts them in one line;
- Required Mark is a symbol that will be displayed near required fields;
- Submit Type can work on “Page Reload” or “AJAX.” You can select the second one if you don’t want to reload the page;
- Enable form pages progress if you have made a multi-step form with Form Break Field to set a step indicator above the form.
The next step is Captcha Settings. Learn more about them in our Form reCAPTCHA customization video tutorial.
Mind that the following step, Post Submit Actions, is significant. Choose in which way you will receive information about submitting a form by a user.
As we create a Subscribe Form, we can use several submit actions in one form. Let’s integrate the “Send Email” and “MailChimp” options.
“Send Email” post submit action
To customize “Send Email” accordingly, check our detailed overview. Edit action to set it for correct work.
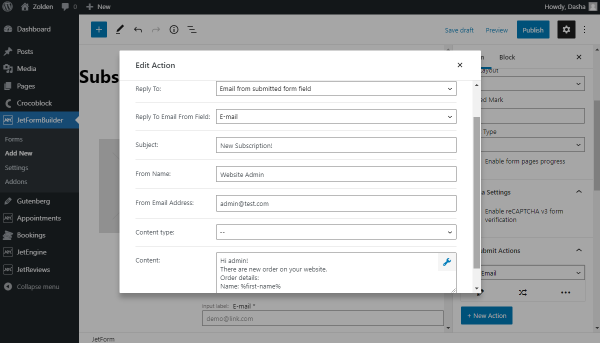
For instance, in the Content tab, you can put the data input by the user. In our case, it is the first name and email address.
The example text can look like this:
“Hi, admin!
There is a new subscription on your website.
Subscription details:
Name: %first-name%
Email: %e-mail%”,
where %first-name% and %e-mail% stand for the user’s input information.
Once you have updated the Send Email Post Submit Action, let’s adjust MailChimp Post Submit Action.
“MailChimp” post submit action
MailChimp will help to manage the Subscribe Form as well.
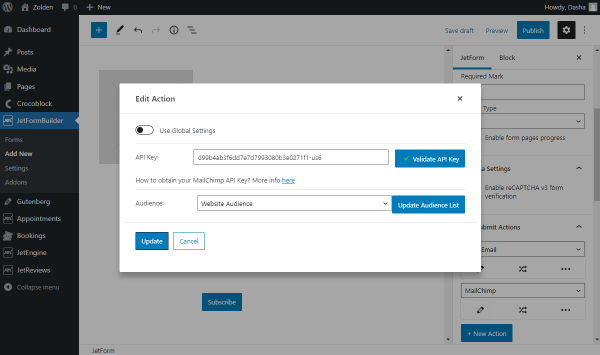
Edit the action, update it, and proceed to the following settings if needed.
Enable Preset Settings and change the General Messages values, or leave them default.
Publish the form and move to the page where you want to locate the form. It can be either Elementor or Gutenberg edited pages.
Attach form to the page
Place the JetForm block in the editor and select the form you have just created.
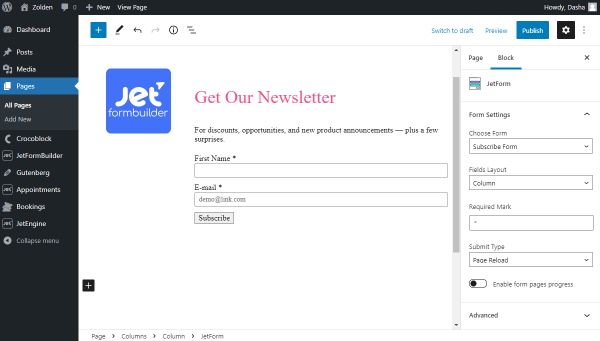
Adjust the Form and Advanced Settings. Note that the page editor settings will not overwrite the form settings. So if you have already established them while creating the form, there will be no point in doing it in the page editor one more time.
Publish the page and go to check how it looks like on the front-end.
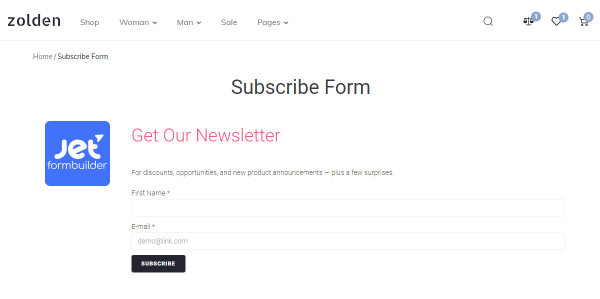
The work is done. Now the free WordPress subscription form is ready for further use.