How to Redirect WordPress Form to Thank You Page
If you want the visitor of your website to see a Thank You page after form submission, you need to set up the Redirect to Page post-submit action.
This guide includes a simple way to redirect a form to a Thank You page and describes how to create a personalized message displayed to the user after the form submission alongside the option to hide a section with the form using the Dynamic Visibility module.
If you’re a fan of visual guides, don’t hesitate to follow our detailed video tutorial.
- Redirect Form to Thank You Page
- Create a Personalized Thank You Message
- Hide Form Using Dynamic Visibility
Redirect Form to Thank You Page
For this option, you need only the JetFormBuilder plugin installed and activated.
Go to JetFormBuilder > Forms and open the form you want to add a redirect to.
Proceed to the JetForm settings > Post Submit Actions. Add a new action and select “Redirect to Page” from the drop-down menu.
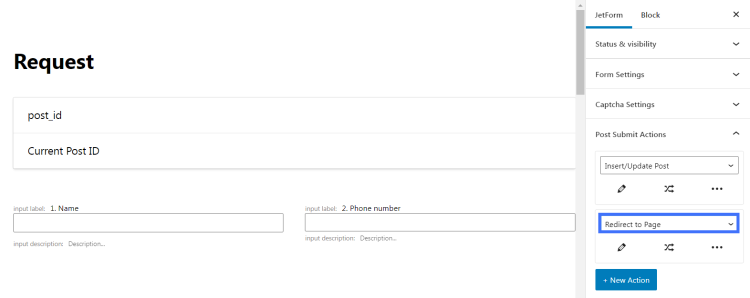
Click on the pencil-shaped button to edit the action and proceed to its settings.
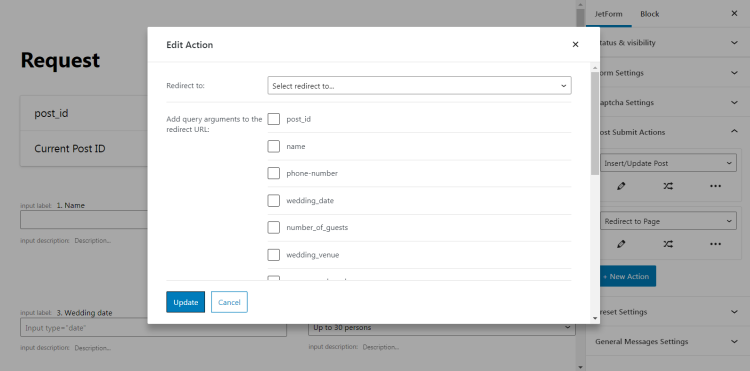
In the Redirect to drop-down menu, choose “Static Page” and proceed to the next option, Select page. There will be a list of all the pages you’ve created so far. Select a “Thank you page” option here.

Update the form. The result can be seen in this video.
Create Personalized Thank You Message
A personalized thank-you message will display the user’s name previously entered into the form.
Before we start, make sure you have the JetEngine plugin installed and activated since we will be using a CPT, meta fields, and a listing template.
A Custom Post Type contains the list of the meta fields repeated in the form. This way, the form will be saved as a post, and the information the user entered into the form fields will be saved under the appropriate meta fields.
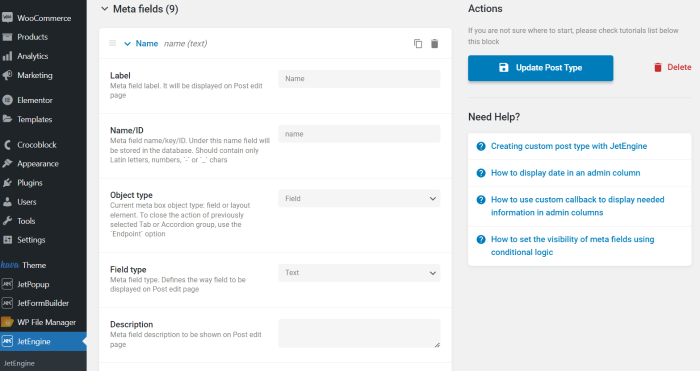
That’s why you need to create a meta field called Name and make sure that you have the same Name field in the form.
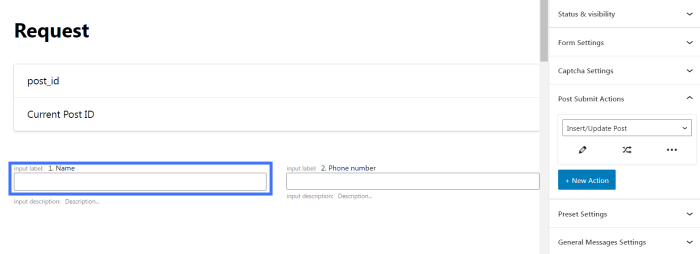
To link the form field with the CPT meta field, you need to set up Insert/Update Post action.
Proceed to the JetForm > Post Submit Actions pathway. Add a new action, select “Insert/Update Post” from the drop-down list, and click on the pencil-shaped button to edit the action.
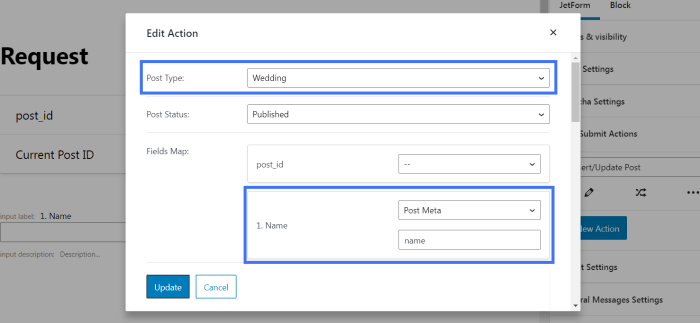
In the Post Type drop-down menu, you will find all types of posts available to you. Select the CPT you’ve previously created. Proceed to the Fields Map and find the Name form field.
In the drop-down menu next to this field, you need to select the “Post Meta” option and enter the name of the same meta field below.
Update the settings and the form.
Now we need to create a listing template to dynamically pull the content from the back end to the Elementor page builder to display it on the front end.
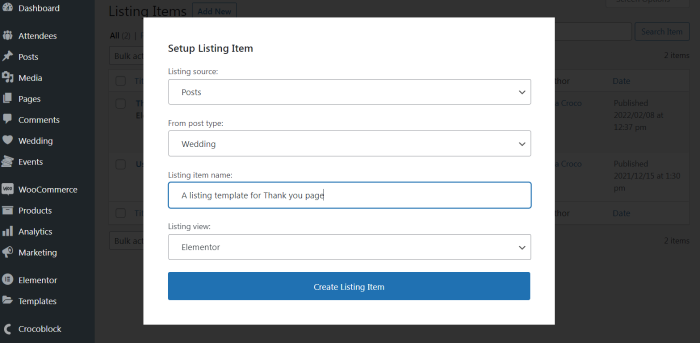
Go back to WordPress Dashboard > JetEngine > Listings. Create a new listing. Don’t forget to set the listing source to Posts and specify it in the following drop-down menu.
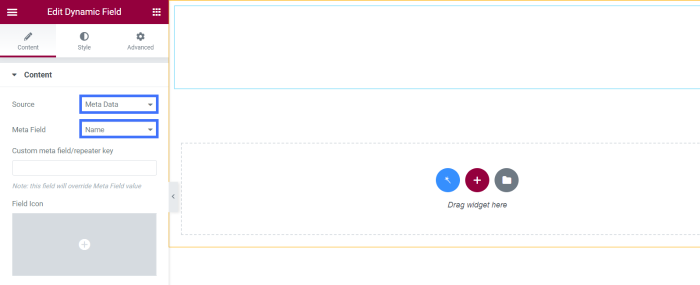
Once you hit the “Create Listing Item” button, you will be redirected to the Elementor page editor. Add a section and apply the Dynamic Field widget.
Under the Content tab, set “Meta Data” as a Source and select the “Name” meta field from the corresponding drop-down list.
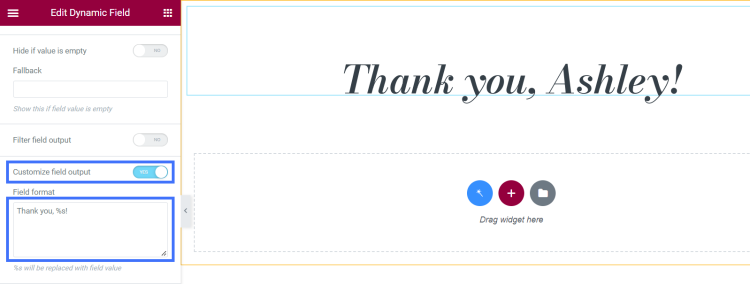
Scroll down the settings and enable Customize field output. In the Field format box, enter the message you want to display on a Thank You page. %s, in this case, will be replaced with the Name field value.
Publish the listing template. Now you need to add this listing to the page.
Head back to the WordPress Dashboard > Pages directory and edit the Thank You page with Elementor.
Find the Listing Grid widget in the elements panel and drag it to the page’s section. Choose the listing template you’ve previously created in the Listing drop-down menu. Also, set Columns and Posts number to 1.
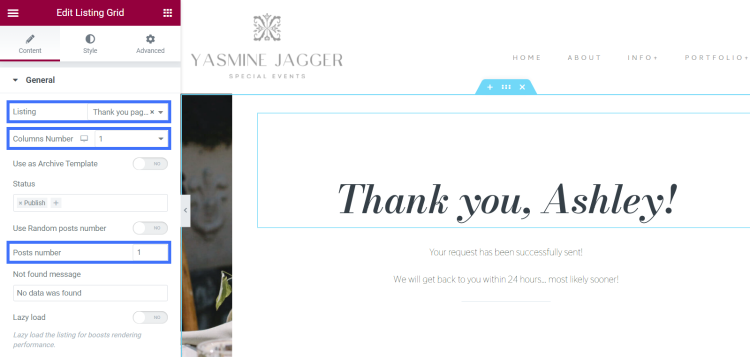
Click on the “Update” button, and here’s the final result.
Hide Form Using Dynamic Visibility
The last option is for those who don’t want to create a separate Thank You page. This way, a form will be hidden after the submission, and a thank-you message will show up.
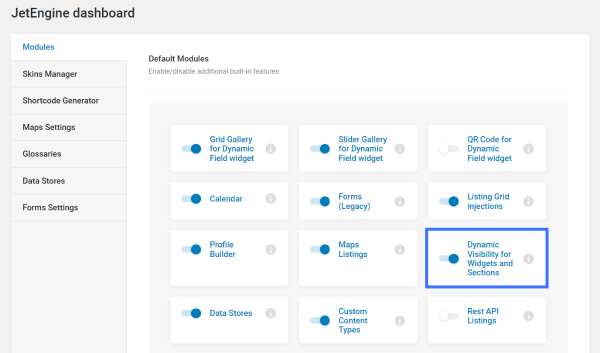
Before we proceed, go to JetEngine > JetEngine Dashboard and make sure that you have the Dynamic Visibility for Widgets and Sections module enabled.
For this option, we don’t need a redirect to a different page; that’s why go back to the form settings and remove the Redirect to Page post-submit action.
Proceed to the Dashboard > Pages directory. Find the page with the form and edit it with Elementor.
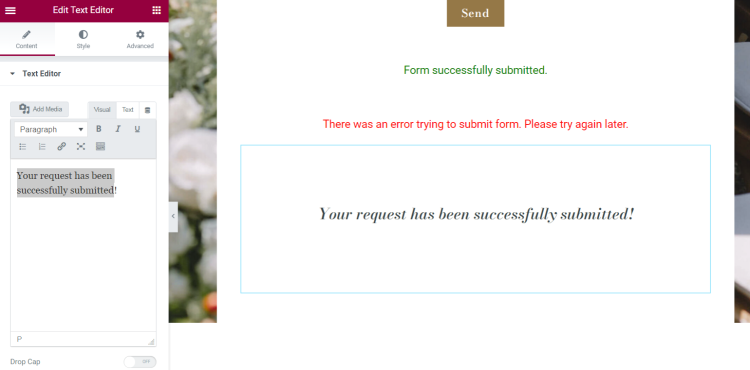
Add the Text Editor widget and enter a message, e.g., “Your request has been successfully submitted.”
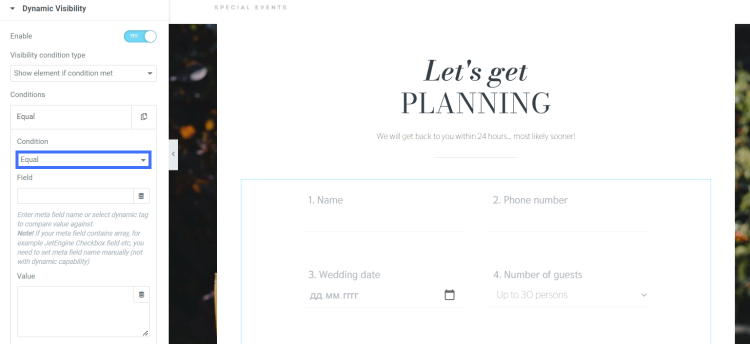
Edit the form and proceed to the Advanced tab. Unfold the Dynamic Visibility section and enable it.
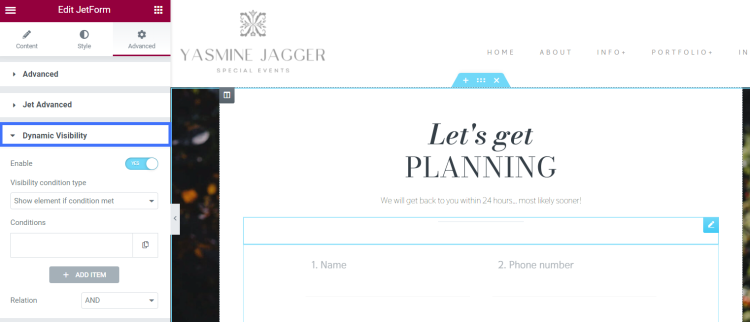
Set the Visibility condition type to “Hide this element if condition met” since we need a form to disappear.
To add a new Condition, press the “Add Item” button and select “Equal” from the drop-down list of conditions.
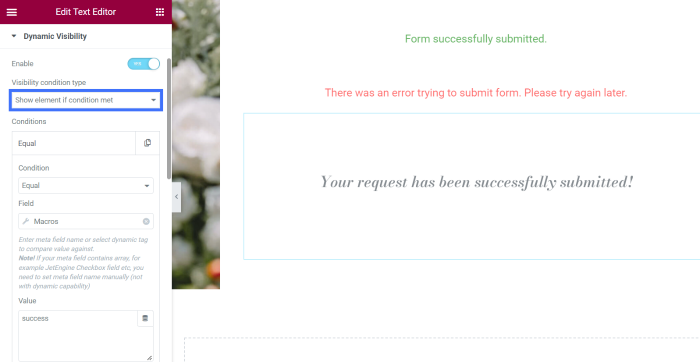
Now edit the Text Editor widget. Proceed to the Advanced tab. Enable Dynamic Visibility and repeat the same steps changing only the Visibility condition type to “Show this element if condition met.”
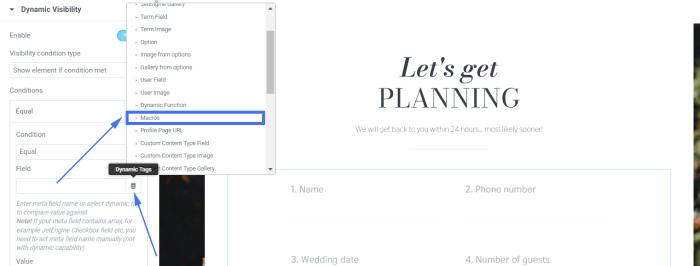
For the Field, click on the Dynamic Tags button and choose “Macros” from the list.
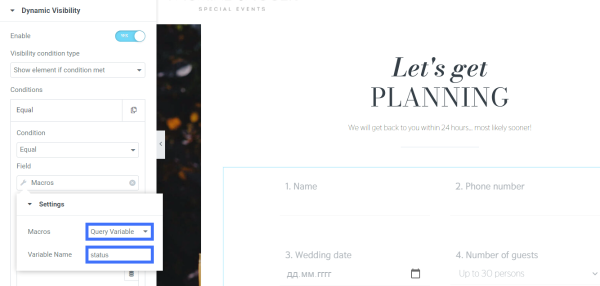
Once it’s selected, there will be a small Settings pop-up window with the list of macros. Set it to “Query Variable” and enter ‘status’ to the Variable name field bar.
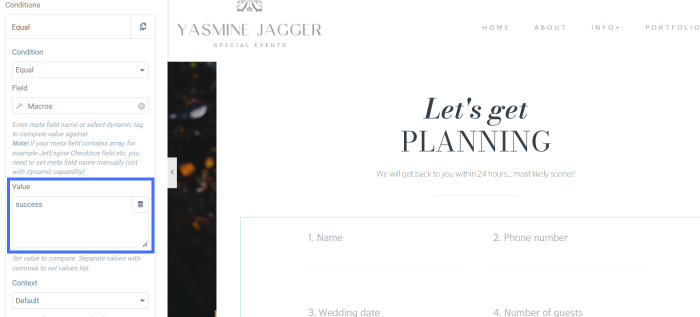
Proceed to the Value and enter ‘success’ there.
Now edit the Text Editor widget. Proceed to the Advanced tab. Enable Dynamic Visibility and repeat the same steps changing only the Visibility condition type to “Show this element if condition met.”
Update the page and check how it looks on the front end.