How to Add and Use a Repeater Field in the Form
The JetFormBuilder’s Repeater Field allows users to add as many JetFormBuilder’s fields in the repeated block as needed, specify the number of repetitions via the dynamical input or by a predefined value, and use the repeated entries in calculations.
In this tutorial, we consider the case of building a form for renting a cottage for a weekend, focusing on the Repeater Field usage. In particular, the number of guests will be added manually via the Number Field. The Repeater Field will include the number of rows according to the number of guests, and each guest can select the needed services via the Checkbox Field. Finally, the prices will be calculated for every guest and totally via the Calculated Fields inside and outside the Repeater Field.
As long as we do not explain the booking issues and are not creating a specific booking form, read the Booking Form tutorial to learn how to build the booking forms with special date fields and booking macros.
- Create a Form
- Add the Number Field
- Add the Repeater Field to the Form
- Set the Repeater Field’s Settings
- Add the Nested Fields in the Repeater Field
- Use the Calculations
- Customize the Action Button
- Set the Post Submit Actions
- Add the Form to a Single Post Page
- Show the First Repeater Automatically Within the Form
- Check the Result
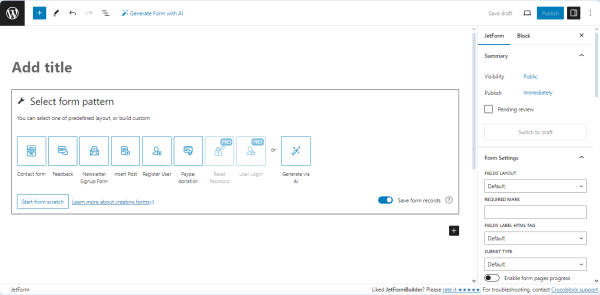
Create a Form
Navigate to the WordPress Dashboard > JetFormBuilder > Add New tab to create a new form.
The new form will be opened in the Gutenberg block editor.
Press the “Start from scratch” button in the Welcome block to develop your form.
The Welcome block will be closed, and the Hidden Field, the Text Field, and the Action Button will be added by default.
Type the form’s name instead of the “Add title” placeholder.
More details can be found in the form creation tutorial.
In the given case, we deleted the Hidden Field as well as the default Text Field because we do not focus on the booking functionality of the form. In contrast, the Hidden Field is necessary if you intend to apply the JetBooking plugin to manage the booking data.
More details about the usage of the Repeater Field in booking forms can be found in the How to Add the Repeater Field to the Booking Form tutorial.
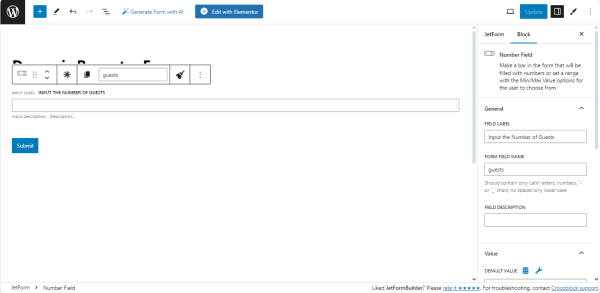
Add the Number Field
We added the Number Field to input the number of guests. This value will be used to set the number of repetitions for the Repeater Field.
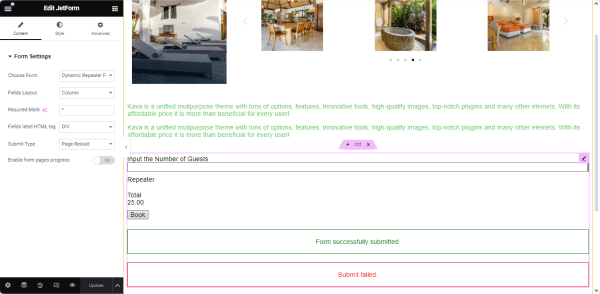
Find the Number Field block, drag-n-drop it onto the form, unfold the block’s settings, and fill in the FIELD LABEL and FORM FIELD NAME fields (the “Input the Number of Guests” and “guests” fields, respectively).
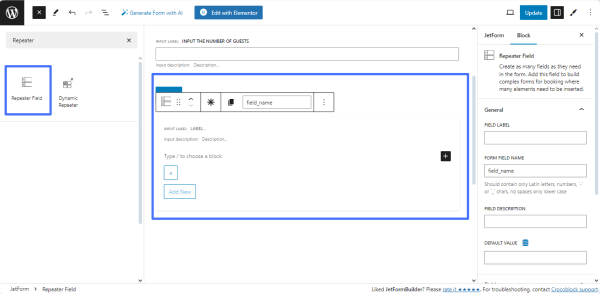
Add the Repeater Field to the Form
Find the Repeater Field block and drag-n-drop it onto the form.
Set the Repeater Field’s Settings
Unfold the Repeater Field’s settings. Here, we set the following options:
- In the General settings tab, we typed the “Repeater” text in the FIELD LABEL, and the appropriate text was shown in the FORM FIELD NAME field automatically;
- In the Field settings, we set the “Dynamically (get count from form field)” option in the MANAGE REPEATER ITEMS COUNT drop-down list, chose the needed field (the “Input the Number of Guests” Number Field in the given case) in the activated FIELD ITEMS COUNT drop-down menu, and picked the “Custom (calculate a custom value for each row)” option in the CALCULATE REPEATER ROW VALUE drop-down menu.
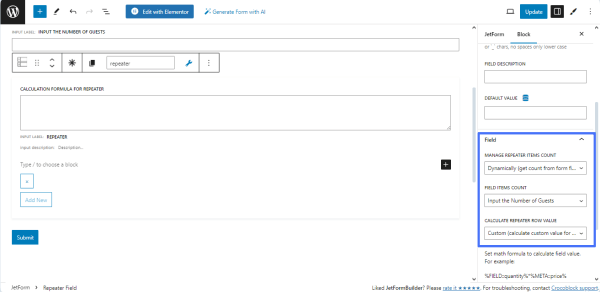
The “Custom (calculate a custom value for each row)” option turns on the CALCULATION FORMULA FOR REPEATER field automatically. We left it empty, and further, it will be used to calculate the price for each guest.
Add the Nested Fields in the Repeater Field
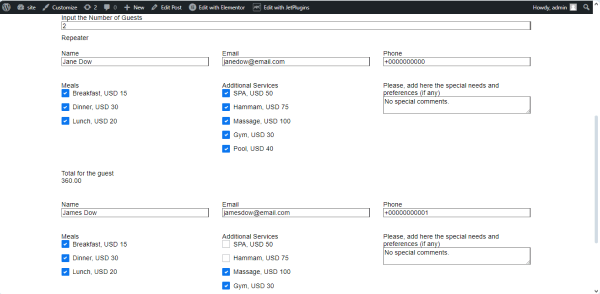
To add fields inside the Repeater Field, we pressed the “plus” icon. First, we added the Columns Field, divided the layout into three equal parts, and added the Text Fields “Name,” “Email,” and “Phone” to get the client’s appropriate data.
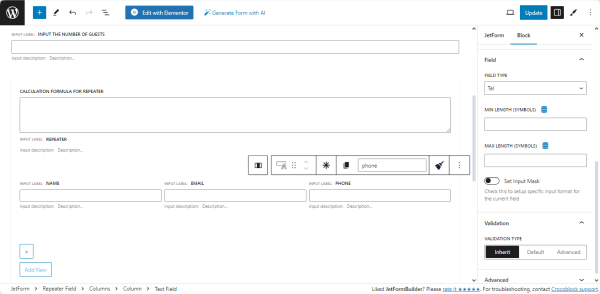
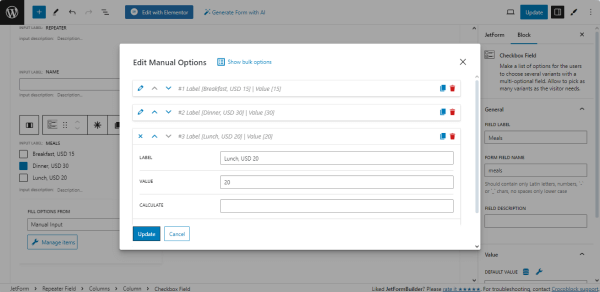
Then, we added the Checkbox Field and typed its FIELD LABEL (here, the “Meals” text), and the FORM FIELD NAME was filled automatically. We kept the default “Manually Input” option for the FILL OPTIONS FROM field and pressed the “Manage Items” button. Then, we added three checkbox items and filled in the LABEL and VALUE fields for each item (the CALCULATED fields are left empty). The added options are “Breakfast,” “Dinner,” and “Lunch.”
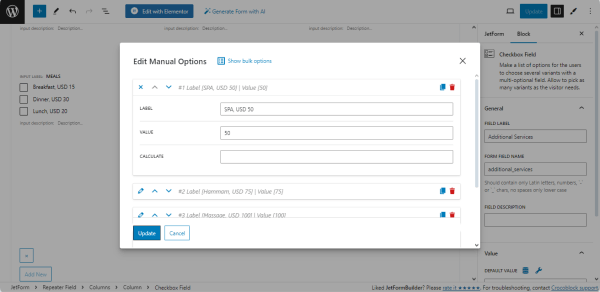
In the same way, we added the “Additional Services” Checkbox Field: we kept the default “Manually Input” option for the FILL OPTIONS FROM field, set the checkbox items (“SPA,” “Hammam”, and more), and specified their VALUEs.
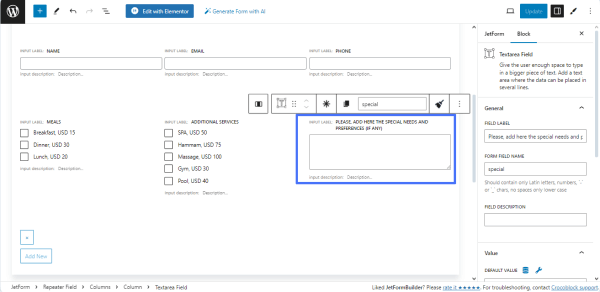
Finally, we added the Textarea Field to the third column and typed its FIELD LABEL and FORM FIELD NAME. In particular, we typed the “Please, add here the special needs and preferences (if any)” text in the FIELD LABEL and “special” text in the FORM FIELD NAME.
For an in-depth understanding of how to manage the Checkbox Field settings, read the How to Customize Default Checkboxes Form Fields tutorial.
Use the Calculations
Calculations inside the Repeater Field
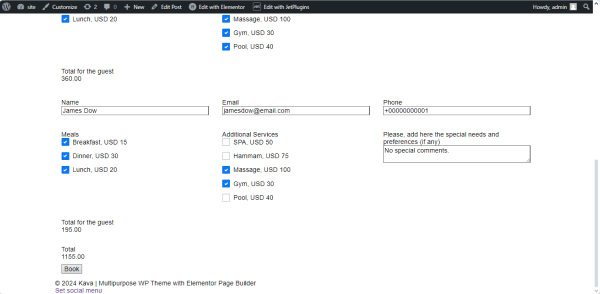
Return to the CALCULATION FORMULA FOR REPEATER of the Repeater Field. Add the formula to calculate the total value for all repetitions. This formula will display the total value returned by the Repeater Field. For example, to calculate the additional services and meal costs for all guests, we typed the formula:
%FIELD::meals%+%FIELD::additional_services%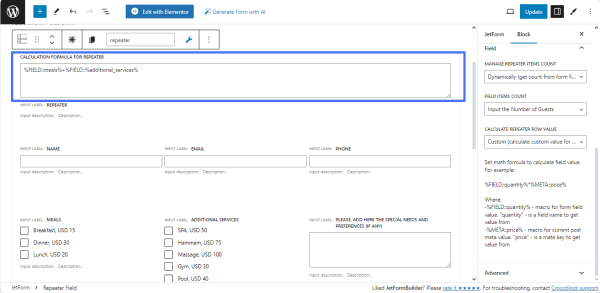
Find and drag-n-drop the Calculated Field. Since we intend this field to return the additional service and meal costs for each guest, we placed it under the Checkbox Fields.
We typed the following formula in the Calculated Field:
%FIELD::meals%+%FIELD::additional_services%
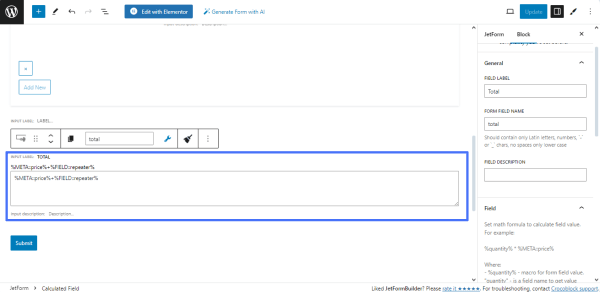
Calculations outside the Repeater Field
In this case, we calculated total costs as a sum of the constant price for renting the cottage and the fees for services and meals for all guests.
To calculate the cottage’s renting price, we used the CPT posts meta fields (i.e., for the cottage’s price). The formula with meta fields will look as follows:
%META::price%+%FIELD::repeater%(Here, the “price” CPT meta field is used).
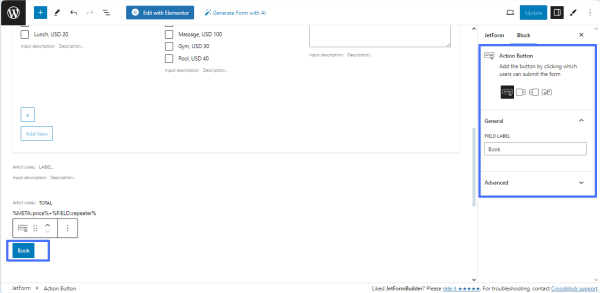
Customize the Action Button
The Action button is added to the form by default. To customize the button text (by default, it’s the “Submit” text), navigate to the Settings block and type the necessary text (in this case, we typed the “Book” text).
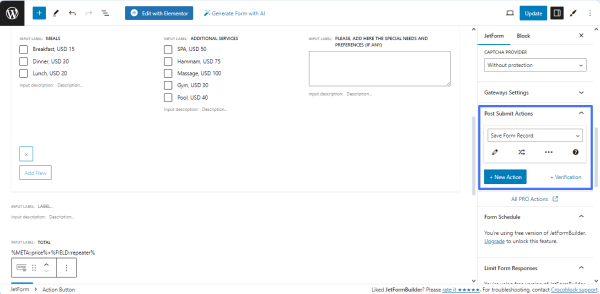
Set the Post Submit Actions
Navigate to the JetForm settings and unroll the Post Submit Actions tab. The “Save Form Record” option is set by default. In this tutorial, we did not add other Post Submit Actions.
Watch the Post Submit Actions video overview to learn how to apply and manage the Post Submit Actions.
Once completed, press the “Publish/Update” button to save the form.
Add the Form to a Single Post Page
Create a single post page you need, navigate to the settings block, and specify the CPT you need.
For more information on how to create single pages and assign them to a certain CPT, read the How to Create a WordPress Single Post Page Template tutorial.
Find the JetForm widget and select the form you need.
Show the First Repeater Automatically Within the Form
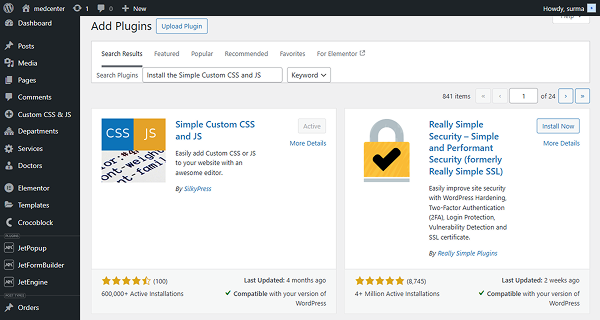
First, install and activate the Simple Custom CSS and JS plugin.
Then, proceed to WordPress Dashboard > Custom CSS & JS and click the “Add JS Code” button. Enter the snippet’s title and add the following code:
<script>
	jQuery( document ).on( 'jet-form-builder/after-init', function( initEvent, $scope, observable ) {

		for ( const input of observable.getInputs() ) {

			if ( input.inputType !== 'repeater' ) {
				continue;
			}

			if ( input.manageItems === 'manually' && input.nodes[0]?.classList.contains( 'item-on-load' ) ) {
				input.addNew();
			}

		}

	});
</script>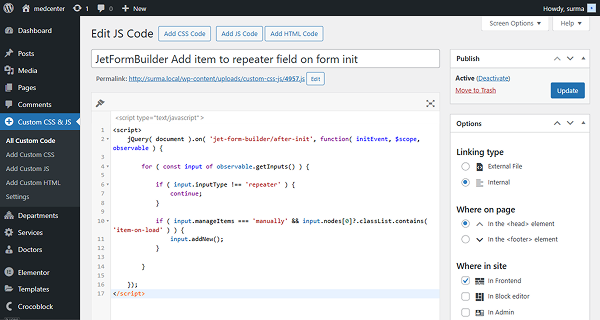
Click the “Publish” button.
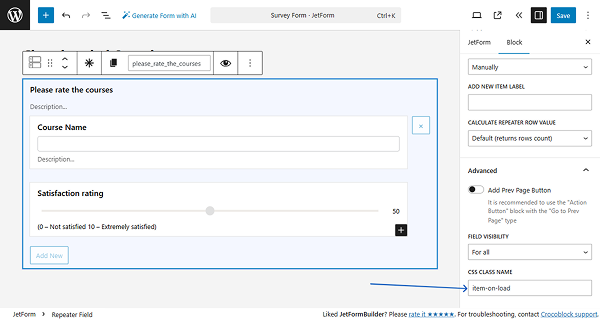
Now, proceed to the backend of the form where the Repeater Field is added. Open the Repeater’s settings and proceed to the Advanced tab.
In the CSS CLASS NAME field, add the “item-on-load” class.
Click the “Save” button and proceed to the front-end page, where the form is added and the first Repeater item is automatically displayed.
Check the Result
Navigate to the front end and check if the Calculated Field works correctly.
Fill in the form fields, scroll down, and press the “Book” button.
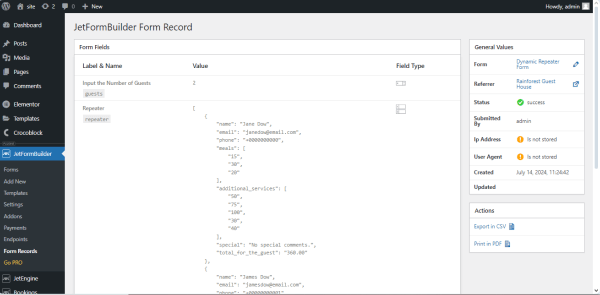
To observe the form details, move to the WordPress Dashboard > JetFormBuilder > Form Records path to open the JetFormBuilder Form Record tab, which lists all submitted forms.
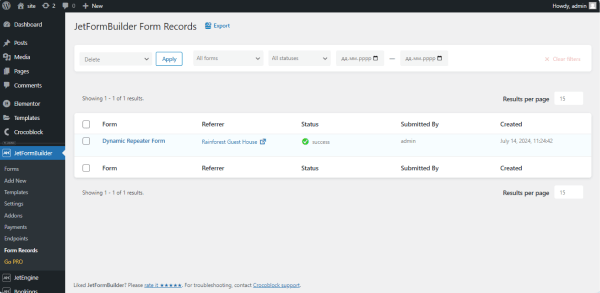
Hover over the name of the needed form, click the “View” link below the name, and unroll the form record.
That’s all about adding and using the Repeater Field to forms of the JetFormBuilder plugin for WordPress.