How to Change User Roles via Forms
The JetFormBuilder’s Post Submit Actions allow changing the User Profile settings via forms, specifically updating a user’s data in the User Account and assigning one or multiple roles to users.
Configuring the User Role(s) is available in the “Register User” Post Submit Action, which can be used initially to add a new user. However, it is not the only feature of this Post Submit Action. You can also use it to set the role of the newly-added user.
Changing user roles is available via the “Update User” Post Submit Action applied to a form. In addition, to assign some user roles, the User Role Editor plugin should be installed and activated.
Assign Multiple User Roles when Registering Users
In this case, the needed roles are assigned to the form during its building. More details can be found in the How to Assign User Role Automatically via Registration Form video.
Create a form
The starting point is creating a form. Go to WordPress Dashboard > JetFormBuilder > Add New. The Welcome block will be opened by default. Here, you can select the needed pattern or build the form from scratch.
Here, we insert the Text Fields to enter data necessary for the “Register User” Post Submit Action (e.g., “USER LOGIN,” “EMAIL,” and more) and the Action Button.
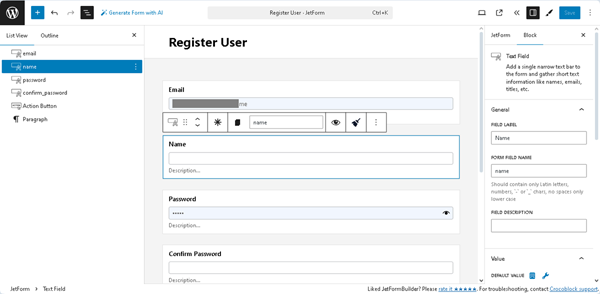
Since this tutorial focuses on assigning roles, we keep only these fields. Also, the Hidden Field with the specific options is not necessary for this case.
Configure the “Register User” Post Submit Action
In the next step, insert the “Register User” Post Submit Action. In the newly appeared Edit Register User pop-up, we keep turning off the Allow creating new users by existing users toggle to prevent existing users from limiting the ability of other users to add new users. However, only logged-in users can change their roles.
Next, match the needed form fields with the corresponding option from the drop-down lists in the FIELDS MAP group.
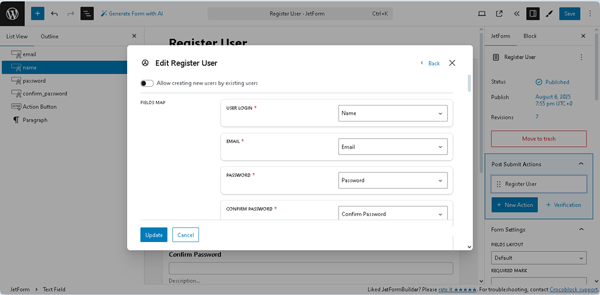
These fields correspond to the names of the columns in which the user’s data is displayed via the WordPress Dashboard. After assigning the fields, scroll the pop-up down and select the required USER ROLE or assign some roles.
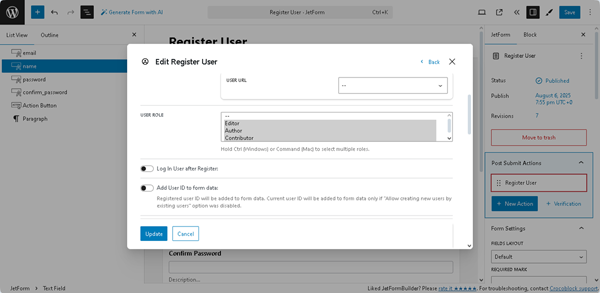
In this case, we allow adding some roles and select the “Editor,” “Author,” and “Contributor” roles, holding the “Ctrl” (Windows) or “Command” (Mac) key to select multiple roles.
In the last step, insert the required messages into the MESSAGE SETTINGS fields. Here, we keep the default data.
Once completed, press the “Update” button at the bottom of the pop-up. Finally, save the form.
Add the form to a page
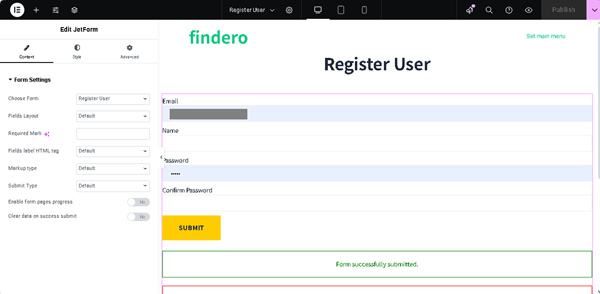
In the second step, open a page or create a new one in your preferred editor. Next, add the form to the page using the JetForm widget/block/element. In this case, we use Elementor.
To learn how to add your form on pages using Elementor, Block Editor, or the Bricks theme, read the Displaying a JetFormBuilder Form in Any Page Builder tutorial.
Watch the video to learn How to Add WordPress Form to any Page Builder using the JetFormBuilder plugin.
Publish the page.
Test the flow
Navigate to the front end and fill out the form.
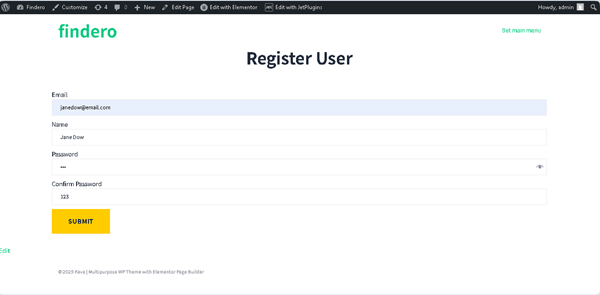
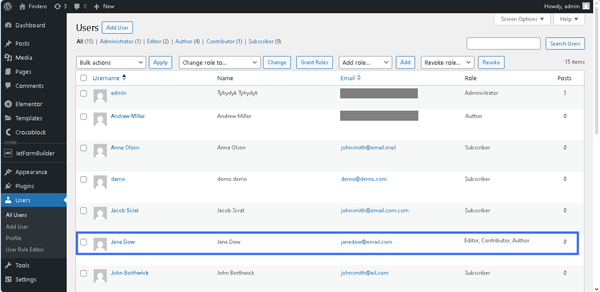
To check the registration, proceed to the WordPress Dashboard > Users tab and observe that the new roles have been added to the needed user.

Change User Roles
In this case, the WordPress user should already exist.
Modify the form
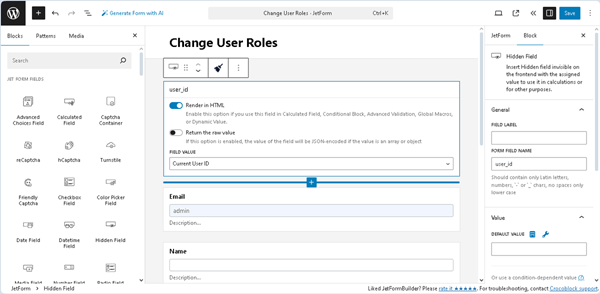
Return to the form (or create a new one). Then, insert the Hidden Field and set the “Current User ID” option in the FIELD VALUE drop-down menu.
Then, add the needed blocks and/or fields. In this case, we change the form’s name and keep all previously inserted fields.
After that, delete the “Register User” Post Submit Action and add the “Update User” Post Submit Action.
Configure the “Update” Post Submit Action
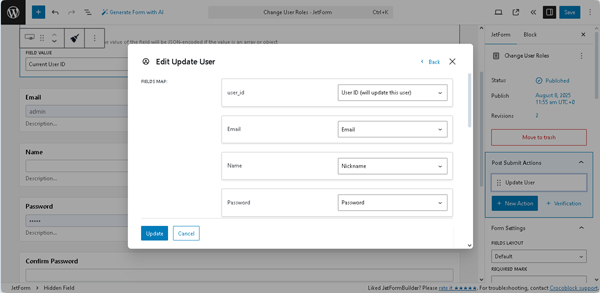
In the newly opened Edit Update User pop-up, match the form’s field with the FIELD MAP drop-down list options.
In particular, we set the “User ID (will update this user)” option for the user_id form’s field, “Nickname” option for the Name form’s field, “Email” option for the Email form’s field, “Compare with the Current Password” option for the Current Password field, and the “Password option for the New Password field.
After assigning the fields, scroll the pop-up down and select the required USER ROLE or assign some roles.
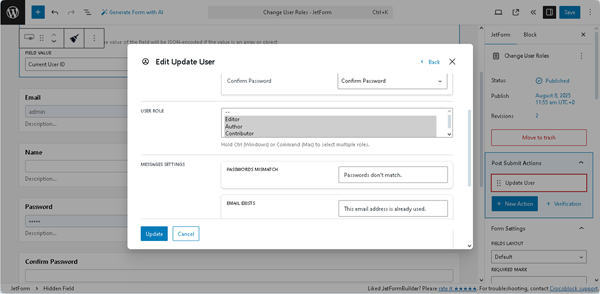
In this case, we allow adding some roles and select the “Editor,” “Author,” and “Contributor” roles, holding the “Ctrl” (Windows) or “Command” (Mac) key to select multiple roles.
In the last step, insert the required messages into the MESSAGE SETTINGS fields. Here, we keep the default data.
Once completed, press the “Update” button at the bottom of the pop-up. Finally, save the form.
After that, add it to the page using the JetForm widget/block/element.
Test the flow
Move to the front end, fill out the form fields, and submit the form.
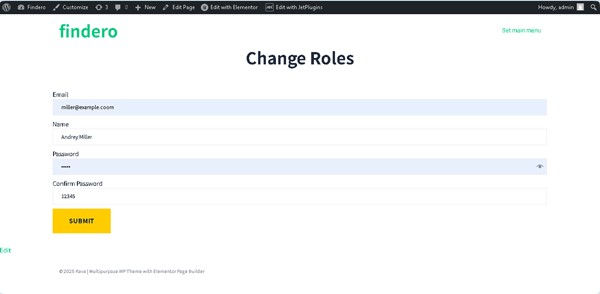
After that, if the form is built correctly, the “Form successfully submitted.” text will appear.
To check the update, move to the WordPress Dashboard > Users tab and observe that the new roles have been added to the needed user.
That’s it. Now you know how to update WordPress user roles via JetFormBuilder forms using the “Update User” and “Register User” Post Submit Actions.