Connect Related Items with Post Submit Actions
Tutorial requirements:
- JetEngine and JetFormBuilder plugins installed and activated;
- Created relations. We have a dedicated tutorial about doing this on the example of CPT posts.
The JetEngine’s relations feature allows you to connect, create, and edit related items just on the editing page of posts, CCT items, users, and taxonomies.
But if you want to connect related items on the front end, you can do this via the form with the help of the JetFormBuilder plugin and the Gutenberg block editor.
Connect Child Objects to Parent Ones
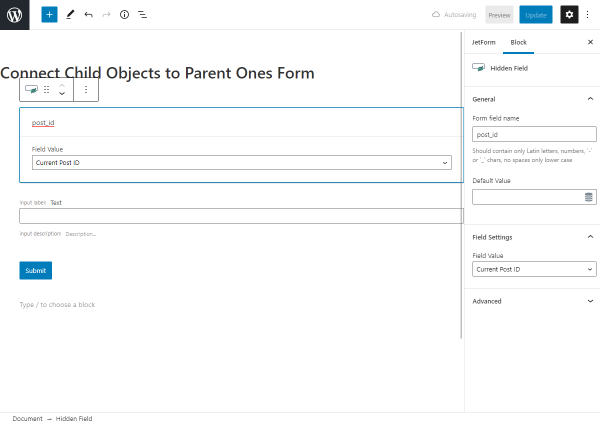
Go to JetFormBuilder > Add New. Give the new form a title and leave the default settings of the Hidden Field block.
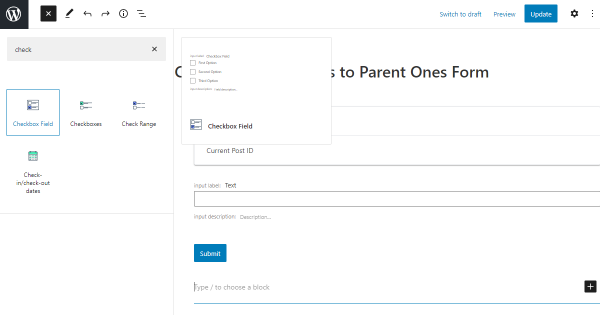
Click on the Toggle block inserter button and place the Select, Radio, or Checkbox fields to display the child items in the form. Be informed that the Radio and Select allow choosing one option and it suits the “One to Many” relation type, and the Checkbox allows selecting one and more options and it matches the “Many to Many” relation type, so we decided to drag-and-drop such Checkbox Field block to our form.
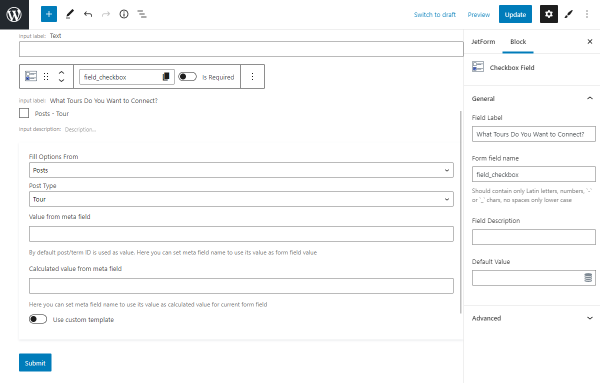
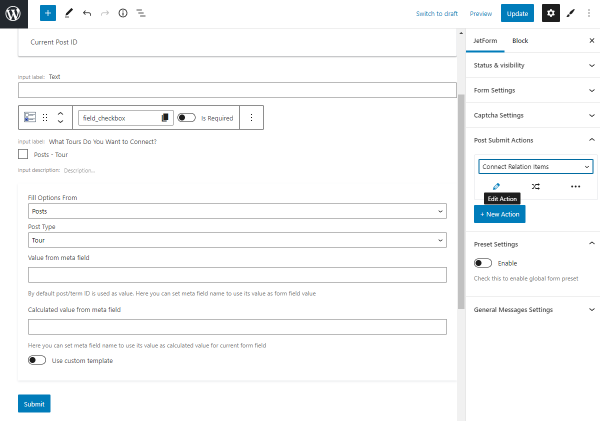
Select the “Posts” as the source in the Fill Options From field and define the needed Post Type. As we want to choose the related children for the relationship “Country > Tours,” we have selected the “Tour” Post Type.
In the Block General settings, type the Field Label and change the Form field name.
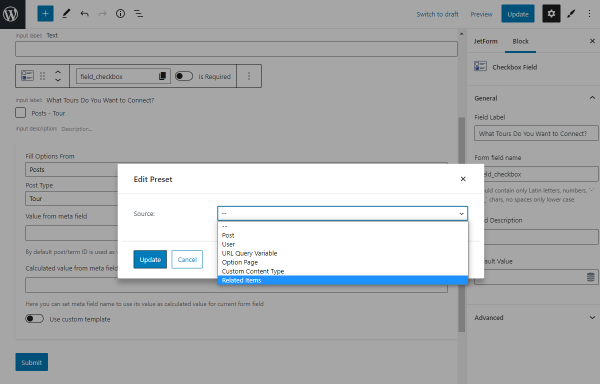
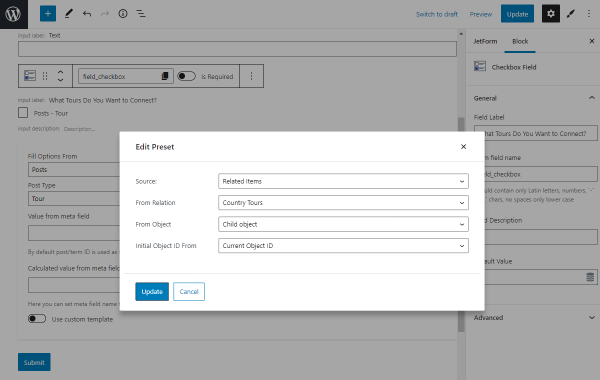
Press the “Dynamic tags” button in the Default Value field to open the pop-up.
Pick the “Related Items” option in the Source field.
After that, you get the new additional settings:
- From Relation. Define the relationship you want to use as the source;
- From Object. Specify if you want to display children (Child object option) or parent (Parent object option) items;
- Initial Object ID From. Indicate where the query will get the object ID from to display its related items in the form:
- Current Object ID. Shows the related items of the current post, of the current active listing item, and so on;
- Current User ID. Shows the related items of the currently logged-in user;
- Queried User ID. Shows the related items of the selected user, e.g., on the User Page in the Profile Builder;
- Query Variable. Shows the related items from the global request or WordPress request variables. If you select this option, the fourth Variable Name will appear;
- Current Object Variable. Shows the related items from the object defined as current by JetEngine. If you select this option, the fourth Variable Name will appear;
- Default WordPress Object (for current page). Always shows the related items of a current global object for the current page defined by WordPress, as opposed to the “From Relation” option.
- Variable Name. This field appears if you select the “Query Variable” or “Current Object Variable” options. This option allows setting the variable’s name, which the plugin will search for in the query or current object.
In this case, we have picked the “Current Object ID” option in the Initial Object ID From field because we want to display the Tours child posts in the form on the Country parent post.
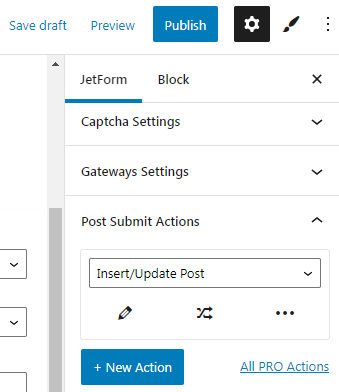
Press the “Update” button and move to the JetForm settings and the Post Submit Actions tab. Select the “Connect Relation Items” option and click on the pencil-shaped icon to edit the action.
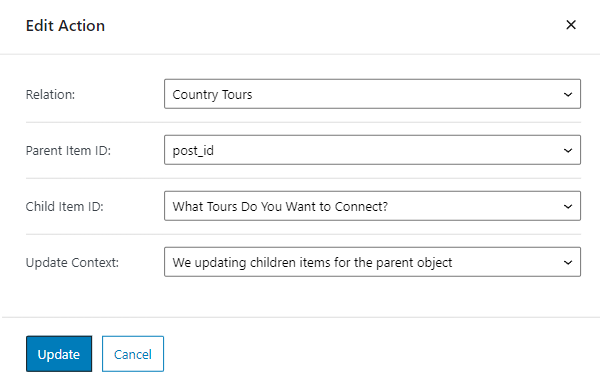
In the new pop-up window, select the needed Relation. Pick the name of the Hidden Field (with the default “Current Post ID” option) as the Parent Item ID. As the Child Item ID, select the label of the created field for the related items (the Checkbox in our case). Since it’s needed to display the children objects in the form, choose the “We updating children items for the parent object” option in the Update Context field.
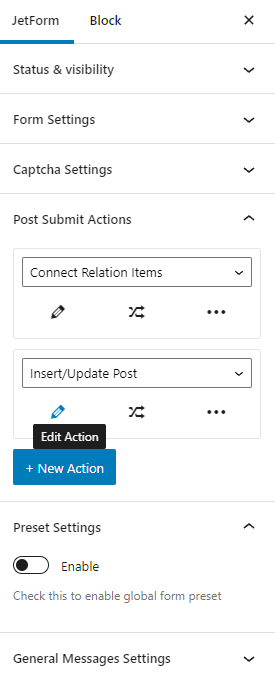
Push the “Update” button to save this action and click on the “+ New Action” button to create a new one. Select the “Insert/Update Post” option and hit the pencil-shaped icon under this action.
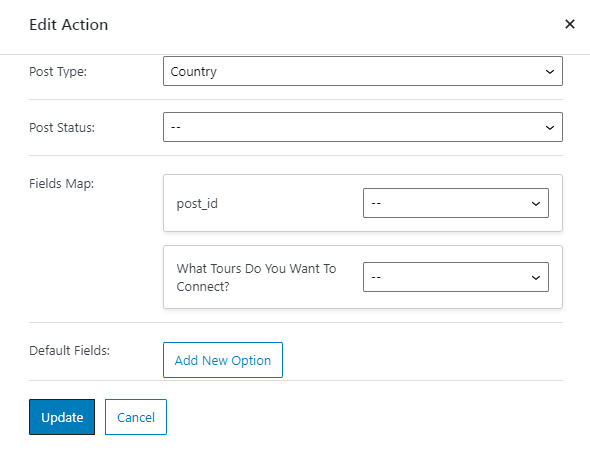
Select the parent post type that you want to update via the form in the Post Type field.
Select the needed Post Status or leave it empty. Also, leave the default Fields Map values.
Hit the “Update” button and publish or update the form to save the changes when you finish editing fields and actions.
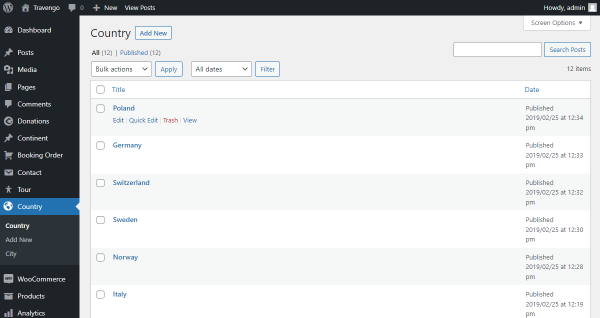
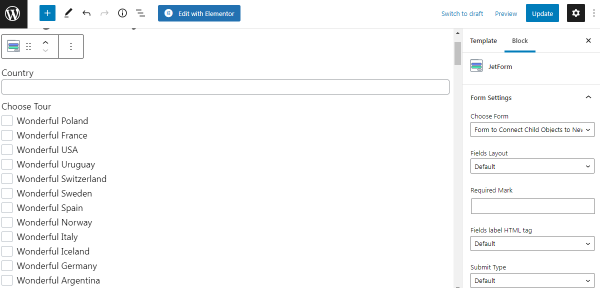
To place the form on the parent object, proceed to the parent Post Type on the WordPress Dashboard and Edit the needed post.
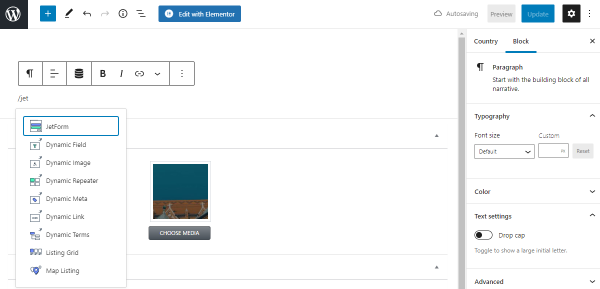
Place the JetForm block in the post.
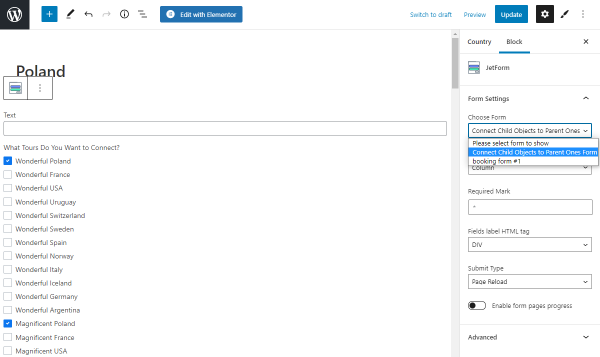
Choose the needed Form to display in the Form Settings and push the “Update” button.
To reach the post on the front end, return to the post type and click on the “View” button of the parent post.
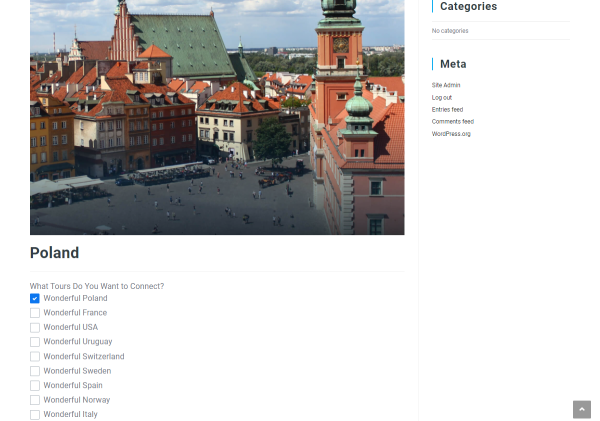
The form is now displayed in the post. Since we have added the Checkboxes field as the selector for the posts, you can select as many posts as you need. When you finish, press the “Submit” button.
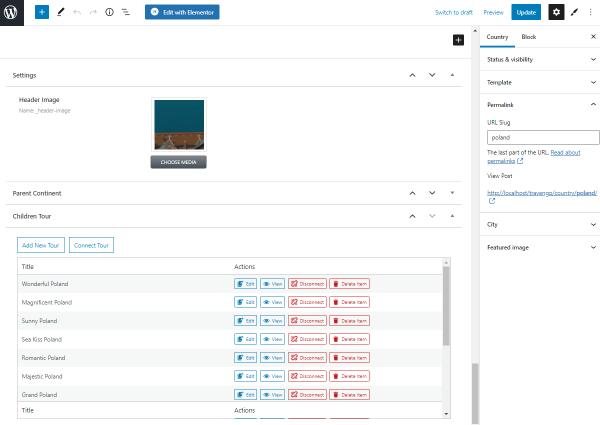
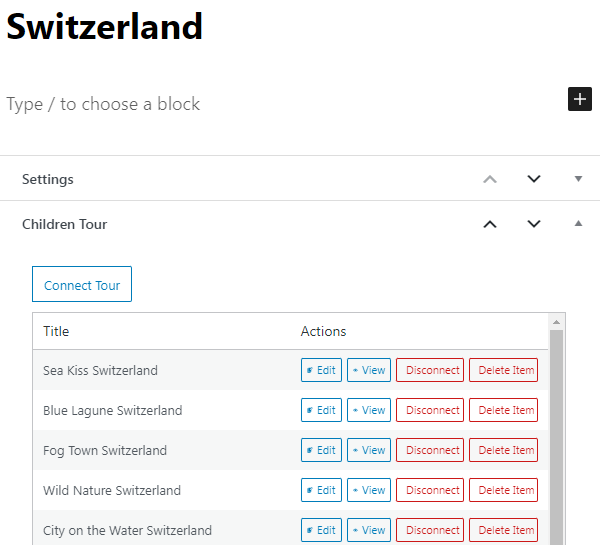
Return to the parent post editing page and scroll down to the Children tab. The options you have checked in the form will be added to the related posts list.
Now you can add the form to all desired parent posts.
Connect Child Objects to New Parent Post
Now let’s find out how to build a form that will make a new parent post and connect child objects to it.
Go to JetFormBuilder > Add New. Give the new form a title and delete the Hidden Field.
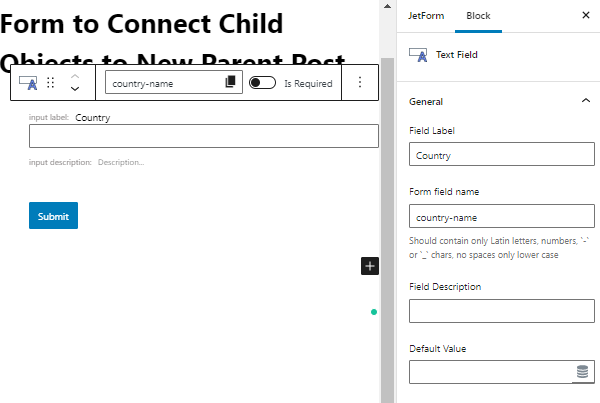
Click to edit the Text Field, it will be for the parent object name. Fill in the needed fields and remember to fill in the Name field appropriately, separate words with the “-” and “_” symbols, and use only lowercase Latin letters.
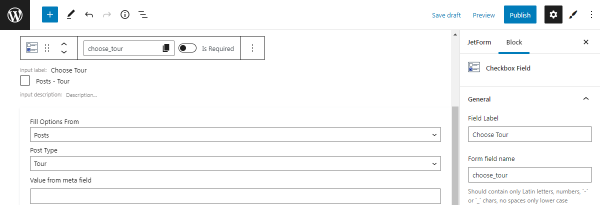
The following field will serve as a selector for child items, so we add a Checkbox Field. During the field adjusting, focus on the Fill Options From and Post Type fields. Here you should select the correct source, the child post type.
Moving to the Post-submit Actions tab, select the “Insert/Update Post” option and click on the pencil-shaped icon to edit the action.
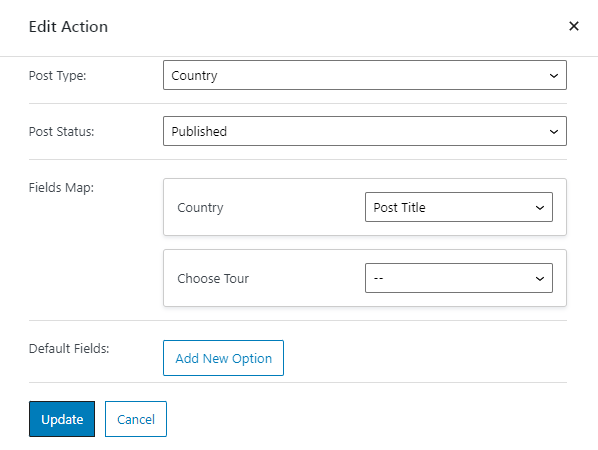
In the appeared pop-up define the parent post type as the Post Type. Set the Post Status to “Published” and head to the Fields Map.
The displayed fields refer to those fields you have added to the form. The Text Field of yours should be connected to the “Post Title” and the following Checkbox Field left with the default option.
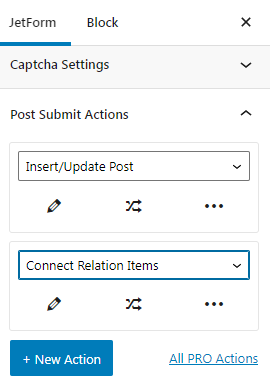
Hit the “Update” button to save the result, and let’s add one more action by pressing the “+ New Action” button.
This time we select the “Connect Relation Items” post submit action.
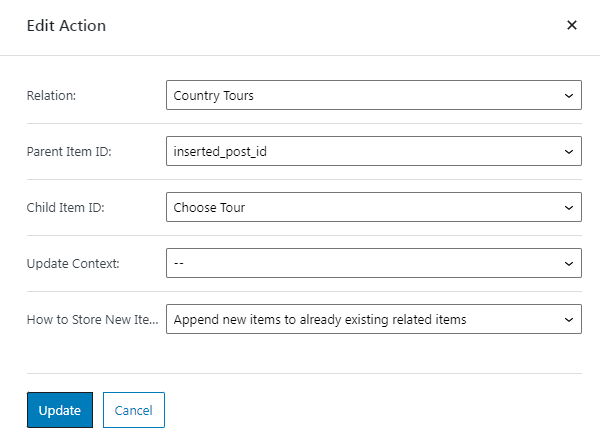
Set the needed Relation, choose the “inserted-post-id” option as the Parent Item ID, choose the name of the Checkbox Field as the Child Item ID, and leave the Update Context field empty. In the How to Store the New Item field, you can select the most appropriate choice for you. When you finish, press the “Update” button.
Feel free to add as many additional fields, as you need, for instance, the Media Field to add a picture to a new post.
The final step here is to save the form, so push the “Publish” or “Update” button and head to the page where the form will be located.
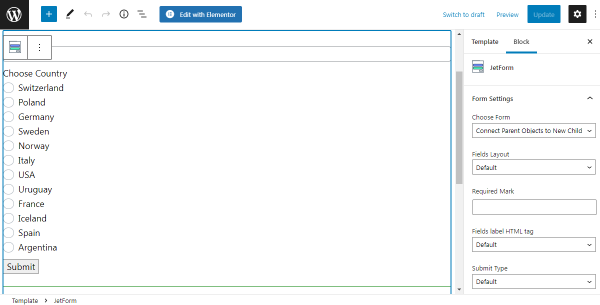
Place a JetForm block on the editing page, and fill in the Choose Form field with the form’s name.
Set up the fields and form styles, and press the “Update/Publish” button to save the page.
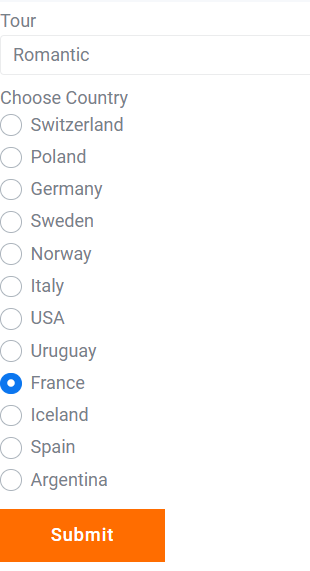
Check the front-end result. You can fill in the form with a title and relate some items to it. Finally, press the “Submit” button.

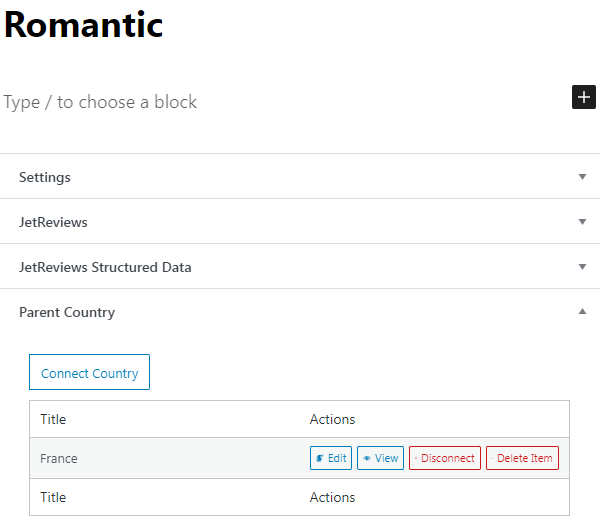
Head to the parent post type (“Country”, in our case) and search for the newly created post. Open it in the editor by pressing the “Edit” button next to the post title and check the attached children posts.
Connect Parent Objects to Child Ones
Navigate to the WordPress Dashboard > JetFormBuilder > Add New. Give a title to the form. Leave the default Hidden Field block settings and create the field for the parent object items list.
For example, we have added the Radio Field block to have the ability to pick only one option in the form.
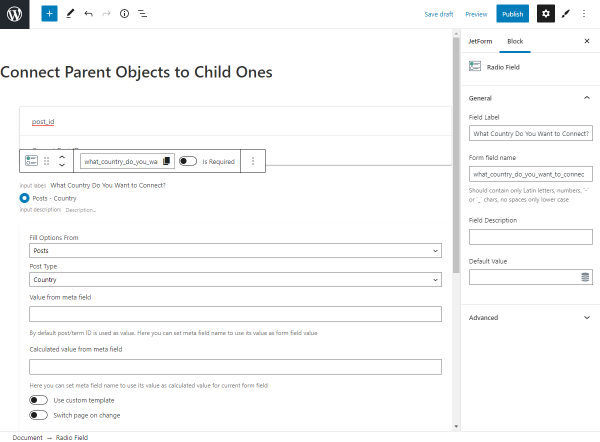
Select the “Posts” as the source in the Fill Options From field and define the needed Post Type. As we want to select the related parent for the relationship “Country > Tours,” we have chosen the “Country” Post Type.
In the Block General settings, type the Field Label and change the Form field name.
Press the “Dynamic tags” button in the Default Value field to open the pop-up.
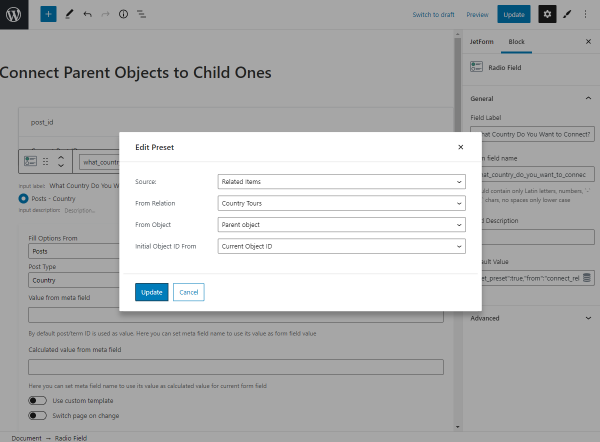
Preset in this form has the same settings and options as in the previous form, but in this case, you need to select the “Parent object” option in the From Object field and click on the “Update” button.
Move to the JetForm settings and the Post Submit Actions tab. Select the “Connect Relation Items” option and click on the pencil-shaped icon to edit the action.
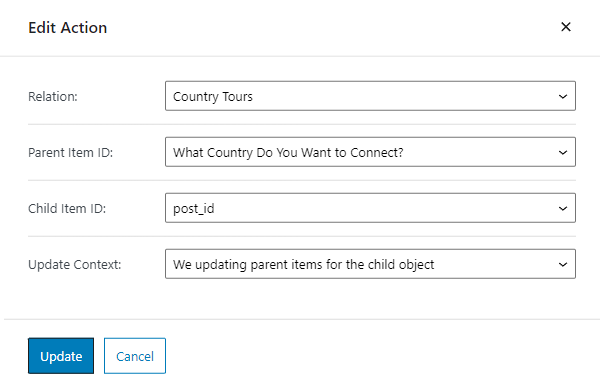
In the new pop-up window, select the needed Relation. As the Parent Item ID, choose the label of the created field for the related items (the Radio Field in our case). Pick the name of the Hidden Field (with the default “Current Post ID” option) as the Child Item ID. Since it’s needed to display the parent object in the form, choose the “We updating parent items for the child object” option in the Update Context field.
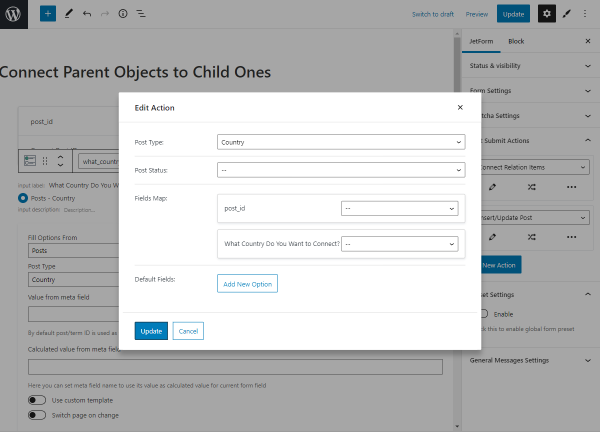
Push the “Update” button to save this action and click on the “+ New Action” button to create a new one. Select the “Insert/Update Post” option and hit the pencil-shaped icon under this action.
Select only the Post Type of the parent items in the new pop-up and nothing more. Otherwise, the new related items replace the old ones instead of just being added to them.
Hit the “Update” button and publish or update the form to save the changes when you finish editing fields and actions.
To place the form on the child object, proceed to the child Post Type on the WordPress Dashboard, click to edit the needed post, and put the JetForm block in the post. Choose the needed Form to display in the Form Settings and push the “Update” button.
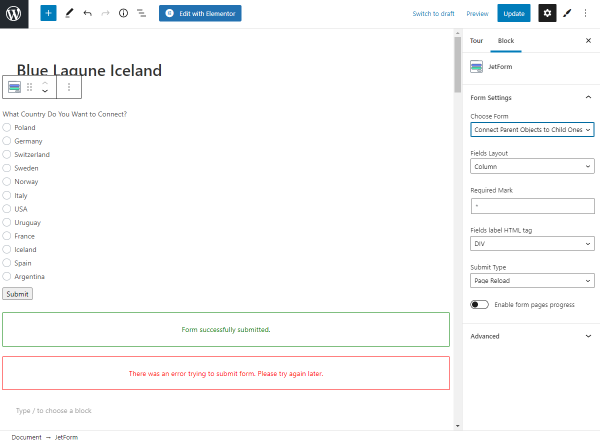
To reach the post on the front end, return to the post type and click on the “View” button of the child post.
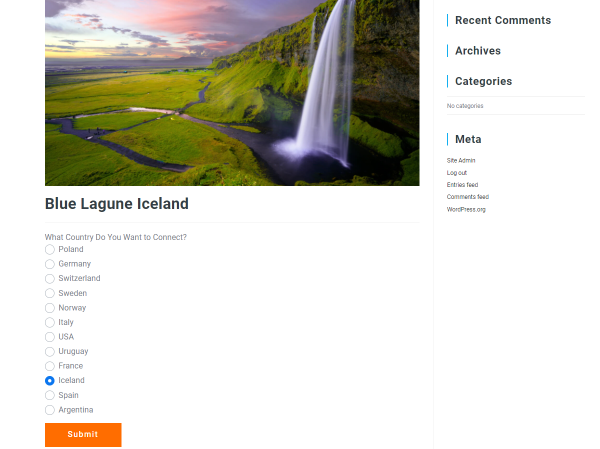
The form is now displayed in the post. Select the needed parent object and press the “Submit” button.
Connect Parent Objects to New Child Post
You can also build a form that will add a new child post and connect it to the parent at once.
Navigate to the WordPress Dashboard > JetFormBuilder > Add New.
Now you can delete all the Hidden and Text fields to avoid getting confused during editing.
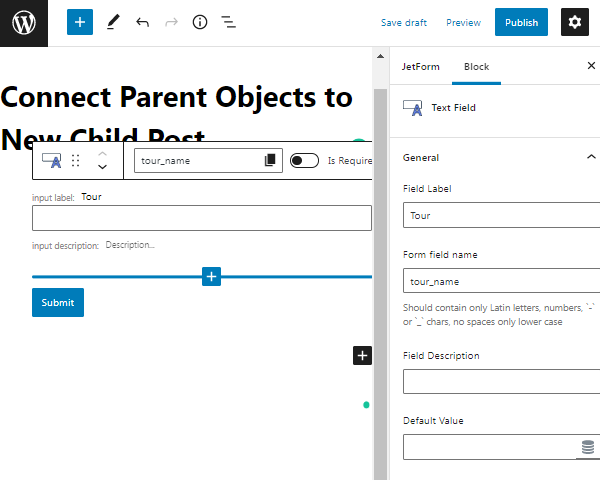
We start with adding a Text Field for a new post name. Feel free to adjust this field as desired. Remember that the Name field shouldn’t include capital letters, spaces, and other special characters.
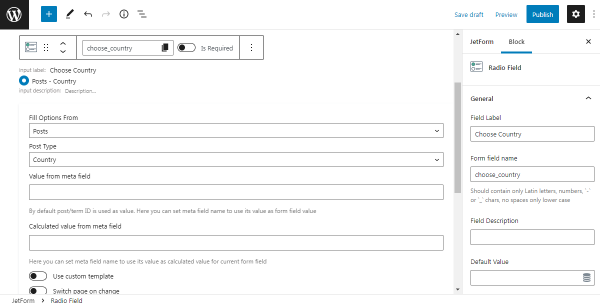
The following field is for choosing a parent, so we select Radio Field to let users pick one option.
Select the “Posts” as the source in the Fill Options From field and define the needed Post Type. As we want to select the related parent for the relationship “Country > Tours,” we chose the “Country” Post Type.
In the Block General settings, type the Field Label and Form field name.
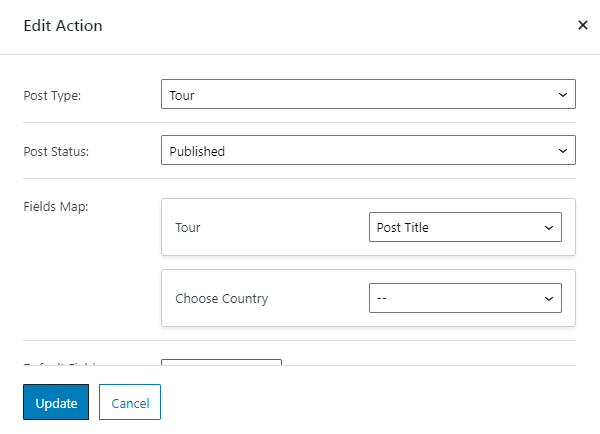
Move to the JetForm settings and the Post Submit Actions tab. Select the “Insert/Update Post” option and click on the pencil-shaped icon to edit the action.
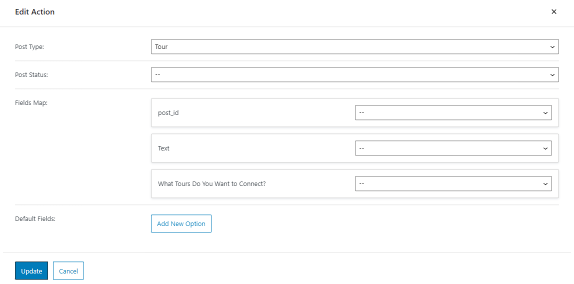
Pick the child post type in the Post Type menu and select the “Published” Post Status.
In the Fields Map, we define the ‘tour-name’ Text Field as a “Post Title” and leave the default “Select post property” in the ‘choose-country’ field.
Click on the “Update” button to save the result.
Click on the “+ New Action” button to add a new one. Select the “Connect Relation Items” option and hit the pencil-shaped icon under this action.
Set the needed Relation, select the name of the Radio Field as the Parent Item ID, choose the “inserted-post-id” option as the Child Item ID, and leave the Update Context field empty. In the How to Store the New Item field, you can select the most appropriate choice for you. When you finish, press the “Update” button.

Feel free to add as many additional fields, as you need, for instance, the Media Field to add a picture to a new post.
The form is ready, so press the “Publish” or “Update” button.
Go to the page you want to place the form. For instance, it can be a standard WordPress page.
Place the JetForm block onto the page editor, and pick a new form name in the Choose Form field.
Work on the other fields if you wish. Ultimately, press the “Update/Publish” button and go to the front end to check the final result.
Now you can complete the form with the title and related parent. Click the “Submit” button to save the post and add a related item to it.
Let’s check if the new tour was added to the child post type. Head to the child post type and search for the new post. For instance, you can type in a post title in the search bar.
Once the post is opened, scroll down to the Related… tab. The parent post is now successfully connected.
That’s it. You know now how to connect the JetEngine relation items via the JetFormBuilder forms.