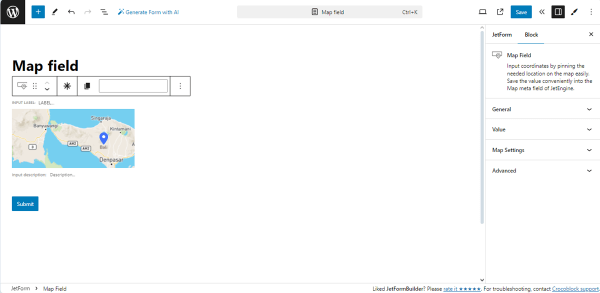
Map Field Overview
The Map Field block displays maps (Google, Leaflet, and Mapbox) with set zoom parameters (zooming to a specific country). The field block allows:
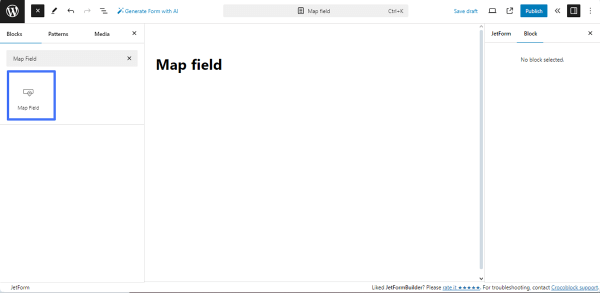
Adding the Map Field
After creating a new form or opening a previously built one, the Map Field block should be found in the search bar of the block inserter (the “plus” icon) and then inserted where needed.
Settings of the Map Field
This field block has the following settings tabs: General, Value, Map Settings, and Advanced.
General Settings
The General settings tab includes the FIELD LABEL, FORM FIELD NAME, and FIELD DESCRIPTION fields:
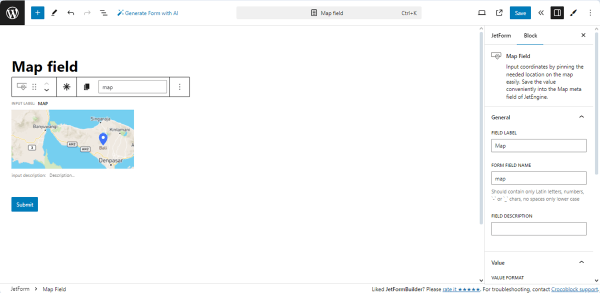
- FIELD LABEL ㅡ a field intended for the field’s label;
- FORM FIELD NAME ㅡ a field intended for the field’s name. This field will be filled out automatically after adding the text in the FIELD LABEL field;
- FIELD DESCRIPTION ㅡ a field for the description of the map.
Value Settings
The Value settings allow for the specification of the location center using coordinates and the zoom setting of the map. The Value tab includes the following settings:
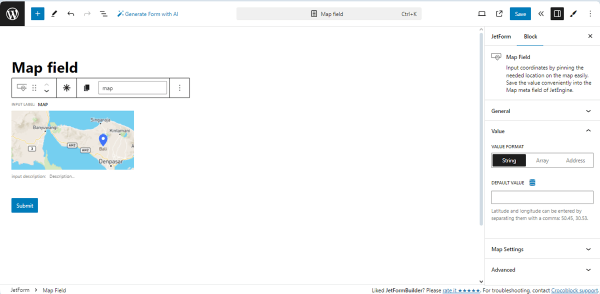
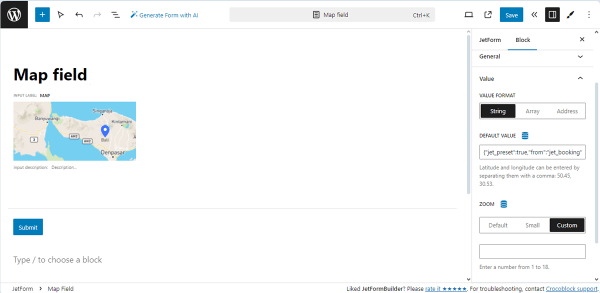
- VALUE FORMAT ㅡ a field that allows choosing how to store the location by clicking the corresponding button (“String,” “Array,” or “Address”):
- String ㅡ an option that, if selected, stores the coordinates as a string with location latitude and longitude separated by a comma. For example: “46.969686110698525,31.991035188696703”;
- Array ㅡ an option that, if selected, stores the coordinates as an array of latitude and longitude. For example: “{“lat”:46.969686110698525,”lng”:31.991035188696703}”;
- Address ㅡ an option that, if selected, stores the location as a physical address, like this: “6 Walnut Road, Manchester SW1A 1AA, UK”.
- DEFAULT VALUE ㅡ a field that allows entering or selecting dynamically the latitude and longitude coordinates.
The DEFAULT VALUE field allows usage of the dynamical data by pressing the “Dynamic Tag“ icon.
It opens the Edit Preset pop-up for selecting a data source from the following options: “Post,” “User,” “URL Query Variable,” and “Option Page.” In turn, each selected option turns on the appropriate field, allowing one to choose the needed data. Also, this pop-up includes the Restrict access toggle that allows restricting users who are allowed to edit this value.
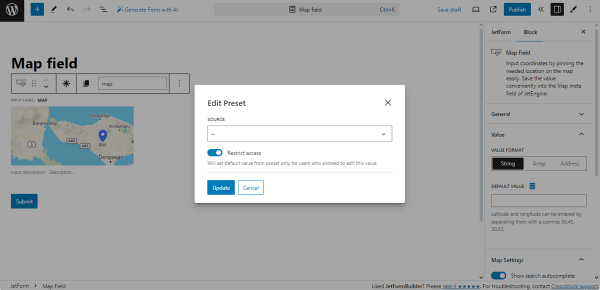
The needed settings should be saved by pressing the “Update” button.
After selecting the dynamic data in the Edit Preset pop-up, the ZOOM slider will be added to the Value settings. This field has three buttons to set the “Default,“ “Small,“ and “Custom“ zoom. Clicking the “Custom” button enables a field to type a zoom value ranging from “1” to “18.”
Map Settings
The Map Settings tab has the following settings:
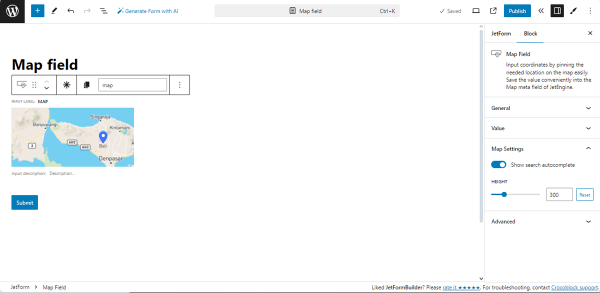
- Show search autocomplete ㅡ a toggle that, if enabled, adds a drop-down field that allows selecting an address from a drop-down list of the proposed five addresses and displaying a picked location on a map. Read the How to Enable Search Autocomplete for Map Field Block tutorial for more details;
- HEIGHT ㅡ a slider that allows setting the map dimensions. The map height can be adjusted between “50“ and “1000“ pixels. Pressing the “Reset” button sets a 300-pixel height.
Advanced settings
The Advanced settings include:
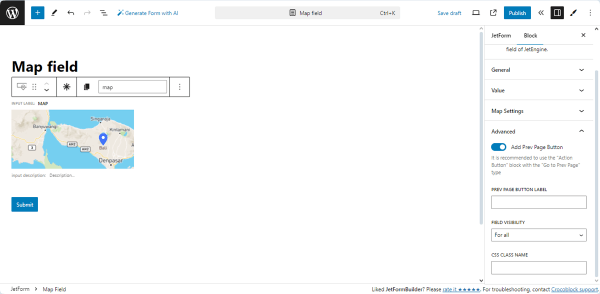
- Add Prev Page Button ㅡ a toggle that, if activated, adds the “Prev Page” button to the form;
- Prev Page Button Label ㅡ a field that allows changing the text to be shown on the “Prev Page” button;
- Field Visibility ㅡ a drop-down list that allows displaying the form for “For all,” Only for logged in users,“ and ”Only for NOT-logged in users”;
- CSS Class Name ㅡ a field for adding the CSS class.
Post Submit Actions
The Map Field block allows storage of the map data inserted on the front end in the WordPress database. In particular, the “Insert/Update Post” Post Submit Action should be added. In this case, the formats of the form Map Field block and the JetEngine’s “Map“ meta field should be of the same type.
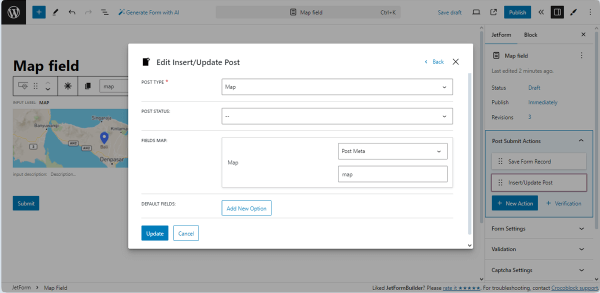
Pressing the “Update“ button saves the changes.
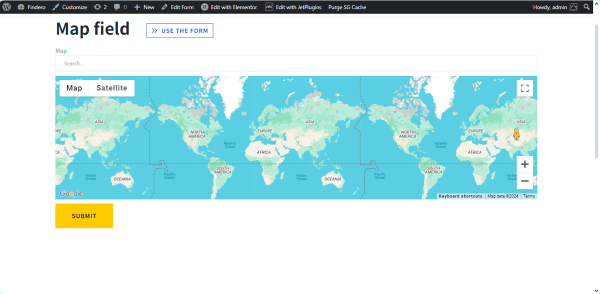
Front End View
On the front end, the Map Field will display two fields: the text field with the “Search” text and the map.
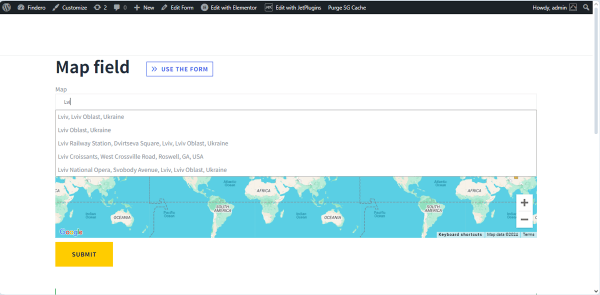
After typing three characters in the text field, the drop-down list will appear.
Once the needed address from the list is picked, the map will show this location.
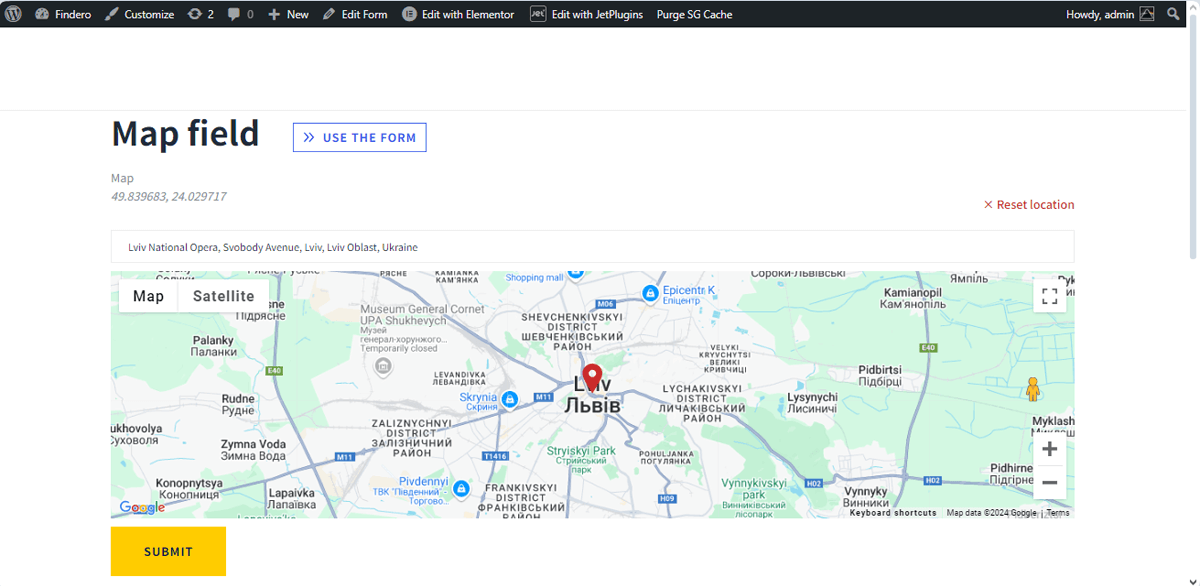
After pressing the “SUBMIT” button, the set address will be added to the specified Custom Post Type.
That’s all about the Map Field block of the JetFormBuilder plugin, which allows one to work with the “Map“ meta field of JetEngine and gives users the ability to select the location on the map.