How to Create a Contact Form with Captcha on WordPress
The contact form lets visitors send messages or inquiries to the website administrator.
Contact forms often use CAPTCHA (Completely Automated Public Turing test to tell Computers and Humans Apart) to prevent automated bots from spamming the form with irrelevant or malicious content. Without CAPTCHA, bots can easily submit large volumes of spam messages, which can overwhelm the recipient’s inbox or database and interfere with legitimate communication.
In this tutorial, we will create a support contact form with hCaptcha, as an example.
The JetFormBuilder plugin also supports ReCaptcha, Turnstile Captcha, and Friendly Captcha.
Contents:
- Register the Captcha Site Key and Secret Key
- Setting Contact Form Fields
- Setting Contact Form Post Submit Actions
- Adjusting Contact Form Captcha Settings
- Placing the Form on the Page
- Checking the Results
Register the Captcha Site Key and Secret Key
First, we proceeded to hcaptcha.com and registered the Site Key and Secret Key as described in the How to Add hCaptcha to a Form tutorial. If you want to add another CAPTCHA type, head to the ReCaptcha, Turnstile Captcha, and Friendly Captcha tutorials.
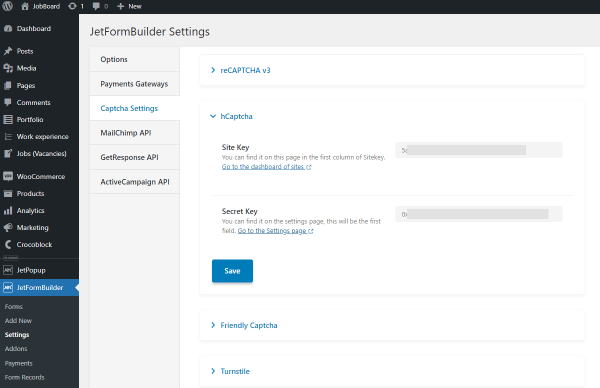
Then, we went to the WordPress Dashboard > JetFormBuilder > Settings > Captcha Settings tab and unfolded the hCaptcha tab, where we entered the Site Key and Secret Key. Here, the keys can be stored and used in numerous forms.
After configuring the settings, we hit the “Save” button.
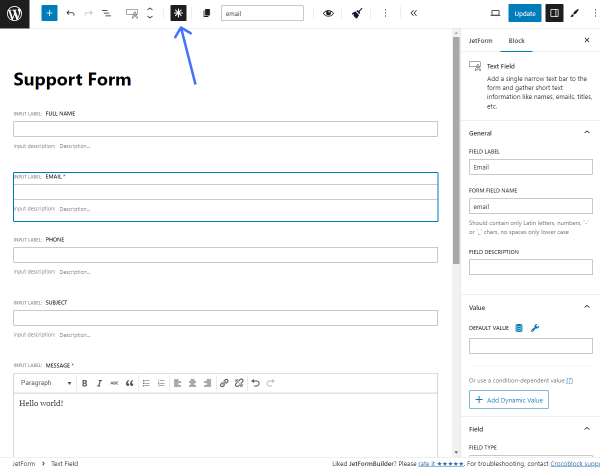
Setting Contact Form Fields
We moved to WordPress Dashboard > JetFormBuilder > Add New to create a new contact form and entered the form title.
The “Contact form” pattern is available in the Welcome block. We used it to create a simple contact form to facilitate the form-crafting process.
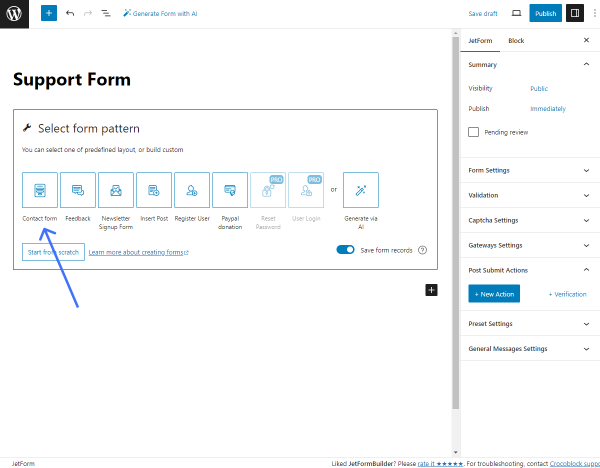
The pattern adds two Text Fields (“Email” and “Subject”), one Wysiwyg Field (“Message”), and an Action Button.
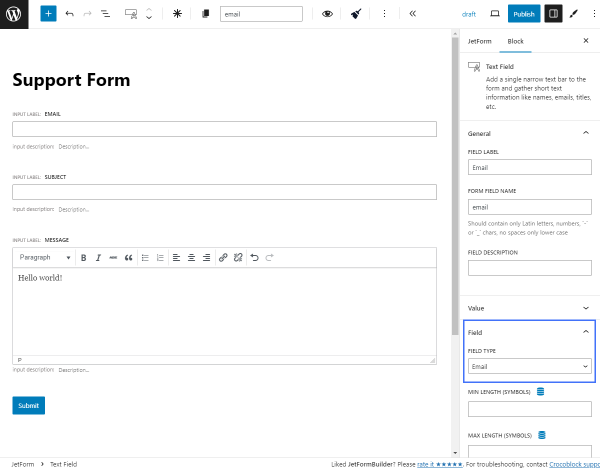
The “Email” Text Field block has the “Email” FIELD TYPE set.
We added two additional Text Fields (“Full name” and “Phone”) and set the FIELD LABEL and FORM FIELD NAME.
For the “Phone” Text Field, we set the “Tel” FIELD TYPE.

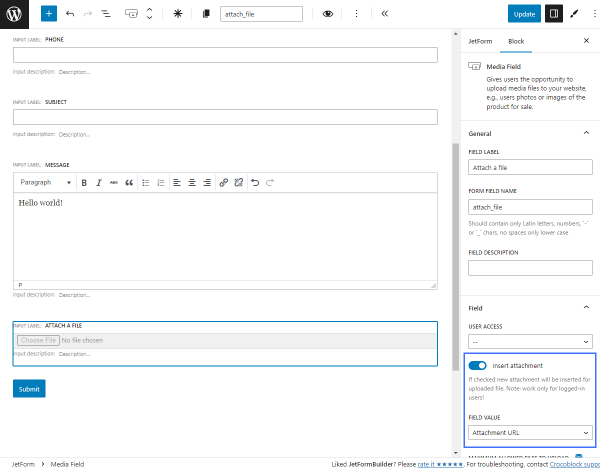
We also added a Media Field block to allow users to attach files to the form.
We set the FIELD LABEL and FORM FIELD NAME and enabled the Insert attachment toggle to attach the file added to the email during the form submission. After that, the FIELD VALUE can be set.
To designate certain form fields as mandatory, the “Required” button can be hit in the settings panel corresponding to the desired field blocks. Required fields will be marked with asterisks next to their labels. Users will be unable to submit the form without completing these mandatory fields.
Setting Contact Form Post Submit Actions
We headed to the JetForm settings tab and unrolled the Post Submit Actions tab. The “Contact Form” pattern added two actions: “Send Email” and “Save Form Record.”
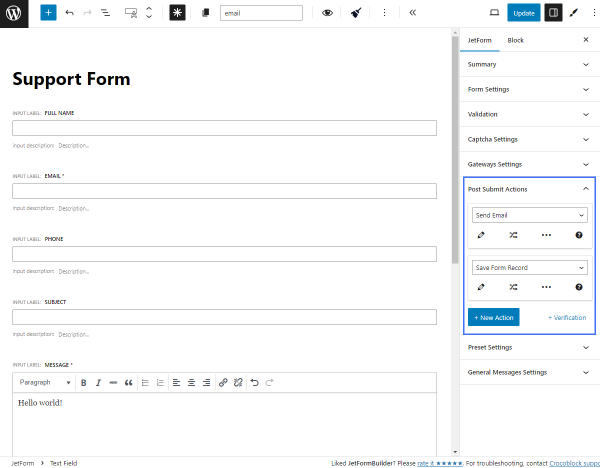
The “Save Form Record” action stores the form entries in the database, which can be accessed from the Form Records Page.
The ”Send Email” action sends a message to the admin or customer email, depending on the settings. To customize the action, we pressed the “pencil” button under it.
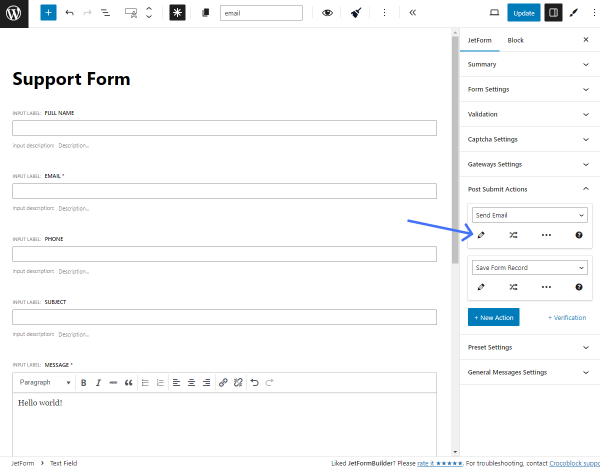
As an example, we adjusted such settings in the Edit Action pop-up:
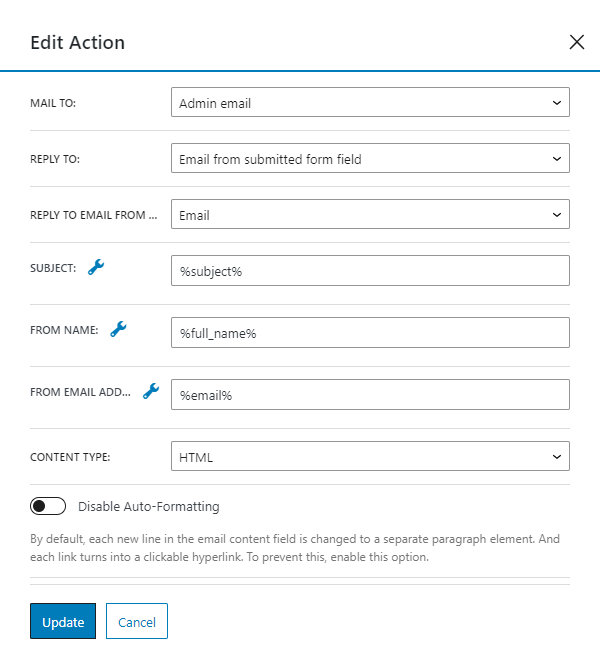
- “Admin email” option for the MAIL TO field to send email with user questions and issues to the email that is mentioned in the admin’s user account;
- “Email from submitted form field” for the REPLY TO field and “Email” form field for REPLY TO EMAIL FROM FIELD accordingly. Here, we configured the settings to send replies to the email address provided by the user in the “Email” Text Field;
- For the SUBJECT field, the ‘%subject%’ macro is set with the FORM FIELD NAME of the “Subject” Text Field. This implies that the text entered by the user in the “Subject” field will be appended to the email Subject bar. The needed macro can be set by clicking the “wrench” icon;
- For the FROM NAME field, the ‘%full_name%’ macro is set with the FORM FIELD NAME of the “Full name” Text Field. This implies that the name entered by the user in the “Full name” field will be appended to the From bar of the letter. The needed macro can be set by hitting the “wrench” icon;
- For the FROM EMAIL ADDRESS field, the ‘%email%’ macro is set with the FORM FIELD NAME of the “Email” Text Field. This indicates that the email entered by the user in the form field will be added as the address of the letter sender. The needed macro can be set by pressing the “wrench” icon;
- “HTML” for the CONTENT TYPE field;
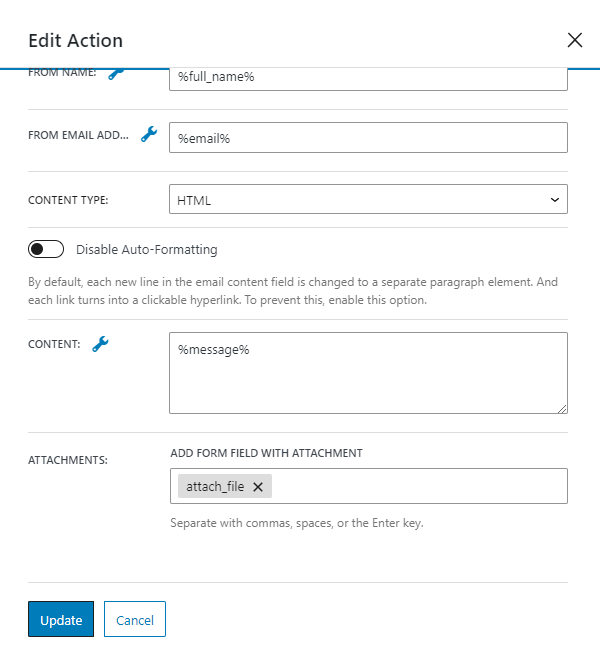
- The ‘%message%’ macro for the CONTENT field to insert text from the “Message” Wysiwyg Field to the email body;
- For the ATTACHMENTS field, we set the Media Field.
When we finished the configuration, we clicked the “Update” button to save the settings and close the pop-up.
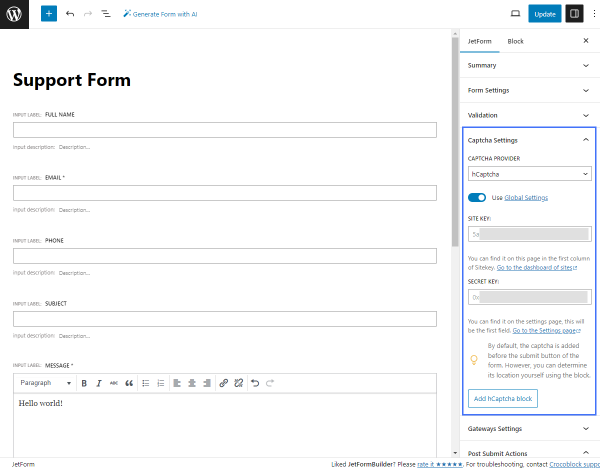
Adjusting Contact Form Captcha Settings
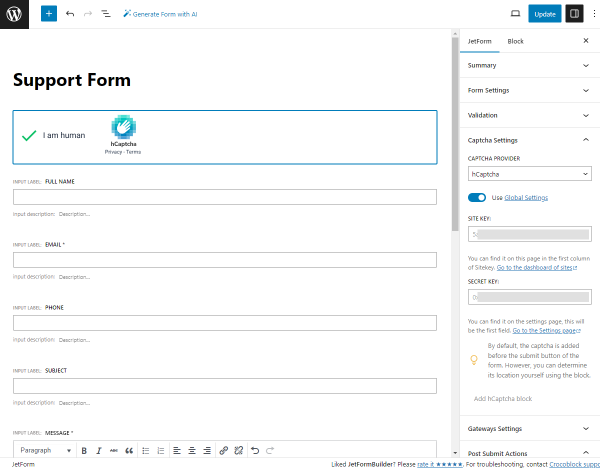
Then, we unrolled Captcha Settings in the JetForm tab, picked the “hCaptcha” option for our case, and enabled the Use Global Settings toggle to pull the SITE KEY and SECRET KEY settings adjusted earlier.
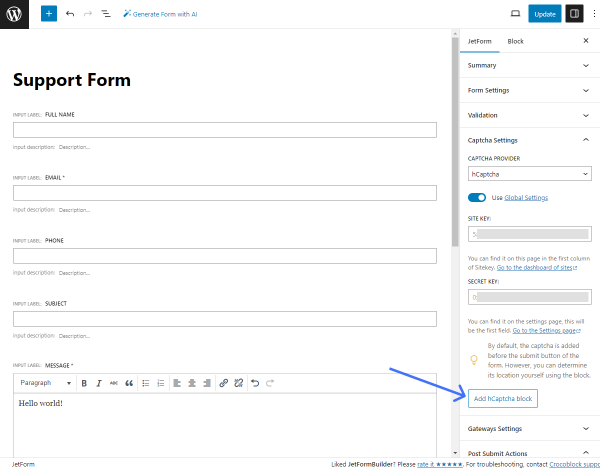
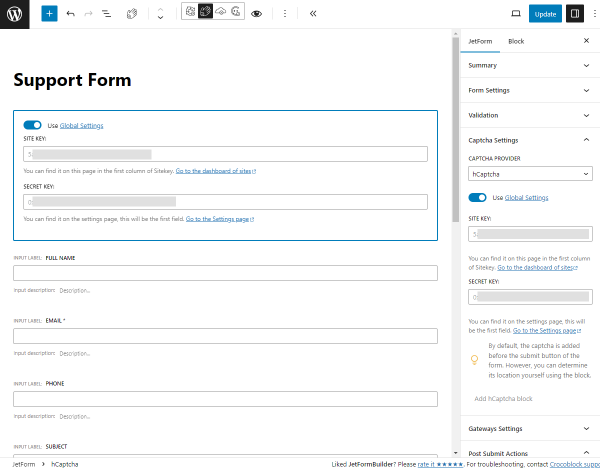
By hitting the “Add hCaptcha” button, we placed the hCaptcha block at the beginning of the form. If we did not add the block, the hCaptcha would be added by default before the “Submit” button.
The block contained the same settings as the JetForm > Captcha Settings tab.
After configuring the Captcha settings, we could preview how the Captcha would appear on the front end when we clicked anywhere else in the form.
After finishing customizing the form, we hit the “Publish/Update” button.
Placing the Form on the Page
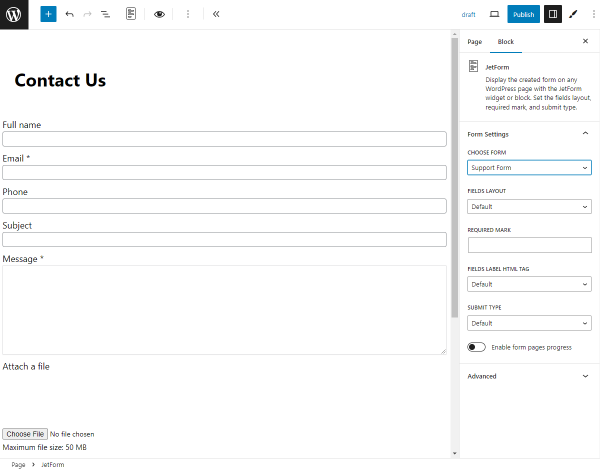
We moved to the WordPress Dashboard > Pages > Add New Page tab to place the form. The page can be edited in Elementor, WordPress block editor, or Bricks.
We drag-n-dropped the JetForm block to the WordPress editing page and chose the created support contact form in the namesake drop-down menu.
Checking the Results
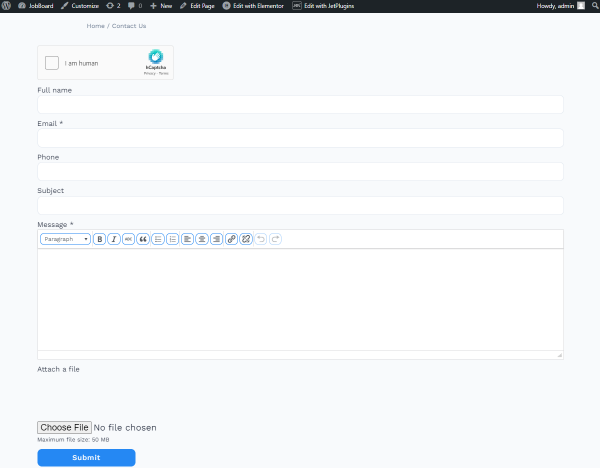
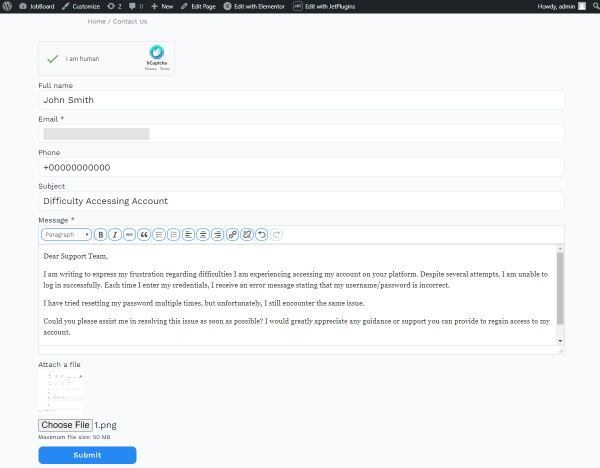
We opened the page on the front end. The hCaptcha verification appeared at the beginning of the form. We started the verification by checking the “I am human” checkbox.
To complete the verification, we needed to complete two simple tasks by indicating objects on the pictures.
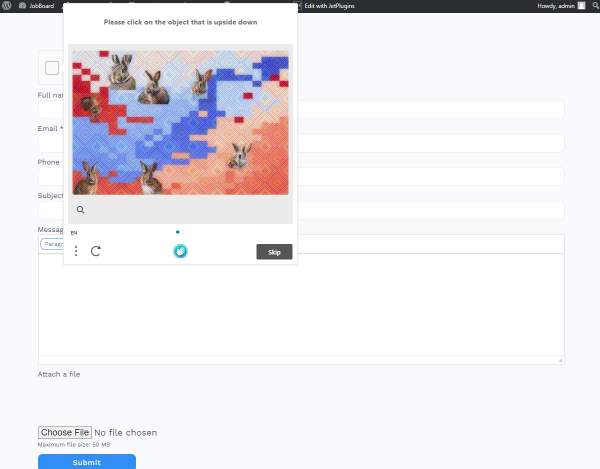
The verification was completed, so we filled in the form fields and clicked the “Submit” button.
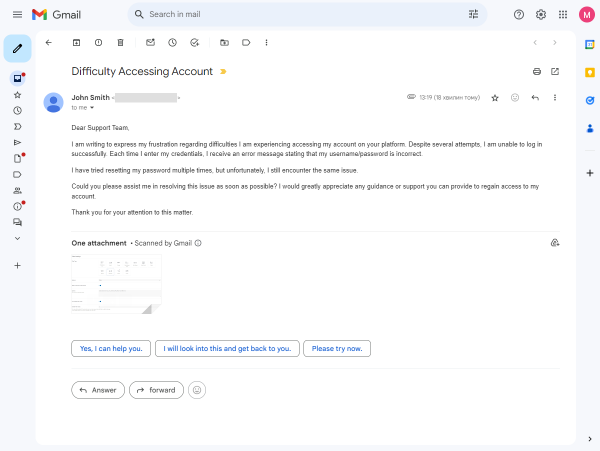
As the website administrator, we received an email with the issue, which contains the information entered into the submitted form fields.
That’s all. With the JetFormBuilder plugin, you can now create a secure contact form with Captcha for your WordPress website.