
Multi-Optional Field Source Settings
The Multi-Optional Field Source is a setting for the Select, Radio, and Checkbox Fields that allows users to choose one or more options from a pre-existing list.
This setting can be used for displaying entered text (“Manual Input” option), meta fields or Custom Post Type (CPT) data to automatically create a list of options (“Posts,” “Terms,” “Users,” “Meta Fields” options), automatically generated data or data taken from the site’s database (“Generate Dynamically” option), taken from the glossaries, and more.
- Manual Input
- Posts
- Terms
- Meta Fields
- Generate Dynamically
- Glossary
- Inserting Data from the Front End
After inserting the Select, Radio, or Checkbox Fields, the settings will be unrolled by default with the “Manual Input” FILL OPTIONS FROM set.
Multi-optional fields allow users to choose one or several options from the ready-made list – Select, Radio, and Checkbox Fields. These three fields have a similar settings window where you can choose the source of the options that will be available to the users.
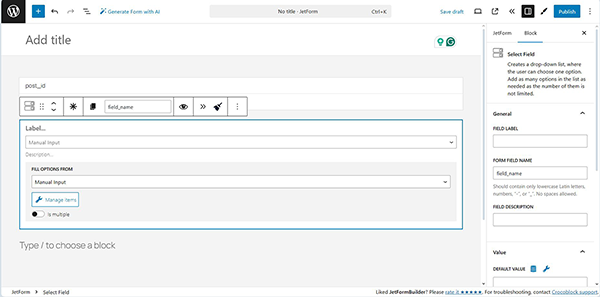
The needed option can be chosen in the FILL OPTIONS FROM drop-down list; other settings depend on the specified option.
In this drop-down menu, you can select the source of the options list. You can add options manually or use the pre-made list from custom meta fields.
Manual Input
Once set, the option allows manual list creation by pressing the “Manage Items” button.
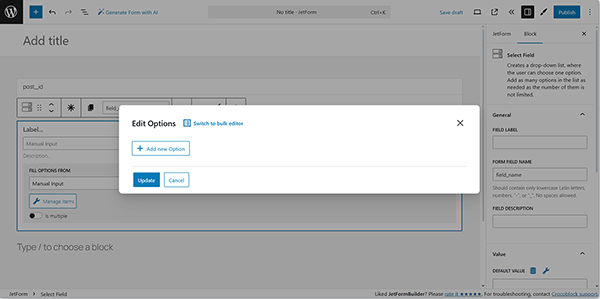
To create a list of options for selection, the “+ Add new Option” button should be hit.
The settings are presented by the following “Clone,” “Delete,” and “Switch to bulk editor” buttons and LABEL, VALUE, and CALCULATE fields:

- LABEL 一 a field to insert the name of the option that users see in the list;
- VALUE 一 a field to insert the inner data, the value that corresponds to the option;
- CALCULATE 一 a value from this bar will be taken to the formula, which is calculated by the Calculated Field.
The “Clone” and “Delete” buttons are placed in the top right corner of the Edit Options pop-up and are intended to make a copy of the created option underneath and delete the item.
Also, pressing the “+ Add new Option” button adds another option to the list.
Clicking the “Switch to bulk editor” button opens the Edit Options pop-up, allowing you to add a list of custom or preset choices in bulk.

The following options are available via the Options preset drop-down list:
- Three simple options 一 an option that allows entering custom options in bulk. After selecting it, the following will be added to the text field below:
“First Option : first_option : 1
Second Option : second_option : 2
Third Option : third_option : 3”
where the “First Option” is a LABEL, the “first_option” is a VALUE, and “1” is the value for the CALCULATE field (if such is needed);
- Days 一 an option that inserts the list of weekday names;
- Months 一 an option that inserts the list of the month names;
- Countries 一 an option that inserts the list of country names.
There is the following link and button at the top and bottom of the pop-up, respectively:
- Switch to manual editor 一 a link that allows return to the manual option input window without saving the bulk options field changes;
- Add to the options 一 a button that adds bulk options to the multi-optional field alongside any manually created options one may already have.

Once done, the “Update” button should be pressed.
The “Manual Input” option is often used in forms that allow selection, such as booking forms. More details on using this option can be found in the How to Add and Use a Repeater Field in the Form tutorial.
Also, look through the How to Create Evaluation Forms in WordPress tutorial to learn how to create a bulk option list manually.
Posts
This type of source extracts data from the post or page’s meta fields to automatically create a list of options. If a CPT is created via plugins like JetEngine or ACF, these posts can also be shown.
The following settings can be configured:
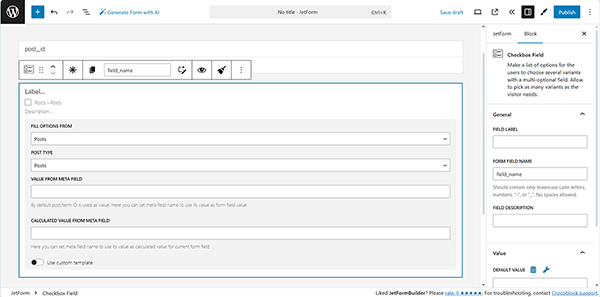
- POST TYPE 一 a drop-down list to select the source for the items (e.g., WordPress Posts, Pages, and Media, or the CPTs if available);
- VALUE FROM META FIELD 一 a field to specify the name of the specific meta field of the CPT from which the value will be pulled (if the meta field is available). In this case, by default, the values of the options will be taken from the post or page IDs;
- CALCULATED VALUE FROM META FIELD 一 a field to specify the name of the Calculated Field in the form to include a value from a specific meta field in the formula;
- Use custom template 一 a toggle that activates the USE CUSTOM TEMPLATE drop-down list to specify the needed custom listing template.
The “Posts” option is often used in forms intended to implement the “Service-Provider” functionality, such as appointment forms. For more details on using this option, refer to the How to Build an Appointment Form tutorial.
Terms
This type of source is intended to build a list from the categories or taxonomies that have already been created. For example, if the WooCommerce plugin is used, a list of product categories can be formed. Also, if the ACF or JetEngine plugins are used and a custom taxonomy is created, it is possible to create a list of content, too.
The following settings are available:

- TAXONOMY 一 a drop-down list to select the type of taxonomy that will be used to create a list. In addition to the default WordPress categories, the tags, navigation menus, link categories, and formats can be selected. The names of the taxonomy items will be used as labels in the list;
- VALUE FROM META FIELD 一 a text field to take the values from a custom meta field added to the taxonomy instead of the default term IDs used as the values for the list items;
- CALCULATED VALUE FROM META FIELD 一 a field to specify the name of the Calculated Field in the form to include a value from a specific meta field in the formula;
- Use custom template 一 a toggle that activates the USE CUSTOM TEMPLATE drop-down list to specify the needed custom listing template.
The “Terms” option is often used in the corresponding fields of forms for registering or using categorized objects. For example, read about applying the “Terms” option for a taxi site in the How to Create a Taxi Booking Form tutorial to learn how to allow choosing categories and display them via the Select Field, and the Insert and Update Term tutorial to know how to manage and display the terms.
Meta Fields
The “Meta Field” option displays the custom meta field data used to create an options list. The information for each post will differ and can be displayed separately from the post’s meta fields, which are created with plugins like JetEngine or ACF.
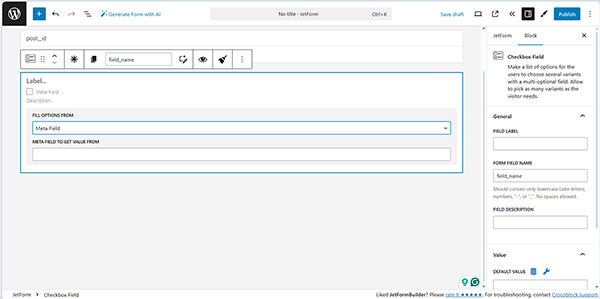
The option’s setting is presented by the META FIELD TO GET THE VALUE FROM bar, which is intended to add the name of the meta field, or meta field values that can also be used as calculated values.
Generate Dynamically
This source option is intended to create two types of dynamically generated lists. In this case, “dynamically generated” means that it is not taken from the meta fields.
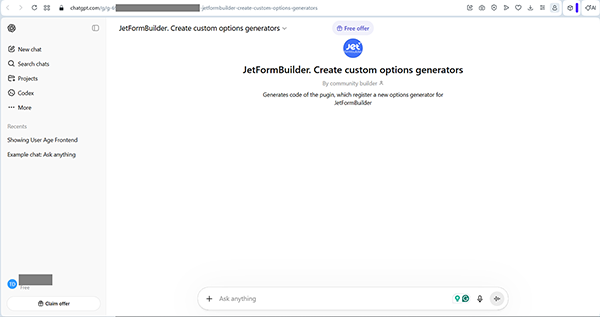
The list is created by one of the generator functions that can be chosen; also, if needed, an AI custom generator can be created.
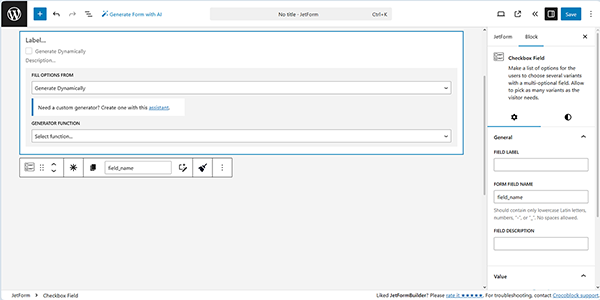
Pressing the “assistant” link below the FILL OPTIONS FROM drop-down list redirects users to chatgpt.com to generate the code of the plugin, which registers a new options generator for JetFormBuilder.
Settings
If the “Generate Dynamically” option is set, the GENERATOR FUNCTION drop-down list will be displayed. This drop-down list is intended to select the rules of the options list generation among the following options.

The first one is the “Numbers range by meta value” GENERATOR FUNCTION option that creates a range of numbers from “1” to the number in the meta field.

If set, it activates:
- META KEY 一 a field to insert the needed maximum number or keep the default “_max_quantity” macro to define it. For example, for a meta field named “Available items,” and for the post where the form is placed, it has a value of “5.” In this case, the “Numbers Range” will create a list containing numbers from “1” to “5;”
- Use custom template 一 a toggle that activates the USE CUSTOM TEMPLATE drop-down list to specify the needed custom listing template.
The second option is the “Numbers range by manual input” GENERATOR FUNCTION option, intended to enter into fields to create a list of numbers. If enabled, it activates:

- META KEY 一 a field to insert the meta key to get values from the “wp_postmeta” table of the WordPress site.
- Enable Auto-Update 一 a toggle that, if enabled, allows automatically refreshing the list of options whenever a selected meta key changes its value. If one option changes, the whole list changes automatically. It works in the following way: users change the value in the watched field, after that JetFormBuilder sends a request to the generator endpoint, next the generator enumerates the options taking into account the context, and, finally, the field receives the updated list. If the Enable Auto-Update toggle is activated, it activates the TRIGGER FIELD drop-down list to specify the form’s field to be used to return one or more user role slugs, for example: administrator, editor, subscriber. The value overrides the static “Filter by Roles” setting above. If the TRIGGER FIELD is empty, the static roles are used. Also, it activates the REFRESH ON BUTTON CLICK drop-down list to specify a button among the form’s buttons that controls this generator, and the CACHE DURATION (SECONDS) field to enter the corresponding value;
- Use custom template 一 a toggle that activates the USE CUSTOM TEMPLATE drop-down list to specify the needed custom template.
The fourth option is the “Get values list from WordPress Users” GENERATOR FUNCTION option 一 an option that allows searching in the User’s data and getting these values. If enabled, the next fields will be added:

- FILTER BY ROLES (OPTIONAL) 一 a menu to select the needed roles to include;
- OPTION VALUE 一 a drop-down list to choose the needed User’s data as “User ID,” “Username (login),” “Email,” and “Nicename (slug)”;
- OPTION LABEL 一 a drop-down list to select the label for the specified OPTION VALUE as “Display Name,” “Username (login),” and “Email”;
- Include Current User 一 a toggle that allows the inclusion of the log-in user in the list;
- ORDER BY 一 a drop-down list to select the field the list should be ordered by. Among available options are: “Display Name,” “Username,” “Registration Date,” and “User ID”. Setting the “-1” option includes all users;
- MAX USERS 一 a field to set the maximum number of users in the list;
- Enable Auto-Update 一 a toggle that, if enabled, allows automatically refreshing the list of options whenever a selected field changes its value. If one option changes, the whole list changes automatically. It works in the following way: users change the value in the watched field, after that JetFormBuilder sends a request to the generator endpoint, next the generator enumerates the options taking into account the context, and, finally, the field receives the updated list. If the Enable Auto-Update toggle is enabled, it activates the TRIGGER FIELD drop-down list to specify the form’s field to be used to return one or more user role slugs, for example: administrator, editor, subscriber. The value overrides the static “Filter by Roles” setting above. If the TRIGGER FIELD is empty, the static roles are used. Also, it activates the REFRESH ON BUTTON CLICK drop-down list to specify a button among the form’s buttons that controls this generator, and the CACHE DURATION (SECONDS) field to enter the corresponding value;
- Use custom template 一 a toggle that activates the USE CUSTOM TEMPLATE drop-down list to specify the needed custom template.
The next option in the GENERATOR FUNCTION drop-down list is the “Get related posts list,” which builds the list based on the related posts. The following fields are activated:

- API Endpoint URL 一 a text field intended for inserting the API Endpoint URL, which must return a JSON array or object. Also, for auto-update, the {field_name} placeholders should be used to inject values from watched fields;
- OPTION VALUE 一 a text field for insertion of a JSON key for option value. The field supports dot notation: “data.id;”
- OPTION LABEL 一 a text field for insertion of the JSON key for the option label. The field supports dot notation: “data.name;”
- ITEMS PATH (OPTIONAL) 一 a text field for a path to the array inside the JSON response. The field should be left empty if the root is already an array;
- REQUEST HEADERS (OPTIONAL) 一 a text field for insertion of a request header. Here, one header per line in format “Header-Name: value” should be inserted;
- REQUEST TIMEOUT (SECONDS) 一 a text field for entering the request timeout in seconds;
- Enable Auto-Update 一 a toggle that, if enabled, allows automatically refreshing the list of options whenever a selected field changes its value. If one option changes, the whole list changes automatically. It works in the following way: users change the value in the watched field; after that, JetFormBuilder sends a request to the generator endpoint; next, the generator enumerates the options taking into account the context; and, finally, the field receives the updated list. If the Enable Auto-Update toggle is enabled, it activates the TRIGGER FIELD drop-down list to specify the form’s field to be used to return one or more user role slugs, for example: administrator, editor, subscriber. The value overrides the static “Filter by Roles” setting above. If the TRIGGER FIELD is empty, the static roles are used. Also, it activates the REFRESH ON BUTTON CLICK drop-down list to specify a button among the form’s buttons that controls this generator, and the CACHE DURATION (SECONDS) field to enter the corresponding value;
- Use custom template 一 a toggle that activates the USE CUSTOM TEMPLATE drop-down list to specify the needed custom template.
The next option of the GENERATOR FUNCTION drop-down list is the Get values list from JetEngine field options, an option that allows adding custom meta fields to posts, terms, or users via the Meta Boxes feature of the JetEngine plugin. In particular, the meta key should be selected from the OPTION NAME bar to get a list from the Meta Box meta fields. Also, the REPLACE SUB FIELD text field is available to insert the corresponding sub field, and the Use custom template 一 a toggle that activates the USE CUSTOM TEMPLATE drop-down list to specify the needed custom listing template.

The last option of the GENERATOR FUNCTION drop-down list is the Get values list from JetEngine Query 一 an option that creates a list of options based on the query results of the custom query built with the Query Builder tool of the JetEngine plugin. This option gets values from any type of custom query (post query, terms query, etc.). For example, a custom query of the Users Query type that filters the list of users by a custom meta field can be used to generate a list of queried users as options for the multi-select fields.
The following fields are available:
- QUERY ID 一 a drop-down to select the needed query to fetch options from. Also, if a Posts Query is used and it is not needed to use a calculated value, only the query ID can be set. An example for the Posts Query may look like this:
47|ID|post_title|post_author
Where “47” 一 the ID of the custom query;
“ID” 一 an option that provides values, in this case, the post ID;
“post_title” 一 an option that provides labels;
“post_author” 一 an option that provides calculated values.
- OPTION VALUE 一 a text field for insertion of an option value (e.g., “ID,” “post_name,” “meta_key”);
- OPTION LABEL 一 a text field for insertion of the option label (e.g., “post_title,” “display_name”);
- CALCULATED FIELD一 an optional field for calculated value (e.g., “price,” “_regular_price”);
- Enable Auto-Update 一 a toggle that, if enabled, allows automatically refreshing the list of options whenever a selected field changes its value. If one option changes, the whole list changes automatically. It works in the following way: users change the value in the watched field, after that JetFormBuilder sends a request to the generator endpoint, next the generator enumerates the options taking into account the context, and, finally, the field receives the updated list. If the Enable Auto-Update toggle is enabled, it activates the TRIGGER FIELD drop-down list to specify the form’s field to be used to return one or more user role slugs, for example: administrator, editor, subscriber. The value overrides the static “Filter by Roles” setting above. If the TRIGGER FIELD is empty, the static roles are used. Also, it activates the REFRESH ON BUTTON CLICK drop-down list to specify a button among the form’s buttons that controls this generator, and the CACHE DURATION (SECONDS) field to enter the corresponding value;
- Use custom template 一 a toggle that activates the USE CUSTOM TEMPLATE drop-down list to specify the needed custom listing template.
The generator takes the parameters obtained via the query. In turn, these parameters can be viewed while editing the query.
Use case
Here, we consider a case of using a query and Post Submit Actions to connect user data with the Custom Post Types via forms. In particular, logged-in users can choose the needed option from a list via forms on the front-end. Since users can have anonymous names, there is a need to establish a backend connection between the users’ data (such as their First Name and Last Name, which should be concatenated) and the selected option.
Additionally, the users should already exist, the necessary data should be added to their profiles, and they should be logged in. Read the How to Create a New User via WordPress Dashboard tutorial for more details. Also, if needed, the required settings can be managed by the User Profile feature of JetEngine.
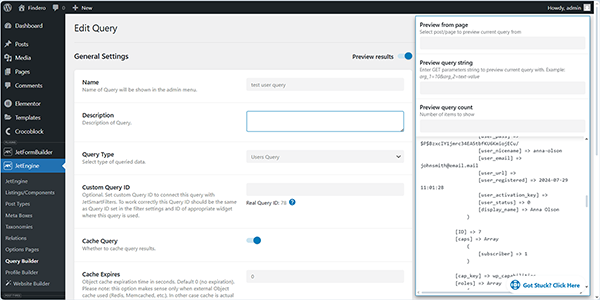
Create a query
Move to the WordPress Dashboard > JetEngine > Query Builder tab and create a user query. Here, we do not configure other settings, but copy the query’s ID (“78”, in this case).
The “Generate Dynamically” option is used, for example, in forms intended to connect user data to Custom Post Types, as described in the How to populate form field with list of users (by user’s role or relation) tutorial.

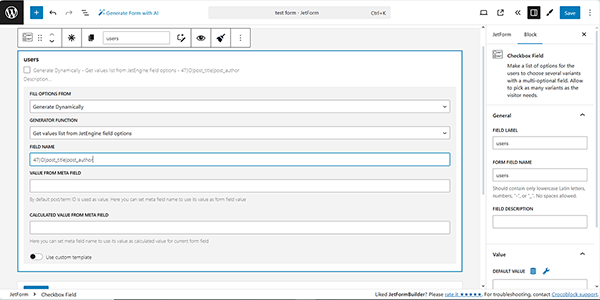
Build and configure a form
Next, create a form and add the needed fields. Since we focus only on the usage of the query as a “Generate Dynamically” option, we do not configure other settings. In this case, one can create a login form or combine registration and login in one form. In the developed form, we divide it into two Columns and insert the Checkbox Field into the left one. Then, we configure the following settings: set the “Generate Dynamically” FILL OPTIONS FROM, “Get values list from JetEngine Query” GENERATOR FUNCTION, and type the following text in the FIELD NAME field: “78|ID|user_login”, where “78” is the created query’s ID.

Once completed, set the Post Submit Action settings. Here, we set the “Insert/Update Post” Post Submit Action to capture students’ full names who want to take a specific course and save the corresponding data in the CPT posts.

Also, the “Update User” Post Submit Action can be added to the form.
Finally, save the form.
Test the flow
Insert the form into a page using the JetForm widget/block/element. Then, save the page and move to the front-end to observe the list of students and courses available. Here, the logged-in users can select their name and the needed courses.

Here, tick the user’s full name and the corresponding course to be saved.
Glossary
The JetEngine Glossary feature creates a list of options and can be used for different custom meta fields and form fields.
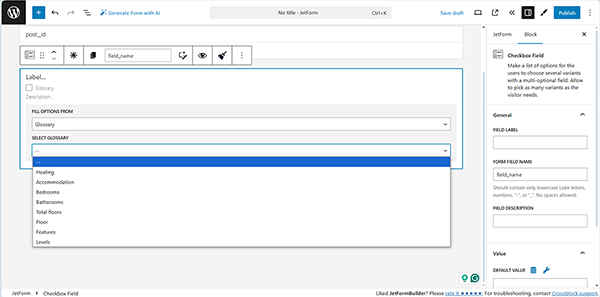
The settings are presented in the SELECT GLOSSARY drop-down list, which allows you to select the required glossary.
More details on adding, configuring, and using glossaries can be found in the How to Add Glossary to Form Fields and How to Import Glossary from the File tutorials. Also, watch the How to work with JetEngine Glossaries video to learn how to display glossaries on the front-end and more.
Inserting Data from the Front End
The “Enable custom option” is available only for the Radio and Checkbox Fields. It allows users to add custom options on the front end. To activate this feature, the “Enable custom option” button should be pressed.
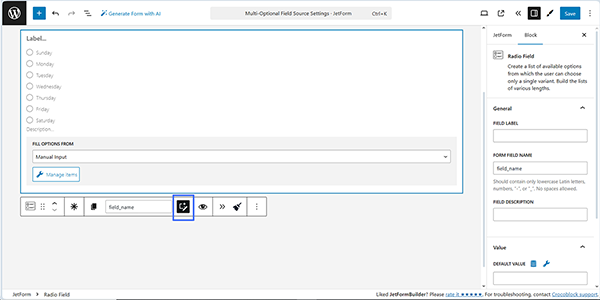
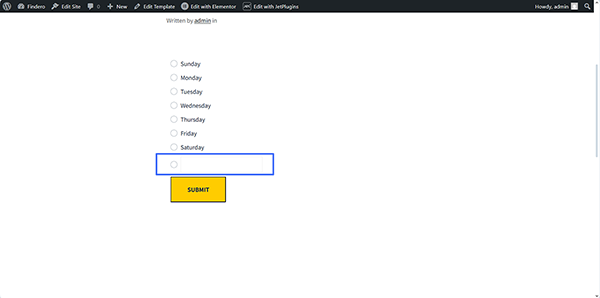
For the Radio Field, the input field will be added on the front-end as one of the options.
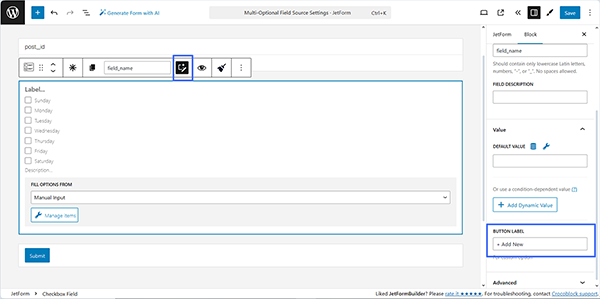
For the Checkbox Field, the “+ Add New” button appears on the front end to add a custom option to the list. Also, the BUTTON LABEL field to customize the corresponding text will be added to the Checkbox Field Block settings on the Value tab.
That’s all about configuring the Multi-Optional Field Source settings of the Select, Radio, and Checkbox Fields of the JetFormBuilder plugin for WordPress to display data entered manually, automatically generated, and from meta fields.