How to Display Different Field Types in the Listings for Form Records Query
This tutorial dives into creating a custom query for the JetFormBuilder Records source using the Query Builder module of the JetEngine plugin. You will learn how to show values from different field types using dynamic widgets and shortcodes.
- Add JetFormBuilder Form
- Build JetFormBuilder Records Query
- Create Listing for JetFormBuilder Records Query
Add JetFormBuilder Form
Let us start with creating a form in the JetFormBuilder directory. To do so, proceed to WordPress Dashboard > JetFormBuilder > Add New.
For instance, we have added the following fields to the form: Text Field, Checkbox Field, Media Field, Select Field, and Date Field.
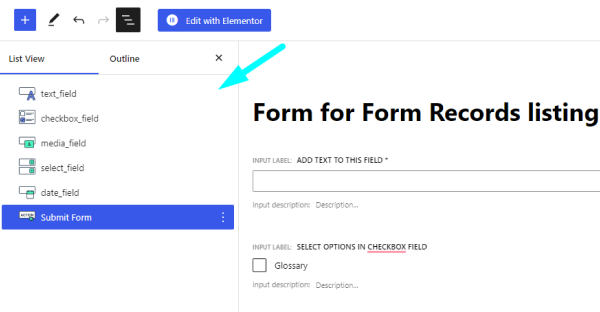
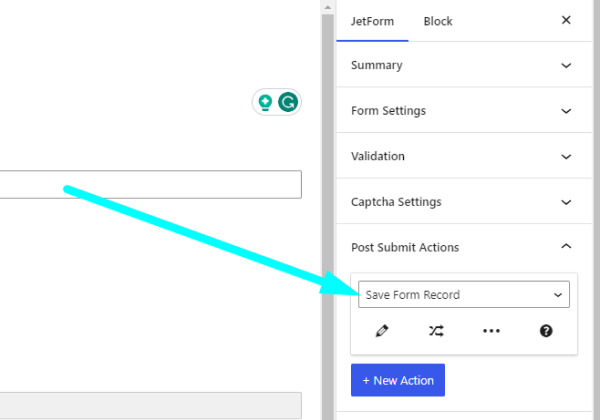
In the Post Submit Actions tab, you need to add the “Save Form Record” action to make sure the submitted values are saved in the Form Records.
Once the form is created, press the “Publish” button. Then the form should be added to the page and submitted to create a Form Record, which will be displayed on the front end later.
Build JetFormBuilder Records Query
Now proceed to WordPress Dashboard > JetEngine > Query Builder to create a custom query for JetFormBuilder Form Records.
Hit the “Add New” button to build a query.
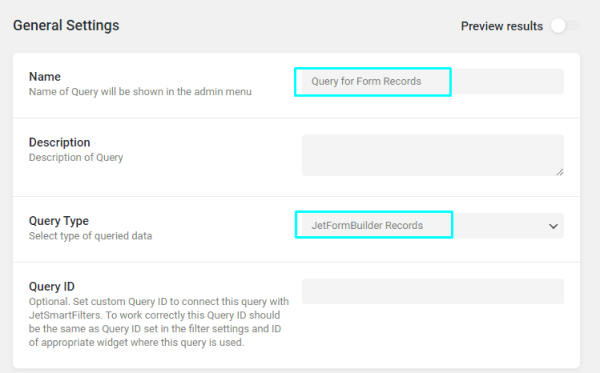
In the General Settings section, complete the Name field and choose the “JetFormBuilder Records” option as Query Type.
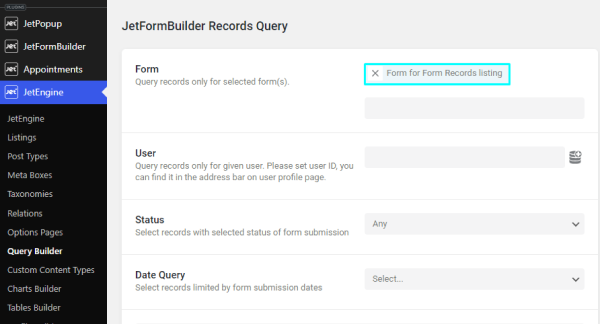
In the JetFormBuilder Records Query, you need to select a Form to query its records. Feel free to add any other settings to the query if needed.
The query is completed. Now it can be saved by hitting the “Add Query” button.
Create Listing for JetFormBuilder Records Query
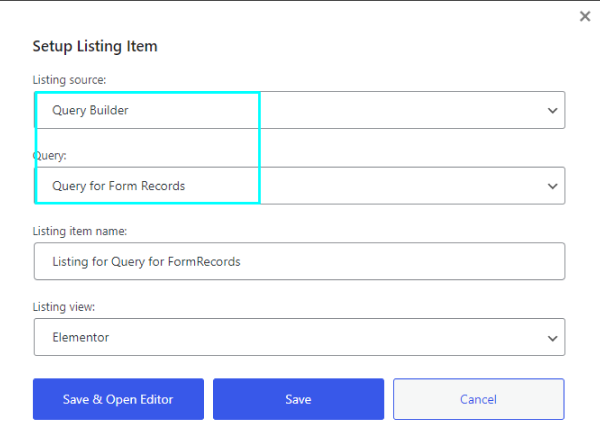
At this point, we can create a Listing template for the custom query in WordPress Dashboard > JetEngine > Listings. Select “Query Builder” as a Listing source, and pick the custom “Query for Form Records” that has just been created.
In the listing template, you can display the values from fields using dynamic widgets like Dynamic Field, Dynamic Image, etc. In the case of Form Records, some values from the fields can be shown using just dynamic widgets, but some can not, which is why we will explore how shortcodes can help in this situation.
To understand better why dynamic widgets like Dynamic Field do not cover this request completely, let us turn to Query Builder again.
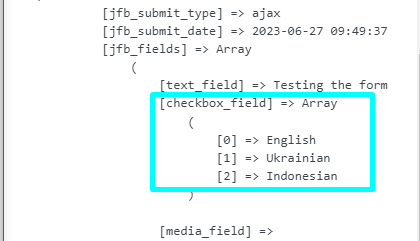
If you enable the Preview results toggle in the custom query, you can see that the fields of the form are saved in the ‘jfb_fields’ property as an array. It means a “Get child element from object/array” Callback is needed to get to the values of these fields.

In the case of the ‘checkbox_field’ field, a second additional callback needs to be applied to output the options from its array as well.
The Dynamic Field widget does not have the opportunity to add multiple callbacks, but the shortcodes can handle them.
Output field types in the listing template
Let’s get back to the listing template.
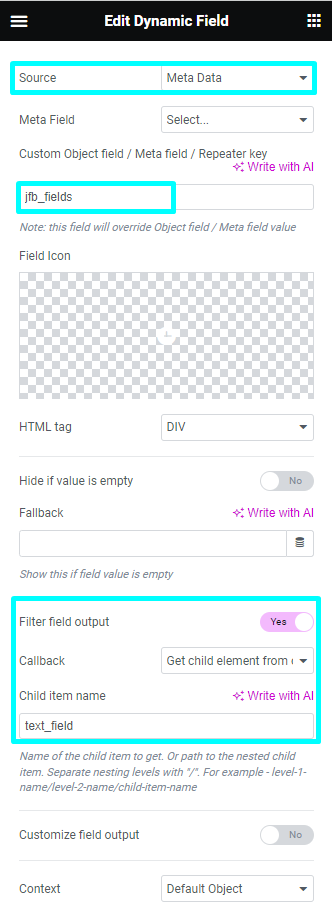
The first field to show is ‘text_field.’ This field has a string value, which is why the “Get child element from object/array” Callback is enough to show its value using the Dynamic Field widget.
Proceed with the ‘checkbox_field’ field. As was stated earlier, it has an array as its value, so another callback is needed to show values from the array.
This is when the Shortcode Generator of the JetEngine needs to be used.
Use shortcode generator
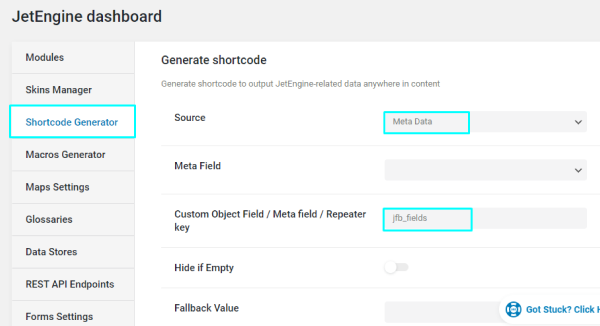
In the WordPress Dashboard > JetEngine directory, you can see a Shortcode Generator tab, where the shortcodes can be created.
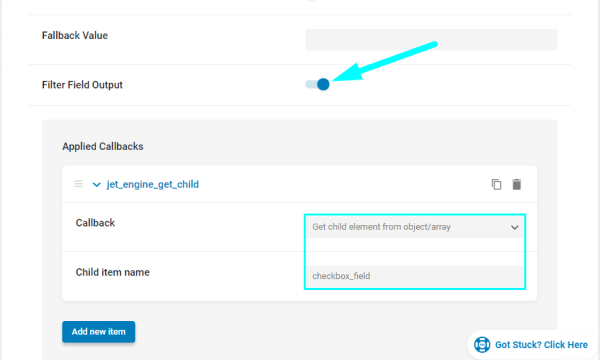
Firstly, select a “Meta Data” Source, and insert the name of the field from which the values need to be pulled in the Custom Object Field / Meta field / Repeater key field; it is ‘jfb_fields.’
Now switch on the Filter Field Output toggle, and add the first “Get child element from object/array” Callback. This callback lets us get to the values of the Checkbox Field.
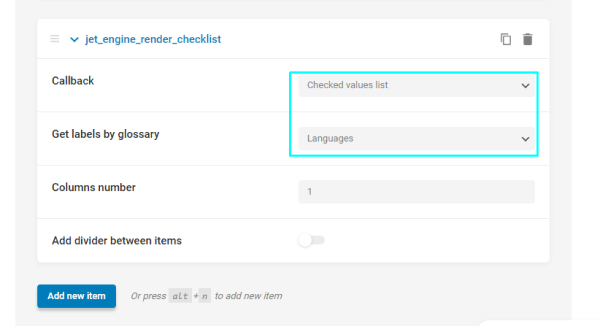
But the values of the Checkbox Field are in the format of the array. This is why another callback is required to show the values in a more presentable format.
Therefore, we need to add another “Checked values list” Callback. In this callback, we selected a glossary because the options in the Checkbox Field in the form were added by the glossary source.
The shortcode is ready now, so you can copy it from the bottom of the page by clicking the corresponding icon.
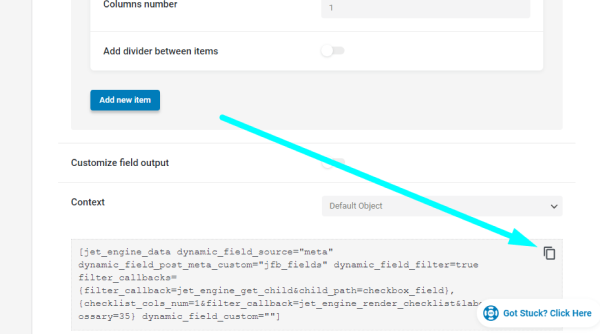
In the Listing template, the shortcode can be displayed using the Shortcode widget or Shortcode block if a listing is created in the Gutenberg editor.

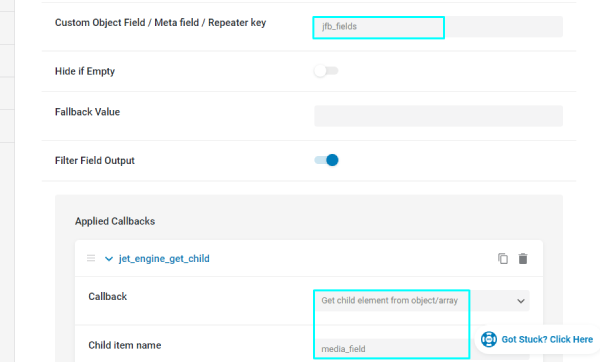
Lastly, display an image from the ‘media_field’ field.
This media field has a URL as a value and, therefore, requires a “Get child element from object/array” Callback.
Also, the Customize field output toggle should be activated with the <img src=’%s’> Field format completed that can show an image by its link.

After copying the shortcode, you can insert it into the Shortcode widget or block.
By the way, these settings can also be created in the Dynamic Field widget.

The listing template is completed. Press the “Publish/Update” button.
You can now display it using the Listing Grid widget on the needed page.
Check the result; now Listing Grid shows the record from the JetFormBuilder Form Records.
Now you know how to create a custom Form Records Query and display JetFormBuilder Form Records in the JetEngine Listing template.