How to Store PayPal Payments from WordPress Form?
One of the most prominent JetFormBuilder features is the ability to receive PayPal payments just with the help of the correctly adjusted form. So let’s discover how you can set the needed form and keep all payments in a well-organized database table.
Build a WordPress Form
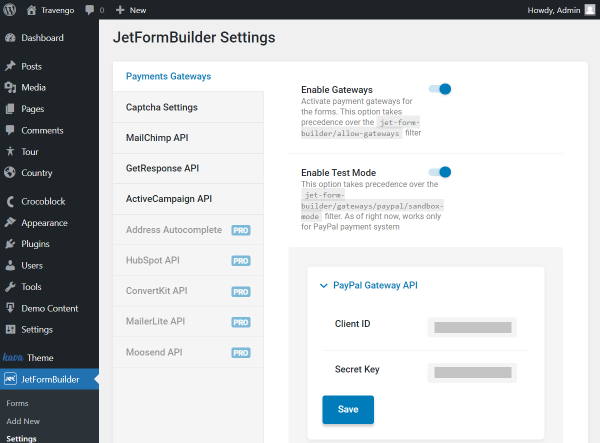
Initially, let’s check the Payments Gateways settings by navigating to WordPress Dashboard > JetFormBuilder > Settings.
Here you can activate the Enable Gateways toggle to have the possibility to work with payments. Enable Test Mode is another available toggle that can be activated to test the payment system.
The following PayPal Gateway API section includes two Client ID and Secret Key fields, which should be completed with the corresponding data from your PayPal account.
Press the “Save” button after all the fields have been filled in.
Go to WordPress Dashboard > JetFormBuilder > Forms and press the “Add New” button to build a form from the ground up.
Hover over the desired item to edit the existing form.
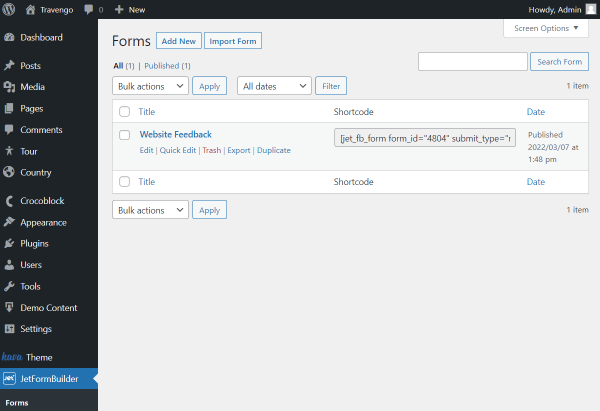
Adjust all the needed fields in the form. For instance, we use the Booking Form pattern that perfectly meets our needs. If you need to build a booking form with the payments from scratch, refer to our How to Create a Booking Form guide.
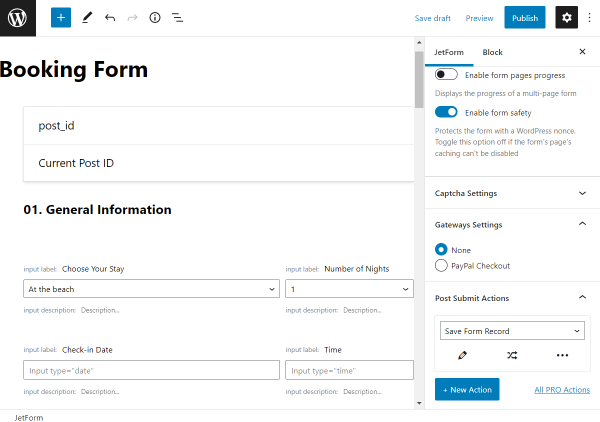
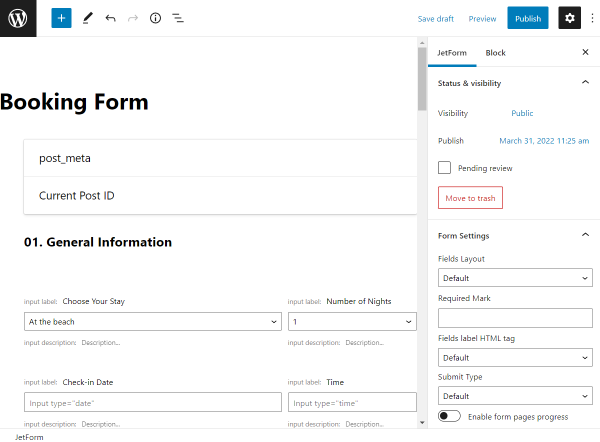
Except for the form fields, we need to work on the form’s settings. So open the JetForm tab and scroll down to the Post Submit Actions section. Add some actions to the form by clicking the “New Action” button.
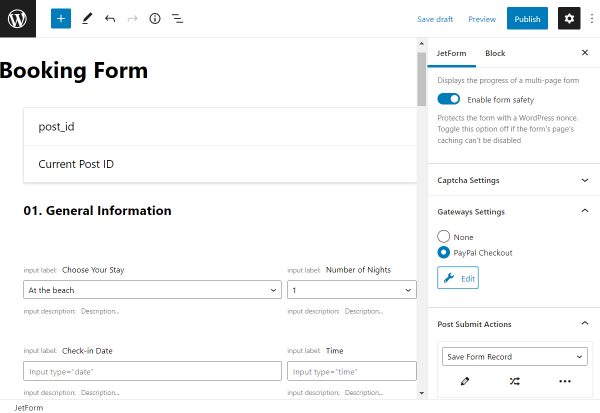
Go to the Gateways Settings section that precedes Post Submit Actions.
Here we pick the “PayPal Checkout” option and press the “Edit” button.
Now let’s find out about all the fields we need to complete in the PayPal Checkout Settings.
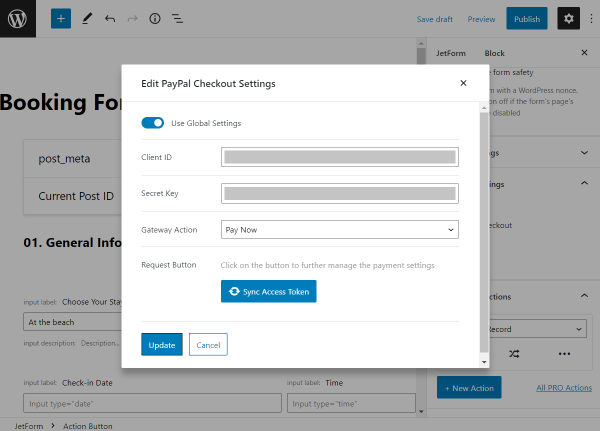
- Use Global Settings — toggle it on to pull out the Client ID and Secret Key if you have entered this information in the JetFormBuilder > Settings > Payments Gateways directory;
- Client ID — complete this field with the Client ID that you can find in your PayPal account;
- Secret Key — fill in the Secret Key attached to your PayPal account;
- Gateway Action — select the scenario that will be performed once the form is submitted;
- Request Button — push the “Sync Access Token” button to synchronize the data and proceed to the additional customization fields;
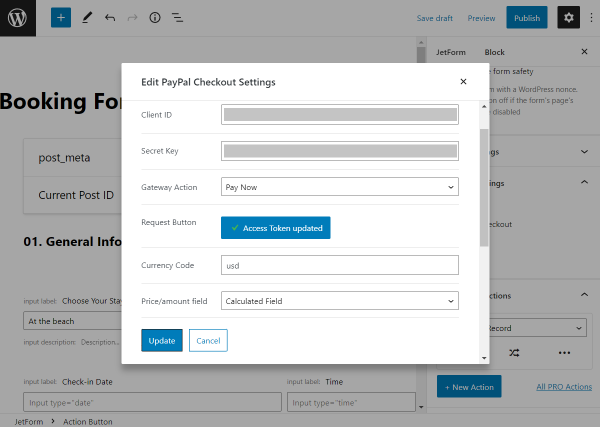
- Currency Code — add the needed global currency code;
- Price/amount field — select one of the form fields representing the final price for the rendered service.
Look at the Available macros list; you can select one of the presented options and paste them into the following fields.
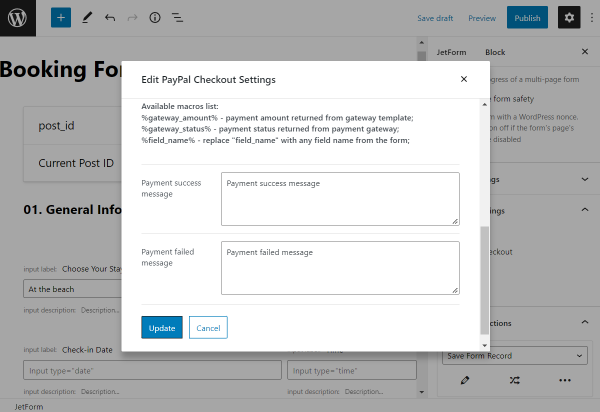
- Payment success message — complete the field with the text that will be shown once the user makes a payment;
- Payment failed message — fill in a similar field. However, now it is meant for the unsuccessful payment.
Push the “Update” button to save all the completed data and the “Publish/Update” one on the top of the form to publish the final result.
Add the Form to a Page
Now decide where you want to place the newly built form. In the described case, we will put the form in a pop-up that will be triggered once the button on the single page is clicked. But don’t forget that you can place the form on the various pages.
So, we navigate to WordPress Dashboard > JetPopup > All popups. Here, we can edit the existing pop-up or build a new one by pressing “Create New Popup.”
In the firstly appeared window, we select the layout preset of the pop-up.
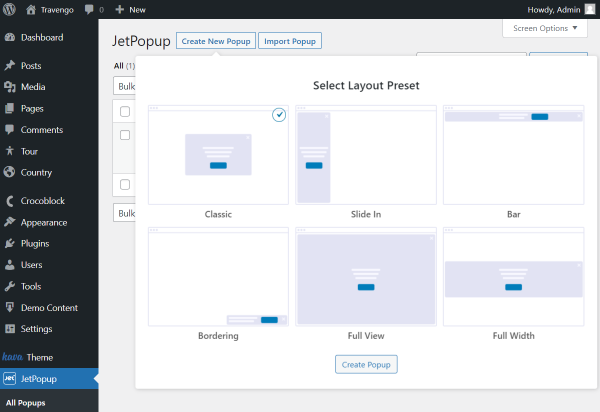
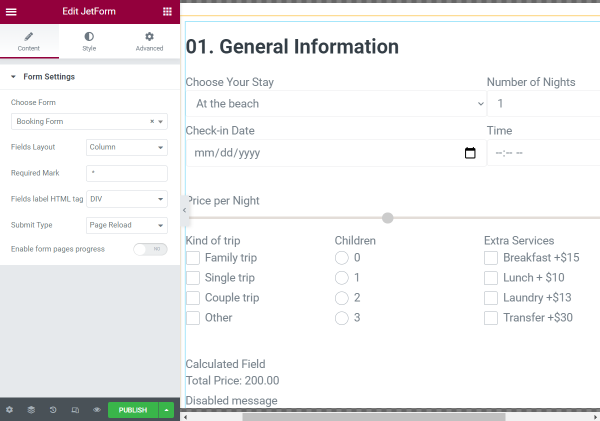
Then click the “Create Popup” button, and, right in the editor, look for the JetForm widget. Select the form you have just created in the Choose Form field, and adjust the other settings if needed.
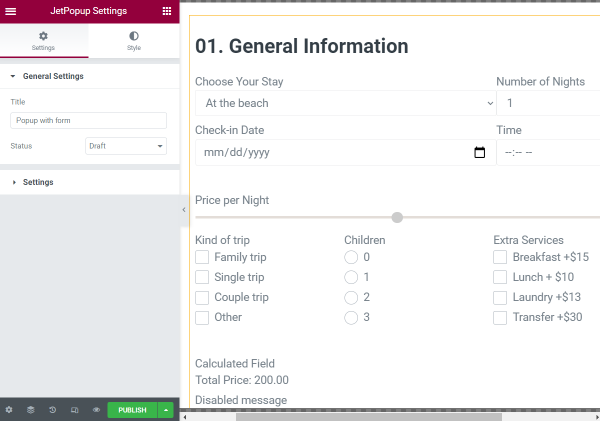
Also, we press the gear-shaped button to change the popup name in the Title field of the General Settings.
Press the “Publish/Update” button after all the customizations have been made.
Continue by following the WordPress Dashboard > Crocoblock > Theme Templates pathway and open the Single page editor.
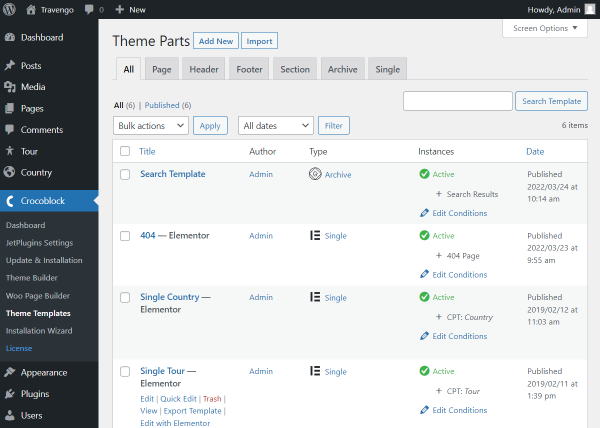
Here, place a Button, set and style it, and open the Advanced tab. Find the JetPopup section and choose the created pop-up in the Attached Popup field.
Complete the following fields, and now you are free to push the “Update” button whenever you are satisfied with the result.

Complete the Form
As we work with tours, we head to the specific tour page. If you have placed the form on the other page, open this page on the front end.
As you can see, the page looks right as we adjusted. Press the button which triggers the popup with the form.

And the form is now shown in the popup. Complete the fields and press the button you have set as a submit one.
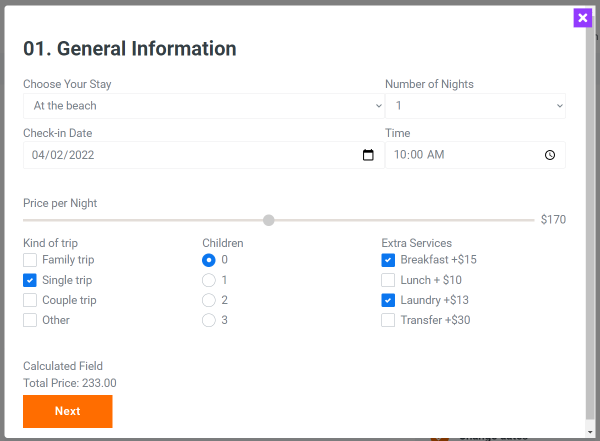
Yet, if all the obligatory fields are completed correctly, the submitted form will redirect you to the PayPal payment page.
Here the user can fill in all the details needed for successful payment.

Check the Payment
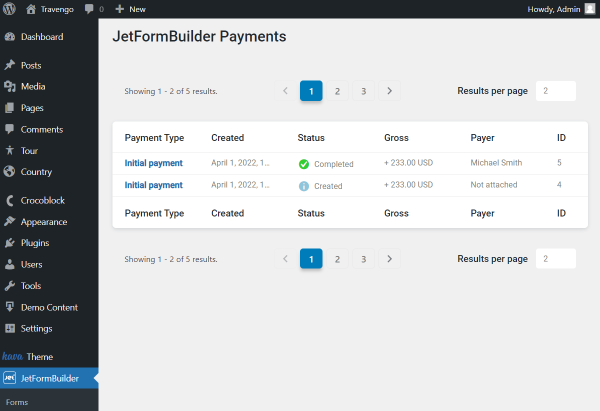
For now, if the user is still completing the required data, you can already see the order by going to WordPress Dashboard > JetFormBuilder > Payments.
The unfinished payment is now marked as “Created” and “Not attached.” The same situation will appear if the user closes the payment window.
Though, if the user completes a payment form successfully, the payment changes its status to “Completed” and gets a Payer.
You can also see the payment creation date in the Created tab, the total amount in the Gross tab, and the payment ID.
Switch pages with the help of pagination and set the desired amount of the Results per page.
Press the item’s title in the Payment type column to see the payment details.
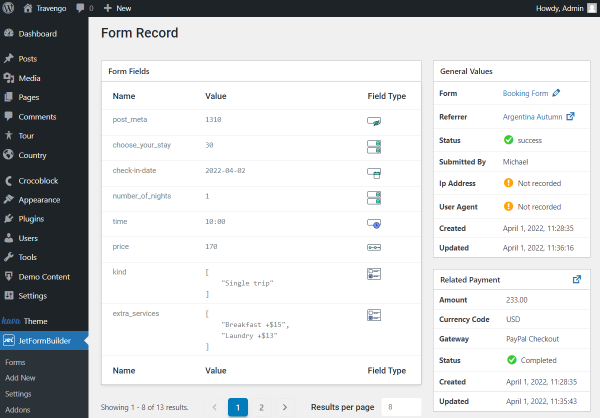
Now all the needed information is shown in the database table.
Pay attention that Ip Address and User Agent are set as “Not recorded.” It is caused by the disabled “Store the IP address and other request headers” toggle in the Save Form Record post-submit action editor.

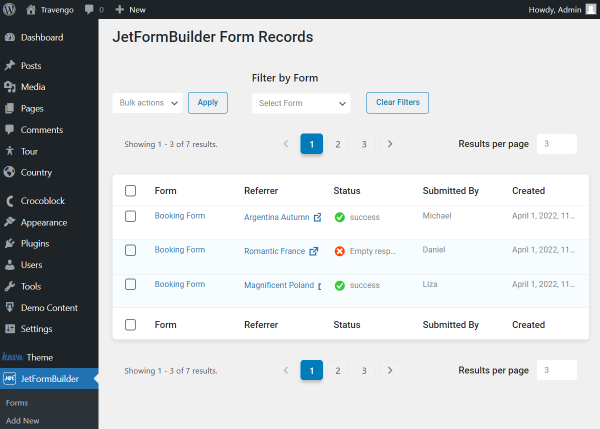
Moreover, we can head to the WordPress Dashboard > JetFormBuilder > Form Records to see more information regarding the completed form.
As you can see, the first form was created by the same author as the payment, so let’s check the additional information by pressing the title in the Form column.
Here you can see the data about the completed form in the Form Fields, General Values, and Related Payment fields.
Now you know how to adjust the form with the convenient PayPal payment and store all the financial data in one systemized WordPress database table.