How to Add Countries to the Form Using Bulk Add
Select, Radio, and Checkbox Fields are the multi-optional form fields that allow users to select one or more options. Using different field sources, you can add options manually or use the pre-made lists.
This tutorial describes how to add country, month, and weekday names to the form using the bulk add feature.
As an example, we added the Select Field with the county list to the Application form.
Keep in mind that all the following steps are the illustration of how the feature works, and you can create an entirely different form with other fields and submit actions that suit your needs.
Contents
Form Creation
Adding a pattern
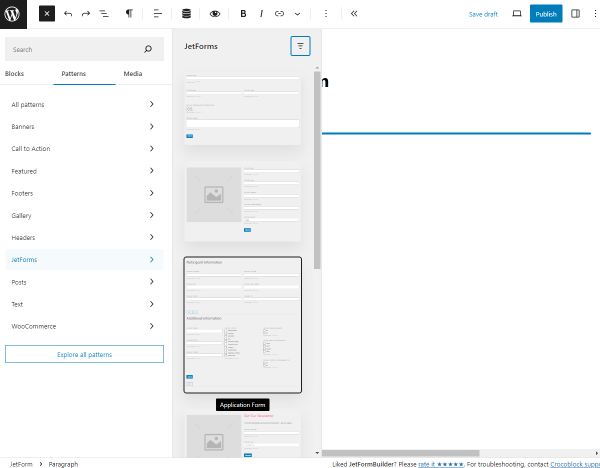
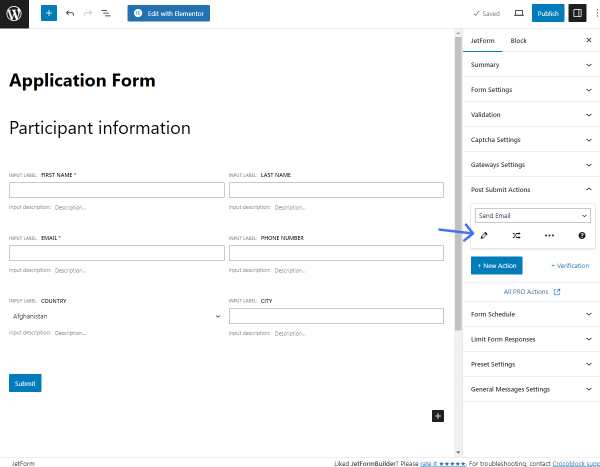
To create the form, we proceeded to the JetFormBuilder > Add New tab and got to the form editing page. We deleted all fields since we added new ones via the pattern.
We gave a title to the form, hit the “+” button, moved to the Patterns > JetForms tab, and picked the Application Form pattern.
Adding country list via the bulk-add feature
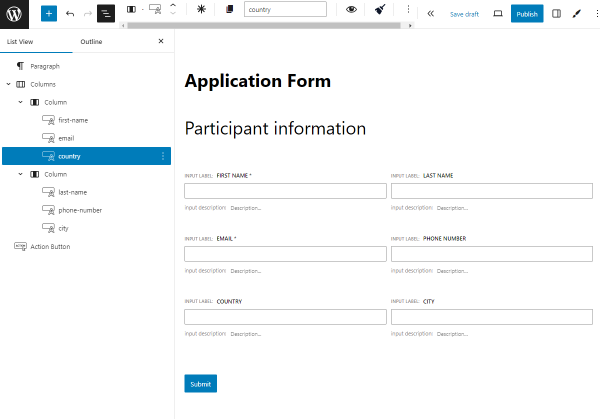
The pattern contained the “country” Text field.
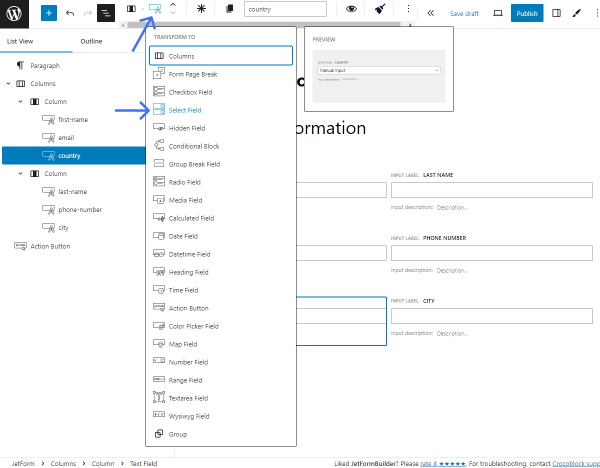
We selected this field, hit the “Text Field” icon, and changed the field type to the “Select Field.”
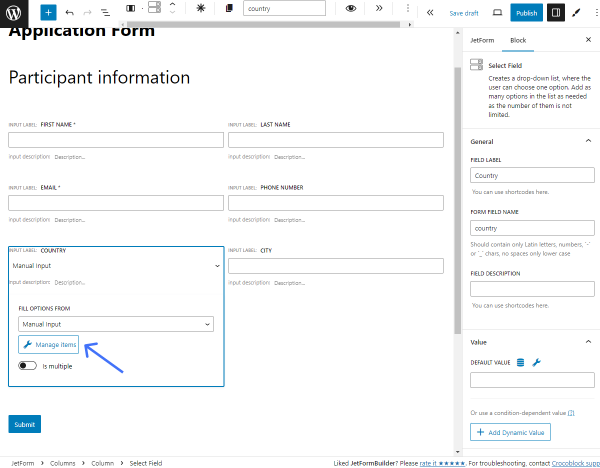
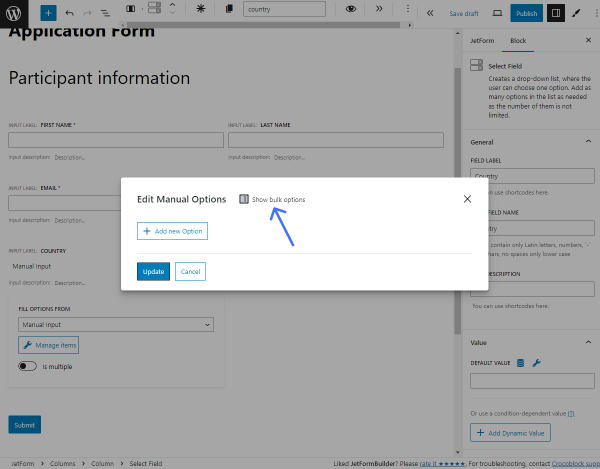
Then, we left the “Manual Input” option in the FILL OPTIONS FROM field and hit the “Manage Items” button.
We hit the “Show bulk options” button in the Edit Manual Options pop-up.
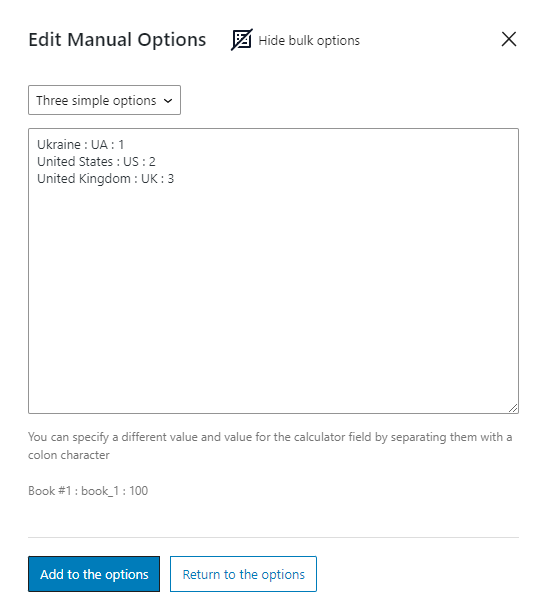
Afterward, we selected the “Countries” option in a drop-down list. Besides that, you can also pick the “Three simple options,” “Days,” and “Months” variants.
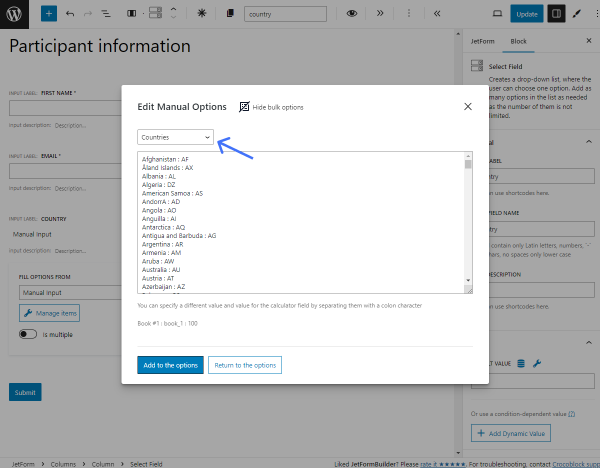
Items in the list were displayed in such a way:
label : value
If you display the selected results in an email or meta field, the value will be shown (e.g., AF) instead of the label (e.g., Afghanistan). So, we edited the values to be the same as the labels. For example:
Afghanistan : Afghanistan
You can use any text editor to do this quickly.

Also, be aware that you can input data in the JSON format, for example:
[
{
"label": "Ukraine",
"value": "UA",
"calculate": 1
},
{
"label": "United States",
"value": "US",
"calculate": 2
},
{
"label": "United Kingdom",
"value": "UK",
"calculate": 3
}
]
In the textarea, it’s automatically converted into the proper format:
Ukraine : UA : 1
United States : US : 2
United Kingdom : UK : 3
The third component of every line in this format is the value for the calculated field.
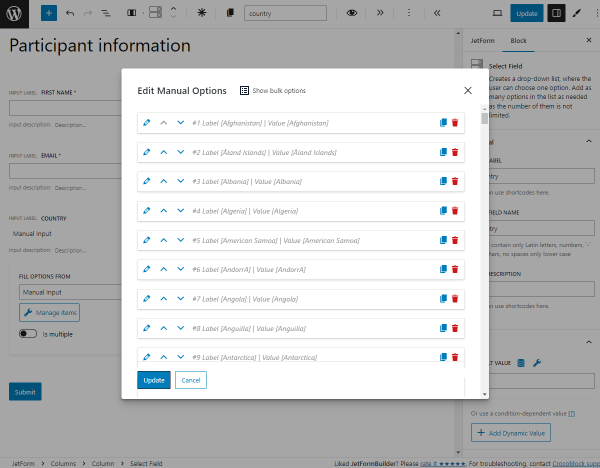
For our case, we created the option list in the “Afghanistan : Afghanistan” format and pushed the “Add to the options” button.
We hit the “Update” button to save the list of the countries.
Setting a post-submit action
Next, we proceeded to the JetForm > Post Submit Actions tab, ensured the “Send Email” action was selected, and hit the “pencil” button.
In the Edit Action pop-up, we set the “Admin email” option in the MAIL TO field.
In the REPLY TO field, we selected the “Email from submitted form field” variant, and from the REPLY TO EMAIL FROM FIELD drop-down menu, we picked the “Email” form field where a user will enter their email address. With such settings, a user would receive the answer on the email they indicated in the form.
The SUBJECT field defines what text will be displayed in the Subject bar of the received email. It can be plain text where you can also put values from the fields of the submitted form by clicking the “wrench” icon and selecting macros. We changed the text in this field to “New application.”
The FROM NAME field signifies what will be shown in the From bar of the letter. We entered the %first-name% and %last-name% macros to include the sender’s name.
The FROM EMAIL ADDRESS field specifies the email address that will serve as the sender’s in the letter. We entered the %email% macro here.
From the CONTENT TYPE drop-down menu, you can choose if the message will be “Plain Text” or an “HTML” code. We picked the “Plain text” option.
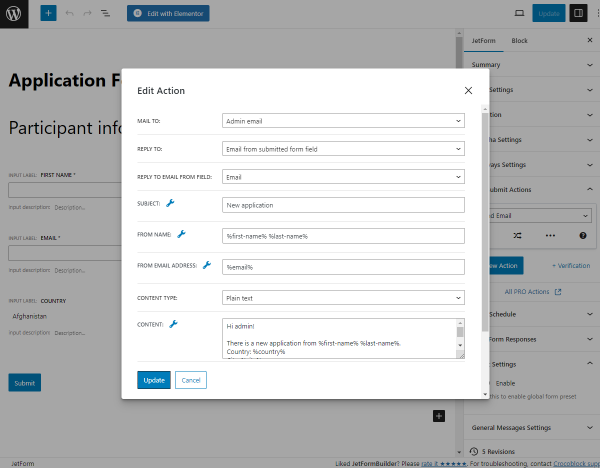
The CONTEXT is the body of the message. Insert the text or HTML code into this text area. Additionally, you can insert values from the fields of the submitted form by clicking the wrench-shaped icon and selecting macros. We set such a text with inserted macros:
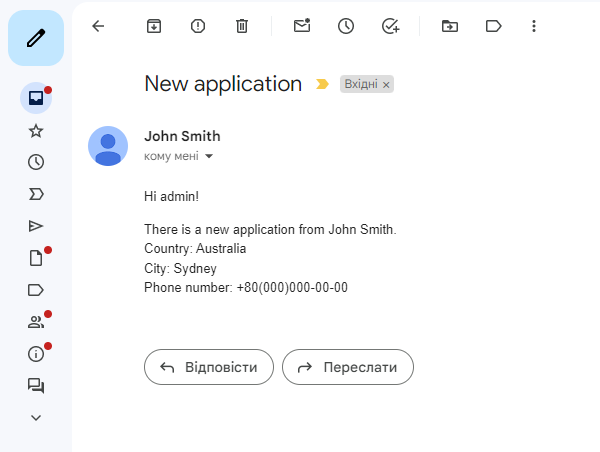
Hi admin!

There is a new application from %first-name% %last-name%.
Country: %country%
City: %city%
Phone number: %phone-number%
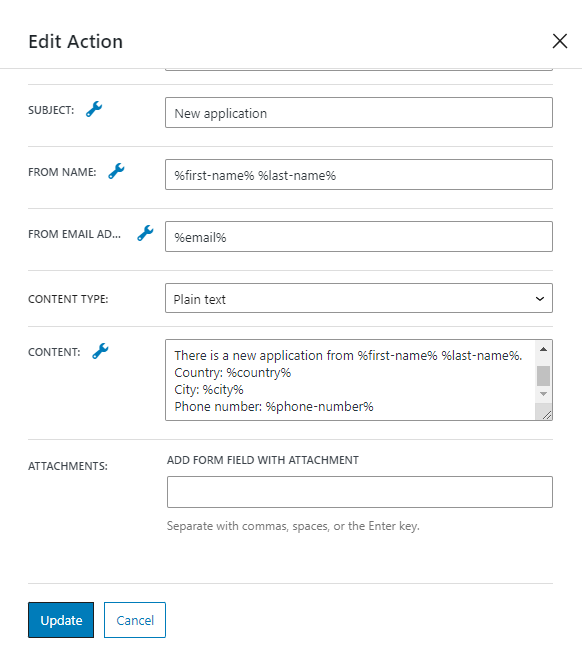
The ATTACHMENTS option allows users to attach files to the form and send them via email. Create one or several Media Field blocks and set them here. Since we didn’t create any Media Fields for this form, we left this field empty.
Finally, we hit the “Update” button.
We finished customizing the form and pressed the “Publish/Update” button to save its settings.
Placing the Form on the Page
Then, we navigated to the Pages > Add New Page tab, added the JetForm block to the page, selected the recently created application form from the CHOOSE FORM drop-down menu, and pushed the “Publish” button.
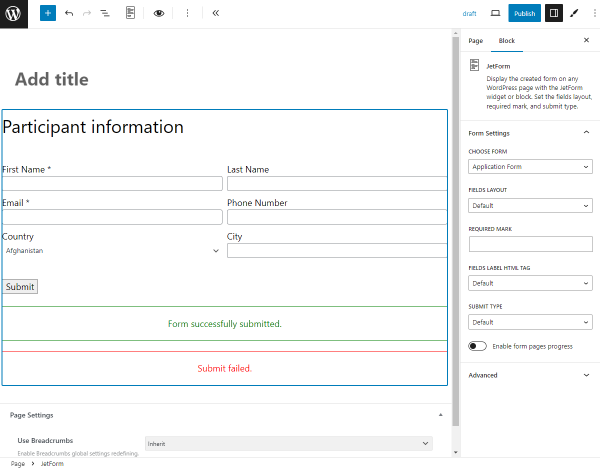
Checking Results on the Front End
We opened the page on the front end, filled in the fields, and hit the “Submit” button.
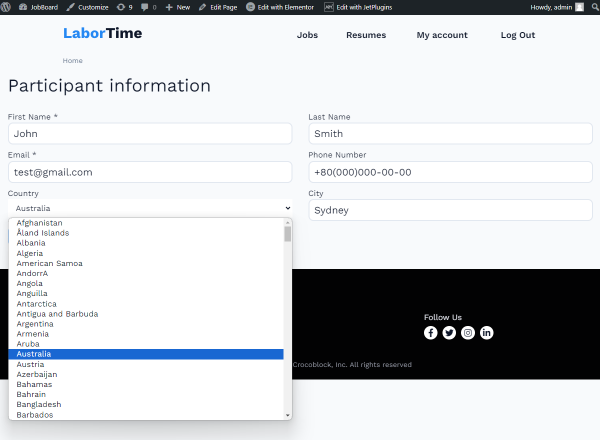
In the received email, we can see values from the submitted form fields, including the select field with the list of the countries.
That’s all. Now you know how to bulk-add countries, months, and days of the week to the JetFormBuilder form fields, like Select, Radio, and Checkbox.