MailChimp Subscribe Form
MailChimp is a service that helps you manage email notifications and a list of user emails. With the MailChimp Post Submit Action, you can connect the JetFormBuilder form and the MailChimp service. The data that users insert into the form will be transferred to the application, and you will be able to use it there.
If you still don’t have a MailChimp account, please, feel free to check this tutorial. It provides detailed instructions on creating an account and finding out your MailChimp API key and Audience ID.
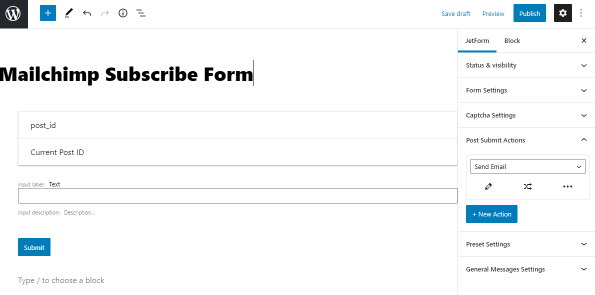
To create a MailChimp Subscribe Form in WordPress, head to JetFormBuilder > Add New. Give a name to the form and delete the default post_id field since we don’t need it.
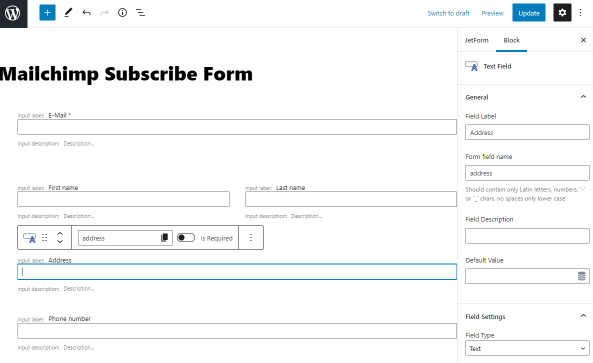
Add new fields manually or use the Subscribe Form Pattern. It is the list of fields that you can create and later connect to the MailChimp:
- Text Fields:
- for Email is required;
- for first\last name, address, phone can be added if you wish;
- Date Field for date of birth.
Then open the JetForm tab and proceed to the Post Submit Actions section. Set the type to MailChimp and click on the “Edit Action” icon.

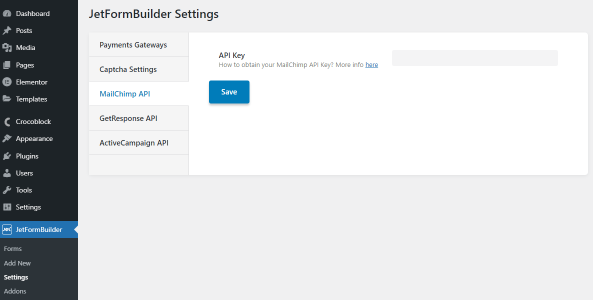
In the newly appeared window, you should input your MailChimp API Key.
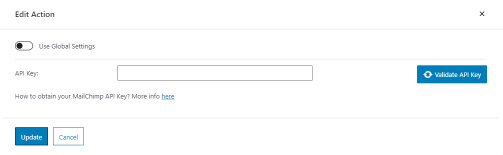
You can paste it manually or enable the Use Global Settings toggle. If you pasted the MailChimp API Key in the JetFormBuilder Settings, it appears automatically. Then hit the “Validate API Key” button.
If the operation is successful, you will see the new “Audience” field. Select the Audience name that you have input on the MailChimp website. If you have added another Audience and don’t see it in the list, click on the “Update Audience List” button.
After you set the Audience, more fields will appear:
- Groups. If you have created them in the Manage contacts tab on the MailChimp website, your groups should appear in this field;
- Tags. You can input here tags, which you have created on the MailChimp website;
- Double Opt-in. Enable this toggle in case you want the contacts to receive an opt-in confirmation email when they subscribe to your list;
- Fields Map. There is a list of fields where users can enter their data, which can be attached to the MailChimp website. In that drop-down, you can choose appropriate fields from the form. The Email field is required.
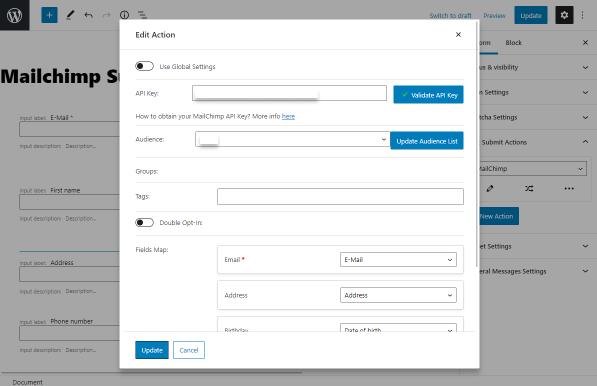
After customizing all settings, “Update” the Edit Action and “Publish” or “Update” the form.
The next step is adding the form to a page. To obtain the information on how to do this, follow this link.
When users subscribe with your form, you can see all information about them on the All contacts tab.
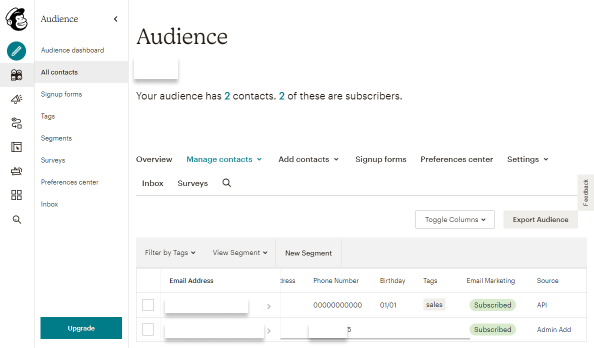
That’s it. Now the users’ data will be transferred to the MailChimp website.