How to Use Radio with Hidden, and Calculated Fields
The value of the Hidden Field can be used in the formula of the Calculated Field just as the value of any other field. However, the fact that this field is invisible to the user gives you an opportunity to add some values secretly. For example, with the help of the Hidden Field, you could add taxes to the “Total Price” formula.
Let’s assume we are creating an order form. The user can choose items, and you want to show the total price of the order, including taxes.
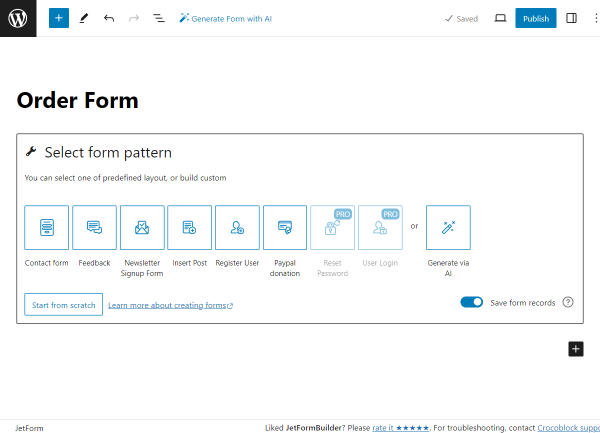
Create a Form
Proceed to WordPress Dashboard > JetFormBuilder > Add New to build a new form.
Give a title to the form. At first, you will see the Welcome block. Now, we click the “Start from scratch” button to build a custom form.
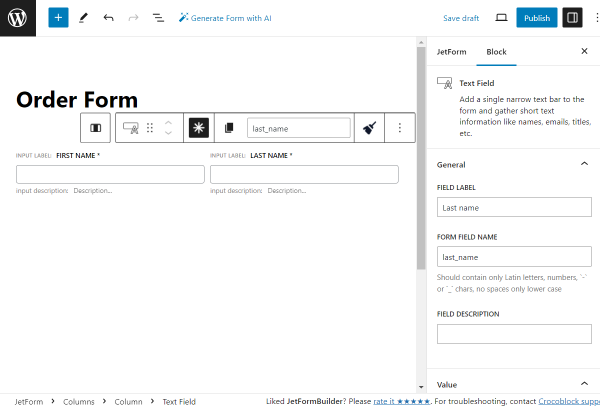
We add two Columns and four Text Fields inside them to get the basic information about a user: “First Name,” “Last Name,” “Email,” and “Phone Number.”
The settings for the “First Name” and “Last Name” fields are left by default, and only the FIELD LABEL and FORM FIELD NAME are completed.
We also make these fields obligatory for completion by pushing the “asterisk” symbol above the field.
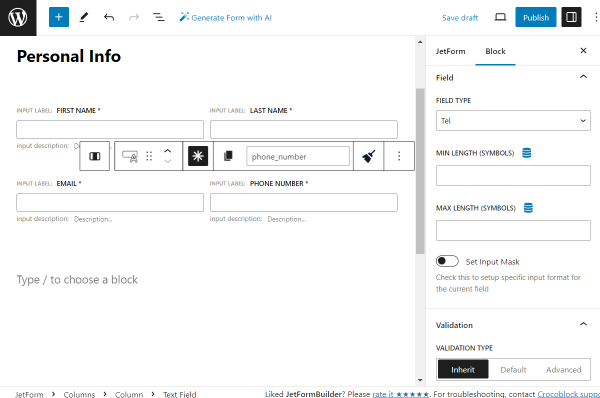
We set the “Email” FIELD TYPE for the “Email” field and the “Tel” field type for the “Phone Number” field, correspondingly.
We also make these fields obligatory for completion.
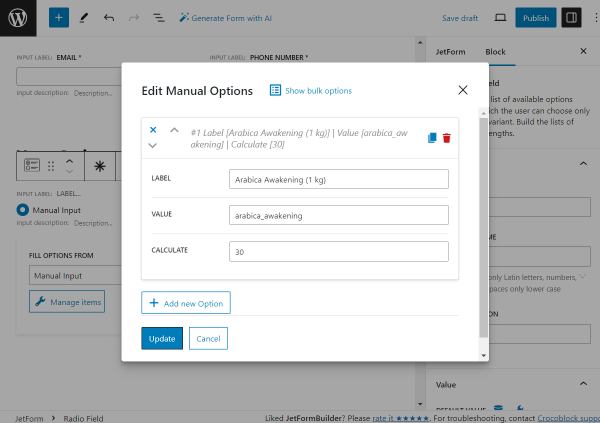
Then, create a field with options that will have different values. In the described case, a Radio Field.
Press the “Manage items” button to add the radio options.
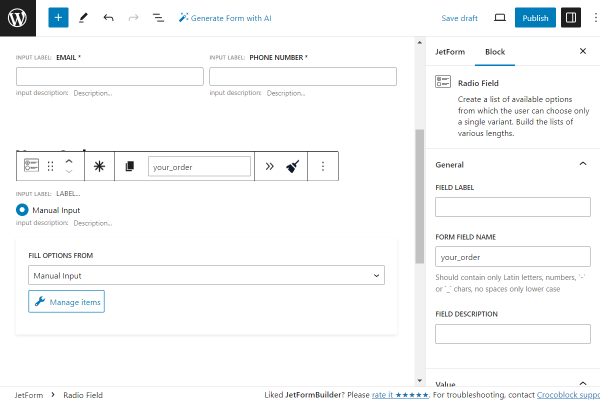
Click the “Add new Option” button in the opened pop-up.
Complete the LABEL, VALUE, and CALCULATE fields for the radio option.
When you need to add a new item, press the “Add new Option” button and complete the fields for all the radio options.
Once all the needed options are added, press the “Update” button.
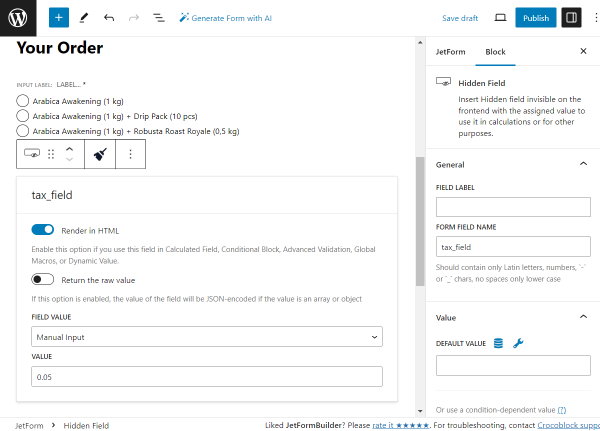
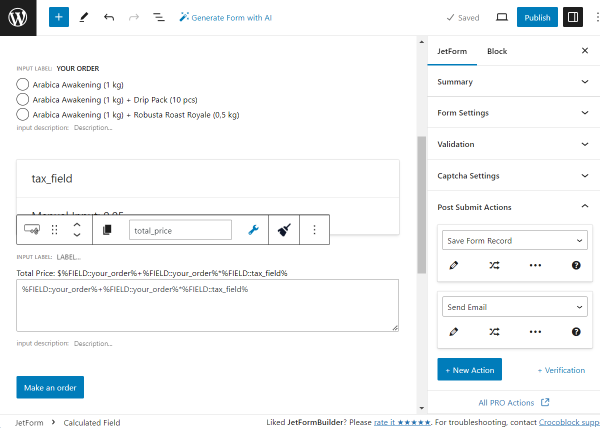
Now, we add the Hidden Field and set its FORM FIELD NAME to “tax_field”.
Let’s assume that you want to set 5% of the item’s price as a tax. So, the VALUE should be set to “0.05.”
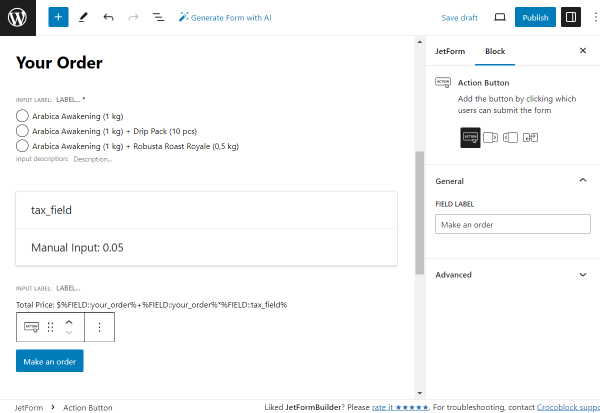
The following block we add is the Calculated Field (with a “total_price” FORM FIELD NAME).
The total price of the item will be the price plus 5% of the price for taxes. That’s why the Calculated Field formula will look like that:
%FIELD::your_order%+%FIELD::your_order%*%FIELD::tax_field%
Let’s also add a Calculated Value Prefix so that the user will understand that the calculated number is the total price.

Add the Action Button to the page and change the default LABEL if desired.
We change the default “Submit” to “Make an order” button.
Adjust Post Submit Actions
You can also set the Post Submit Actions in the corresponding section of the JetForm tab.
For instance, we leave the default “Save Form Record” action to save the form completion results in the WordPress Dashboard > JetFormBuilder > Form Records directory.
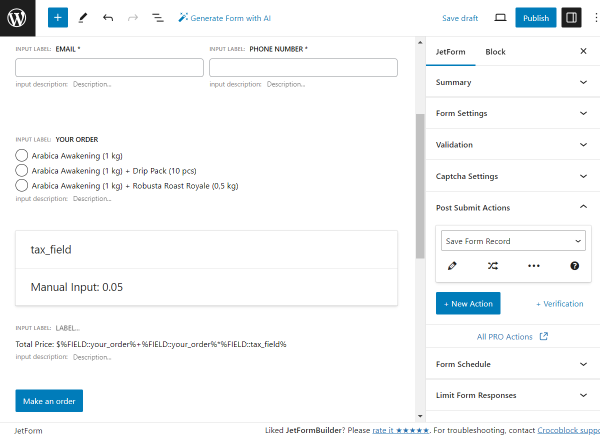
Also, we push the “New Action” button and pick the “Send Email” action from the list.
Then, we press the “pencil” icon to adjust the settings.
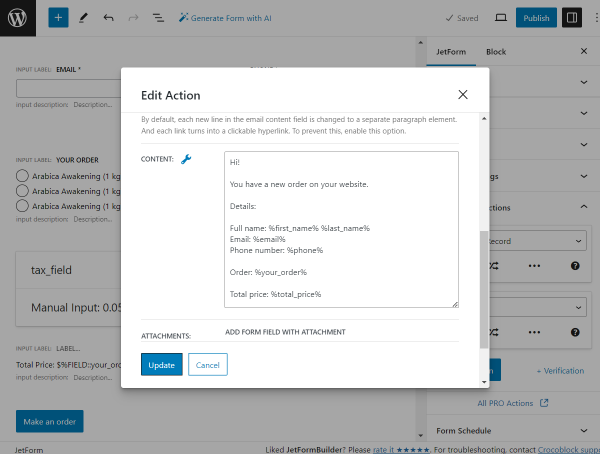
Adjust an action according to your needs. For instance, we have set the following message as a CONTENT:
“Hi!
You have a new order on your website.
Details:
Full name: %first_name% %last_name%
Email: %email%
Phone number: %phone%
Order: %your_order%
Total price: %total_price%”
You can adjust other post submit actions if needed.
Also, check an article on How to Configure Payment Gateways.
Once the changes are made, press the “Publish” button to save the form.
Add the Form to the Page
Head to the page where you want to place the form. For instance, we go to WordPress Dashboard > Pages and open the already existing page.
The JetForm can be added to Block Editor, Elementor, or Bricks-edited pages/templates. In the given case, we open the page in the Elementor editor.
Find and place the JetForm widget/block/element on the page.
Select the just-created form in the Choose Form dropdown menu.
Adjust the further settings of the JetForm if needed.
You can also add other content to the page, and once it is ready, press the “Publish/Update” button.
Check the Result
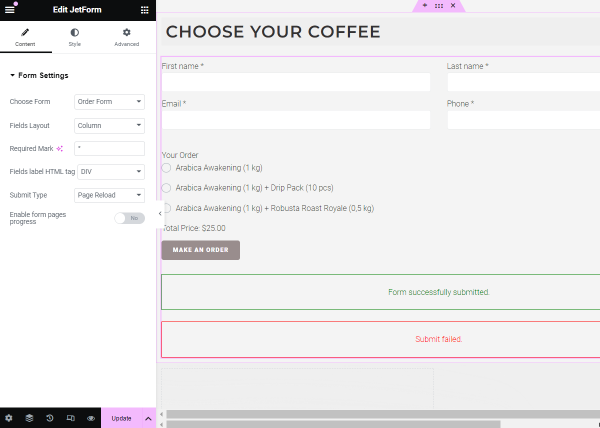
Open the page with the form on the front end and complete the fields.
You can observe that depending on the selected option in the Radio Field, the total price below changes.
After the fields are completed, we press the “Make an order” button.

Let’s check if the post submit actions added earlier have worked.
We have adjusted the email sending. Let’s check the admin email.
So, the email with the completed info has been sent to the admin mailbox.

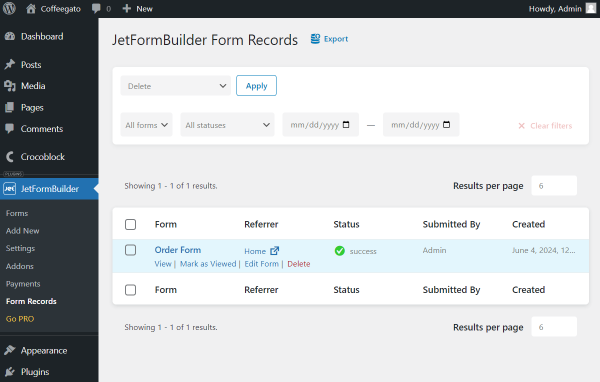
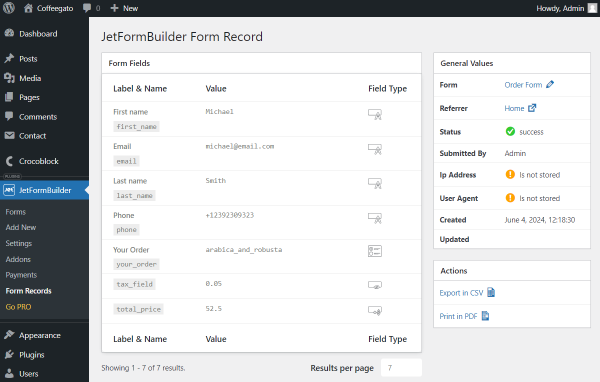
Then, we go to WordPress Dashboard > JetFormBuilder > Form Records.
Here, all the form records should be stored. We check the last one by hovering over the record and pushing the “View” button.
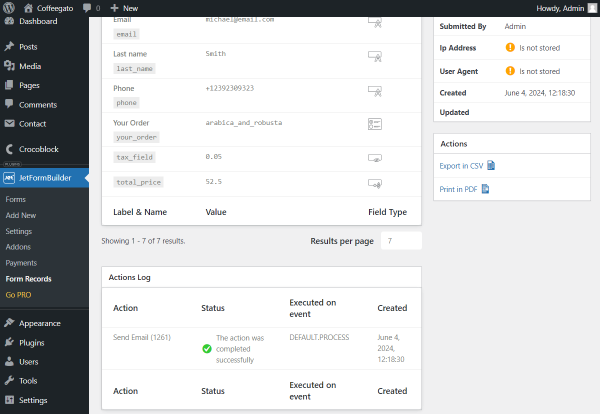
On the opened form record page, we can see info on all the completed form fields.
If we scroll down a little, we see that the information on the successful email sending is also here, in the Actions Log section.
That’s all about creating a form with Radio, Hidden, and Calculated Fields, which are available with the JetFormBuilder plugin for WordPress.