How to Create File Upload Forms
The file uploading functionality is implemented via the Media Field block of the JetFormBuilder plugin. It allows different user access, storage of attachments, and specification of the maximum size of the uploaded files and their formats.
Users can use the MediaField block independently, as part of the pre-built forms, or as generated by the AI ones.
- Create a Form
- Add the Media Field Block
- Set the Post Submit Actions
- Add the Form to a Page
- Collect and Process Form’s Data
Create a Form
Navigate to the WordPress Dashboard > JetFormBuilder > Forms tab and press the “Add New” button to create a new form. Also, check the tutorial on How to Create a Form.
Initially, the form includes the Welcome block, which allows the application of a pre-created or AI-generated form.
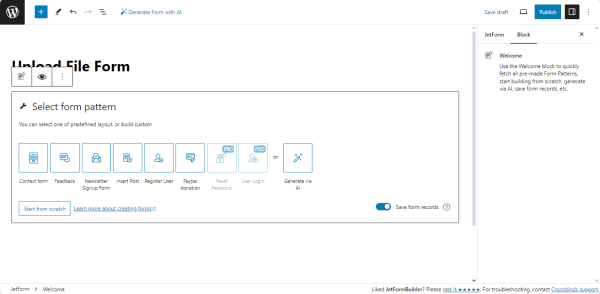
Press the “Start from scratch” button to develop a custom form.
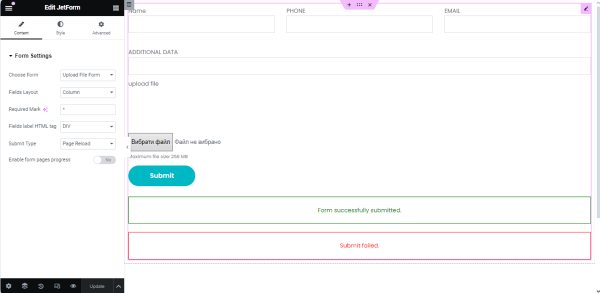
Add the Media Field Block
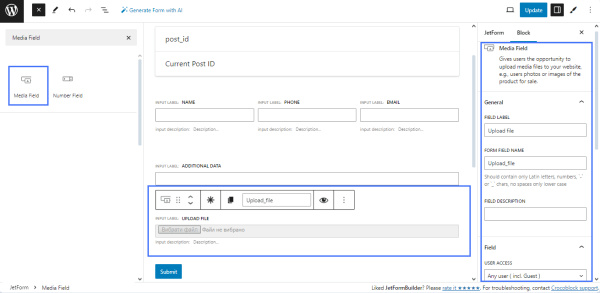
In the given case, we added only the Text Fields for the contact data, but you can add all the needed fields.
Find, drag, and drop the Media Field block.
Fill in the FIELD LABEL field (in this case, “Upload file”). The FORM FIELD NAME field will be filled in automatically, but this value can be changed if desired.
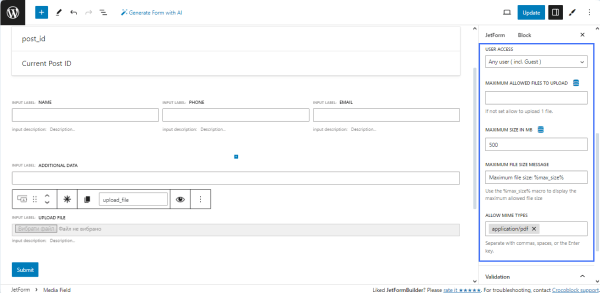
Set the following settings of the MEDIA FIELD block:
- USER ACCESS — select the user type available to upload the files. In the given case, we allow uploading for the “All users (inc. Guests)” option;
- MAXIMUM ALLOWED FILES TO UPLOAD — type the maximal number of allowed files to upload (for the given case, we left this field blank to upload one file);
- MAXIMUM SIZE IN MB — type or select the maximum size of the uploaded files (here, we specified 500 MB);
- MAXIMUM FILE SIZE MESSAGE — type the text to be displayed instead of the default “Maximum file size %max_size%” text;
- ALLOW MIME TYPES — specify the allowable file types. For instance, we allowed uploading only PDF files.
Set the Post Submit Actions
Navigate to the JetForm settings and scroll down to the Post Submit Actions settings.
Read the Post-Submit Action Controls Overview tutorial to learn how to manage Post Submit Actions.
The “Save Form Record” action is set by default, allowing the saving and processing of form data.
If needed, edit this action and turn on the following toggles: Store the IP address and other request headers and Keep form records that have not passed spam or captcha protection. In the given case, we did not activate these toggles.
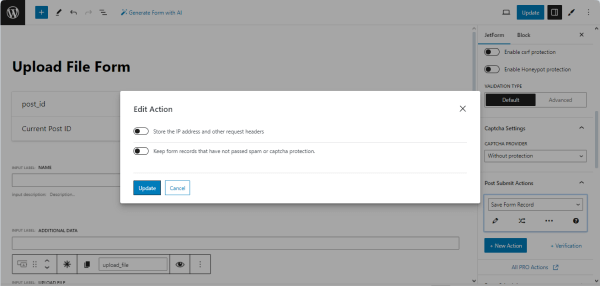
The tutorial How to Use Save Form Record Action And Manage Form Submissions explains how to manage the “Save Form Record” actions.
Press the “Publish” button to save the form.
Add the Form to a Page
Create a page in Elementor/Block Editor/Bricks. In the given case, we created the page in Elementor.
Find the JetForm widget/block/element and drag and drop it onto the page.
Once you are through with the page editing, press the “Update” button to save the result.
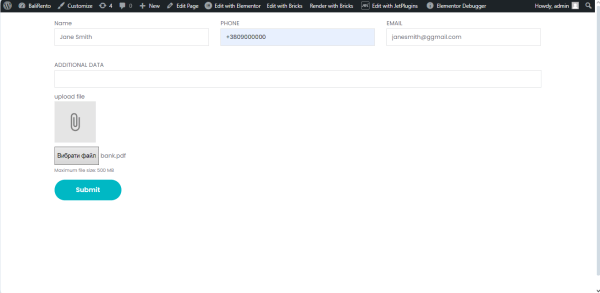
Navigate to the front end to check if the form works correctly.
Fill in the form and press the “Submit” button.
Also, check the Displaying a JetFormBuilder Form in Any Page Builder tutorial.
Collect and Process Form’s Data
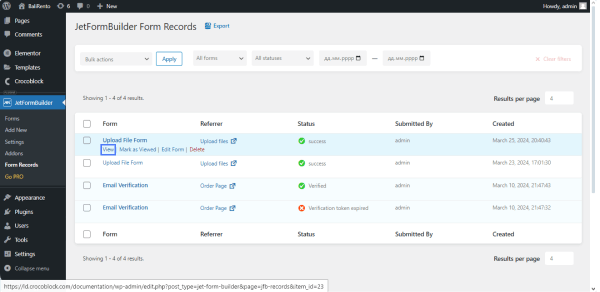
Navigate to the WordPress Dashboard > JetFormBuilder > Form Records tab to see all collected form entries.
Hover the cursor over the needed form and press the “View” link under the form’s title.
The form record displays all collected data, including a link to the uploaded file.
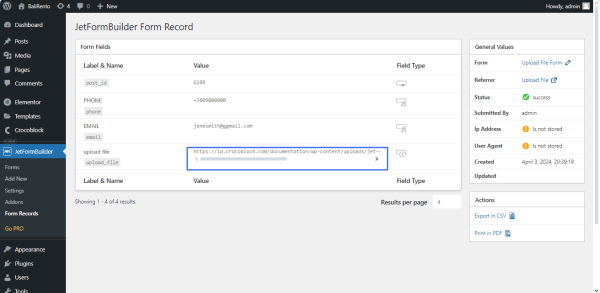
Follow the link to see the file uploaded with this form. To check all collected uploaded files via the developed form, navigate to the JetFormBuilder folder (wordpress/htdocs/wp-content/uploads/jet-form-builder) on the PC where your WordPress is installed.
That’s all about creating file upload forms and storage attachments in different ways on your WordPress website using the JetFormBuilder plugin.