Add to Data Store
This overview describes the “Add to Data Store” Post Submit Action settings and how to apply this action to the JetFormBuilder form on the WordPress website.
Table of Contents:
- Module Activation
- Data Store Creation
- Form Creation
- Placing the Form on the Page/Template
- Creating the Listing with the Saved Posts
- Building a Query for the Listing
- Adding the Listing to the Page/Template
- Submitting the Form
- Checking the Result
Module Activation
Before starting, one should ensure that the JetEngine plugin is installed and activated on the website and that the “Data Store” module is enabled in its settings.
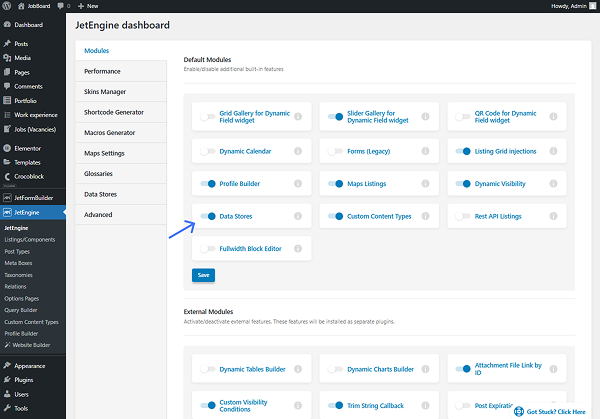
To do so, one should navigate to the WordPress Dashboard > JetEngine > JetEngine > Modules tab and check if the Data Stores toggle is enabled in the Default Modules section.
Once the changes have been made, the “Save” button should be clicked.
Data Store Creation
Next, the data store should be built. It can be done in the WordPress Dashboard > JetEngine > JetEngine > Data Stores tab.
Here, the “New Store” button should be clicked in order to build a store. More information about the Data Stores settings can be found in the Data Stores Overview.
For example, in this guide, the “Favorite Jobs” data store with the “User Metadata” Store type will be used.
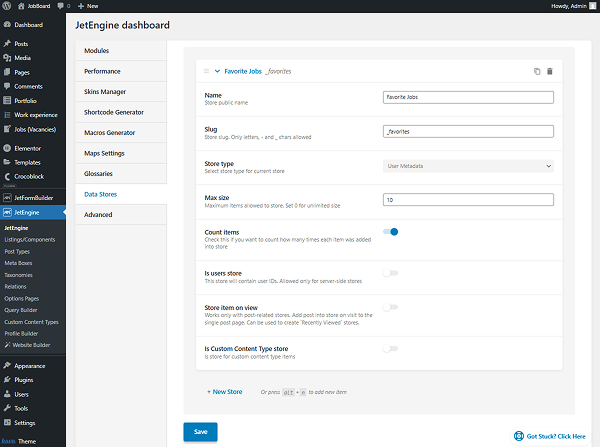
When the data store settings are adjusted, one should click the “Save” button.
Form Creation
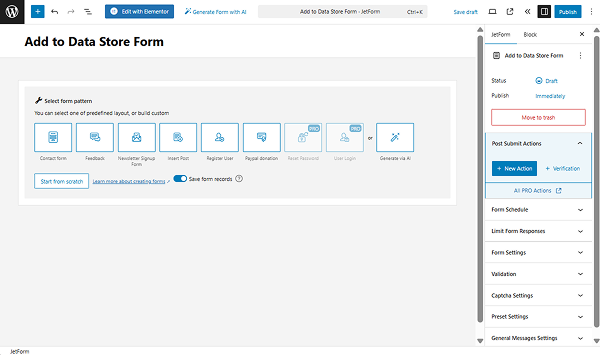
To build a form, one should proceed to the WordPress Dashboard > JetFormBuilder > Add New Form.
After naming the form (here, “Add to Data Store Form”), one will see the Welcome block. If not needed, it can be deleted to build a form from scratch.
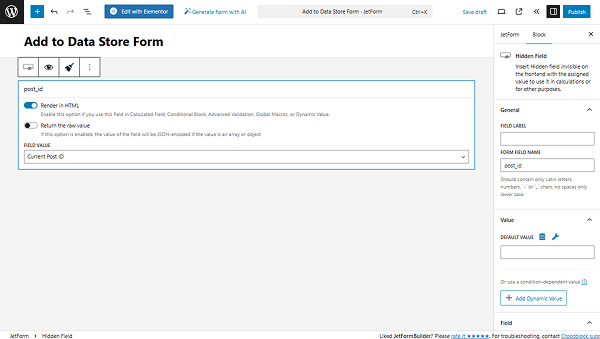
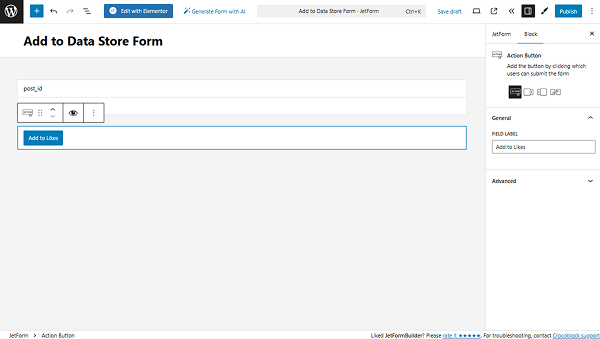
The first field added to the form should be the Hidden Field with the “Current Post ID” FIELD VALUE. One can change the FORM FIELD NAME if needed; we leave it as it is.
The following field will be the Action Button, which will serve as the “Add to Likes” button, so the name is changed correspondingly.
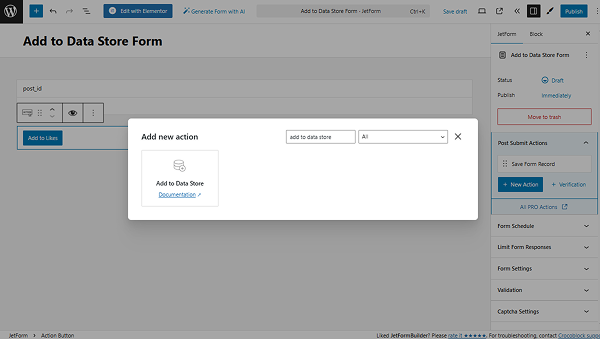
Next, one should proceed to the JetForm tab and click the “New Action” button.
In the Add new action pop-up, one should search for and click on the “Add to Data Store” action to open its settings.
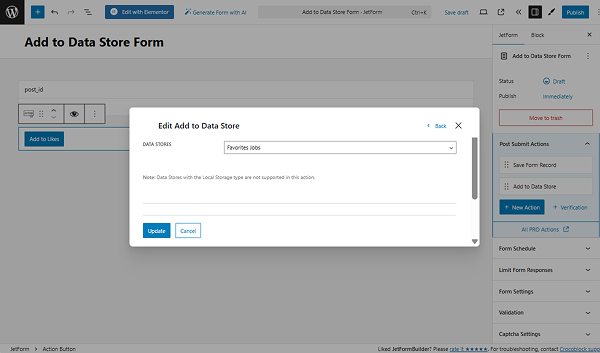
In the DATA STORES dropdown, the previously built data store should be selected.
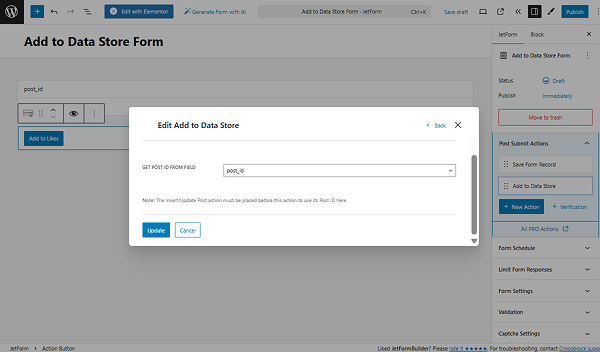
In the following GET POST ID FROM FIELD dropdown, one should pick the Hidden Field’s name that stores the post ID.
When the form is ready, the “Publish” button should be clicked.
Placing the Form on the Page/Template
After that, the built form should be placed on the needed page/template. For example, we place the JetForm widget onto the Single Page template of the Custom Post Type we work with (“Jobs (Vacancies)”).
In the JetForm settings, one should select the just-built form in the Choose Form dropdown field and adjust other settings if needed.
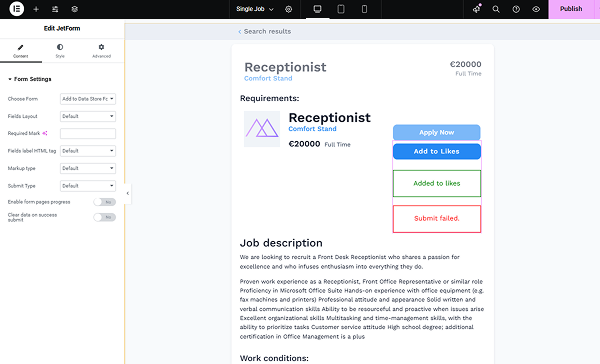
When the page/template is ready, one should press the “Publish” button.
Creating the Listing with the Saved Posts
Next, we want to display the jobs that users have liked in the Listing Grid.
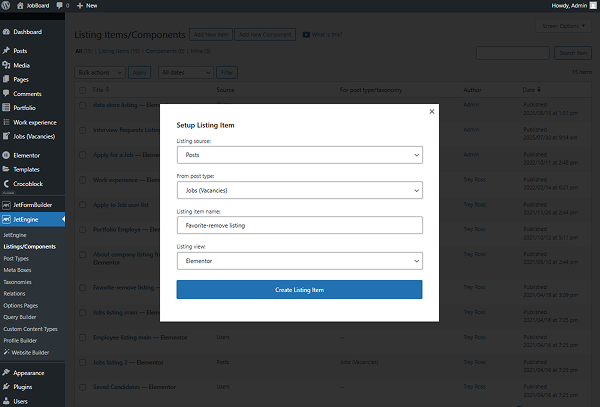
So, initially, the listing item should be built in the WordPress Dashboard > JetEngine > Listings/Components directory.
When the “Add New Item” button is clicked, the Setup Listing Item pop-up appears. Here, we leave the default “Posts” Listing source, select the “Jobs (Vacancies)” CPT in the From post type dropdown list, set the Listing item name, and pick the “Elementor” Listing view.
Once done, the “Create Listing Item” button should be pressed.
When the listing item editor is opened, it should be filled with content. For example, the listing template we work with contains the Dynamic Image, Dynamic Field, Dynamic Terms, Dynamic Link, and Button widgets.
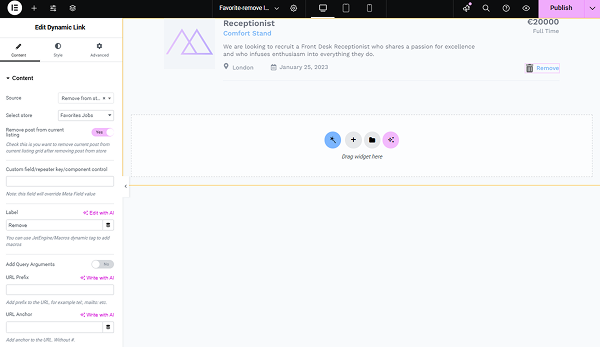
When the listing item is completed with data, the “Publish” button should be hit.
Building a Query for the Listing
Now, the query for the built listing should be adjusted with JetEngine’s Query Builder. This query will help to show only the items added to the data store in the listing.
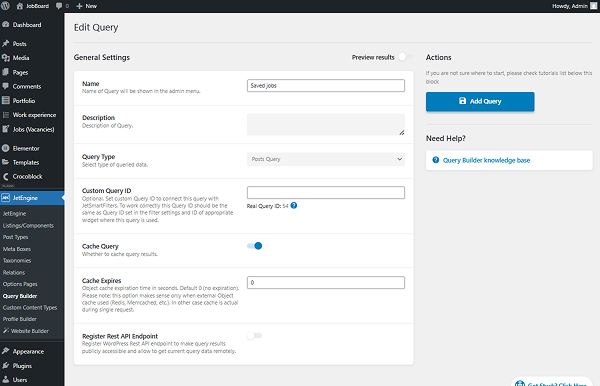
The query can be built in the WordPress Dashboard > JetEngine > Query Builder directory by clicking the “Add New” button.
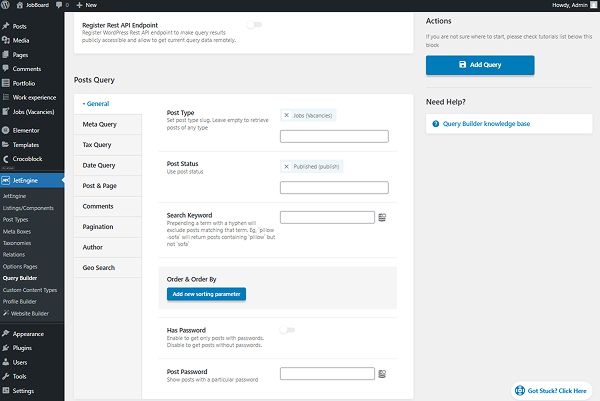
In the General Settings section, one should complete the Name of the query (here, “Saved jobs”) and select the Query Type. In the described case, we work with the CPT, so the default “Posts Query” type should be left.
After setting up the General Settings of the query, one should proceed to the Posts Query.
Here, we select the Post Type we work with and set the Post Status to “Published (publish)”.
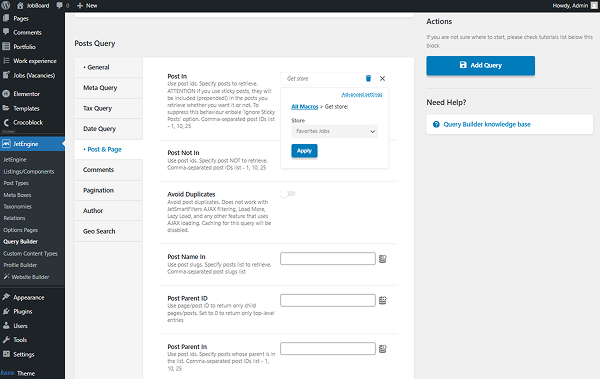
Then, one should open the Post & Page settings tab and click the “Dynamic Tags” button next to the Post In field.
In the list, one should search for the “Get store” option and click it to open its settings. In the Store field, the needed data store should be selected, and the “Apply” button should be clicked.
Other changes can be applied to the query if needed, and once done, the “Add Query” button should be clicked.
Adding the Listing to the Page/Template
Now, the queried listing should be displayed on the page/template. We want to place it on the user’s account page.
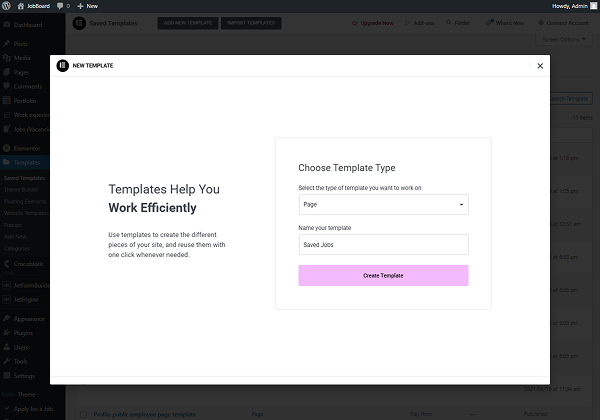
So, initially, the Elementor template should be created in WordPress Dashboard > Templates > Saved Templates.
In the opened pop-up, one should select the “Page” option in the Select the type of template you want to work on dropdown and complete its name in the Name your template field.
To proceed to the editor, the “Create Template” button should be clicked.
In Elementor, a Listing Grid widget should be added.
In the General settings, one should select the Listing previously created.
Other widget settings should be adjusted as well if needed.
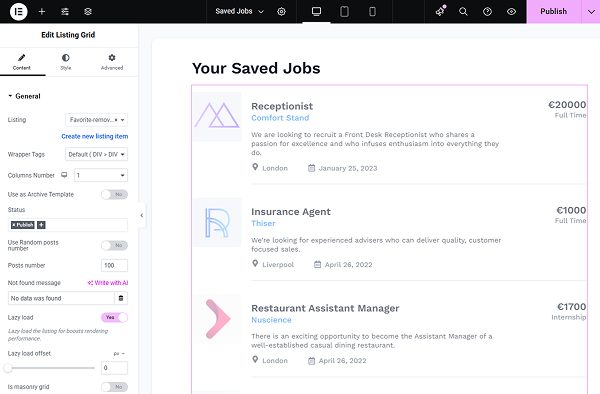
Now, it’s time to apply the built query to the listing. It can be done in the Custom Query tab.
Here, the Use Custom Query toggle should be activated. Then, the Custom Query should be selected.
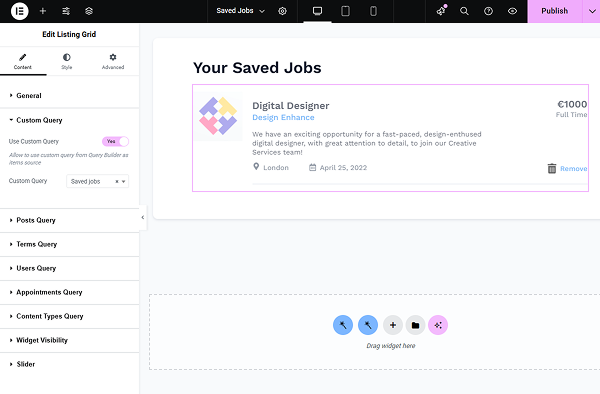
After all the changes have been made to the template, one should press the “Publish” button.
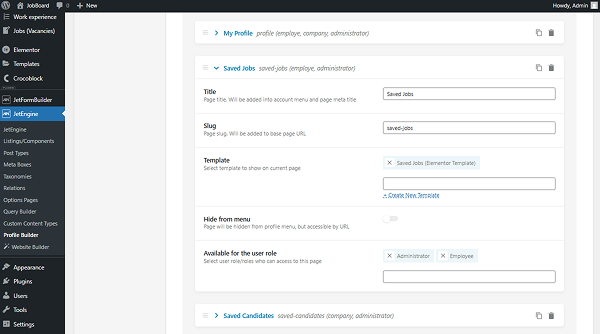
Now, the built template should be assigned to the user account by following the WordPress Dashboard > JetEngine > Profile Builder > Account Page tab and pressing the “Add New Subpage” button.
Here, the Title and the Slug of the subpage should be completed, and the just-created template should be assigned. Other settings can be adjusted as well, and when ready, the “Save” button should be clicked.
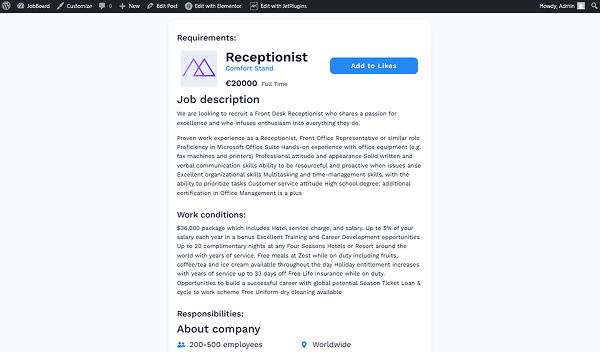
Submitting the Form
Everything is ready, so users can proceed to the frontend of any single page and press the “Add to Likes” button.
Checking the Result
Now, if the user navigates to their Saved Jobs page on the account, the list of the liked jobs will be displayed.
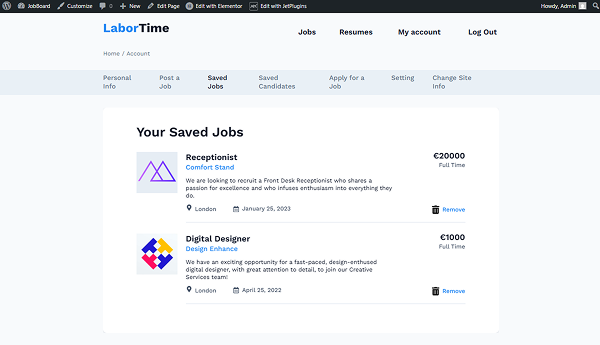
That’s all about the “Add to Data Store” Post Submit Action available as a part of the JetFormBuilder and JetEngine plugins functionality for WordPress websites.