How to Set Up a WordPress Pop-up Form
In this tutorial, we consider a case of creating a WordPress pop-up form that will be displayed on a property sale site. The form allows users to request a call back for a property viewing appointment.
The form includes the Text Field, the Action Button, and applied Post Submit Actions. Further, the form will be added to a JetPopup pop-up, and special visibility conditions will be set (the form will be displayed when a single post is scrolled).
- Create a Form and Add Its Fields
- Create a Pop-up
- Add the Form to the Pop-up
- Customize the Pop-up Settings
- Set the Pop-Up Visibility
- Check the Result
- Check the Form Record
Create a Form and Add Its Fields
Navigate to WordPress Dashboard > JetFormBuilder > Add New tab to create a new form. The form will be opened in the Gutenberg editor.
The Form Creation tutorial details the main fields and settings of the form-building process.
Initially, the form includes the Welcome block, which allows the application of the pre-created or AI-generated forms.
Press the “Start from scratch” button to develop a custom form.
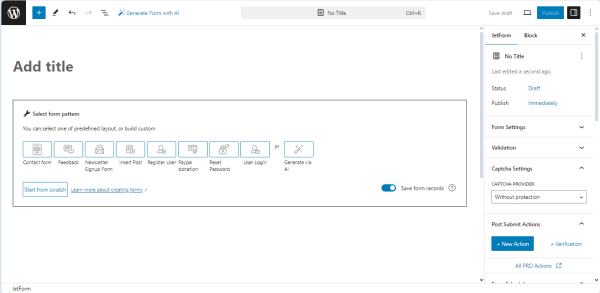
The Welcome block will be closed, and the Hidden Field, the Text Field, and the Action Button will be added by default.
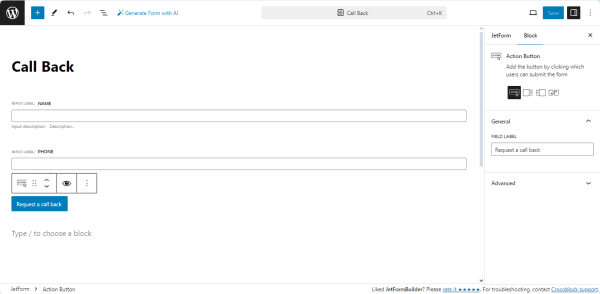
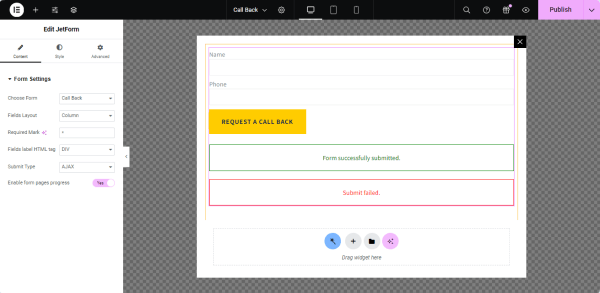
Add the form’s title (“Call Back” in the given tutorial).
In this case, the form will contain Text Fields for entering the clients’ names and phones.
First, we deleted the default Hidden Field because it is unnecessary in this case.
Then, we customized the Text Field and typed its label (the “Name” text) in the FIELD LABEL field.
We added another Text Field, added its FIELD LABEL, and set its “Phone” FIELD TYPE.
Finally, we modified the text on the Action Button: we typed the “Request a call back” text instead of the default one.
Navigate to the JetForm settings and unroll the Post Submit Actions tab. The “Save Form Record” option is set by default. We left this option enabled to collect data via the JetFormBuilder Dashboard.
Watch the Post Submit Actions Overview to learn how to apply and manage the Post Submit Actions.
Once we completed it, we clicked the “Publish/Save” button.
Create a Pop-up
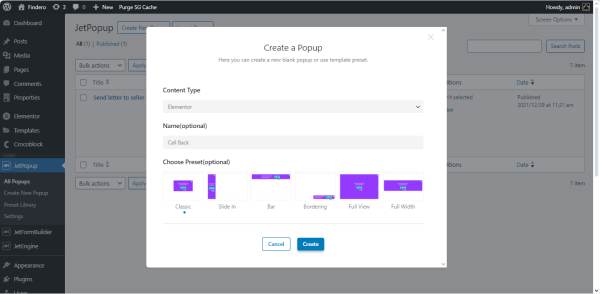
Return to the WordPress Dashboard. Then, move to the JetPopup > Create New Popup path and fill in the field in the Create a Popup window that will appear. In this case, we selected the “Elementor” Content Type, typed the “Call Back” text in the Name(optional) field, and ticked the “Classic” option in the Choose Preset(optional) field. Finally, we clicked the “Create” button.
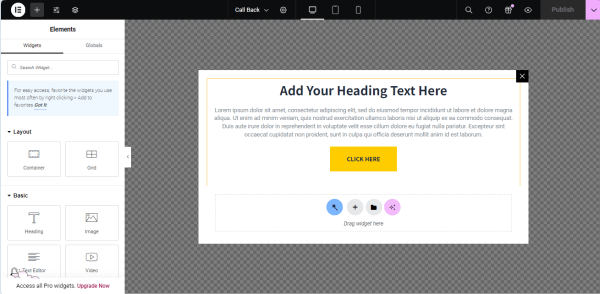
After that, you will be redirected to the selected editor (Elementor, in this case).
Read the How to Create a New Popup Template in Elementor tutorial to learn how to create pop-ups and manage their settings. Also, you can check the How to Create Popup in Gutenberg tutorial.
Add the Form to the Pop-up
We deleted the pop-up’s default content and added the JetForm widget. In the JetForm widget, we selected the built form (“Call Back” in this case) in the Choose Form drop-down list and chose the “AJAX” Submit Type.
After that, we pressed the “Publish” button.
For an in-depth understanding of how to manage the form’s settings, read the How to Display a Form on the Front End tutorial.
Customize the Pop-up Settings
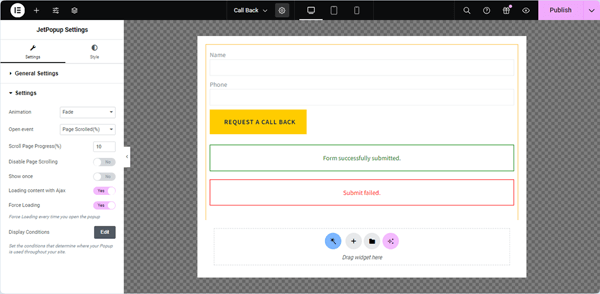
To set the pop-up settings, unroll the JetPopup Settings (i.e., by pressing the “gear” icon at the bottom left corner of the page). Then, unroll the Settings block in the opened tab.
Here, we specified the “Page Scrolled(%)” Open event and set the Scroll Page Progress(%) to display a pop-up on the page while it is being scrolled.
The Popup Trigger Events Overview explains how to attach pop-ups to a widget or block and set the trigger event type.
Set the Pop-up Visibility
Then, we pressed the “Edit” button near the Display Conditions option on the Settings tab. This redirects to the WordPress Dashboard > JetPopup > All Popups tab and opens the Set the popup visibility conditions pop-up. In this pop-up, we pressed the “+ Add condition” button, selected the “Include,” “Singular,” and “CPT Single” options, and chose the needed Custom Post Type (CPT) to display the pop-up (the “Properties” CPT in this tutorial).
To learn more about how to set and manage the pop-up visibility conditions, read the Popup Conditions Overview.
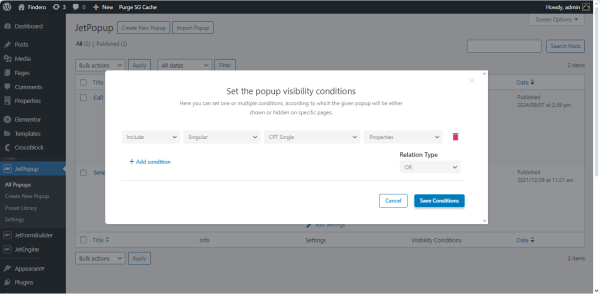
Set the conditions and press the “Save Conditions” button.
Check the Result
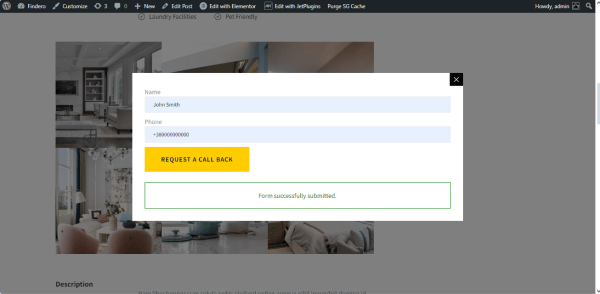
The last stage is opening a page/CPT post you want to display this pop-up with the form. In this case, we display the pop-up on the single pages.
Navigate to the front end to check if the form works correctly. Fill in the form’s fields and press the “Submit” button (in the given case, with the “Request a call back” text).
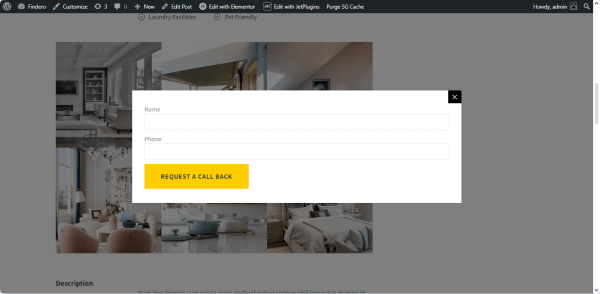
If the form was submitted successfully, the pop-up will display the “Form successfully submitted.” text.
Check the Form Record
Since the “Save Form Record” Post Submit Action was set, the JetFormBuilder plugin will save the submitted form data.
To check the form data records, navigate to the WordPress Dashboard > JetFormBuilder > Form Records tab. This tab displays all submitted forms and their statuses.
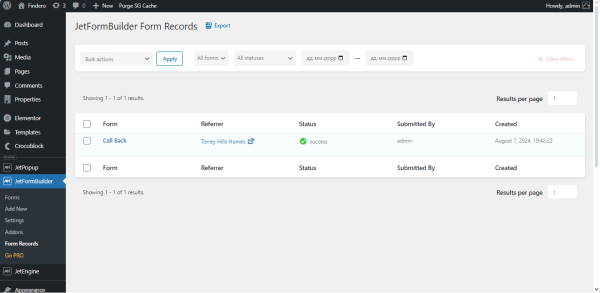
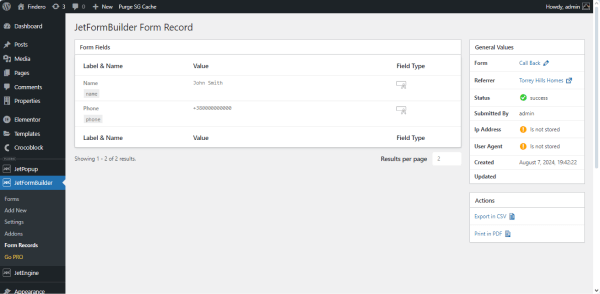
Hover the cursor over the name of the specific form and press the “View” link below the name of the form to unfold it.
That’s it. Now you know how to create a WordPress pop-up form using the JetFormBuilder and JetPopup plugins.