How to Create Evaluation Forms in WordPress
Contents:
An evaluation form collects feedback, opinions, and assessments about a specific service, product, event, or experience. Evaluation forms are used in various contexts, such as customer service, education, healthcare, employee performance, and event management.
In this tutorial, we will create a form for rating tours for the travel agency booking website.
Be aware that this case is provided as an example. You are free to customize a form suitable for your needs.
How to Create a WordPress Custom Evaluation Form
To build a WordPress evaluation form, we navigate to WordPress Dashboard > JetFormBuilder > Add New.
We enter the form’s title (“Evaluation form”).
The Welcome block appears by default. From here, you can select a form pattern or generate a form with Open AI.
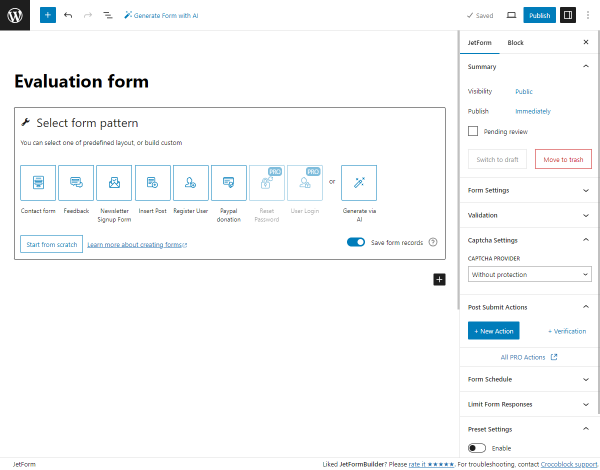
We hit the “Start from scratch” button and delete three fields added by default to begin anew.
Personal Information
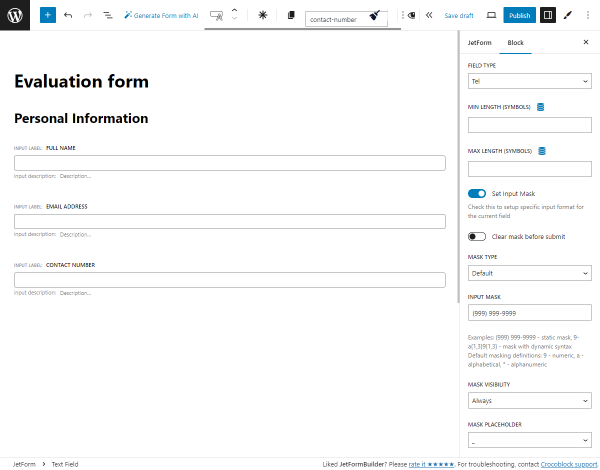
The first block is the Heading with the “Personal Information” text.
Then, we add several Text Field blocks with such settings:
- “Full Name” with the “Text” FIELD TYPE in the Block settings tab;
- “Email Address” with the “Email” FIELD TYPE;
- “Contact Number” with the “Tel” FIELD TYPE. For this field, you can enable the Set Input Mask toggle and set the INPUT MASK field (e.g., “(999) 999-9999”).
For all fields in the form, we should adjust the FORM FIELD NAME (each form field name must be unique) and the FIELD LABEL (optional; the field label will be shown for users on the front end). For more information, proceed to the General Settings Section tutorial.
To make some fields required so users cannot submit the form if the fields are empty, click the “asterisk” icon in the upper settings panel. Learn more from the Form Settings tutorial.
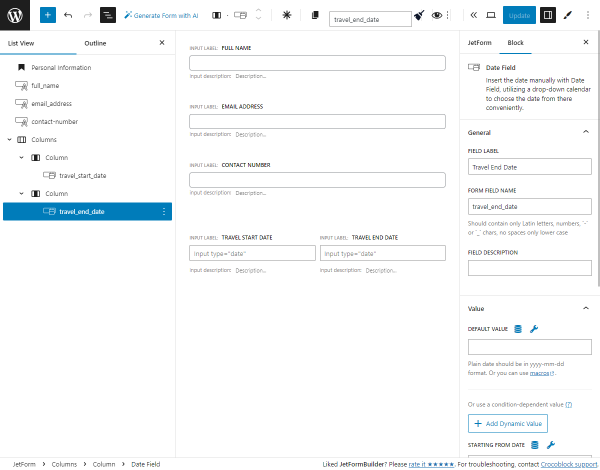
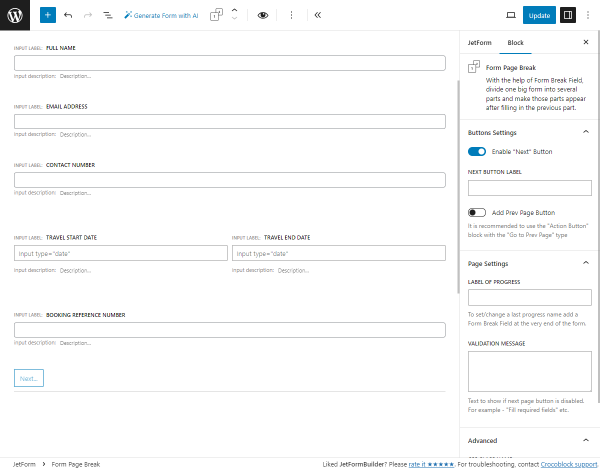
Then, we add the Columns block and insert two Date Field blocks. Here, users can set the travel start and end dates.
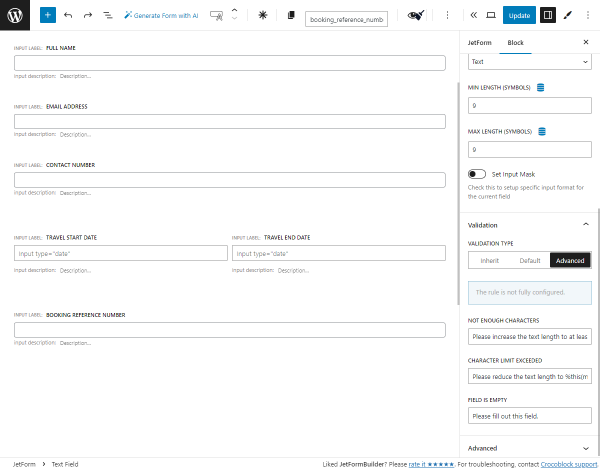
The last field for this section is the “Booking Reference Number” Text Field block with the “Text” FIELD TYPE.
Let’s assume the booking reference number is nine characters long. In the Block settings tab, we enter the “9” value into the MIN LENGTH (SYMBOLS) and MAX LENGTH (SYMBOLS) fields.
Also, we unroll the Validation tab and select the “Advanced” VALIDATION TYPE. In this tab, the validation messages can be changed.
With such settings, if users enter less than “9” characters, they’ll receive the “Please increase the text length to at least %this(minLength)% characters (you are currently using %this|length% characters).” message. Also, they won’t be able to enter more than “9” characters.
For more information, head to the Advanced Form Validation tutorial.
At the end of the section, we put the Form Page Break block and keep the Enable “Next” Button toggle activated in the Block > Buttons Settings tab. The NEXT BUTTON LABEL can be customized.
This block divides a long form into multiple pages or sections. It improves the user experience by making the form more manageable and less overwhelming to complete.
The first part of the form will contain the “Next” button, the middle parts — “Next” and “Prev” buttons, and the last one — only the “Prev” button.
You can also check the WordPress Multi-Step Form with Step Indicator and Conditional Blocks tutorial.
Trip Details
The first block of this section is the Heading with the “Trip Details” text.
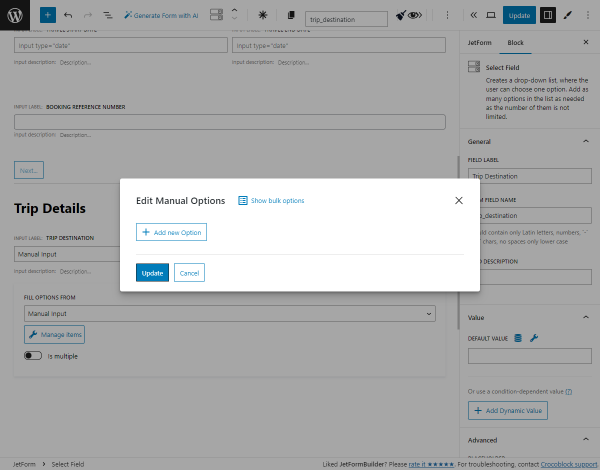
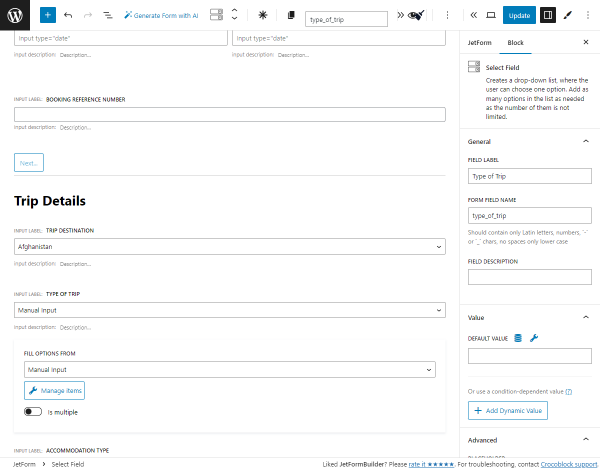
The first field of this section is the “Trip Destination” Select Field, where users can select their destination country.
We keep the “Manual Input” option in the FILL OPTIONS FROM dropdown menu and hit the “Manage items” button.

In the Edit Manual Options pop-up, you can add the needed options by clicking the “+ Add new Option” button.
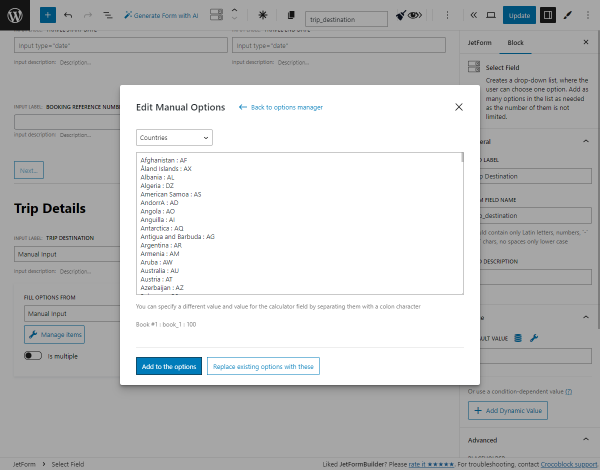
We hit the “Show bulk options” button to add many options at once.
Learn more from the Multi-Optional Field Source Settings tutorial.
From the dropdown list, we select the “Countries” option.
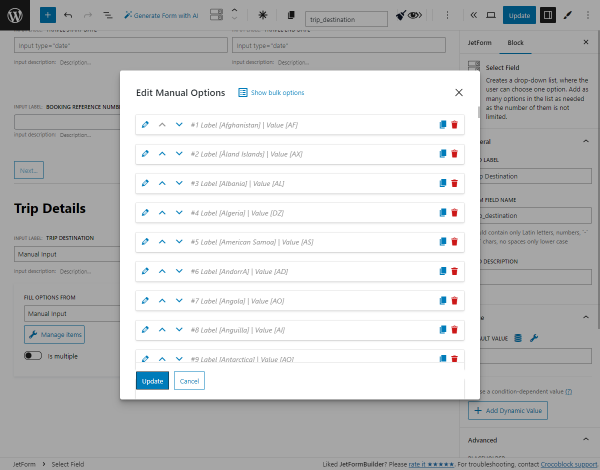
Options can be edited in the “Label : value” format (e.g., “Afghanistan : AF”) in the textarea.
After adjusting the options, we push the “Add to the options” button.
Then, we press the “Update” button.
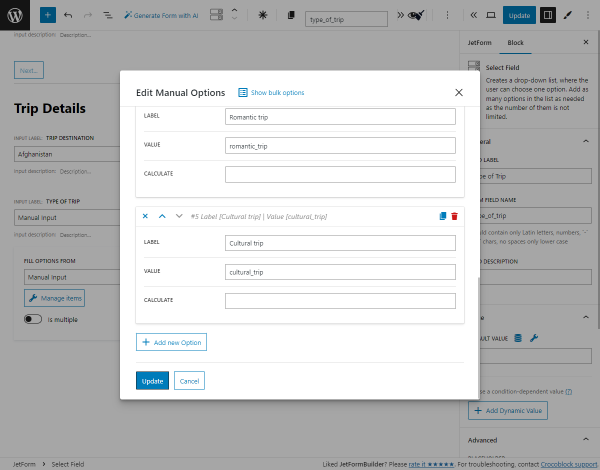
Next, we add the “Type of Trip” Select Field, keep the “Manual Input” option in the FILL OPTIONS FROM dropdown menu, and hit the “Manage items” button.
Here, we add the “Leisure trip,” “Adventure trip,” “Family trip,” “Romantic trip,” and “Cultural trip” options and hit the “Update” button.
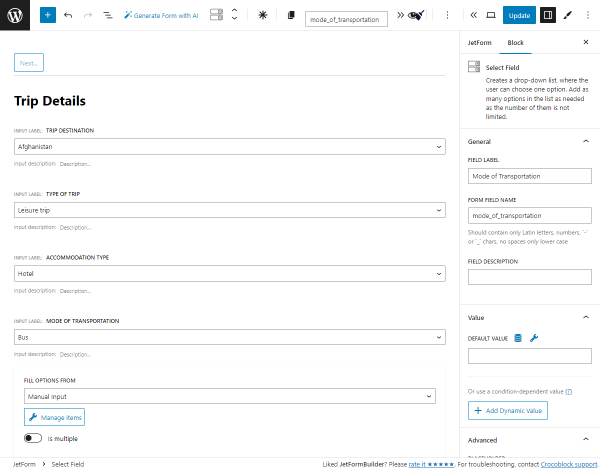
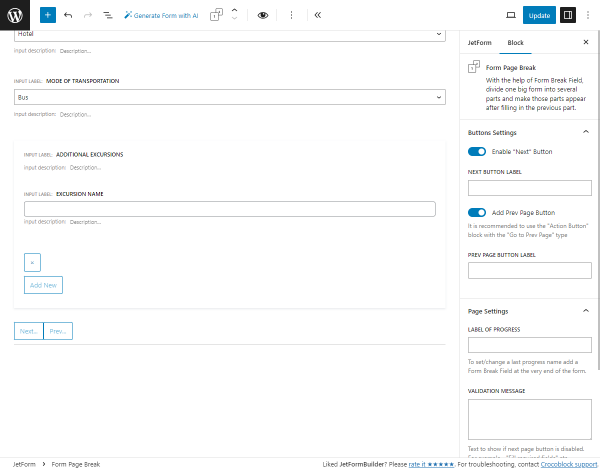
In the same manual way, we set the “Accommodation Type” Select Field with the “Hotel,” “Resort,” “Hostel,” “Lodge,” and “Camping” options, and the “Mode of Transportation” Select Field with the “Bus,” “Flight,” and “Train” options.
The last field is the “Additional Excursions” Repeater Field, where users can add excursions they visited that weren’t included in the tour.
Inside the block, we added the “Excursion Name” Text Field.
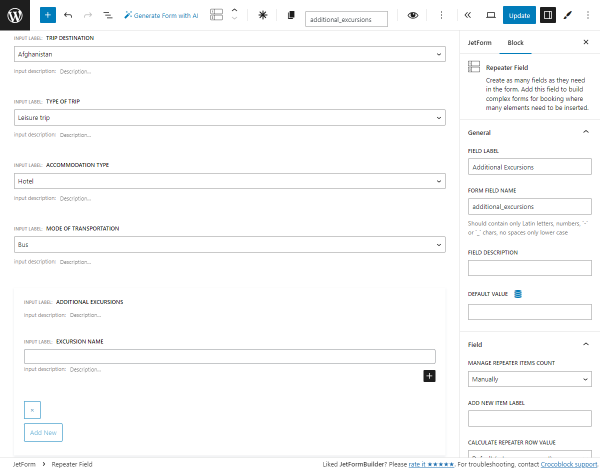
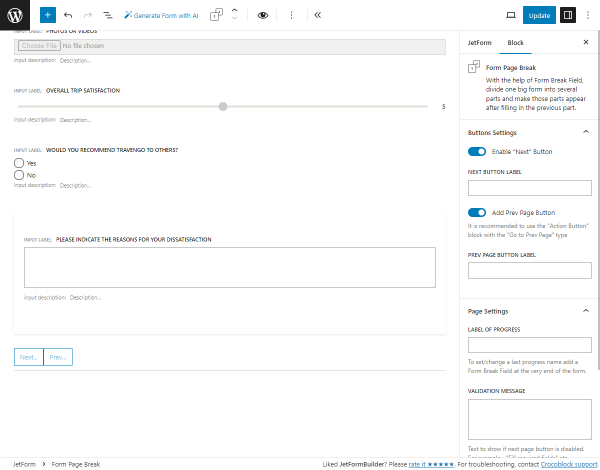
Lastly, we added the Form Page Break block with the Enable “Next” Button and Add Prev Page Button toggles enabled. You can also set the NEXT BUTTON LABEL and PREV PAGE BUTTON LABEL.
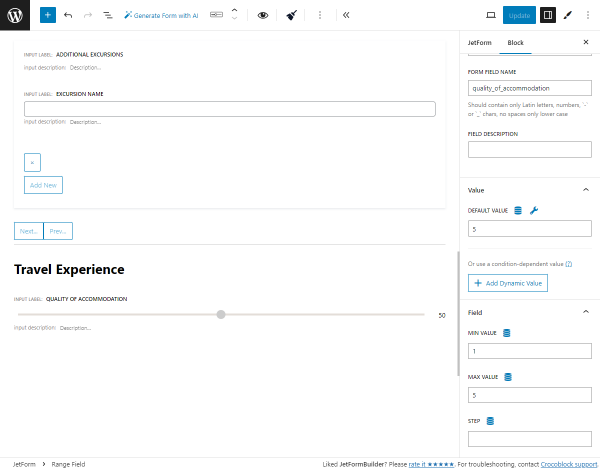
Travel Experience
This section is intended for users to value their travel experience from “1” to “5” with the Range Fields.
We place the “Travel Experience” Heading block.
Then, we add the “Quality of Accommodation” Range Field. In the Block > Value settings tab, we set the “5” DEFAULT VALUE.
In the Block > Field settings tab, we set “1” MIN VALUE and “5” MAX VALUE.
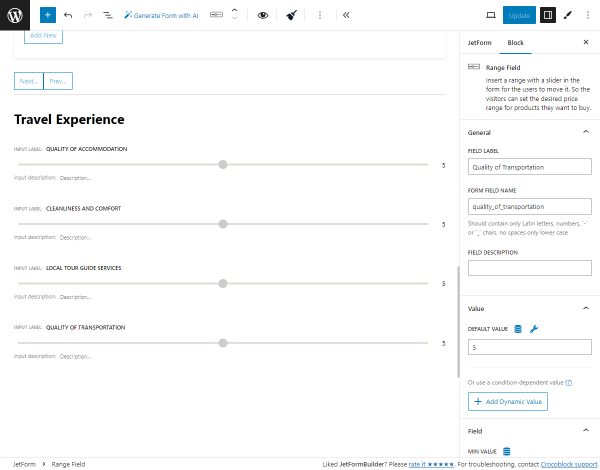
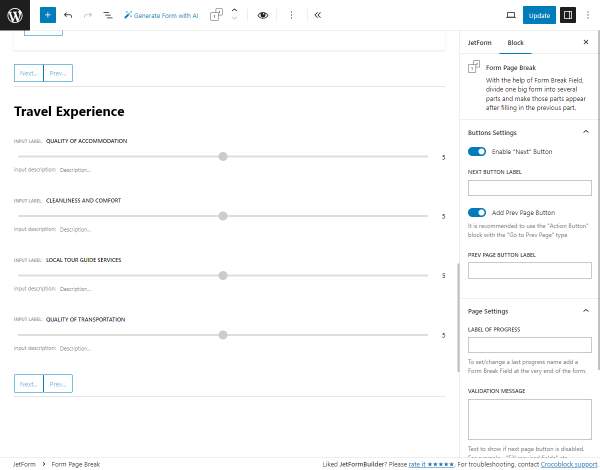
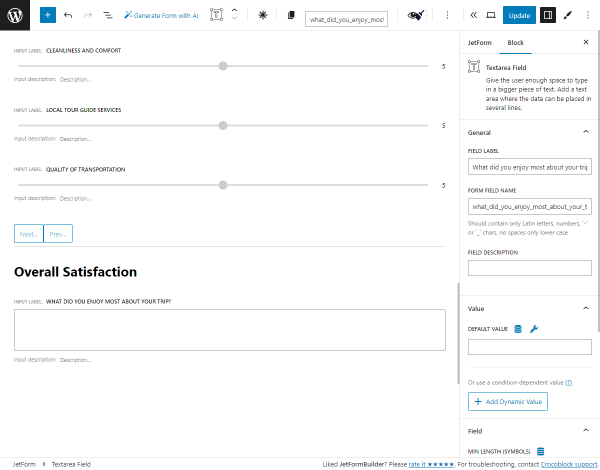
With the same settings in the Block tab, we add the “Cleanliness and Comfort,” “Local Tour Guide Services,” and “Quality of Transportation” Range Fields.
At the end of the section, we added the Form Page Break block with the Enable “Next” Button and Add Prev Page Button toggles enabled. You can also set the NEXT BUTTON LABEL and PREV PAGE BUTTON LABEL.
Overall Satisfaction
First, we add the “Overall Satisfaction” Heading block.
Then, we place the “What did you enjoy most about your trip?” Textarea Field, where users can fully describe their travel experience.
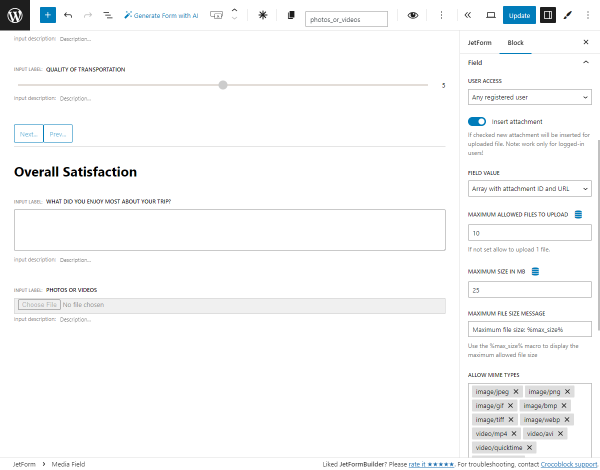
Next is the “Photos or videos” Media Field, where users can upload media files from their trips.
In the Block > Field settings tab, you can adjust such settings:
- USER ACCESS — a dropdown menu where we set the “Any registered user” option to avoid spam from unverified users;
- Insert attachment — a toggle that we turn on to store the uploaded media files in the folder on the PC and Media Library. From the FIELD VALUE dropdown menu, we choose the “Array with attachment ID and URL” option to store the ID and URL of the files;
- MAXIMUM ALLOWED FILES TO UPLOAD — a field, if empty, allows the upload of “1” file. We set the “10” value to enable the upload of a maximum of ten files;
- MAXIMUM SIZE IN MB — a field, by default, allows the maximum file size the user can upload to be “40” MB. We set the maximum “25” MB;
- ALLOW MIME TYPES — as an example, we add such mime types:
- For images: JPEG — “image/jpeg”, PNG — “image/png”, GIF — “image/gif”, BMP — “image/bmp”, TIFF — “image/tiff”, WebP — “image/webp”;
- For videos: MP4 — “video/mp4” AVI — “video/avi”, MOV — “video/quicktime”, WMV — “video/x-ms-wmv”, MPEG — “video/mpeg”, WebM — “video/webm”.
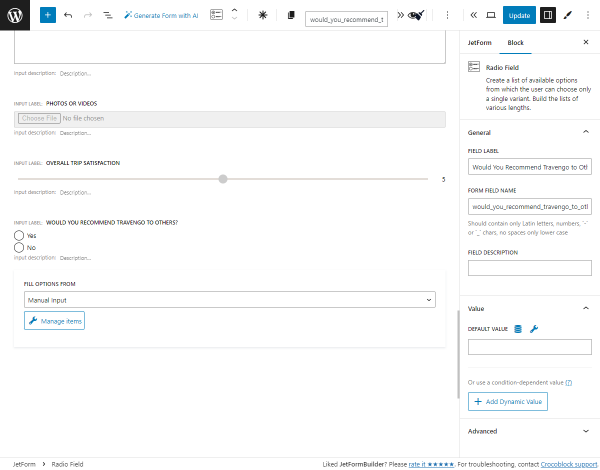
Then, we place another “Overall Trip Satisfaction” Range Field that has the same settings as the previous ones.

The last two fields of this section will be connected with a conditional rule.
First, we add the “Would You Recommend Travengo to Others?” Radio Field block. The “Travengo” name in the FIELD LABEL can be replaced with the name of your website.
We keep the “Manual Input” option in the FILL OPTIONS FROM dropdown menu and hit the “Manage items” button.
In the Edit Manual Options pop-up, we add the “Yes” and “No” options and hit the “Update” button.
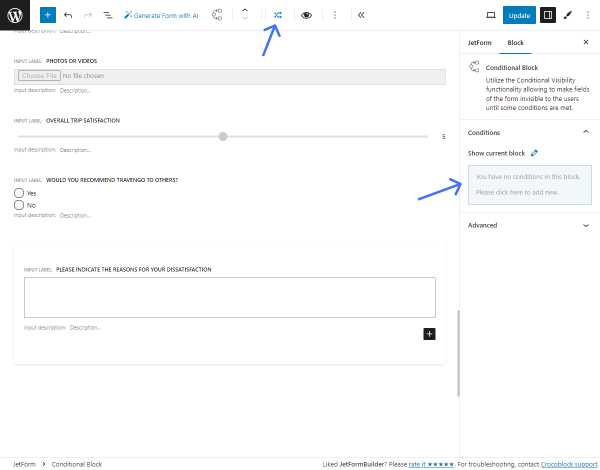
Under this field, we place the Conditional Block. Inside this block, we hit the “plus” button and add the “Please indicate the reasons for your dissatisfaction” Textarea Field.
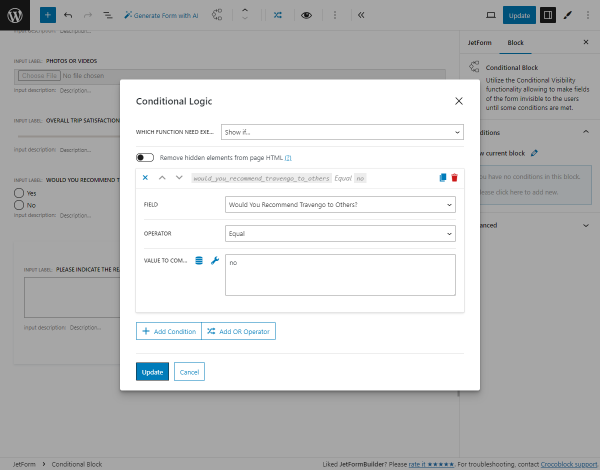
After that, you can click the “crisscross arrows” icon from the upper panel or the “pencil” icon near the Show current block field in the Block > Conditions tab, or hover over the light-blue block in the same tab and hit the “+ Add new” button to set a new conditional rule.
In the Conditional Logic pop-up, we pick the “Show if…” option from the WHICH FUNCTION NEED EXECUTE? dropdown menu and hit the “+ Add Condition” button.
In the repeater field, we select the “Would You Recommend Travengo to Others?” Radio Field created recently, choose the “Equal” OPERATOR, and enter the “no” VALUE TO COMPARE.
Then, we press the “Update” button.
With such settings, if users are not satisfied with the trip and select the “No” option from the Radio Field, they will trigger the Textarea Field, where they can leave their negative feedback.
At the end of the section, we added the Form Page Break block with the Enable “Next” Button and Add Prev Page Button toggles enabled.
Consent
It will be the last section of the form.
First, we craft the “Consent” Heading block.
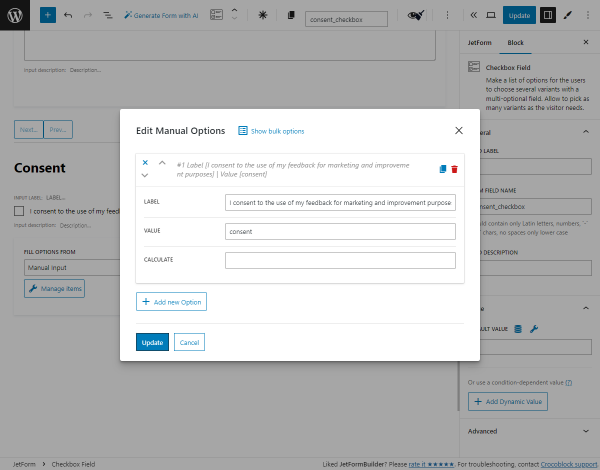
Then, we place the Checkbox Field. For this block, we keep the FIELD LABEL empty and set only the FORM FIELD NAME field in the Block > General settings tab.
We keep the “Manual Input” option in the FILL OPTIONS FROM dropdown menu and hit the “Manage items” button.
In the Edit Manual Options pop-up, we add only an “I consent to the use of my feedback for marketing and improvement purposes” and hit the “Update” button.
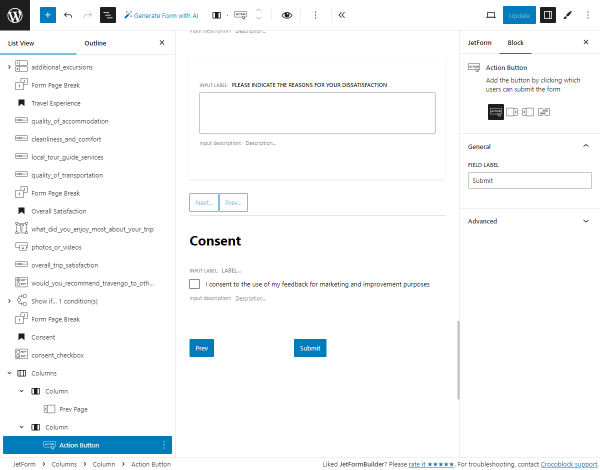
Next, we placed the Columns block with two columns. In the first one, we place the Action Button. In the Block settings tab, we pick the “Prev Page” option and set the “Prev” text in the FIELD LABEL.
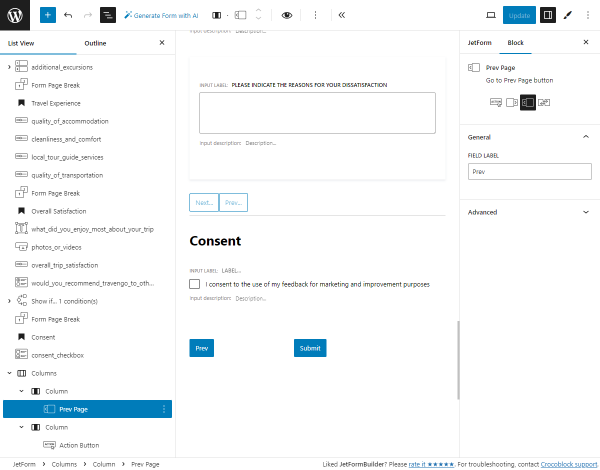
In the second column, we add another Action Button with the default settings.
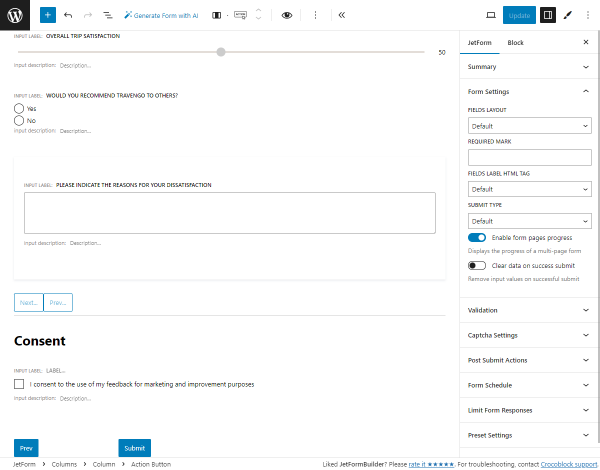
All fields are set. If you wish, you can proceed to the JetForm section on the right panel, unroll the Form Settings tab, and activate the Enable form pages progress to display the progress of a multi-page form.
More details are described in the WordPress Multi-Step Form with Step Indicator and Conditional Blocks tutorial.
Post Submit Actions
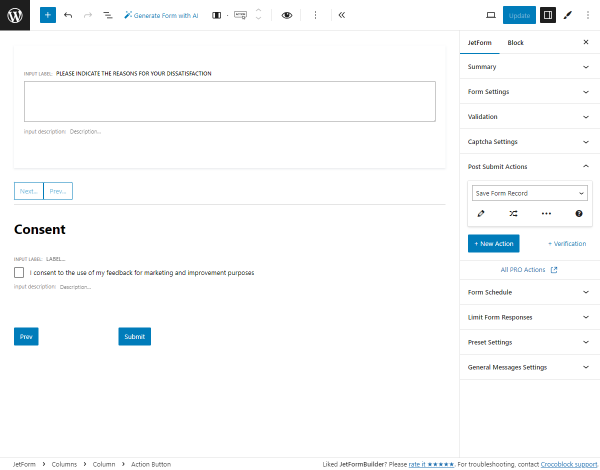
In the JetForm tab on the right panel, you can set the Post Submit Actions in the namesake tab.
The “Save Form Record” action is added by default. It stores the form entries in the database, which can be accessed from the Form Records Page.
Also, you can set the “Send Email” action to send evaluation details to your or the user’s email and the “Redirect to Page” action to redirect the user to another page (e.g., the “Thank You” or “Home” page) after submitting the form.
After finishing customizing the form, we push the “Publish/Update” button.
Testing the Flow
Placing the evaluation form on the page
We go to the WordPress Dashboard > Pages > Add New Page tab and enter a page title (“Feedback”). The page can be edited using the WordPress block editor (Gutenberg), Elementor, or Bricks builder.
Here, we place the JetForm block and pick the recently created form (“Evaluation form”) in the CHOOSE FORM dropdown menu.
Learn more from the How to Display a Form on the Front End tutorial.
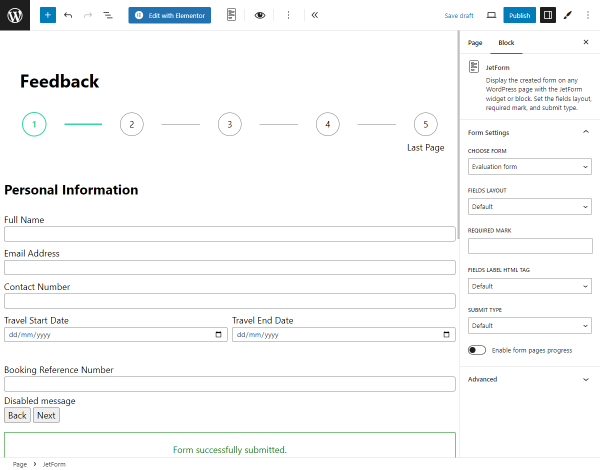
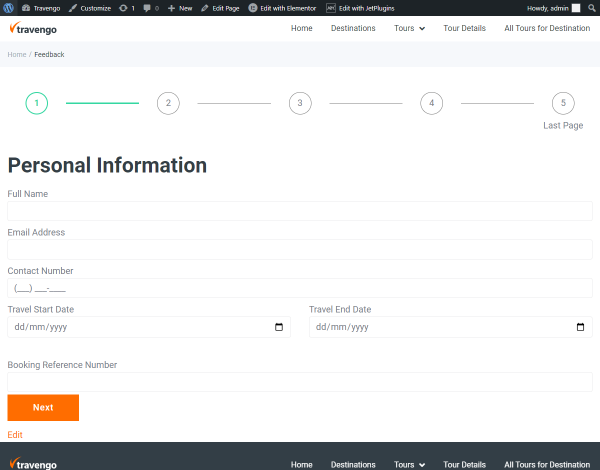
Evaluation form on the front end
We open the page on the front end to test the form.
The first section of the form is the “Personal Information.”
The activated Enable form pages progress toggle from the Form Settings tab shows the progress bar above the form.
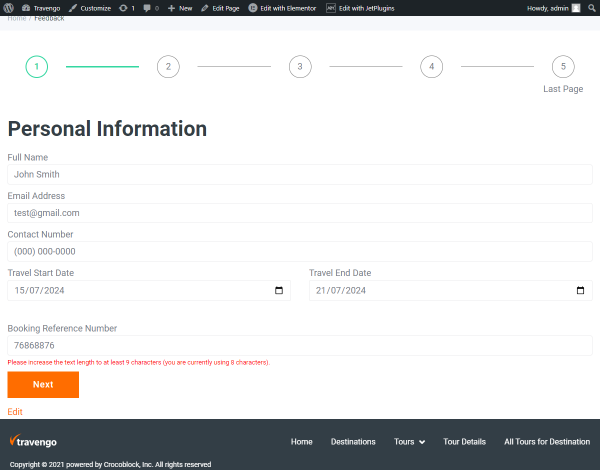
In our case, if the user enters less than “9” characters into the “Booking Reference Number” field, they will get the “Please increase the text length to at least 9 characters (you are currently using “the number of the current” characters).” according to the MIN LENGTH (SYMBOLS) and Advanced Validation settings.
Also, users cannot enter more than “9” characters into this field, according to the MAX LENGTH (SYMBOLS) option.
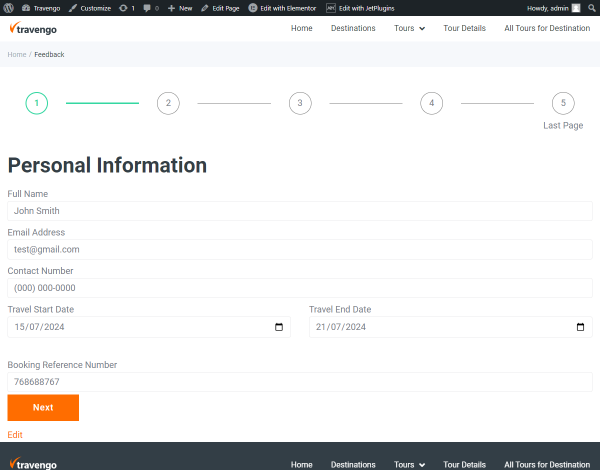
We fill in the field and hit the “Next” button.
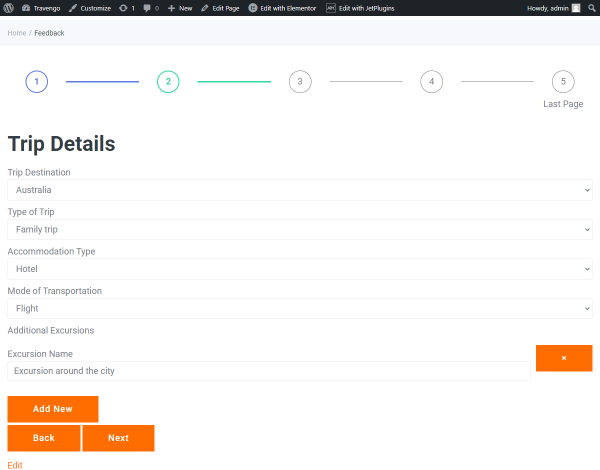
The next section is the “Trip Details.”
By hitting the “Add New” button, users can add text repeater fields to indicate additional excursions they participated in.
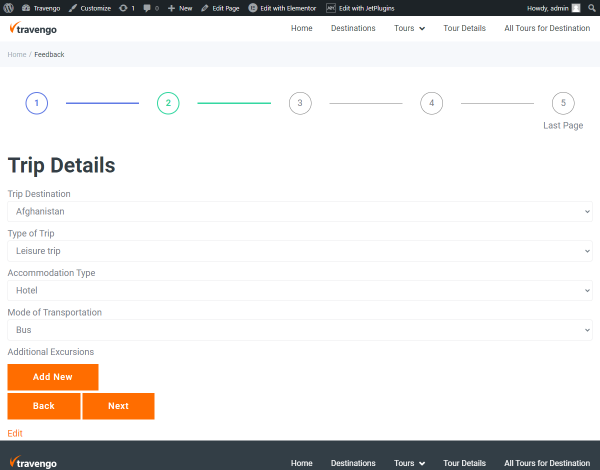
We fill in the field and hit the “Next” button.
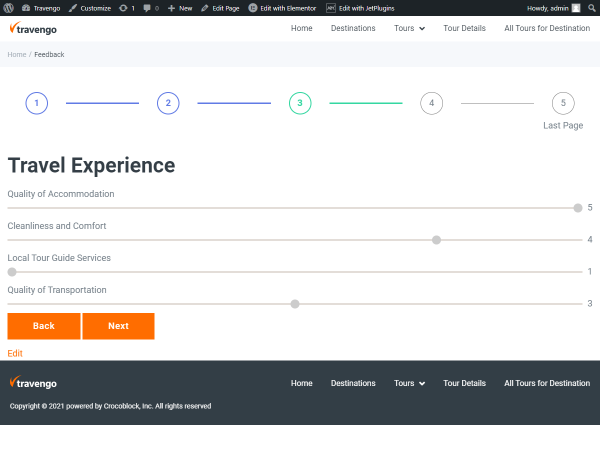
The next section is the “Travel Experience.”
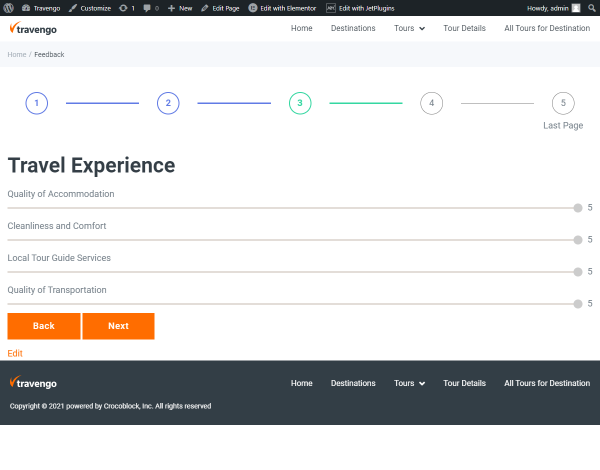
Here, users can set their rating using the range fields.
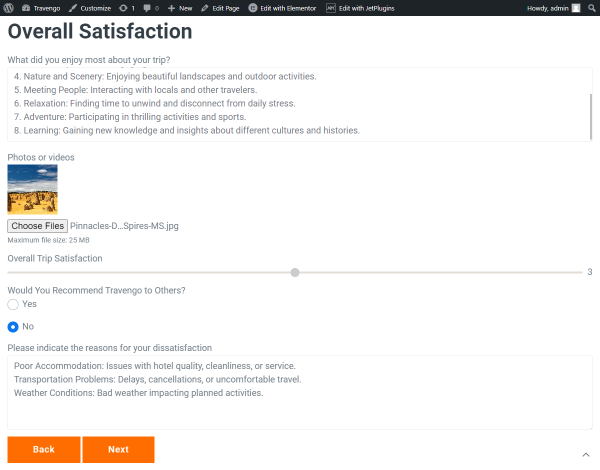
The next section is the “Overall Satisfaction.”
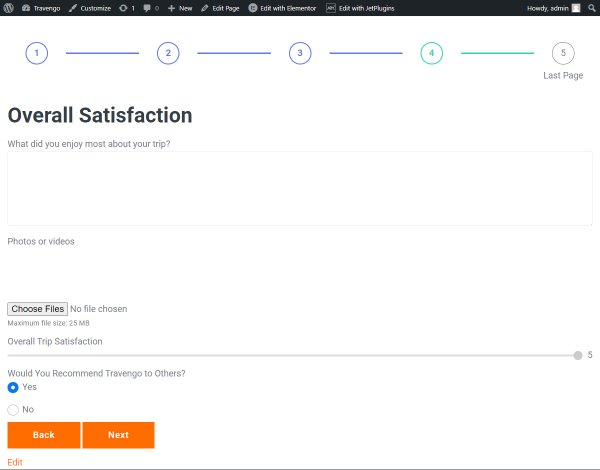
If the user selects the “No” option from the “Would You Recommend Travengo to Others?” radio field, the conditional rule shows the textarea field.
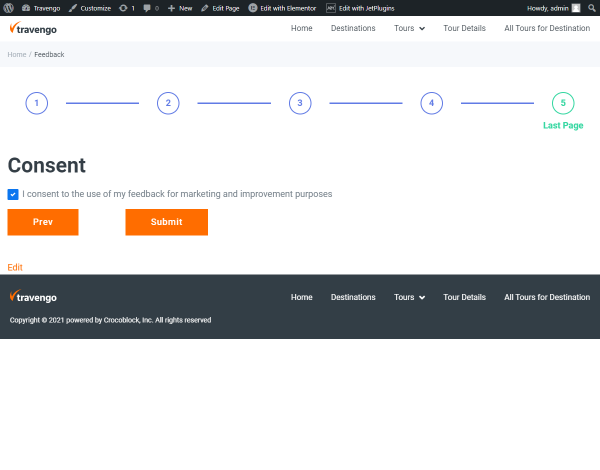
In the last “Consent” section, the option from the checkbox field can be ticked. After that, the form can be submitted.
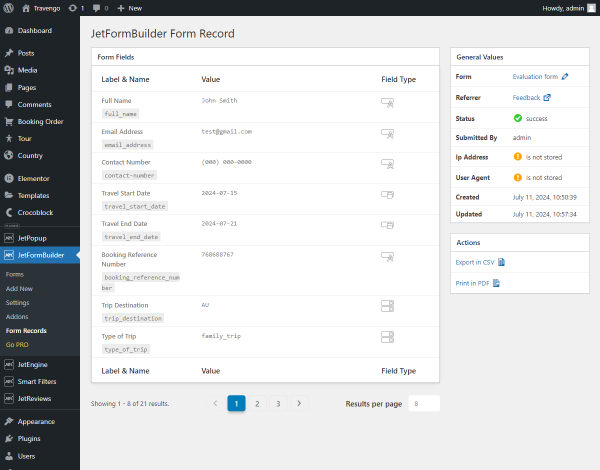
Evaluation Form Record
Then, we go to the WordPress Dashboard > JetFormBuilder > Form Records tab. We hover over the “Evaluation form” and hit the “View” button.

Here, you can observe the values of the submitted fields.
That’s all; now you know how to build an evaluation form using the JetFormBuilder plugin for WordPress.