How to Build a WordPress Registration Form With Payment
In this tutorial, we exemplify creating a conference registration form with payment. We focus on setting the payment options and explaining how this feature works (e.g., configuring gateway settings, setting conditions and events, using macros for payment success or failed messages, etc.).
The needed information about creating registration forms and managing their settings can be found in the corresponding tutorials, i.e., in the How to Create an Event Registration Form tutorial.
- Configure the Payment Settings
- Create a Form
- Configure the Gateway Settings
- Set the Post-Submit Actions
- Add the Form to a Page
- Fill Out the Form
- JetFormBuilder Form Records Data
- JetFormBuilder Payments
- WordPress Dashboard Users Tab
Configure the Payment Settings
Navigate to the WordPress Dashboard > JetFormBuilder > Settings tab and unroll the Payment Gateway section. Here, switch on the Enable Gateways and Enable Test Mode toggles.
This section displays all available gateways. The PayPal gateway is available by default, but you can use the Stripe functionality if the Stripe Payments add-on is installed and activated.

Unroll the needed section and insert the Client ID and Secret Key.
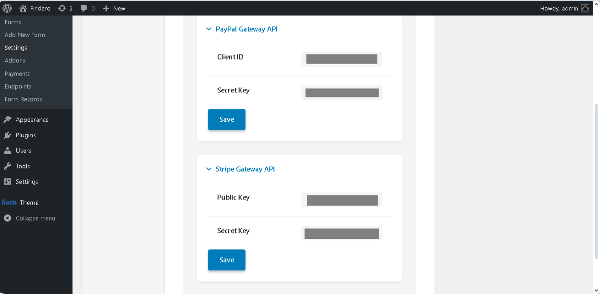
Read the How to Enable and Set Up Payment Gateways tutorial to learn how to obtain the Client ID and Secret Keys.
Create a Form
Navigate to the WordPress Dashboard > JetFormBuilder > Add New Form tab to create a new form. The form will be opened in the Gutenberg editor, and the Welcome block, which allows the application of the pre-created or AI-generated forms, will be displayed.
Here, you can select the needed pre-created form from the Welcome block, delete this block and choose the needed JetForm pattern, or build the form from scratch by adding the required fields.
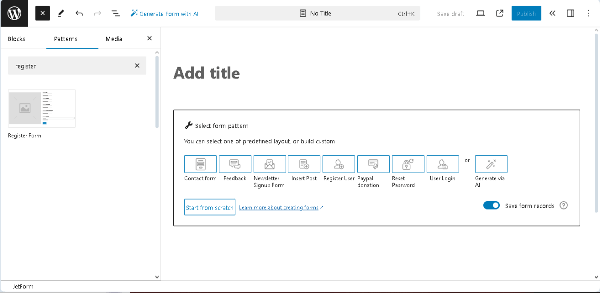
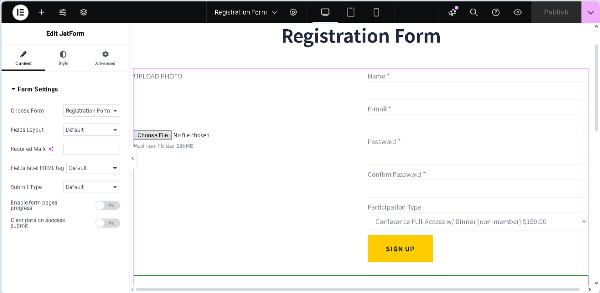
In this case, we deleted the Welcome block, typed the form’s name (the “Registration Form” text), and inserted the premade “Register Form” pattern. After that, we changed the Image block to the Media Field. Now, the built form contains the Media Field, Text Fields, and the Action Button.
In the next step, we inserted the Select Field to choose the needed type of participation and moved down the Action Button. This field will be set as a PRICE/AMOUNT FIELD for payments in the gateway settings.
After adding the Select Field, we pressed the “Manage Item” button and filled out the fields of the newly appeared pop-up. In particular, we added two options 一 the “Conference Full-Access w/ Dinner (member) $125.00” and “Conference Full-Access w/ Dinner (non-member) $150.00” and typed the corresponding VALUE and CALCULATE fields.
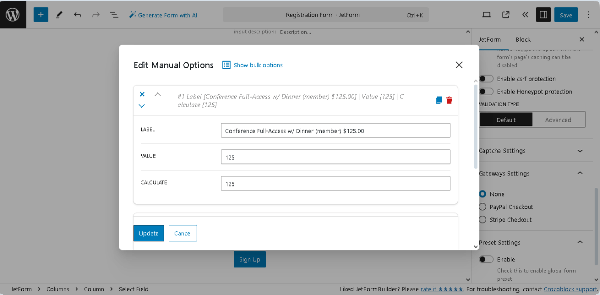
Once completed, press the “Update” button in the pop-up.
Read the Form Creation tutorial for more details on the main fields and settings of the form-building process.
Configure the Gateway Settings
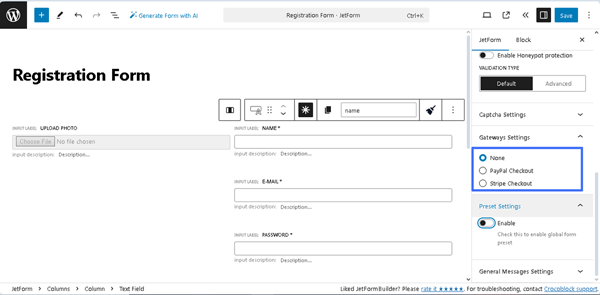
Scroll the JetForm settings down to the Gateway Settings block, which displays all available gateways. In this case, it shows the “None,” “PayPal Checkout,” and “Stripe Checkouts” options.
Adjust the PayPal Checkout settings
To adjust the PayPal Checkout settings, tick the “PayPal Checkout” option. Then, click the newly-appeared “Edit” button and fill out the fields in the Edit PayPal Checkout Settings pop-up.
First, activate the Use Global Settings toggle. Then, the data from the Client ID and Secret Key fields inserted on the WordPress Dashboard > JetFormBuilder > Settings page will be added to the CLIENT ID and SECRET KEY fields of the pop-up.
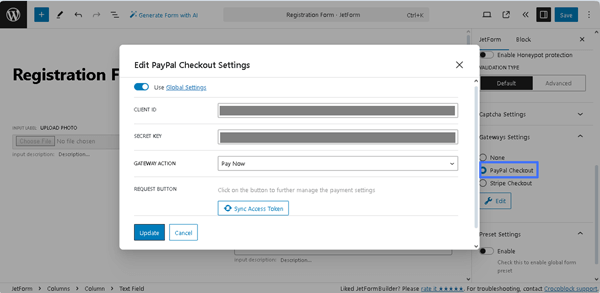
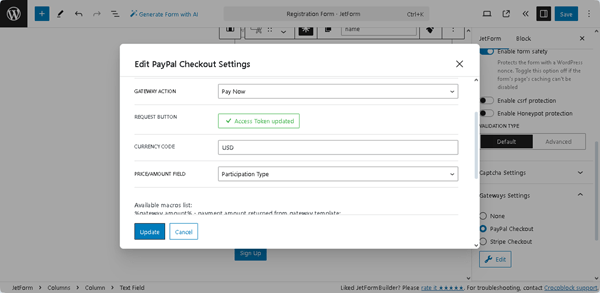
After that, click the “Sync Access Token” button. After synchronization is completed, the text on the button will change to “Access Token updated.”
In the next step, type the required CURRENCY CODE (the “USD” text, in this case) and select the PRICE/AMOUNT FIELD (the “Participation Type” form field in this tutorial).
In the last step, add the texts in the PAYMENT SUCCESS MESSAGE and PAYMENT FAILED MESSAGE. In this tutorial, we used the %field_name% and %gateway_amount% embed macros and typed the following text in the PAYMENT SUCCESS MESSAGE field: “Dear %Name%! We confirm your payment in the amount of %gateway_amount%. Thank you for your participation!”. Here, the %Name% text will be changed with the user’s name taken from the form’s “Name” field, and the %gateway_amount% text will be changed with the payment amount taken from the form’s field set as the PRICE/AMOUNT FIELD.
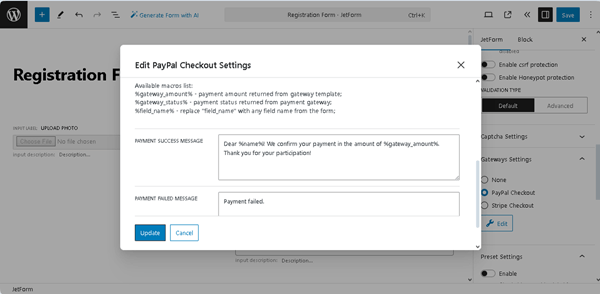
Finally, click the “Update” button and close the pop-up.
Configuring the Stripe Checkout settings
The Stripe Checkout settings are the same as the PayPal Checkout ones. To configure the Stripe Checkout settings, tick the “Stripe Checkout” option in the Gateway Settings block. After that, the “Edit” button will appear. Press this button and fill out the fields in the Edit Stripe Checkout Settings pop-up.
First, activate the Use Global Settings toggle. Then, as for the PayPal gateway settings, the data from the Client ID and Secret Key fields of the WordPress Dashboard > JetFormBuilder > Settings page will be added to the CLIENT ID and SECRET KEY fields of the pop-up. Finally, click the “Sync Access Token” button to synchronize.
After that, the CURRENCY CODE field will be displayed, as will the PRICE/AMOUNT FIELD, PAYMENT SUCCESS MESSAGE, and PAYMENT FAILED MESSAGE fields, prefilled with the previously entered data.
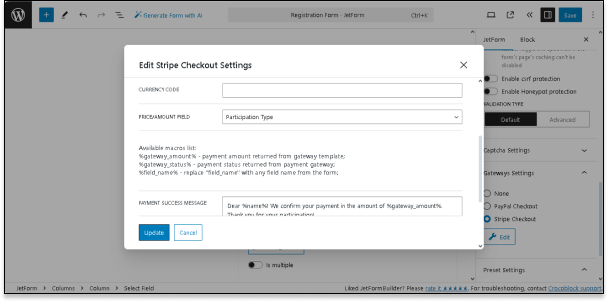
In this case, we typed “USD” into the CURRENCY CODE field and left prefilled data in the other fields.
Finally, press the “Update” button to save settings.
Set the Post-Submit Actions
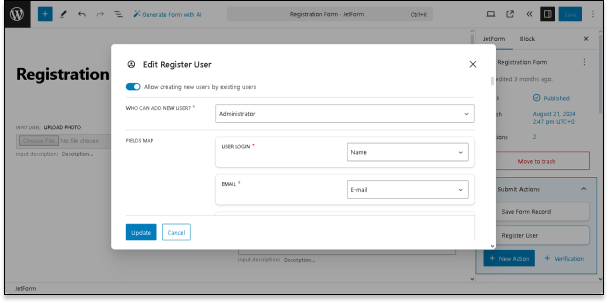
Navigate to the JetForms > Post Submit Actions section. The Save Form Record Post Submit Action is set by default. Here, press the “+ New Action” button and add the Register User Post Submit Action. After that, the “Edit Register User” window will appear.
In this window, first, enable the Allow creating new users by existing users toggle. Then, select the “Administrator” option in the WHO CAN ADD NEW USER drop-down and fill in the FIELDS MAP. In this case, we selected the form fields in the appropriate drop-down lists.
In the last step, choose the “Author” USER ROLE.
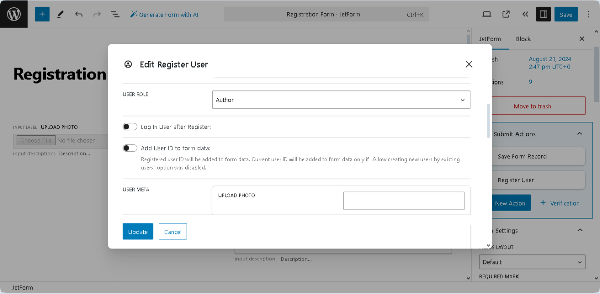
Also, if needed, enable the Log In User after Register toggle to make the user logged-in.
Finally, press the “Update” button to save the changes and close the window.
To set the condition that this Post Submit Action should be performed only after successful payment, we hovered over the action and pressed the “Edit Conditions & Events” button. Once pressed, the Edit Action Conditions & Events pop-up will appear. In this pop-up, click the Events match tab and select the “GATEWAY.SUCCESS” option from the ADD EVENT drop-down list.
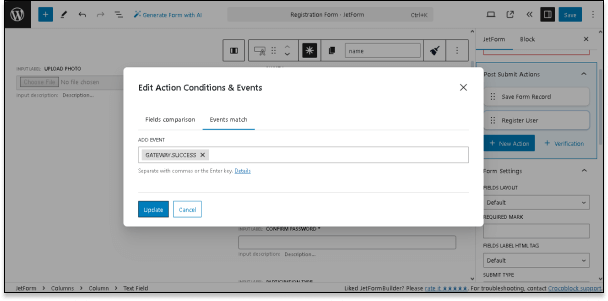
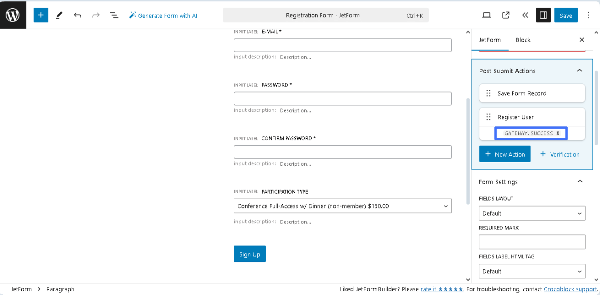
Finally, press the “Update” button in the pop-up. Then, the “GATEWAY.SUCCESS. X” text will be added below the “Register User” Post Submit Action.
Read the Post Submit Actions Overview to know how to add and manage Post Submit Actions. For instance, you can set “Email Verification.” Also, read the How to Verify Users by Email Before Registration tutorial to learn how to manage the email verification settings.After completing the form, move to the top right corner of the screen and press the “Publish/Save” button.
Add the Form to a Page
Open an editor you prefer and find the JetForm widget/block/element. In this tutorial, we use Elementor.
Read the Displaying a JetFormBuilder Form in Any Page Builder tutorial to know how to add the JetForm widget/block/element in Elementor, Block Editor, and the Bricks theme.
Fill Out the Form
Move to the front end to fill out the form.
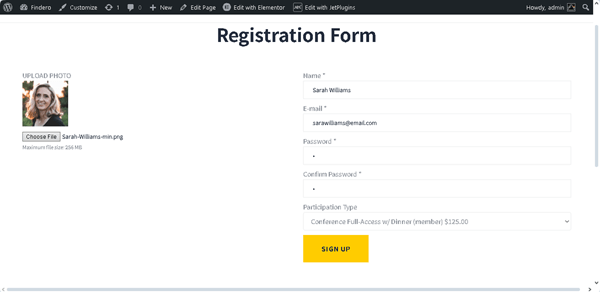
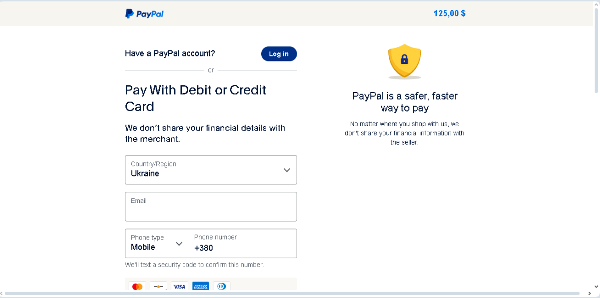
After that, press the “SIGN IN” button. If the form was submitted successfully, you will be redirected to the PayPal page with the option to pay.
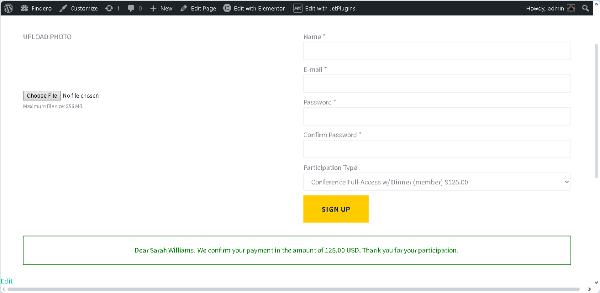
After completing the payment, you will be redirected back to the form, where the following text will be shown: “Dear “user name”! We confirm your payment in the amount of **** USD. Thank you for your participation!”
JetFormBuilder Form Records Data
Since we set the “Save Form Record” Post Submit Action, the JetFormBuilder plugin saves the submitted form data in the WordPress Dashboard > JetFormBuilder > Form Records tab. This tab displays all submitted forms and their status.
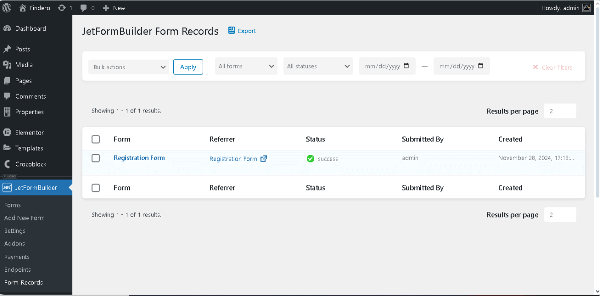
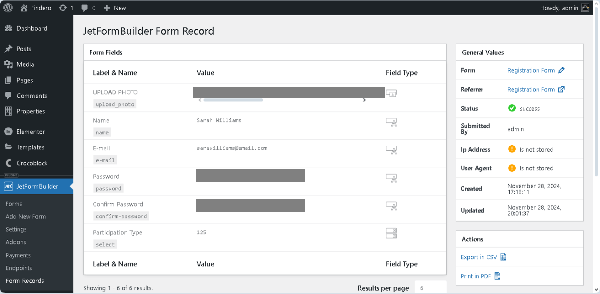
To view more details about a specific form submission, hover the cursor under the form’s name and press the “Edit” link below it.
JetFormBuilder Payments
The JetFormBuilder plugin collects all payments and their data in the WordPress Dashboard > JetFormBuilder > Payments path.
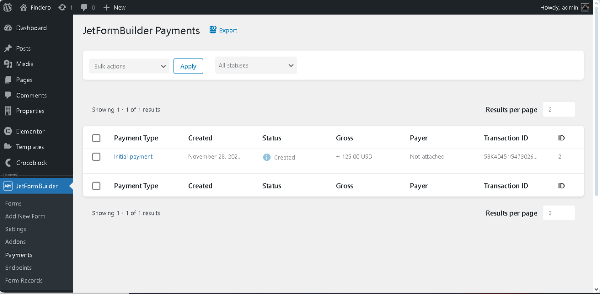
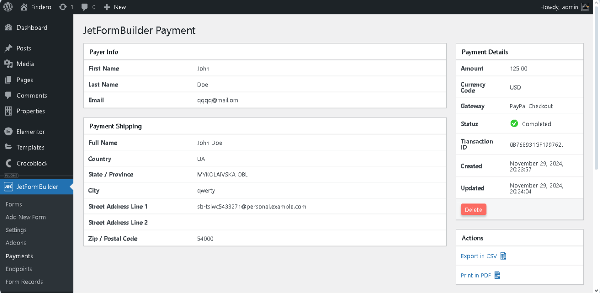
Hover over the payment’s name and press the “View” link. Then, observe the payment details.
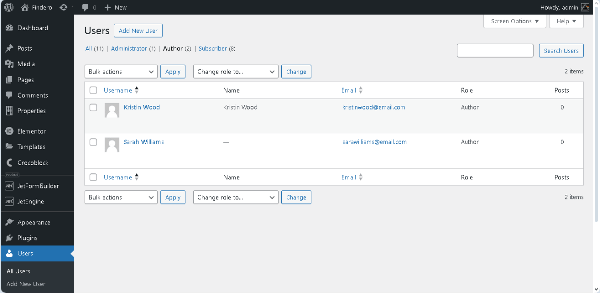
WordPress Dashboard Users Tab
To check if the user was created, proceed to WordPress Dashboard > Users.
Here you go; the new user is already displayed. As we previously selected, its user role is set to “Author.”
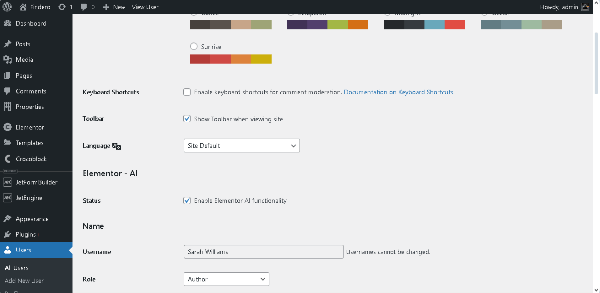
Press the “Edit User” button to see if the completed information is saved in the database.
That’s it. Now you know how to build WordPress registration forms with payment.