How to Create a Quiz in WordPress
Learn how to create a form for a many-paged quiz that allows multiple choices using the Advanced Choice, Conditional Block, Calculated, and other fields of the JetFormBuilder plugin for WordPress. Also, you can use the pre-made Quiz Form template.
- Create a Form
- Customize the Text Field
- Enable Form Page Progress
- Add the Advanced Choices Field with One Choice
- Break the Page
- Add the Conditional Block for One Choice
- Add the Advanced Choices Field with Multiple Choice
- Add the Calculated Field
- Post-Submit Actions
- Add the Form to a Page
Create a Form
First, navigate to the WordPress Dashboard > JetFormBuilder > Add New tab to create a new form. The form will be open in the Gutenberg editor.
Initially, the form includes the Welcome block, which allows the application of the pre-created or AI-generated forms.
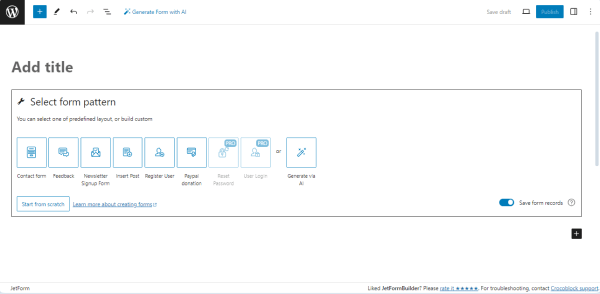
Press the “Start from scratch” button to develop a custom form.
The Welcome block will be closed, and the Hidden Field, the Text Field, and the Action Button will be added by default.
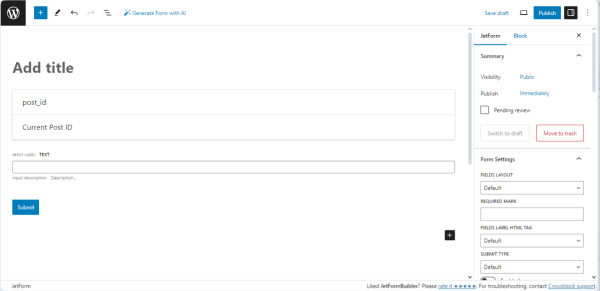
Add the form’s title (here, “Quiz”).
The Form Creation Tutorial details how to build the JetFormBuilder forms.
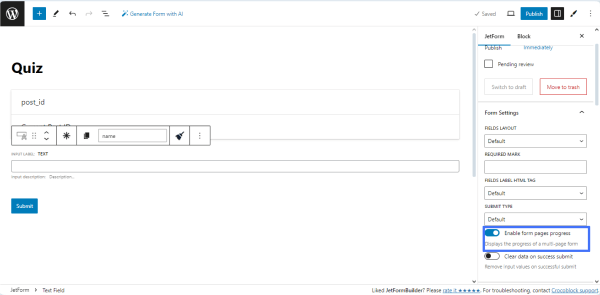
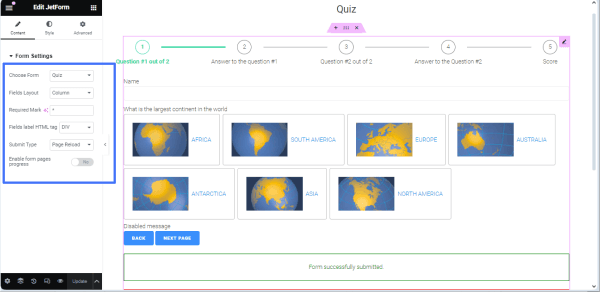
Enable Form Page Progress
Navigate to the JetForm settings and switch on the Enable form pages progress toggle.
Read the WordPress Multi-Step Form with Step Indicator and Conditional Blocks tutorial to learn more details about the creation of multi-step forms.
Customize the Text Field
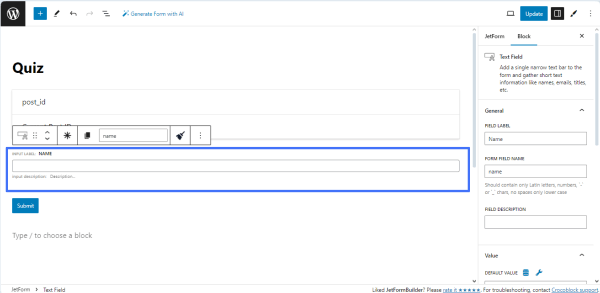
Navigate to the Block settings tab of the Text Field and fill in the FIELD LABEL field.
The General Settings Section guide details how to manage the JetFormBuilder field settings.
Add the Advanced Choices Field with One Choice
Find and then drag and drop the Advanced Choices Field block onto the page.
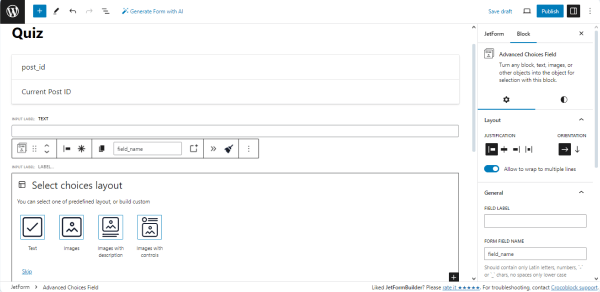
In the given case, we selected the “Images with controls” choice layout.
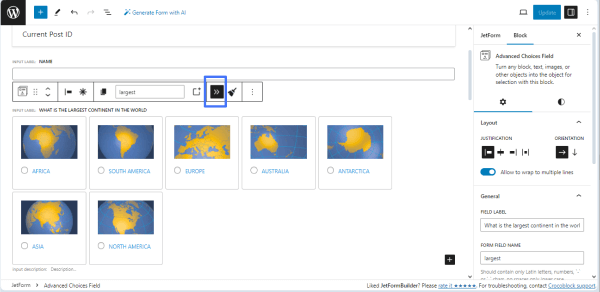
Then, type the field’s name in the FIELD LABEL field (“What is the largest continent in the world?” text, for example) and fill in the FORM FIELD NAME field (e.g., “largest”).
In the next step, select the image above the “Book Name” text on a choice item. Press the “Replace” button on the settings panel that appears and add the image you need.
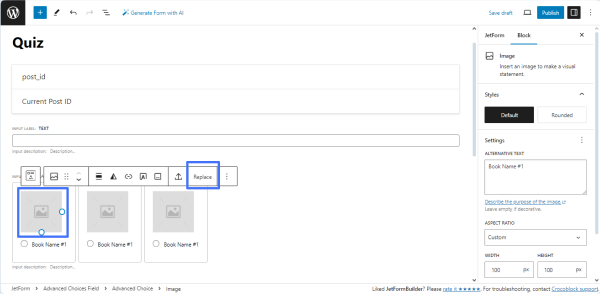
Type the needed text instead of the “Book Name #” on the choice item.
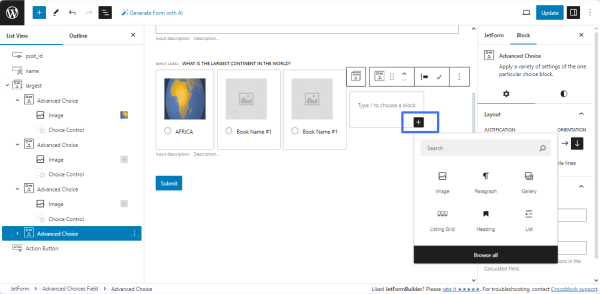
If you need more than three choice items added by default, press the “plus” icon in the bottom right corner of the choice item to add another. Then, add the needed images and texts into the Image and Choice Control fields.
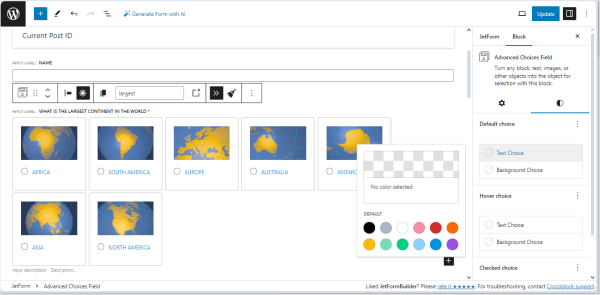
You can customize the style settings as well. To change the text or background color for all options, click the Advanced Choices Field block and open the Block > Style tab.
To alter the style settings of one option, click the needed Choice Control block, open the Block > Style tab, and, for instance, change the text color.
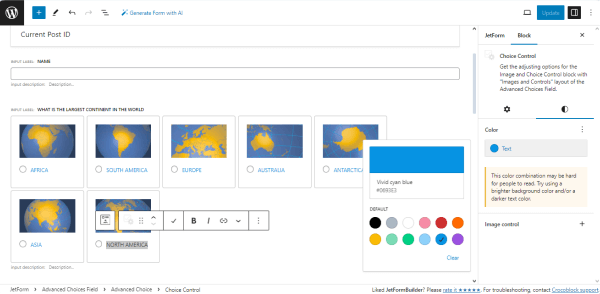
Also, for the Choice Control block, you can open the Block > Settings tab, and, in the CONTROL TYPE field, you can select how the item should be chosen – by pressing the “Image” or using the “Radio input” option.
Here, we pick the “Radio input” option.

Every option is considered as the Advanced Choice block.
Click the needed Advanced Choice block, open the Block > General tab, and set the needed values in the VALUE and VALUE FOR CALCULATED FIELD fields.
Fill in these fields for all choice items.
For instance, we set “zero” for incorrect answers and “one” for the correct answer.
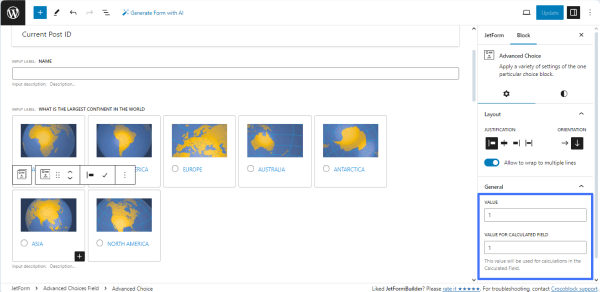
In this tutorial, this question and this Advanced Choices field have only one correct answer.
To redirect users to another page, click the “double-chevron” icon on the settings panel. This action enables the automatic transition to the next page when the values are changed.
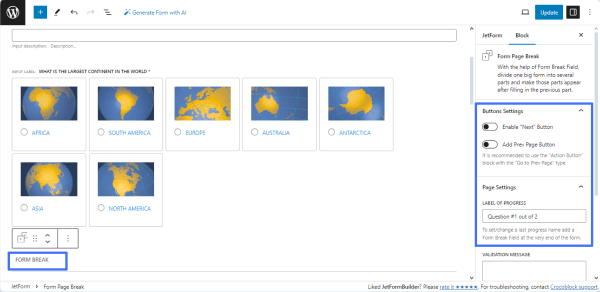
Break the Page
Find the Form Page Break Field block and drag and drop it onto the page.
Then, navigate to the Buttons Settings tab and leave the “Enable “Next” Button” toggle inactive.
Finally, navigate to the Page Settings block and type the text in the LABEL OF PROGRESS field (e.g., “Question #1 out of 2”).
Add the Conditional Block for One Choice
In this tutorial section, we added the Conditional Blocks to display the needed text if users select the correct or incorrect answer.
We dragged and dropped the Conditional Block to the page and pressed the “crisscrossed arrows” button in the upper tools panel. Then, the Conditional Logic pop-up will be unrolled.
In the Conditional Logic pop-up, we selected the “Show if…” option in the WHICH FUNCTION NEED EXECUTE? drop-down list; then, we pressed the “+ Add Condition” button to set the conditional rule. Here, we selected the Advanced Choices Field label in the FIELD drop-down list (“What is the largest continent in the world?” in this case), chose the “Equal” OPERATOR, and, finally, typed the correct answer value in the VALUE TO COMPARE field (the “1” text, in this case).
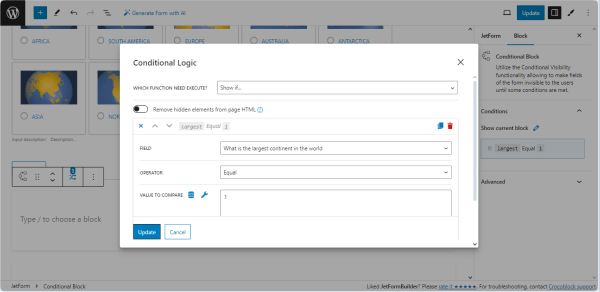
Once completed, press the “Update” button.
Then, press the “plus” icon on the right side of the Conditional Block and select the needed field.

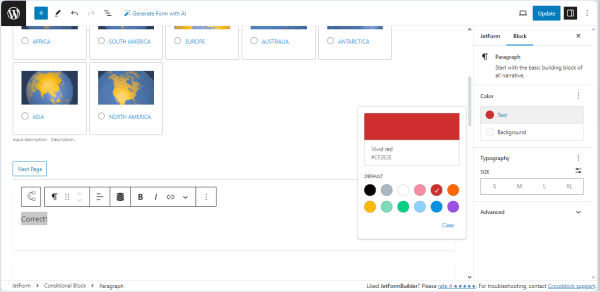
We selected the Paragraph block and typed the “Correct!” text in the Conditional Block text field. We also set the color for this text.
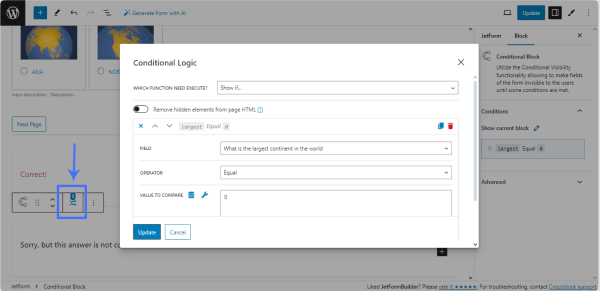
In the same way, we added another Conditional Block that will display the “Sorry, but this answer is not correct!” text in case of an incorrect answer. The only difference is that we set the zero (the “0” text) in the VALUE TO COMPARE field.
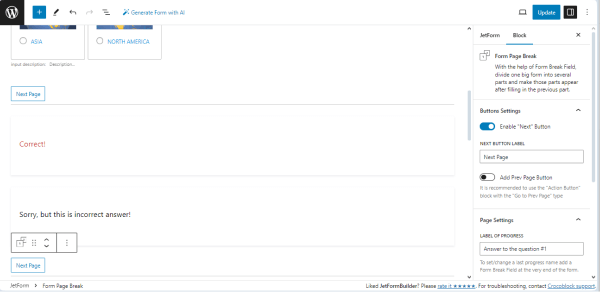
In the next step, we added the Form Page Break block to the page and activated the Enable “Next” button toggle for the button setting block.
Then, we typed the text displayed on the “Next” button in the NEXT BUTTON LABEL field.
Finally, we navigated to the Page Settings block and typed the text in the LABEL OF PROGRESS field (“Answer to the question #1” in our case).
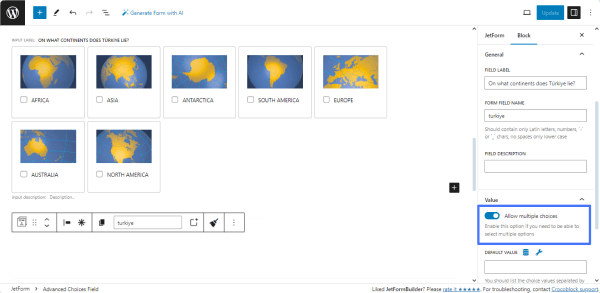
Add the Advanced Choices Field with Multiple Choice
Duplicate the added Advanced Choices Field and move it below the Form Page Break block, or add another Advanced Choices Field and add the needed Images and Choice Controls.
Navigate to the Block > General settings block and type the field’s name in the FIELD LABEL field (“On what continents does Türkiye lie?” text, in this case), then fill in the FORM FIELD NAME field (the “turkiye” text in the given case).
Enable the To allow the multiple choices toggle in the Value setting block of the field.
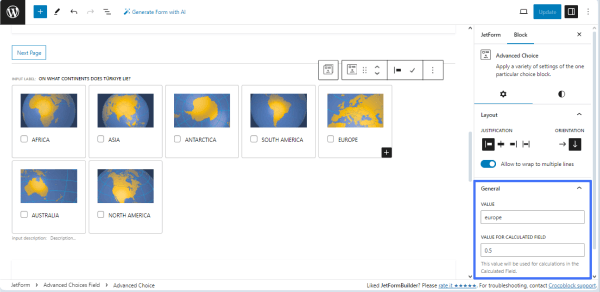
Finally, press the specific item (Advanced Choice block) and set the needed values in the VALUE and VALUE FOR CALCULATED FIELD fields of the Block > General setting tab.
Set these values for all choice items. In the given case, we set the continent names (i.e., “africa,” “asia,” etc.) in the VALUE field for all items. Then, we typed “0.5” for Asia and Europe and “0” for other continents in the VALUE FOR CALCULATED FIELD setting fields.
Press the “asterisk” icon to make the Advanced Choice Field required.
In the last step, we added the Form Page Break block, activated the Enable “Next” Button toggle, and filled in the NEXT BUTTON LABEL and LABEL OF PROGRESS fields.
Add the Conditional Block for Multiple Choice
Add the Conditional Block to the page and trigger the Conditional Logic pop-up by clicking the “crisscrossed arrows” button.
In the Conditional Logic pop-up, we selected the “Show if…” option in the WHICH FUNCTION NEED EXECUTE? drop-down list, then pressed the “+ Add Condition” button to set the conditional rules.
Here, we selected the Advanced Choices Field label in the FIELD drop-down list (“On what continents does Türkiye lie?” text, in this case), chose the “In the list” OPERATOR, and, finally, typed the correct answer value in the VALUE TO COMPARE field (“asia” in this case).
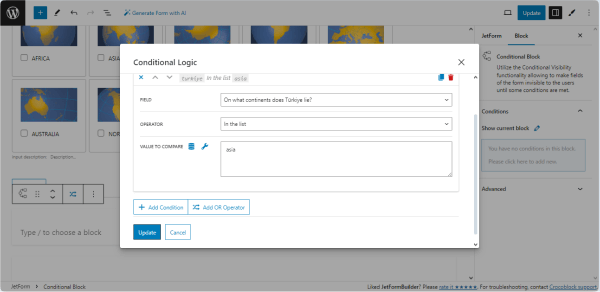
To add another condition, scroll down the pop-up and press the “+ Add Condition” button.
In the appeared fields, select the required FIELD (“On what continents does Türkiye lie?” in this case); choose the “In the list” OPERATOR, and, finally, type the correct answer value in the VALUE TO COMPARE field (“europe” in this case).
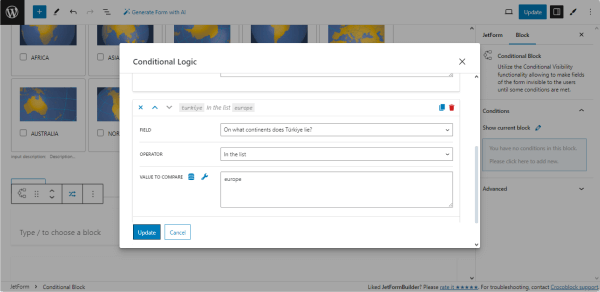
Once all conditions are added, press the “Update” button.
Add the needed fields onto the Conditional Block (the Paragraph block and with the “Correct!” text in our case).
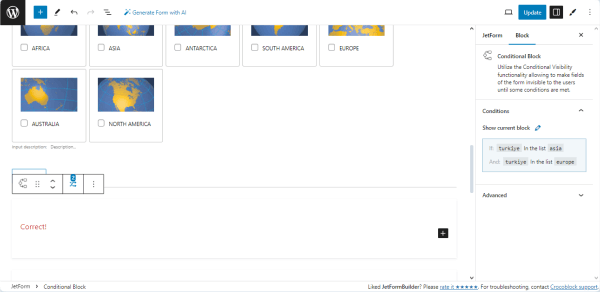
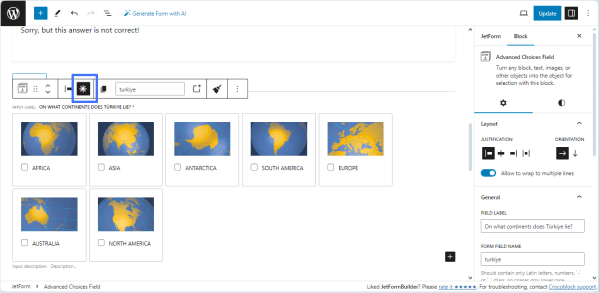
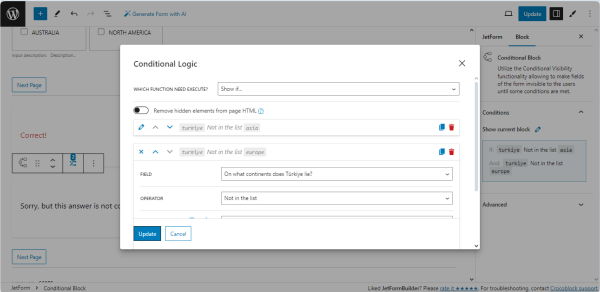
Add another Conditional Block and set the conditional rule to display the “Sorry, but this answer is not correct!” text if the conditions are unmet. Here, we set the “Not in the list” operator, and the other settings are the same.
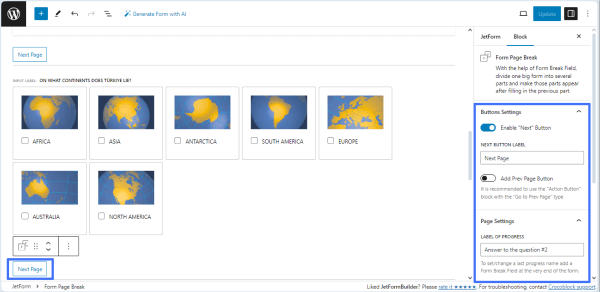
Finally, we added the Form Page Break block, activated the Enable “Next” Button toggle, and filled in the NEXT BUTTON LABEL and the LABEL OF PROGRESS fields (the “Next Page” and “Score” texts, respectively).
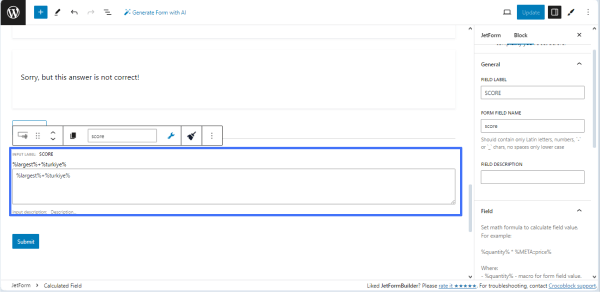
Add the Calculated Field
We added the Calculated Field to show the quiz’s total score. Then, we filled in the FIELD LABEL and FORM FIELD NAME fields (the “SCORE” and “score” texts, respectively).
We typed the “%largest%+%turkiye%” text, which means that this field will calculate the correct answers for the first and second Advanced Choices Fields (in this case, we typed the names of the previously added Advanced Choices Fields).
The Checkbox + Calculated tutorial explains how to combine these fields.
The last step is adding the Form Page Break block. Here, we did not activate the “Enable “Next” Button” and “Add Prev Page Button” toggles but filled in the LABEL OF PROGRESS field with the text that will be displayed as the last step of the progress bar (the “Score” text).
Finally, once you complete the form with the fields, press the “Update/Publish” button.
Post-Submit Actions
The “Save Form Record” Post-Submit Action is set by default. We kept this action and did not add any others because such actions are uncommon for online quizzes.
However, you can add other Post-Submit Actions, such as “Send Email.”
Add the Form to a Page
Open a page/post/CPT post/template you need and place the JetForm widget (in Elementor), JetForm block (in Block Editor), or JetForm element (in Bricks). Select the built form in the Choose Form drop-down list.
Learn about other settings from the JetForm Overview.
Finally, navigate to the front end and check how this form works.
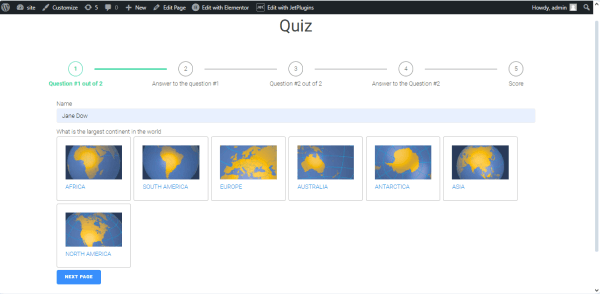
First, we typed the name and pressed the “Asia” choice item. Then, we got the result of the choice.
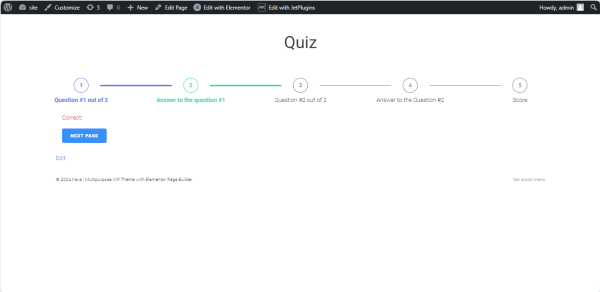
After clicking the “NEXT PAGE” button, we were redirected to the second page of the form.
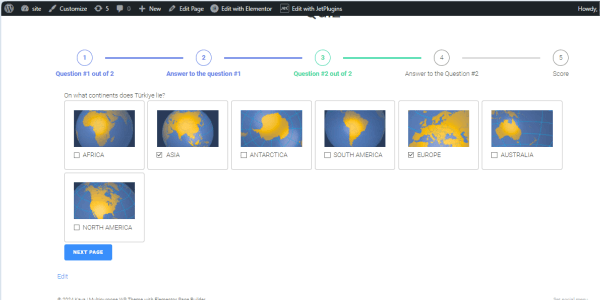
Here, we ticked the “Asia” and “Europe” checkboxes and clicked the “Next Page” button.
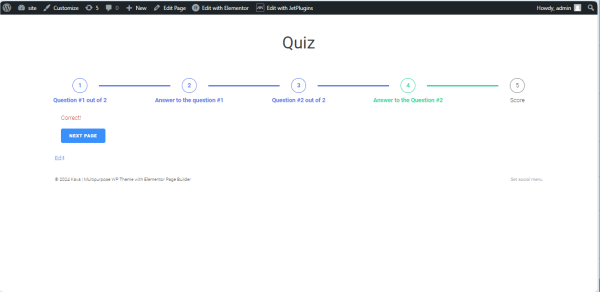
The result will be shown on the next page.
Finally, we were redirected to the last page of the form.
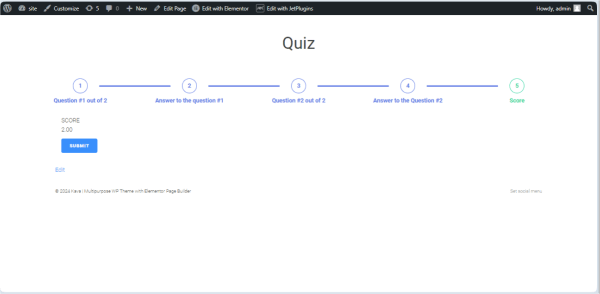
Pressing the “Submit” button submits this form.
That’s all about creating the form for the many-paged quiz that allows multiple choices using the Advanced Choice, Conditional Block, Calculated, and other fields of the JetFormBuilder plugin for WordPress.