How to Create a Wholesale Order Form in WordPress
In this tutorial, we demonstrate the common use of the JetFormBuilder and JetProductTables (with WooCommerce) plugins to create a wholesale order form. In particular, the form described here lists the WooCommerce Products and Variations, allowing users to select multiple items in bulk and then proceed to the cart and checkout pages for payment.
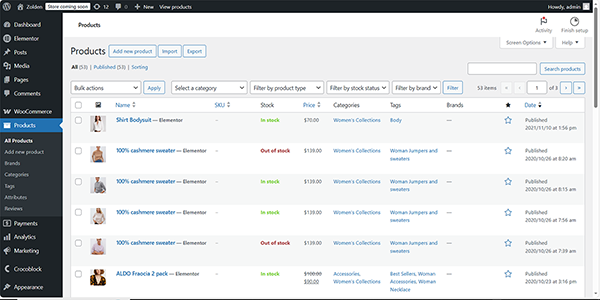
Therefore, the WooCommerce plugin should be installed and activated, and the Products should be created.
Read the How to Create Variable Products Via WordPress Form tutorial to learn how to automate the process of inserting WooCommerce products.
In addition, here we calculate the total price of the order and configure the form’s redirection to a payment page. To implement this functionality, except for the JetFormBuilder and JetProductTables plugins, we use the Code Snippets plugin to insert the code and the JetEngine plugin to generate and apply macros.
- Configure the WooCommerce Settings
- Set the Payments Gateway
- Insert the Code Snippets
- Generate a Macro
- Build a Form
- Add the Form to a Page
- Test the Flow
Configure the WooCommerce Settings
Move to the WordPress Dashboard > WooCommerce > Settings tab.
First, unroll the Products tab and tick the “Enable AJAX add to cart buttons on archives” option in the Add to cart behaviour checkbox.
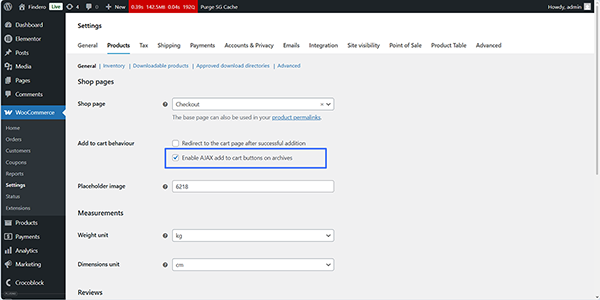
Once ticked, scroll the page down and press the “Save changes” button at the bottom of the page.
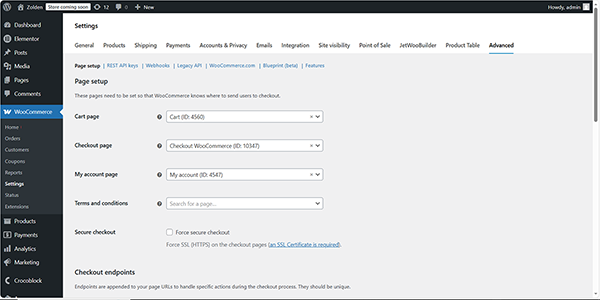
Second, assign the needed pages to the corresponding WooCommerce fields in the Advanced tab. After that, scroll the page down and press the “Save changes” button at the bottom of the page.
In addition, you can use the JetWooBuilder plugin and assign the corresponding templates in the JetWooBuilder tab. Watch the Crocoblock WooCommerce with JetWooBuilder & Elementor video to learn how to build the WooCommerce shop templates and a full WooCommerce online store.
Once completed, scroll the page down and press the “Save changes” button.
In the third step, configure the JetProductTables settings: move to the Product Table tab and specify which product data should be displayed in the form. Watch the How to Сreate and Set Up a WordPress Product Table video to configure columns, customize styles, add navigation filters, enable sticky headers, and optimize the mobile layout for a seamless shopping experience. Also, watch the JetProductTables WordPress Plugin Overview. WooCommerce Focused video for more details on configuring the filters, WooCommerce integration features, design options, generating and displaying a shortcode, etc.
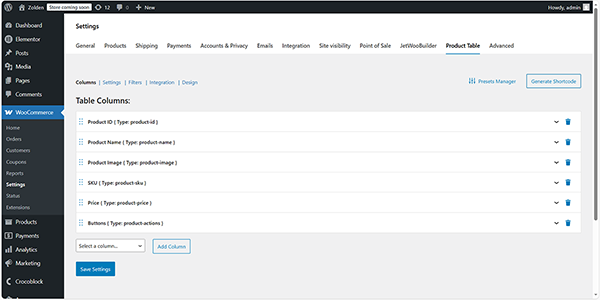
Finally, once completed, scroll the page down and press the “Save changes” button.
Set the Payments Gateway
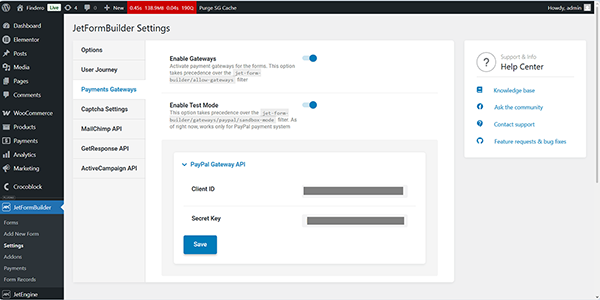
Move to the WordPress Dashboard > JetFormBuilder > Settings page and expand the Payments Gateway tab. Here, configure the Stripe or Paypal payment.
In this case, we set the PayPal gateway and insert the corresponding data into the Client ID and Secret Key fields. Finally, we move the Enable Test Mode toggle to simulate payments without real money transfers and press the “Save” button.
Insert the Code Snippets
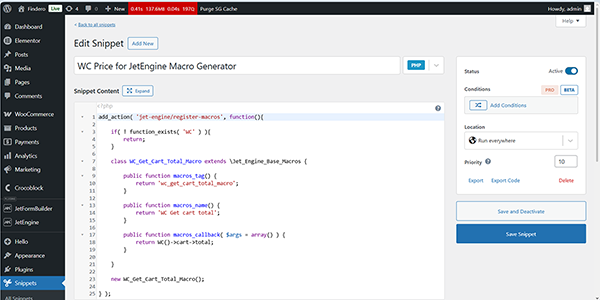
First, move to the WordPress Dashboard > Snippets tab that will be displayed after installation and activation of the Code Snippets plugin. Here, press the “Add New” button at the top of the page. In the Edit Snippet window, insert the snippet’s name (we type the “WC Price for JetEngine Macro Generator” text) and insert the following code into the text field below the Snippet Content heading.
<?php


add_action( 'jet-engine/register-macros', function(){

	if( ! function_exists( 'WC' ) ){
		return;
	}


	class WC_Get_Cart_Total_Macro extends \Jet_Engine_Base_Macros {


		public function macros_tag() {
			return 'wc_get_cart_total_macro';
		}


		public function macros_name() {
			return 'WC Get cart total';
		}


		public function macros_callback( $args = array() ) {
			return WC()->cart->total;
		}

	}

	new WC_Get_Cart_Total_Macro();

} );
Keep the default “Run everywhere” Location option and click the “Save Snippet” button.
In the same way, create a new code snippet, insert its name (we type the “Hidden field macro apply”), and insert the following code into the text field below the Snippet Content heading.
<?php


add_filter( "jet-form-builder/render/hidden-field", function( $args ) {
   if ( function_exists( 'jet_engine' ) ) {
       $args[ 'field_value' ] = jet_engine()->listings->macros->do_macros( $args[ 'field_value' ] );
   }


   return $args;
} );
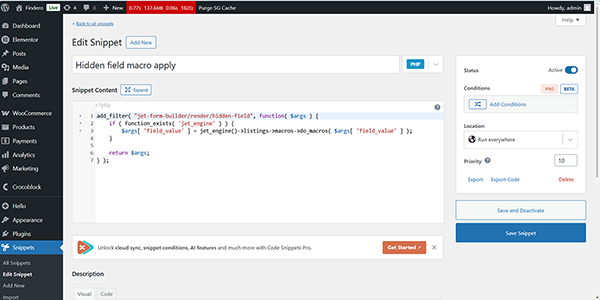
Also, keep the default “Run everywhere” Location option and click the “Save Snippet” button.
Generate a Macro
In this step, proceed to the WordPress Dashboard > JetEngine > JetEngine path and unroll the Macros Generator tab. Here, select the “WC Get cart total” macro in the Macros drop-down.
Read the WooCommerce Macros Guide to learn how WooCommerce macros work and how to use them in JetEngine listings, single product pages, and queries to display dynamic product data in WordPress.
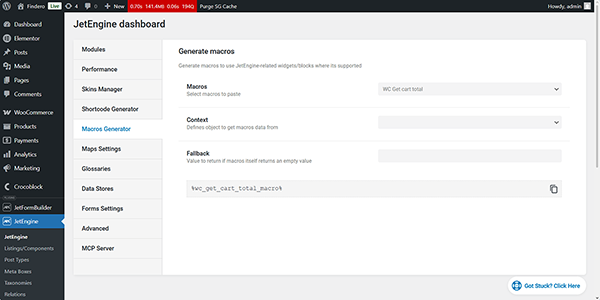
After selecting the needed macro, it’ll be displayed in the text field below the Fallback field:
%wc_get_cart_total_macro%
Copy this macro.
Build a Form
Go to WordPress Dashboard > JetFormBuilder > Add New. The form will be opened in the Block Editor (Gutenberg).
In this stage, additionally, you can combine some functionality: for example, build a login form, provide verification, a form with the Signature Field, add the Social Login to the form, restrict access to some users, etc.
Select the needed embedded form in the Welcome block, use an open AI, or build the form from scratch. In this case, we type the form’s name (the “Wholesale Order” text), press the “Start from Scratch” button, and insert a Hidden Field. After that, add the hidden field’s FIELD LABEL (“woo_price”, in this tutorial) and the copied macro in the VALUE field.
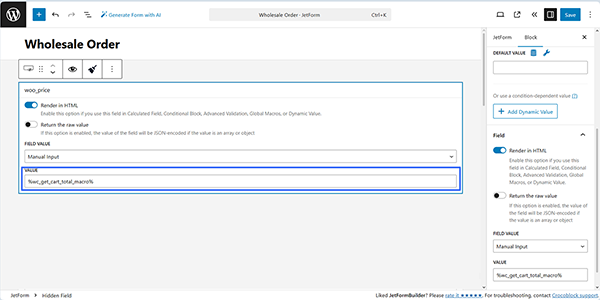
Alt text: the macro as a value in the hidden field
In the next step, add the needed field blocks into the form, for example, the Text Fields, Textarea Field, and Action Button field blocks. This form creation tutorial explains how to build forms from scratch.
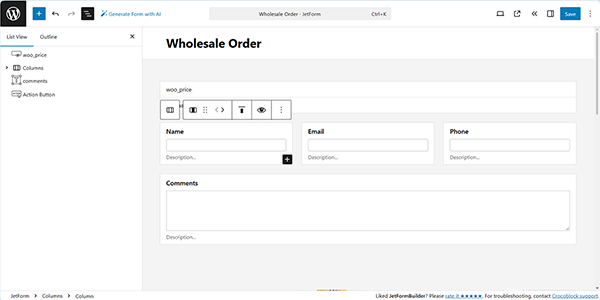
Then, find in the search bar the Product Tables block and insert it where needed. Also, read the JetProductTables Plugin: Showcase WooCommerce Products in Table Format article to learn how to show products in tables, making it easier to customize and manage them.

Next, to display the total price, insert a Calculated Field, specify its FIELD LABEL (“Total”, in this case), and the FORM FIELD NAME will be filled in automatically. Then, press the “wrench” icon and select the macro associated with the Hidden Field (the “%woo_price%”, in this tutorial) to be inserted into the Calculated Field.
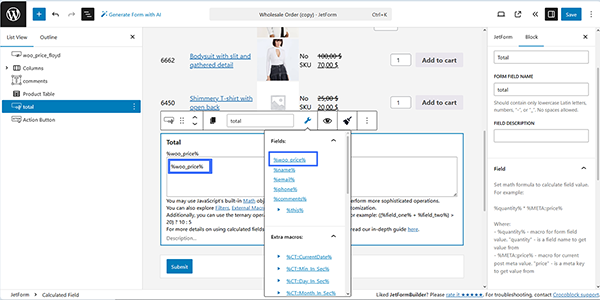
That’s all about inserting the form’s fields.
The final step is configuring the payment settings. First, scroll the JetForm settings down to the Gateway Settings section. Since we enabled the PayPal functionality only, the “PayPal checkout” option will be displayed in this section. Tick this option, and press the “Edit” button below.
Watch the How to connect PayPal to a form video to learn how to enable and set up payments in JetFormBuilder settings, build a user registration form from scratch, and set up each of the form fields individually.
After pressing the “Edit” button, activate the Use Global Settings toggle, and the CLIENT ID and SECRET KEY fields will be filled automatically. Then, select the preferred GATEWAY ACTION; it can be either the “Pay now” or “Create a subscription” option. The further settings for these options will appear once you press the “Sync Access Token” button, and the synchronization process will be completed successfully.
Finally, select the needed CURRENCY CODE and set the name of the Calculated Field (the “woo_price” Calculated Field).
You can also customize the following payment messages if desired or leave them as the default.
Press the “Update” button to save the changes.

Then, if needed, customize the Post Submit Actions: for example, add the Send Email, and/or keep the Save Form Record actions.
That’s all about the form: finally, move to the top of the page and press the “Save” button.
Add the Form to a Page
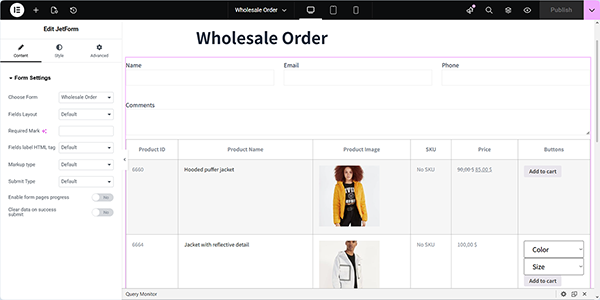
Open an editor you prefer and find the JetForm widget/block/element. In this tutorial, we use Elementor. Read the Displaying a JetFormBuilder Form in Any Page Builder tutorial to learn how to add the JetForm widget/block/element in Elementor, Block Editor, and the Bricks theme.
After that, to provide reloading of the page after adding an item to your cart, insert the HTML Code widget below the form and add the following code into it:
<script> jQuery( function($) {
$( document.body ).on(
           'added_to_cart',
           function() { console.log('The item is added! Reloading of the page...'); location.reload(); }); }); </script>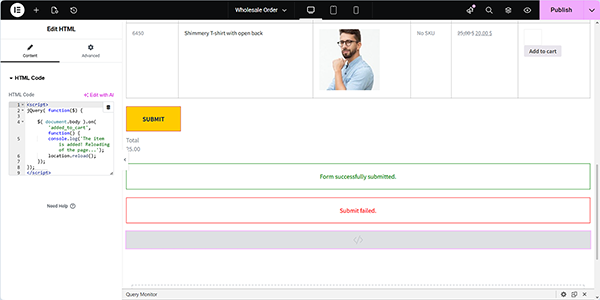
Finally, publish the page and check how the form works.
Test the Flow
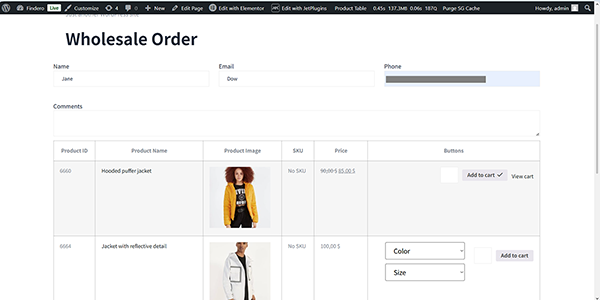
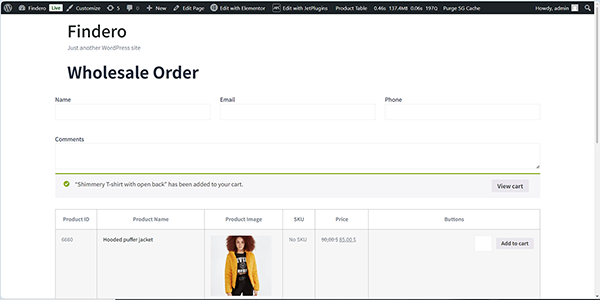
Move to the front end, complete the form with the required information, and select the items you’d like to add to the card. After that, the “View cart” link will appear near the corresponding item.
After adding the item to the cart, the corresponding text will be shown.
Once completed adding items, scroll the page down, and check if the Calculated Field shows the correct value.
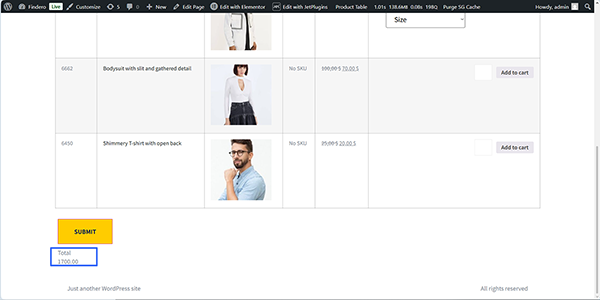
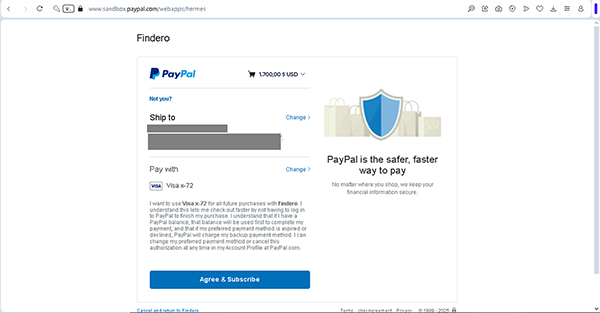
Here, if you press the “SUBMIT” button, you will be transferred to the PayPal payment page.
Also, if you press the “View cart” link, you will be redirected to the cart page.
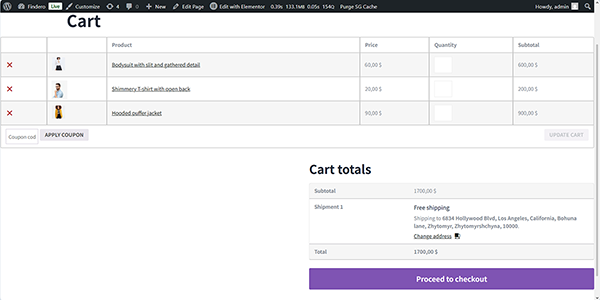
Here, you can change the address by pressing the “Change address” link or directly on the “Proceed to checkout” page by pressing the corresponding button.
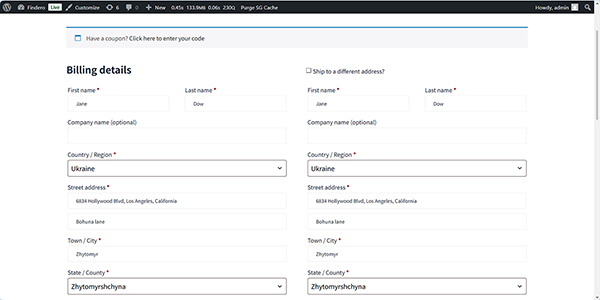
The checkout page will display the billing details.
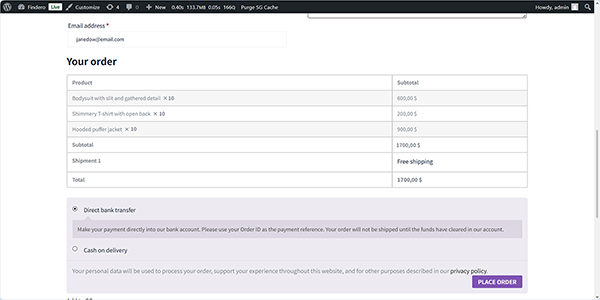
Scroll the page and press the “PLACE ORDER” button at the bottom.
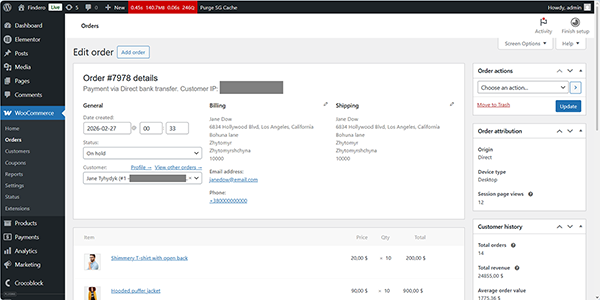
The final step is to check the WordPress Dashboard > WooCommerce > Orders tab. Here, finally, review the provided information and change it if needed.
That’s it. Now you know how to use the JetFormBuilder and JetProductTables plugins for WordPress to create a wholesale order form that lists the product and its variations, to calculate the total price, and to provide payments.