How to Create a Taxi Booking Form
When building booking forms, it is important to provide users with clear options and accurate price calculations. For a taxi website, this may include selecting a car type, choosing the pickup and drop-off locations, and automatically calculating the total cost. In this guide, you will learn how to create a “Book a Taxi” form in the JetFormBuilder WordPress plugin, using custom fields and calculation logic to deliver a seamless booking experience.
Tutorial Requirements:
- JetFormBuilder plugin installed and activated
- JetEngine plugin installed and activated
- JetAppointment plugin installed and activated
Table of Contents:
- Create a Custom Post Type
- Create a Taxonomy
- Adjust the Appointment CPT
- Build a Form
- Add the Form to the Page
- Check the Result
Create a Custom Post Type
First, a Custom Post Type for cars should be created. Proceed to WordPress Dashboard > JetEngine > Post Types and click the “Add New” button.
Enter the Post Type Name and Post Type Slug.
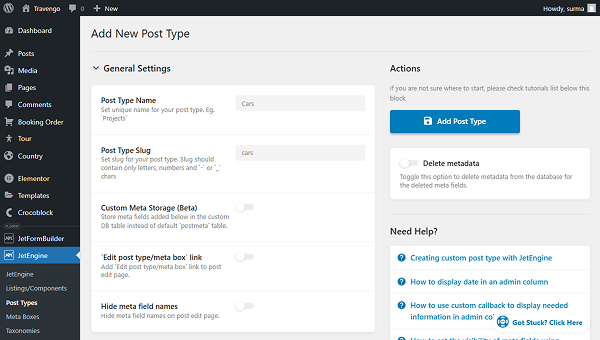
In the Meta fields tab, you can add custom fields if needed.
Click the “Add Post Type” button once you are ready.
Create a Taxonomy
Then, proceed to WordPress Dashboard > JetEngine > Taxonomies and click the “Add New” button.
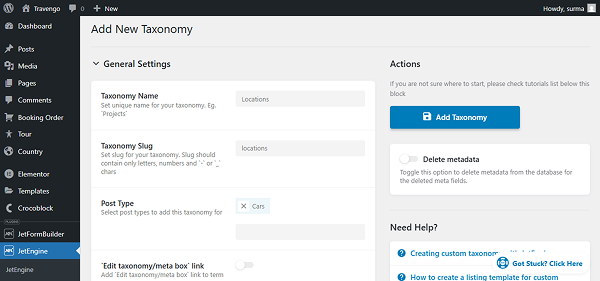
Enter the Taxonomy Name (“Locations” in this case). Add the custom fields if needed in the Meta fields tab.
Click the “Add Taxonomy” button once you are ready with the settings.
Now, proceed to the taxonomy page and in the Add Tag section, enter the category Name and Slug. Click the “Add Tag” button.
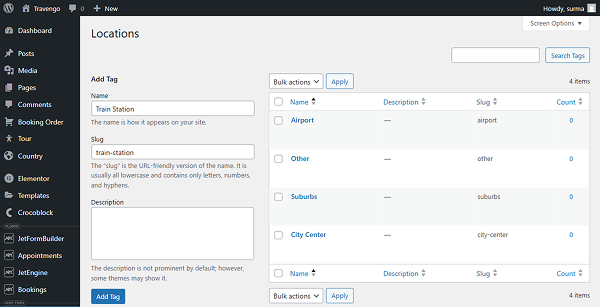
Add as many locations as needed – in this case, we use four locations (airport, city center, suburbs, and other).
Adjust the Appointment CPT
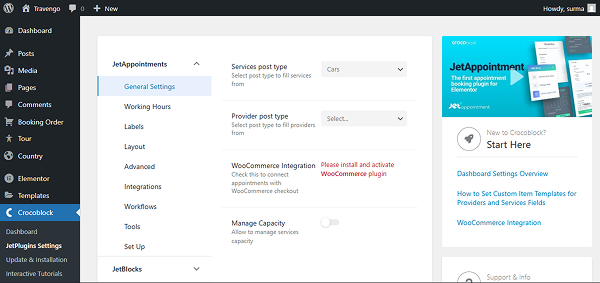
Navigate to WordPress Dashboard > Appointments > Settings > General Settings. In the Services post type field, select the CPT we created earlier (“Cars”).
Then, move to the CPT page and click the “Add Post” button. Fill in the custom fields and set the Price per slot in the Appointment Settings section. Click the “Save” button once you are ready with the settings.
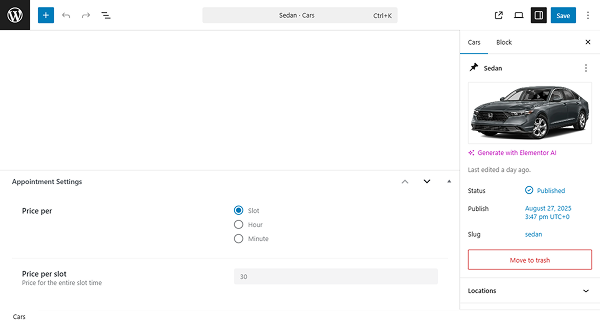
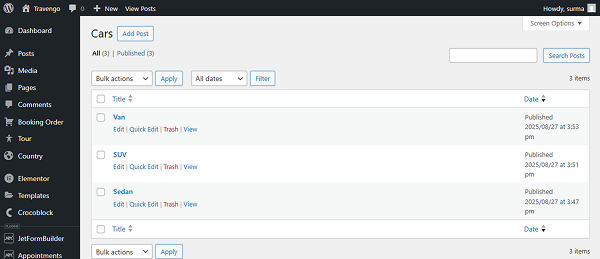
Thus, we add three car types: Sedan, SUV, and Van.
Build a Form
Now, let’s proceed to creating a form. To build a WordPress form, we navigate to WordPress Dashboard > JetFormBuilder > Add New Form.
Enter the form’s title – in this case, it is “Book a Taxi Form”.
Set up fields
The Welcome block appears by default. From here, you can select a form pattern or generate a form with OpenAI. Otherwise, you can hit the “Start from scratch” button and use the three fields added by default; otherwise, you can delete them to begin anew.
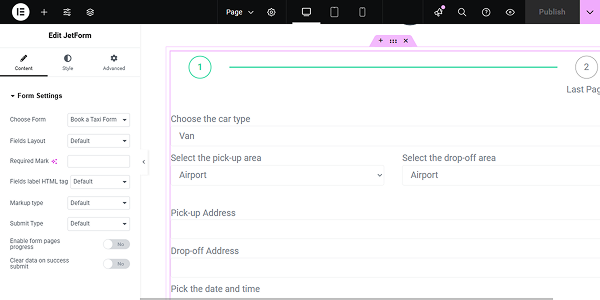
In this case, we build our form from scratch. We also delete the default fields. Let’s create a multi-step form where customers select their desired car type, location, and time on the first step, and then enter their details on the second step.
First, we add the Form Page Start block, which indicates the start of the first form page.
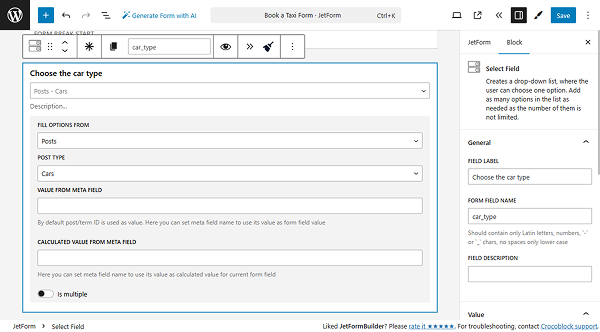
Then, we add a Select Field for the car types. For the FIELD LABEL, we put “Choose the car type”. Then, from the FILL OPTIONS FROM dropdown, we select the “Post” option. In the POST TYPE field, we select the “Cars” CPT.
Then, add two more Select Fields for the pick-up and drop-off locations. In the FILL OPTIONS FROM dropdown, we select the “Terms” option. In the TAXONOMY field, select the “Locations”.

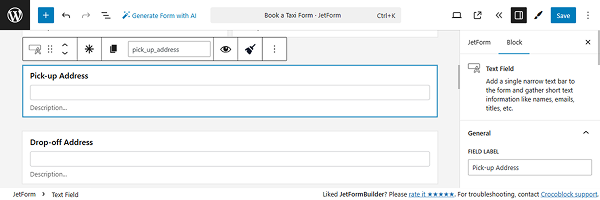
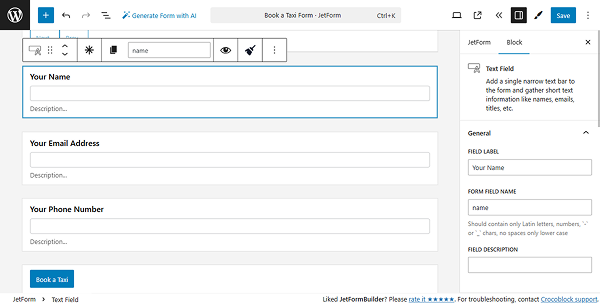
Then, add two Text Fields for the exact addresses.
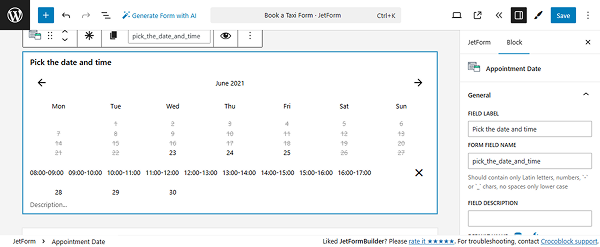
Additionally, we add the Appointment Date block, allowing customers to select the date and time they need to book a taxi. The only thing we change here is the FIELD LABEL.
Now, we add the Calculated Field. We return to its settings in the next step, as it requires more attention.
Add the Form Page Break block. In the block’s settings, the Enable “Next” Button toggle can be enabled, and the NEXT BUTTON LABEL can be set to change the default name of the “Next” button. In this first Form Back Break block, we also use the “Back” button, so we enabled the Add Prev Page Button switcher. The LABEL OF PROGRESS option can be filled in if you want to show the step labels below the progress bar.
For the second step, we add three Text Fields for the user’s name, email address, and phone number, as well as the Action Button Field.
Adjust the ternary operators in the calculated field
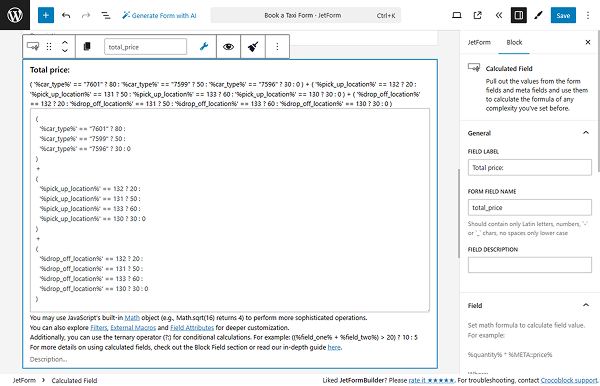
Let’s move back to the Calculated Field settings. In this form, we need the price to depend on the car type and the locations the customer selects.
We offer different prices for each car type: Sedans cost $30, SUVs cost $50, and Vans cost $80. Additionally, locations for pick-up and drop-off also affect the total price.
Therefore, we need the following logic to work: if “sedan” is selected as the car type, “city center” is selected as the pick-up location, and “airport” is selected as the drop-off location, we must calculate “30+20+60”. If we change the car type to “SUV”, the calculation should look like this: “50+20+60”. However, if the customer chooses an SUV to travel from the city center to the suburbs, we would apply the “50+20+50” calculation.
To apply this logic, we need to use the Ternary Operators in the Calculated Field formula.
In this form, we use the following formula:
(
  '%car_type%' == "7601" ? 80 :
  '%car_type%' == "7599" ? 50 :
  '%car_type%' == "7596" ? 30 : 0
)
+
(
  '%pick_up_location%' == 132 ? 20 :
  '%pick_up_location%' == 131 ? 50 :
  '%pick_up_location%' == 133 ? 60 :
  '%pick_up_location%' == 130 ? 30 : 0
)
+
(
  '%drop_off_location%' == 132 ? 20 :
  '%drop_off_location%' == 131 ? 50 :
  '%drop_off_location%' == 133 ? 60 :
  '%drop_off_location%' == 130 ? 30 : 0
)
Where the “car_type” is the name of the form Select Field for the cars’ types; “pick_up_location” and “drop_off_location” are form Select Fields for the locations. The “7601”, “7599”, and “7596” are the IDs of the “Cars” posts. The IDs “130”, “131”, “132”, and “133” correspond to the “Locations” categories. Please note that the category’s ID does not require a double quotation mark symbol. The numbers, such as “80”, “50”, and “30”, at the end of each line represent the prices associated with each car type and location.
Set up the post submit actions
Now, proceed to the JetForm settings section and open the Post Submit Actions tab. Here, press the “+ New Action” button. In the opened pop-up, find and click the “Insert appointment” action to add it.
Now, you should see a pop-up that provides the settings for this action.
In the SERVICE ID FIELD, we pick the “Choose the car type” Select Field with the posts of the “Cars” post type.
In the APPOINTMENT DATE FIELD, we picked the Appointment Date field called “Pick the date and time.”
The USER E-MAIL FIELD has the “Your Email Address” field mapped.
The USER NAME FIELD is mapped to the “Your Name” field.
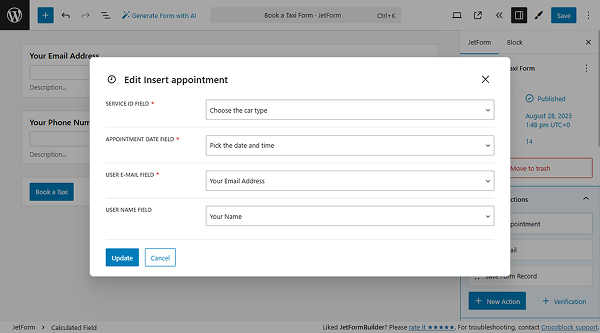
Click the “Update” button once you are ready with the settings.
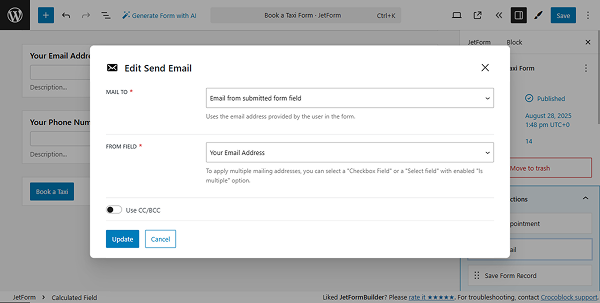
Additionally, we would like to add the Send Email action. In the MAIL TO field, we select the “Email from submitted form field” and for the FROM FIELD we choose the “Your Email Address” form field.
Additionally, we set the “Your Taxi Booking Request Has Been Received” text as the SUBJECT.
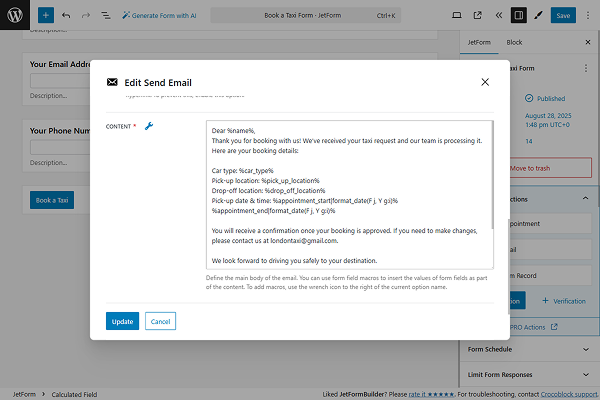
For the required CONTENT field, we set up the message the customer will get after submitting the form.
Here, we use macros to get the form fields’ values – you can click the “wrench” icon.
Click the “Update” button once you are ready.
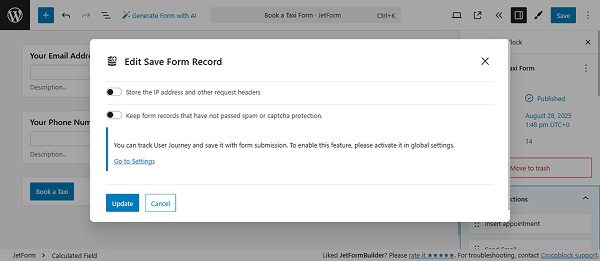
Additionally, we add the Save Form Record Submit Action.
Click the “Update” button.
Once you are ready, click the “Save” button.
Add the Form to the Page
Following the How to Display a Form on the Front End guide, we add the created form to the page where it is needed.
Click the “Publish” button once you are ready with the settings.
Check the Result
Let’s proceed to the front-end page with the form and try to choose the “Sedan” car to get from the city center to the airport:
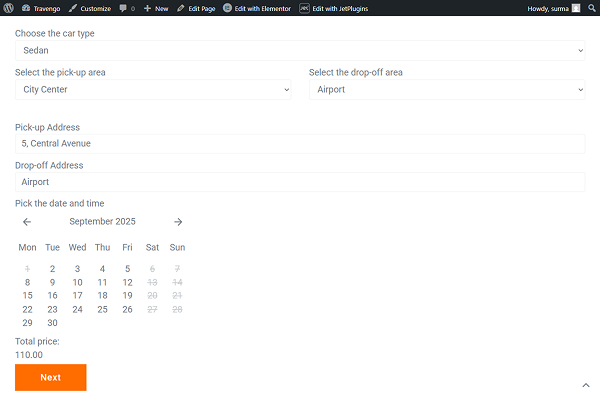
The Calculated Field gives the correct result of “110” (where we sum “20”, “60”, and “30”).
If we change the car type to “Van” and the drop-off location to “Suburbs” (the Calculated Field is supposed to sum “80”, “20”, and “30”), we get the correct result of “130”.

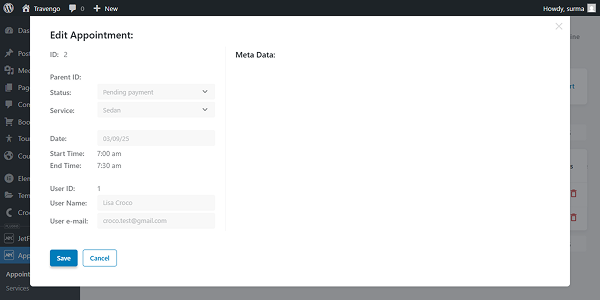
So the Calculated Field works correctly with its formula. When we submit the form, we receive the appointment in WordPress Dashboard > Appointments > Appointments.
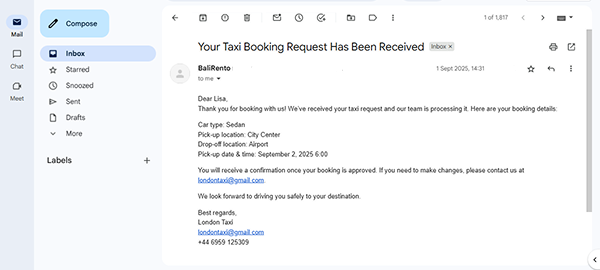
The email was sent as well.
That’s it. Now, you know how to create a “Book a Taxi” form in the JetFormBuilder WordPress plugin with dynamic calculation.