How to Create a Conversational Form?
With the JetFormBuilder WordPress plugin, you can easily create custom conversational forms tailored to your needs. Whether you are collecting user feedback, running a quiz, or gathering research data, this guide will walk you through building an interactive multistep conversational form step by step.
Table of Contents:
- Create a Custom Content Type
- Set Up the Form
- Add the Form to the Page
- Add the Feedback List to the Page
- Check the Result
A conversational form is an interactive type of online form designed to mimic a natural conversation between the user and the website. Instead of displaying all questions at once, it presents them one or a couple at a time — often with smooth transitions, friendly wording, and visual cues that simulate a chat-like experience.
In this article, we will focus on creating a multistep conversation for collecting users’ feedback. We will obtain feedback in the Custom Content Types (CCT) and display a list of responses.
Create a Custom Content Type
As we mentioned in this article, we will keep the feedback responses in the CCT.
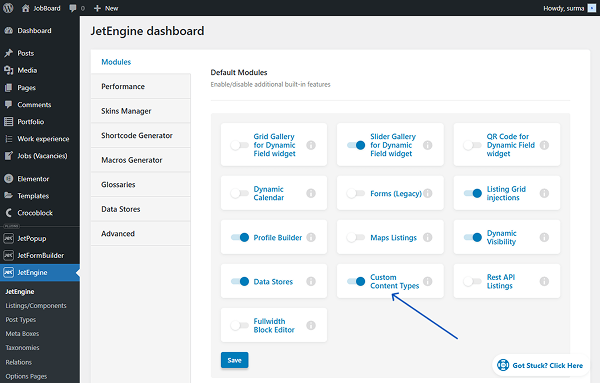
First, go to the WordPress > JetEngine > JetEngine > Modules tab, and enable the Custom Content Types toggle. This will provide access to the CCT creation.
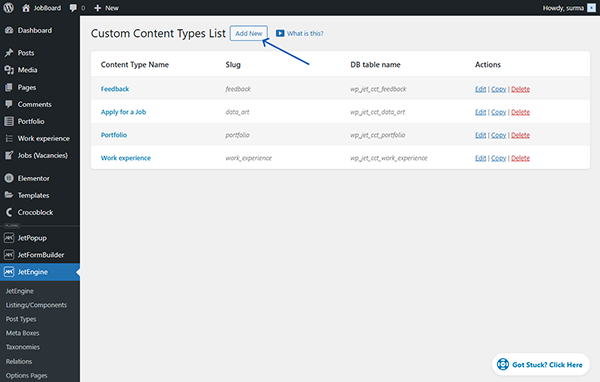
Then, proceed to WordPress > JetEngine > Custom Content Types and click the “Add New” button.
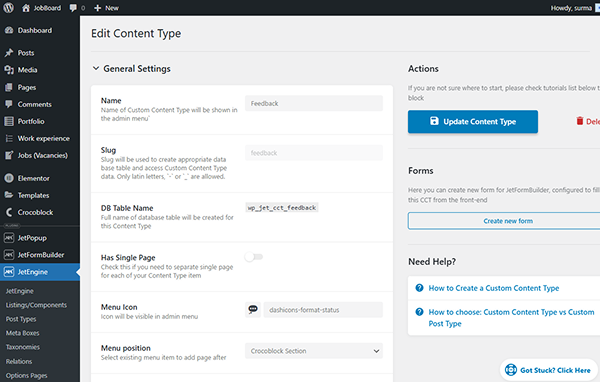
Enter the Name and Slug of the CCT.
Scroll down to the Fields tab and add as many meta fields as needed.
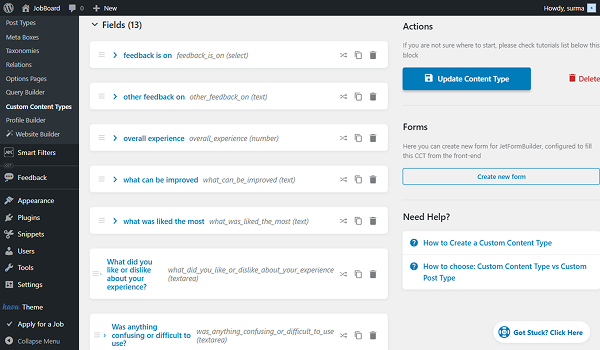
Click the “Add Content Type” button once you are ready.
Refer to the How to Create Custom Content Type guide to learn the settings details.
Set Up the Form
Proceed to setting up a form. For that, we navigate to WordPress Dashboard > JetFormBuilder > Add New Form.
Enter the form’s title — in this case, it is “Conversational Feedback Form”.
The Welcome block appears by default. From here, you can select a form pattern or generate a form with OpenAI. Otherwise, you can hit the “Start from scratch” button and use the three fields added by default; otherwise, you can delete them to begin anew.
In this case, we build our form from scratch. As we mentioned earlier, the conversational form is supposed to have multiple steps. You can refer to our WordPress Multi-Step Form with Step Indicator and Conditional Blocks guide to learn more about setting up this feature.
Fields set-up
First, add the Form Page Start block, which indicates the start of the first form page. Everything above this block is regarded as a header.
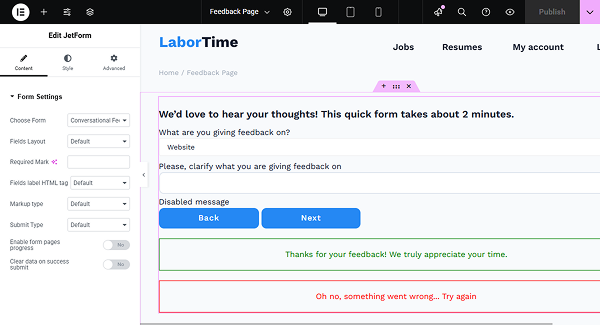
We add the Heading Field with the “We’d love to hear your thoughts! This quick form takes about 2 minutes” text for a better user experience.
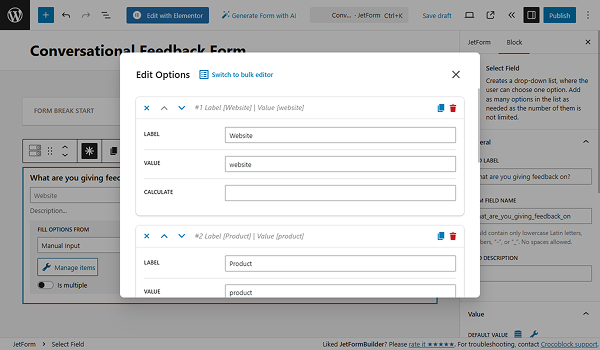
Then, we use the Select Field for users to answer the “What are you giving feedback on?” question. Here, we used the “Manual Input” for the source and added four options: “Website”, “Product”, “Service”, and “Other”. Click the “Update” button once options are set up.
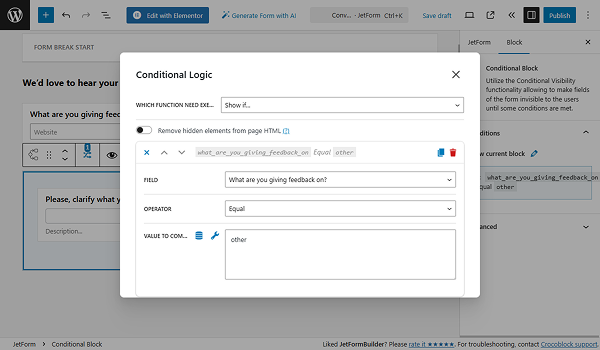
As we have the “Other” option, we need to add the input that will be available only when the user chooses the “Other” option. To do this, add the Conditional Block to the form and place the Text Field inside it. Add the desired LABEL to the Text Field (“Please, clarify what you are giving feedback on” in this case).
Proceed to the Conditional Block settings and click the “arrows” icon to set up the conditions for the Text Field to be shown.
Select the “Show if…” option for the WHICH FUNCTION NEED EXECUTE? dropdown. For the FIELD input, choose the field according to which the current field should be shown (Select Field in our case). Choose the “Equal” OPERATOR and set the VALUE (“other” for this tutorial). Click the “Update” button.
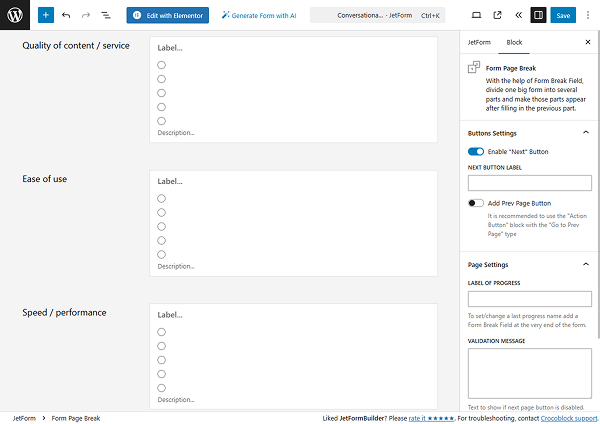
To identify the end of the first page, add the Form Page Break Field.
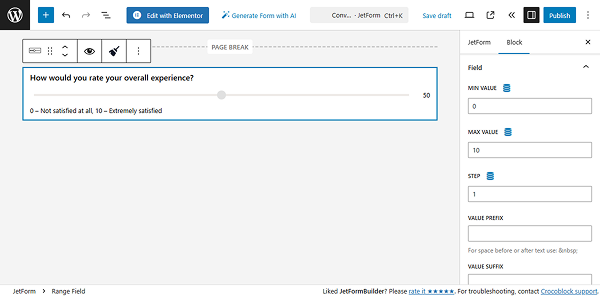
On the second page, we add the rating scale for users’ overall experience. For that, we can use the Range Field.
In the FIELD LABEL, enter the question. In the Field tab, set the MIN and MAX VALUES (in this case, we set them to “0” and “10”). Enter the STEP value (we use “1”).
Additionally, we add the FIELD DESCRIPTION (“0 – Not satisfied at all, 10 – Extremely satisfied”) to make the field easier to use.
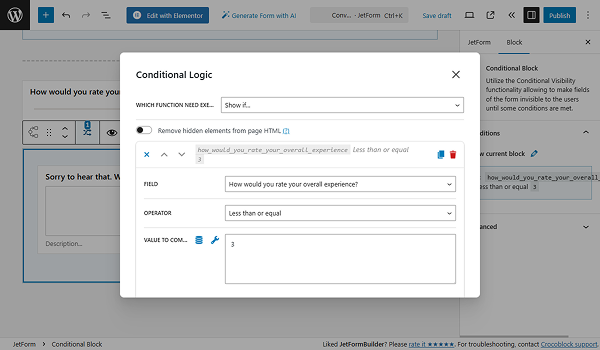
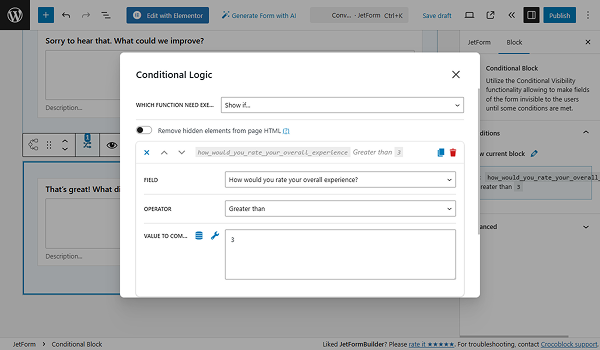
Now, let’s add two more Conditional Blocks with Text Fields inside: one to show when the user puts “0-3” rate with the “Sorry to hear that. What could we improve?” question, and another one to be shown when the rating is “4-10” with the “That’s great! What did you like most?” question.
So, for the first Text Field, we add the condition with the “Less then or equal” OPERATOR and “3” VALUE TO COMPARE. Click the “Update” button.
For the second Text Field, the condition is almost the same, only the OPERATOR should be changed to the “Greater than” option.
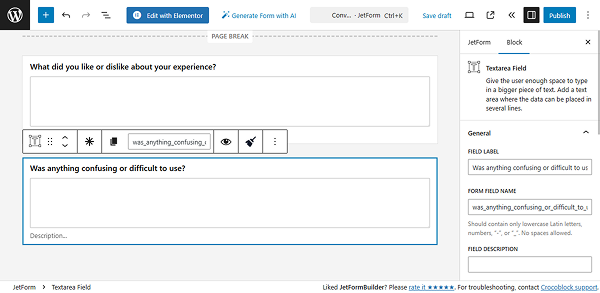
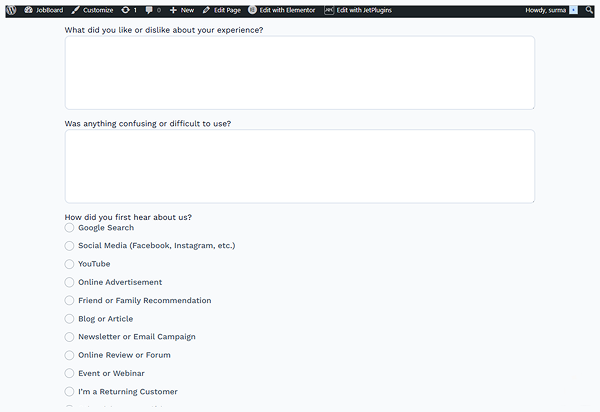
Now, add one more Form Page Break Field. On the following page, we add two more Textarea Fields for users to answer “What did you like or dislike about your experience?” and “Was anything confusing or difficult to use?” questions.
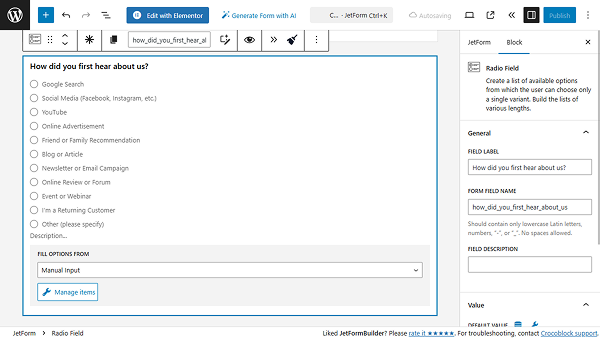
Additionally, we add a Radio Field with options to answer the “How did you first hear about us?” question. We used the “Manual Input” for the FILL OPTIONS FROM input.
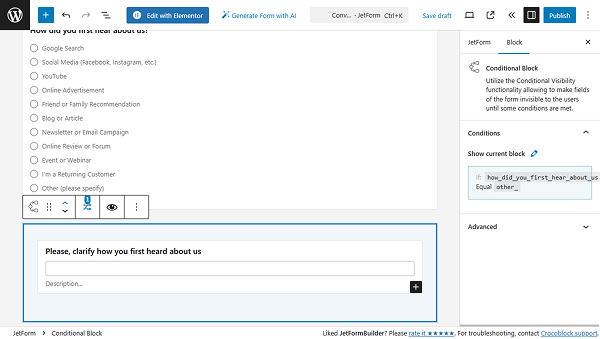
As we have the “Other” option, we also add a Conditional Block with a Text Field to display when the “Other” option is selected.
Add the Form Page Break Field again. On this page, we add the Likert Scale with options that allow users to evaluate it.
Since there is no ready solution for the scale, we will need to add the following code to the site. Proceed to the WordPress Dashboard > Appearance > Customize > Additional CSS and paste the CSS code:
.checkradio-wrap {
    display: flex !important;
    flex-direction: row !important;
    justify-content: space-around !important;
    flex-wrap: nowrap !important;
    gap: 1rem;
}


.checkradio-wrap .jet-form-builder__field-wrap {
    flex-grow: 1 !important;
    width: auto !important;
    text-align: center;
}


.wp-block-columns:nth-of-type(odd) {
    background-color: #FFFACD !important;
}


.wp-block-columns:nth-of-type(even) {
    background-color: #FFD700 !important;
}


.wp-block-columns {
    border-left: 1px solid #cccccc;
    border-right: 1px solid #cccccc;
    border-bottom: 1px solid #cccccc;
    padding: 10px;
}


.wp-block-columns:first-of-type {
    border-top: 1px solid #cccccc;
}
Click the “Publish” button when the code is added.
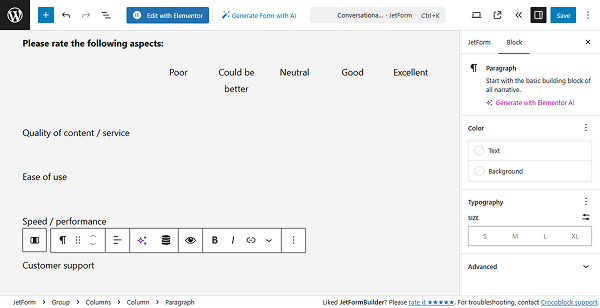
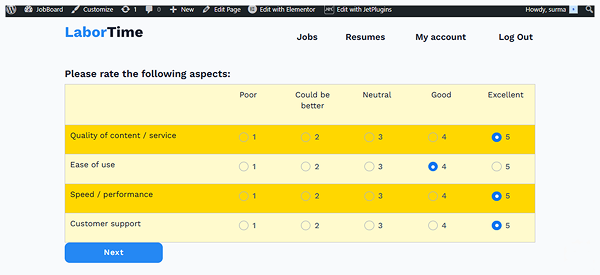
Move back to the form editing page. In the Heading, we add the question (“Please rate the following aspects:”).
Then we need to add three parameters and five options to select (“Poor”, “Could be better”, “Neutral”, “Good”, “Excellent”). For that, we add six Columns. Starting from the second column, we put the options’ names in the Paragraphs.
Below, we add four more columns for two sections, and in the first section, we add the parameters that are expected to be evaluated.
Now, we need to add the Radio Field. Leave the LABEL empty and manually enter five options, adding numbers in the VALUE field.
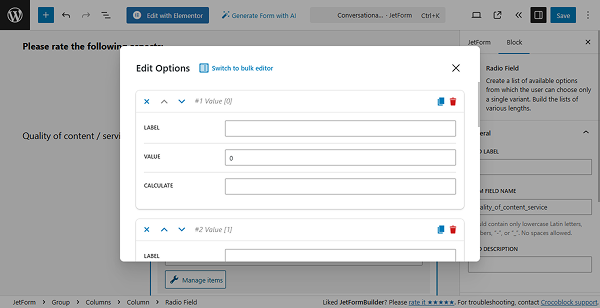
We need as many options in the field as we have added options to select (“Poor”, “Could be better”, “Neutral”, “Good”, “Excellent”). Once you have added all the options, click the “Update” button.
Now we need to add three more of the same Radio Fields (or we can simply duplicate them). When duplicating, ensure that the fields have unique names.
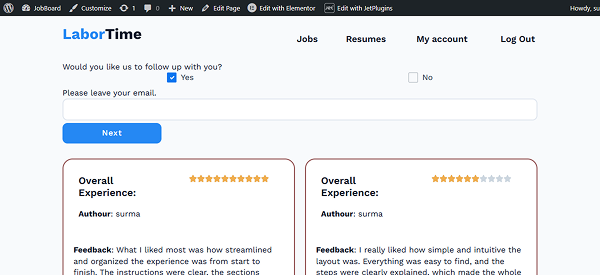
To add a new page, we add a new Form Page Break Field. Here, we add a Checkbox Field with the “Would you like us to follow up with you?” question. Among the options, we add “yes” and “no” answers.
If the user selects the “yes” option, another Text Field for their email address should appear. For that, we put the Text Field inside the Conditional Block. The “In the list” option should be used for the OPERATOR when the Checkbox Field options are used in the VALUE input.
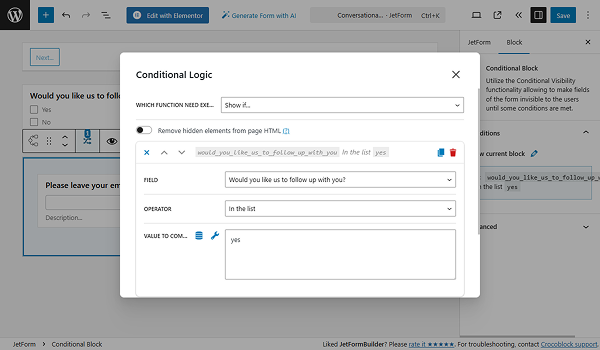
Click the “Update” button once you are ready.
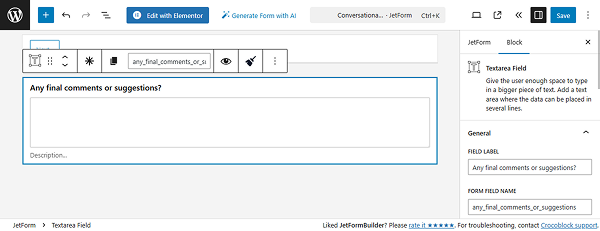
Add one more Form Page Break Field. This page will be the last one, so we will add the Textarea Field with the “Any final comments or suggestions?” question here.
Then, add the Action Button and the last Form Page Break Field.
Adjust the Post Submit Action
Now, proceed to the JetForm tab and scroll to the Post Submit Actions. In this case, we add the Insert/Update Custom Content Type Item, Send Email, and keep the Save Form Record actions.
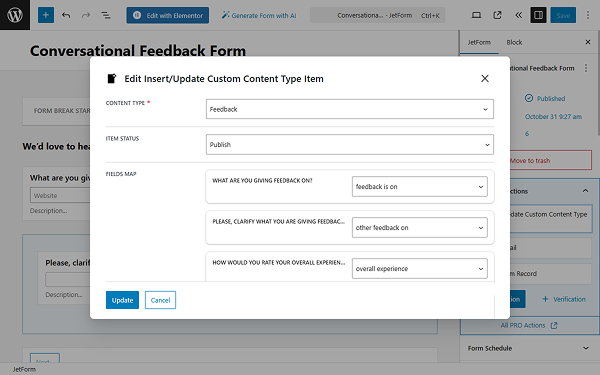
To add a new CCT Item, set up the CONTENT TYPE, ITEM STATUS, and adjust the FIELDS MAP in the Edit Insert/Update Custom Content Type Item pop-up. Click the “Update” button once you are ready.
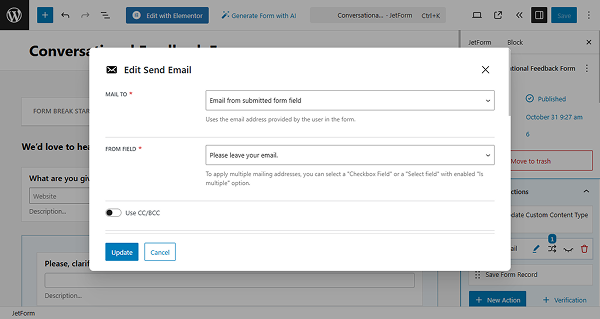
The follow-up email should only be sent when the user agrees, selecting the “yes” option in the Checkbox Field. In the Edit Send Email pop-up, we select the “Email from submitted form field” in the MAIL TO field. In the FORM FIELD dropdown, the needed email field is selected. The CONTENT should also be set. Click the “Update” button.
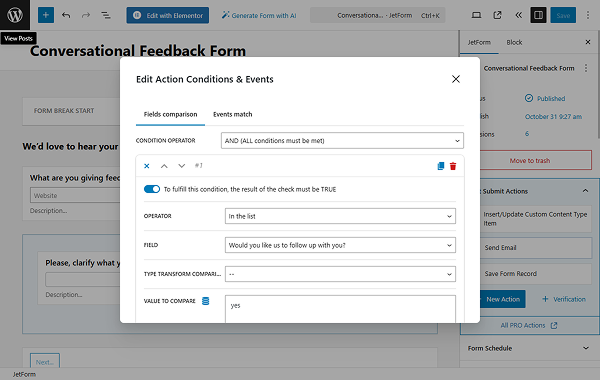
Then, proceed to the Post-Submit Actions Conditions settings for the Send Email action. In the Fields comparison tab, click the “Add New Condition” button. In the OPERATOR field, select the “In the list” option and the needed field in the FIELD input. The TYPE TRANSFORM COMPARING VALUE we leave empty. For the VALUE TO COMPARE, we put the “yes” option. Click the “Update” button.
Change the messages
Additionally, we modify the messages displayed after the form is submitted. For that, proceed to the General Messages Settings section and type the desired text into the FORM SUCCESSFULLY SUBMITTED and SUBMIT FAILED fields (in this tutorial, we used the “Thanks for your feedback! We truly appreciate your time.” and “Oh no, something went wrong… Try again” messages).

Once you are ready with the settings, click the “Publish” button.
Add the Form to the Page
Following the How to Display a Form on the Front End guide, we add the created form to the necessary page.
Click the “Publish” button once you are ready with the settings.
Add the Feedback List to the Page
If you need to display all the feedback you receive, you can create a listing template for the CCT.
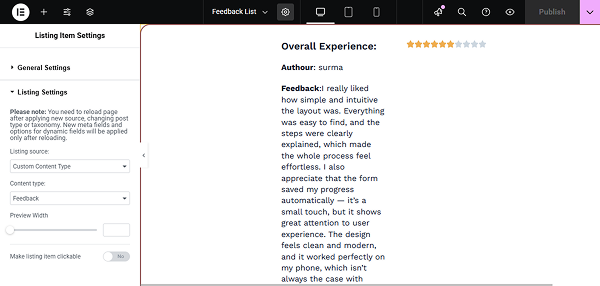
Publish it, then proceed to the necessary page and add it using the Listing Grid widget.
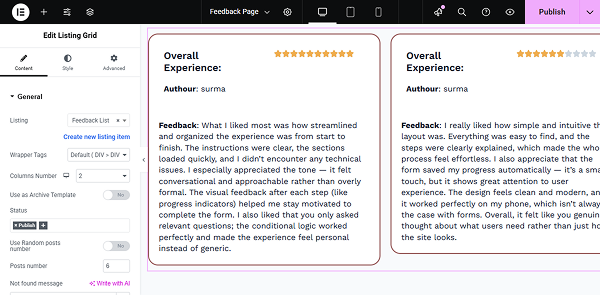
Click the “Publish” button once you are ready with the setup.
Check the Result
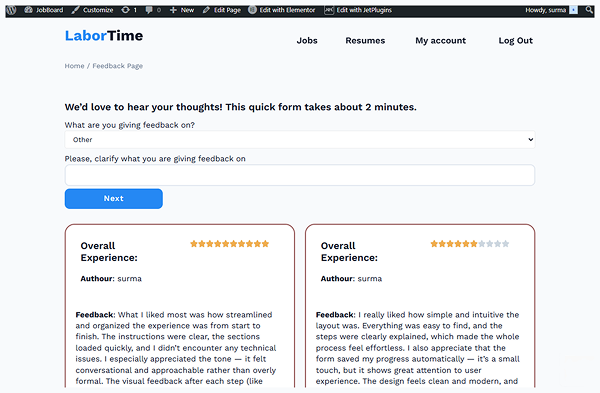
Let’s proceed to the front end and check if the form works correctly.
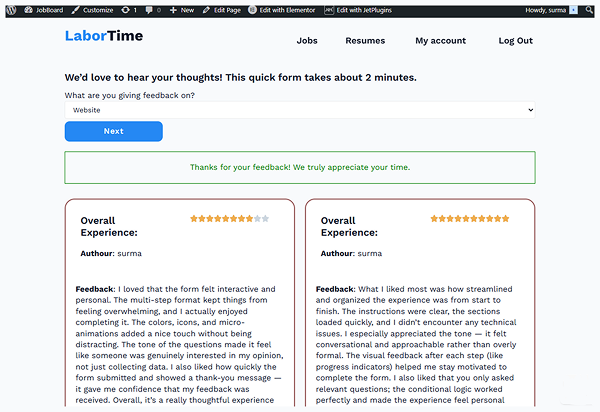
On the front page, the feedback form and the feedback list are displayed.

It is also clear that when the “Website” option is selected in the What are you giving feedback on? field, no other fields are displayed. But if we select the “Other” option, the Text Field appears.
On the next page, when the Range Field has a value selected less than “3”, the “Sorry to hear that. What could we improve?” field is displayed.

When we change the value to “8”, for example, the “That’s great! What did you like most?” becomes visible.

On the next page, we can fill in the Textarea Fields and choose an option from the Radio Field.
The Likert scale is presented on the following page.
Then, the user can select whether they want to receive follow-up emails. If the “yes” option is checked, the extra field for the email is opened.
And finally, users can enter comments in the Textarea Field and submit the form.
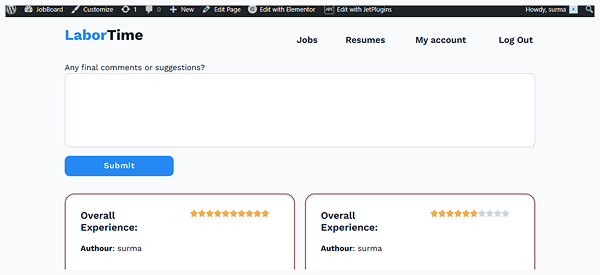
When the form is submitted, the custom message is displayed, and the feedback response is added to the list.
That’s it. Now, you know how to create a conversational form for collecting feedback using the WordPress JetFormBuilder plugin.