How to Create RSVP Forms in WordPress
RSVP forms (or “Please respond” forms) are intended to collect and manage data on clients who would visit an event.
The RSVP form functionality can be implemented, for example, via the following:
- fields to collect the needed data: Text Field (to add the client’s name), Radio or Select Fields (to select the appropriate response option), and Textarea Field (i.e., to add a commen);
- Post Submit Actions to manage records using the “Save Form” action, mail letters using the “Send Email” action, and redirect users to a pre-specified page using the “Redirect to Page” action.
In this tutorial, we create an RSVP form with the Text, Radio, and TextareaFields and set Post Submit Actions with conditions.
- Create a Form
- Add Fields to the Form
- Specify the Post Submit Actions
- Style the Form
- Add the Form to a Page
- Collect and Process Form’s Data
Create a Form
Navigate to the WordPress Dashboard > JetFormBuilder > Forms tab and press the “Add New” button to create a new form. Also, check the tutorial on How to Create a Form.
Initially, the form includes the Welcome block, which allows the application of the pre-created or AI-generated forms.
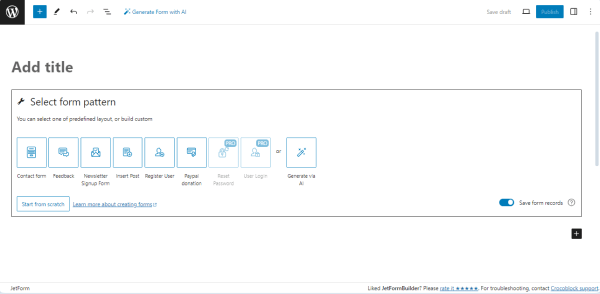
Type the form’s title instead of the default “Add title” heading text (the “Wedding Invitation” text in the given case).
Press the “Start from scratch” button to develop a custom form.
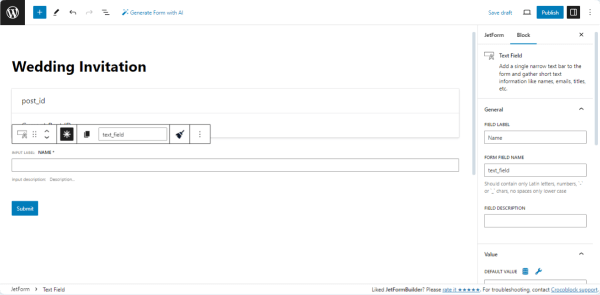
After closing the Welcome block, three blocks are added to the page: the Hidden Field, the Text Field, and the Action Button.
Add Fields to the Form
The default Hidden Field is not necessary in this case; we left this field to save the post ID in the form record data.
We leave the Text Field, added to the form by default, to get the client’s name.
Unroll the field’s settings, type its name in the FIELD LABEL field, and press the “asterisk” sign to make this field required.
Then, add the Radio Field or Select Field block.
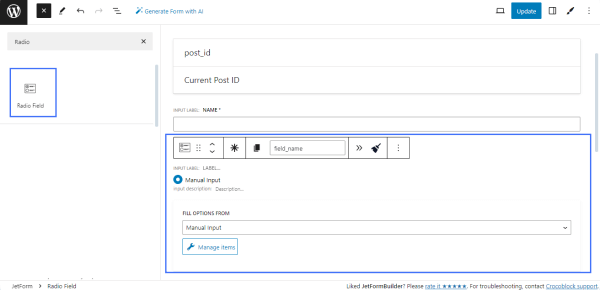
Unroll the field’s settings and complete the FORM FIELD LABEL (in the given case, we set the “Will you be attending?” label). The FORM FIELD NAME field will be filled automatically (in the given case, the “will_you_be_attending” text was added).
Press the “Manage items” button and add the needed variant of answers in the appropriate fields of the Edit Manual Options pop-up (here, we added the “Yes,” “No,” and “Maybe” options and typed the appropriate texts into the VALUE fields).
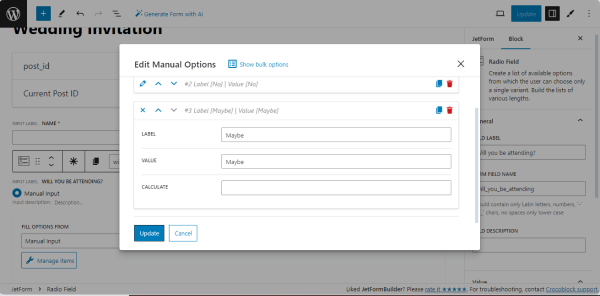
Press the “Update” button to save the field’s option and close the pop-up.
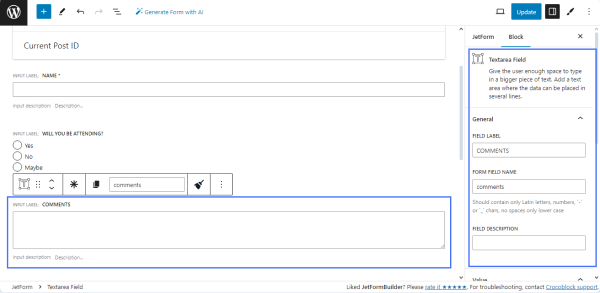
Find and drag-n-drop the Textarea Field. Fill the FIELD LABEL (in the given case, this field is for comments).
Specify the Post Submit Actions
In this section, we set the Post Submit Actions, which will be performed if some conditions are met. In this tutorial, we set the following Post Submit Actions: mailing the letters using the “Send Email” action and redirecting users to the “Thank You” page using the “Redirect to Page” action if users selected the appropriate option from the Radio Field block.
Unroll the JetForm settings. Navigate to the Post Submit Actions tab.
Set the Save Form Record action
The “Save Form Record” action is set by default.
The tutorial called How to Use Save Form Record Action And Manage Form Submissions details how to set this action and manage its settings.
Set the “Send Email” action
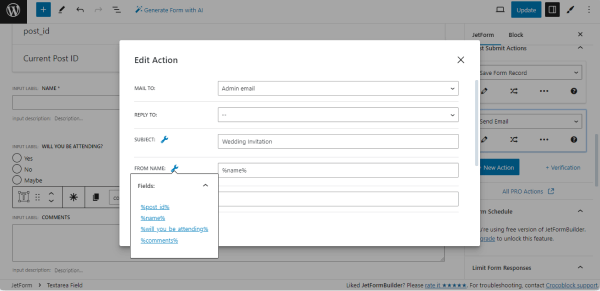
Press the “New Action” button and select the “Send Email” option from the drop-down list. Then press the “pencil” icon and set the following settings in the pop-up:
- Select the “Admin email” option from the MAIL TO drop-down list to mail a visit confirmation letter to the site administrator. This email is set in the Administration Email Address field in the WordPress Dashboard > Settings > General tab.
- If an appropriate field with the email to reply to is added to the form, unroll the REPLY TO drop-down list and select the “Email from submitted form field” or “Custom email” option. If selected, these options activate the REPLY TO EMAIL FROM FIELD and REPLY TO EMAIL ADDRESS menus, respectively; in this case, we did not intend the form’s field for the client’s email, so we left this field empty.
- Type values in the SUBJECT field, FROM NAME field, and FROM EMAIL ADDRESS field or choose it from the form’s fields by pressing the Dynamic Tag icon (“wrench“); in the given case, we typed the “Wedding Invitation” text into the SUBJECT field of the pop-up and used the “Name” Text Field to add the client’s name (%name%) in the FROM NAME field. The FROM EMAIL ADDRESS field is left empty.
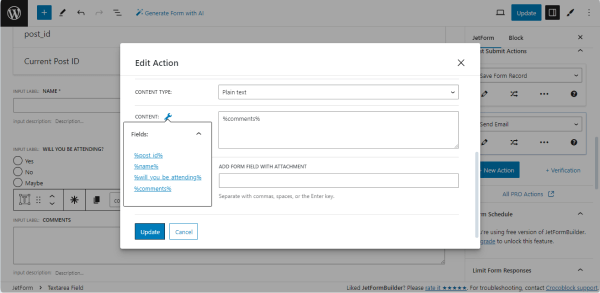
- Scroll down the pop-up and select the “Plain text” or “HTML” options from the CONTENT TYPE drop-down list. If selected, both options activate the CONTENT and ATTACHMENT fields, allowing the form fields with attachments to be added. Additionally, the “HTML” option activates the Disable Auto-Formatting toggle, which prevents inserting paragraph breaks automatically in each new line in the email content field.
- In the CONTENT text field, type the email message that the admin will receive if clients select the “Yes” option. Alternatively, you can press the Dynamic Tag icon near the CONTENT field and choose the form’s field to get such text. In this tutorial, we selected the “Comments” Textarea Field (the “%comments%” option) to add the client’s message to the email.
Press the “Update” button to close the pop-up.
Now, we will set action conditions to send the email if the needed option from the Radio Field block is selected.
Read the Post-Submit Actions Conditions tutorial to know how to manage the Post Submit Actions and set specific conditions.
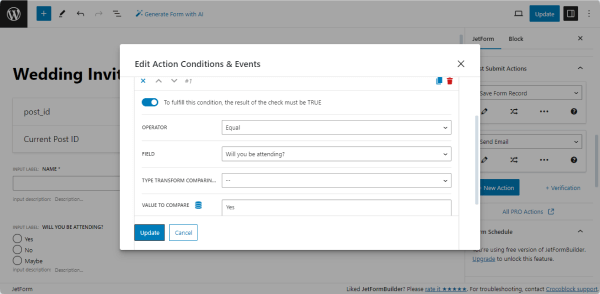
Then, click the “Edit Conditions & Events” button to set the conditions for sending “Thank You” letters.
In this case, the emails will be sent if users confirm their attendance.
The “AND (ALL conditions must be met)” option is set by default in the CONDITION OPERATOR drop-down list.
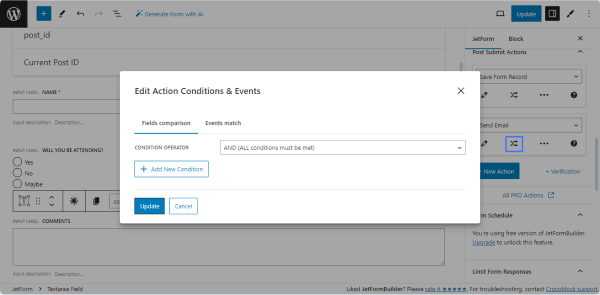
Press the “Add New Condition” button on the pop-up and select the options in the appropriate drop-down lists to set conditions:
- To fulfill this condition, the result of the check must be TRUE toggle is enabled by default; therefore, if you need to set the condition opposite to the options from the OPERATOR drop-down list, turn off this toggle;
- Unroll the OPERATOR drop-down list and select the needed condition: “Equal,” “Greater than,” “Less than,” “Between,” “In the list,” or “Contain text”;
- Unroll the FIELD drop-down list and select the field that contains data for comparison;
- If you compare date or time values, you may need to convert them into the timestamp. Select the “String to Timestamp” option from the TYPE TRANSFORM COMPARING VALUE drop-down list;
- Type the value to compare in the VALUE TO COMPARE field or press the Dynamic Tag icon and select if from the “Post,” “User,” “URL Query Variable,” and “Option Page” options.
In this tutorial, to meet the condition, users should select the “Yes” text value from the “Will you be attending?” Radio Field. Therefore, we selected the “Equal” option from the OPERATOR drop-down list, then chose the “Will you be attending?” field from the FIELD drop-down list, and finally typed the text equal to the needed value (in the given case, the “Yes” text without brackets) in the VALUE TO COMPARE field.
Once completed, press the “Update” button to close the pop-up.
To set conditions for performing other Post Submit Actions (for example, if clients selected the “No” or “Maybe” options), press the “New Action” button to add another Post Submit Action and set specific conditions as it was done for the “Yes” options.
Set the “Redirect to Page” action
Press the “New Action” button and select the “Redirect to Page” option from the drop-down list.
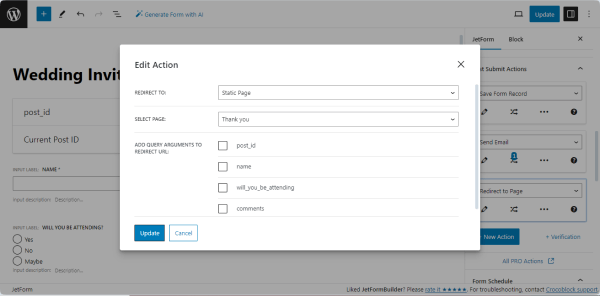
Then, press the “pencil” icon to open the Edit Action pop-up. In this case, users, after selecting the “Yes” variant from the Radio Field, will be redirected to a static page; thus, we set the following settings in the Edit Action pop-up:
- Select the needed type of page in the REDIRECT TO drop-down list (here, the “Static Page” option);
- Add the particular page in the SELECT PAGE drop-down list.
Press the “Update” button to close the pop-up.
Click the “Edit Action” button to set the conditions of redirecting to the “Thank You” page. In the given case, this pop-up has the same settings as for the “Send Email” action: we selected the “Equal” option from the OPERATOR drop-down list, then chose the “Will you be attending?” field from the FIELD drop-down list, and finally typed the text equal to the needed value (in the given case, the “Yes” text without brackets) in the VALUE TO COMPARE field.
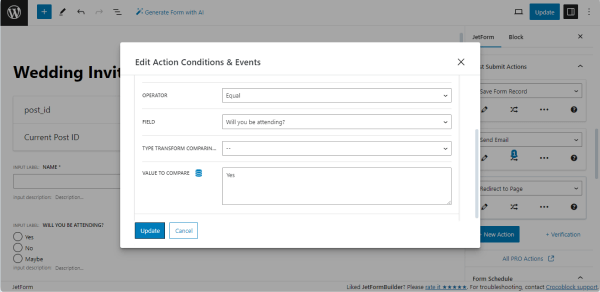
Press the “Update” button to close the pop-up.
Style the Form
To style the form’s elements, install and activate the JetStyleManager plugin via the WordPress Dashboard.
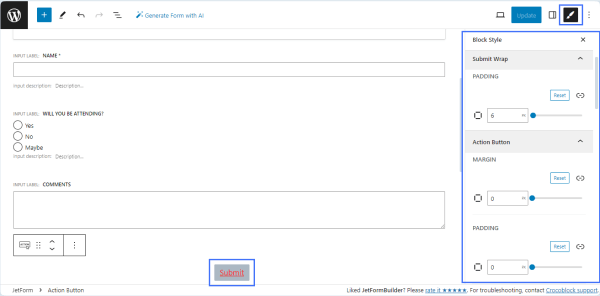
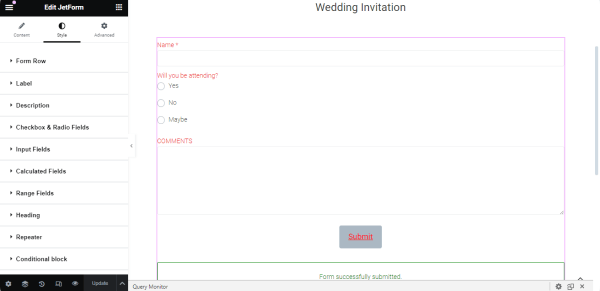
Then, return to the form and press the “brush” icon in the top right corner of the screen.
In this case, we customized the “Submit” button’s background and typography.
Read the tutorial JetFormBuilder: WordPress Form Block Style Setting to know how to style any form’s block.
If completed, press the “Publish/Update” button.
Add the Form to a Page
Create a page in Elementor/Block Editor/Bricks. In the given case, we created the page in Elementor.
Also, check the Displaying a JetFormBuilder Form in Any Page Builder tutorial.
Find the JetForm widget and drag and drop it onto the page. Then, select the just-built form in the Choose Form field.
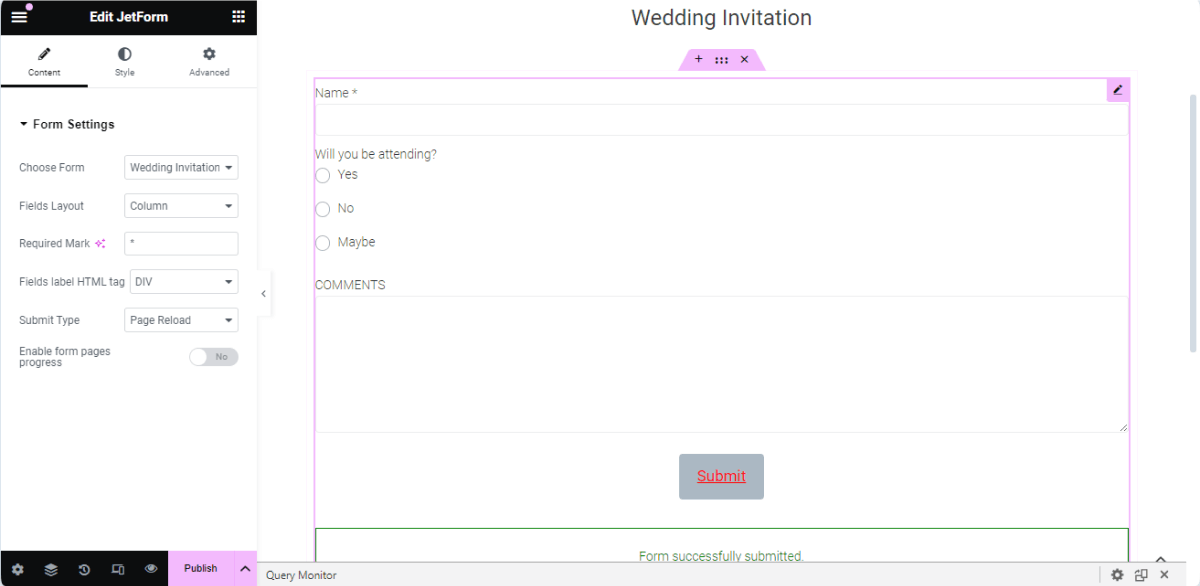
This widget has Style settings that allow customization of the particular fields (such as the Input Fields or Conditional block) and the form’s style as a whole (such as Form Row or Label). We customized the typography of this form.
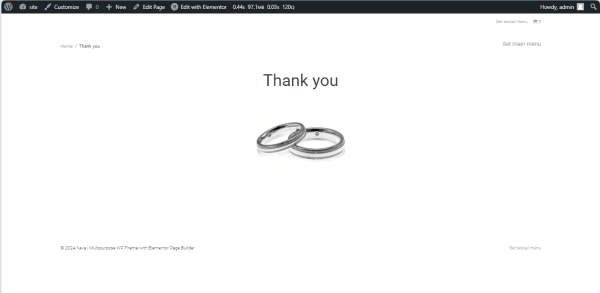
Fill in the form and press the “Submit” button.Then, users will be redirected to the “Thank You” page.
Collect and Process Form’s Data
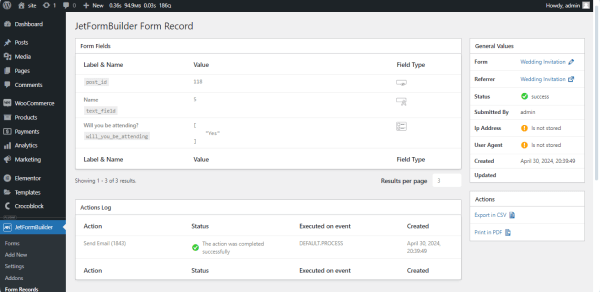
Navigate to the WordPress Dashboard > JetFormBuilder > Form Records tab to see all collected form entries. Open the needed form or hover the cursor over the form’s title.
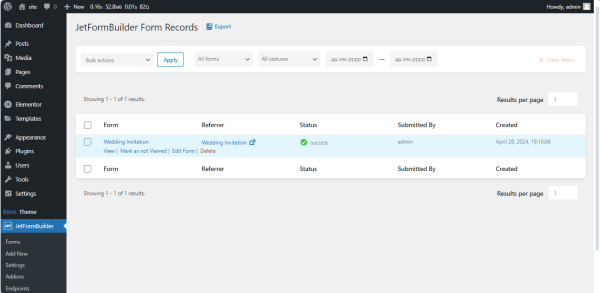
Press the “View” link under the form’s title to unroll the submitted form data.
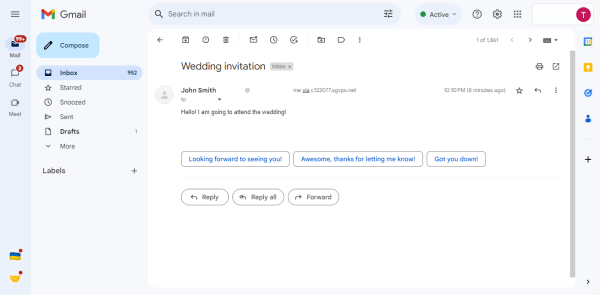
Enter your mailbox and open the email you received.
That’s all about creating RSVP forms in WordPress using the JetFormBuilder plugin’s fields and setting different post-submit actions and conditions.