How to Build a Customer Feedback Survey Form
In this use case, we’ll demonstrate how to create a customer survey form using JetFormBuilder, focusing on gathering feedback about the shopping experience.
Table of Contents
Whether you want to understand customer satisfaction, identify areas for improvement, or receive direct comments, this survey will cover multiple key aspects of a shopper’s experience in six steps.
As a demonstration of this use case, we’re going to build a form that has the following structure:
- Form Step 1: Two Text Field blocks;
- Form Step 2: Radio Field block;
- Form Step 3: Select Field block and Text Field block;
- Form Step 4: Radio Field block;
- Form Step 5: Checkbox Field block and Text Field block;
- Form Step 6: Textarea Field block.
Two blocks separate all form steps:
- Progress Bar — a block that adds the navigation and shows users on what page they are now and how many pages are left to finish the form;
- Form Page Break — a block that allows navigating to the next or previous step; it displays the “Next” / “Previous” buttons within the current page, demonstrating the user’s current progress. On the front end, it looks like a “Back” or “Next” button that opens the previous or next part of the form when the current one is finished.
Create a Survey Form
To create a web form with the JetFormBuilder plugin, follow the WordPress Dashboard > JetFormBuilder > Forms path and click the “Add New Form” button.
In the title field, write the name of the survey. In our case, it’s the “Zolden Customer Survey 2024.”
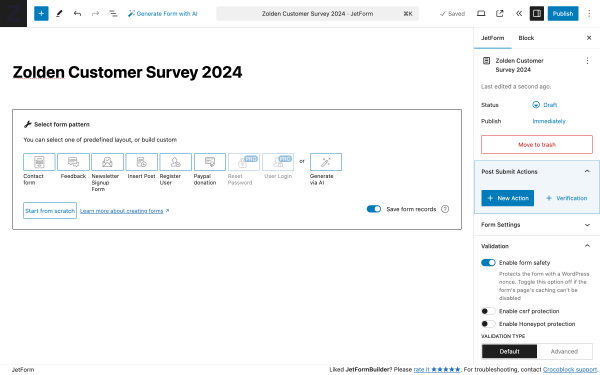
Upon default, the newly created form contains the Welcome block; with its help, one can fetch all pre-made Form Patterns, use the Generate via AI feature, and so on.
We’re not going to use so we’ll delete it.
Form step 1: Form intro
The form intro includes short information about the survey, and two Text Field blocks to collect basic user information, including name and email.
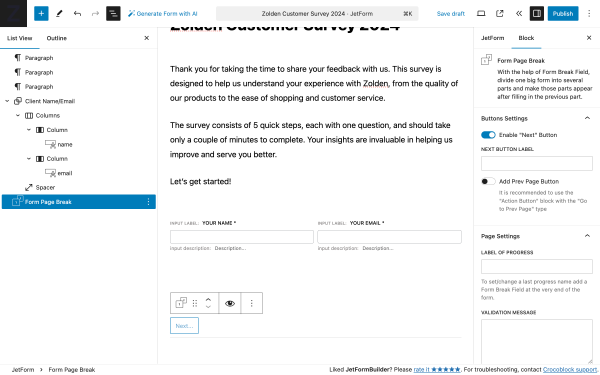
We’re going to group both fields into columns to make the layout more convenient.
The structure of fields:
- Paragraph — a block that contains an introduction to the form;
- Group — a set of blocks that contain two Column blocks of equal width:
- left Column — contains the required Text Field block to collect the user name;
- right Column — includes the required Text Field block to collect user email;
- Form Page Break — a block that divides the form into several parts and makes those parts appear after filling in the previous part.
So, to enable the Text Field to collect and validate email ID, we need to go to the Block settings in the side menu.
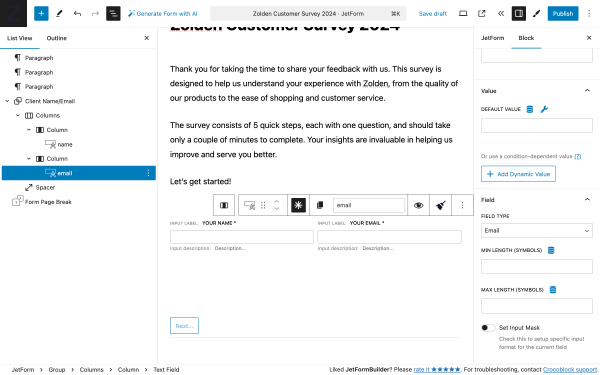
Scroll to the Field settings, and in the FIELD TYPE dropdown, select the “Email” value. Following the same pattern, you can enable the Text Field block to collect specific data, including:
- website by applying the “Url” value;
- phone number by applying the “Tel” value;
- password by applying the “Password” value (if you’re creating a registration form).
Form step 2: Overall shopping experience
The survey begins by estimating the customer’s overall shopping experience. This section aims to provide an overview of customer satisfaction, making it crucial for understanding general impressions.
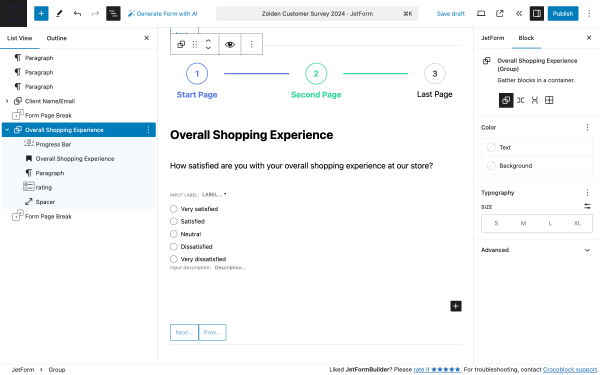
The structure of fields:
- Progress Bar — a block that adds navigation and shows users on what page they are now and how many pages are left to finish the form;
- Heading — a block that contains the title of the form step “Overall Shopping Experience”;
- Paragraph — a block that contains a question: “How satisfied are you with your overall shopping experience at our store?”;
- Radio Field — a block that provides a list of answers where customers can select all relevant satisfaction levels: “Very satisfied,” “Satisfied,” “Neutral,” “Dissatisfied,” and “Very dissatisfied”;
- Form Page Break — a block that divides the form into several parts and makes those parts appear after filling in the previous part.
To add the values to the Radio Field block, select the block, and in the FILL OPTIONS FROM, select “Manual input” and then click on the “Manage Items” button.
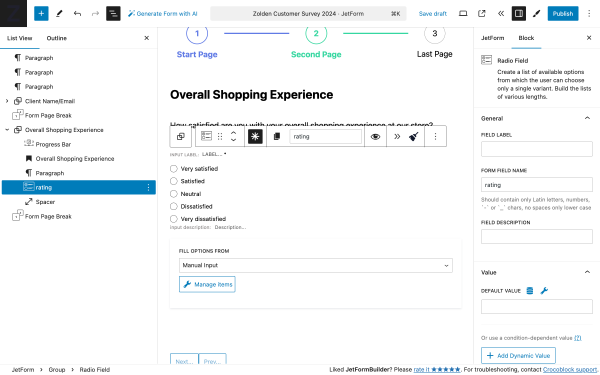
In the Edit Manual Options pop-up, you can create as many field options as you need. To create field options, click on the “+ Add new Option” button. To remove the field option, click on the red “trash can” icon in the upper right corner.
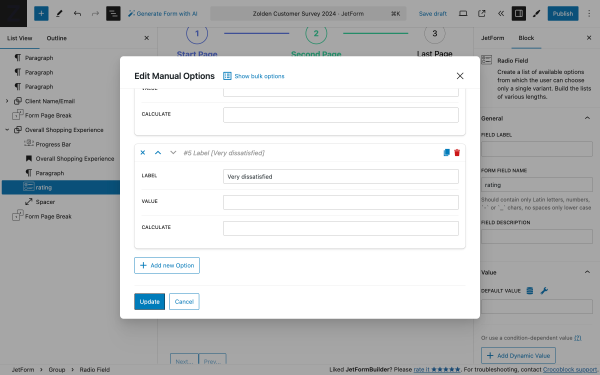
When you’re done, click on the “Update” button to save settings or “Cancel” to discard them.
Form step 3: Product quality
In this step, we give respondents the chance to rate and share details about product quality.
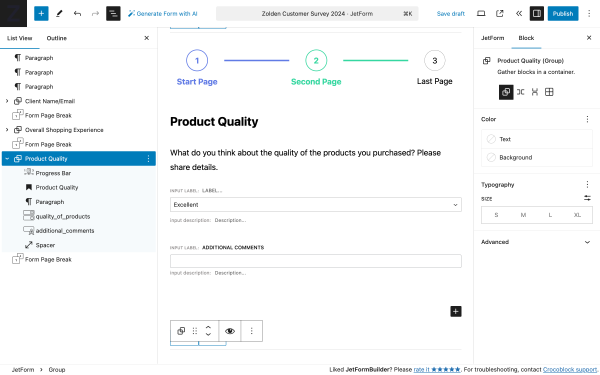
The structure of fields:
- Progress Bar — a block that adds navigation and shows users on what page they are now and how many pages are left to finish the form;
- Heading — a block that contains the title of the form step “Overall Shopping Experience”;
- Paragraph — a block that contains a question: “What do you think about the quality of the products you purchased? Please share details.”;
- Select Field — a block that provides a dropdown list where customers can select all relevant options: “Excellent,” “Good,” “Average,” “Poor,” and “Very Poor” to get a quick categorical rating from customers;
- Text Field — a block that provides space for additional comments;
- Form Page Break — a block that divides the form into several parts and makes those parts appear after filling in the previous part.
To add the values to the Select Field block, select the block, and in the FILL OPTIONS FROM, select “Manual input” and then click on the “Manage Items” button.
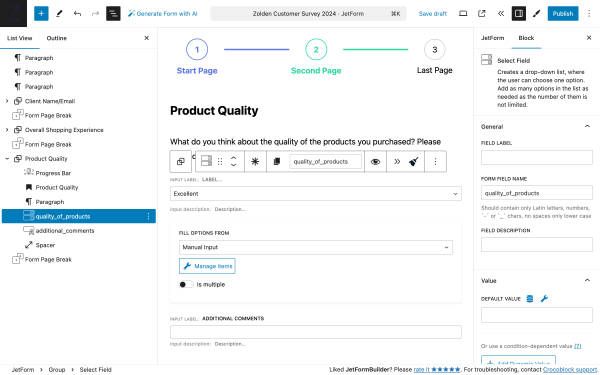
In the Edit Manual Options pop-up, you can create as many field options as you need. To create field options, click on the “+ Add new Option” button. To remove the field option, click on the red “trash can” icon in the upper right corner.
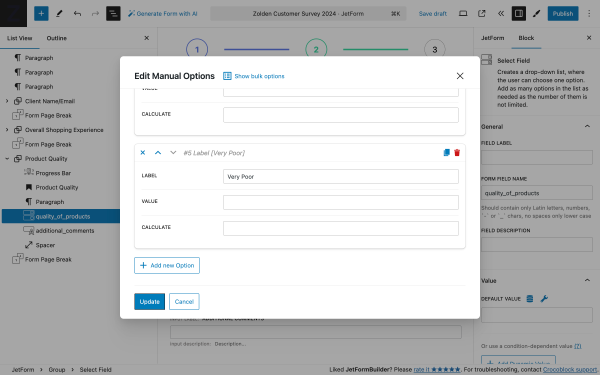
When you’re done, click on the “Update” button to save settings or “Cancel” to discard.
Form step 4: Customer service
It’s essential to know whether customers received adequate support during their shopping journey. Here, customers can express if they are satisfied with the assistance they receive.
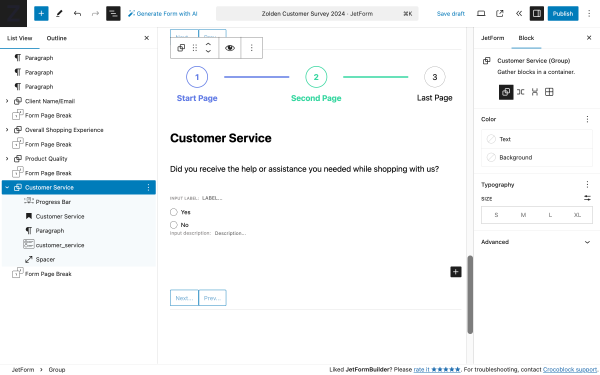
The structure of fields:
- Progress Bar — a block that adds navigation and shows users on what page they are now and how many pages are left to finish the form;
- Heading — a block that contains the title of the form step “Customer Service”;
- Paragraph — a block that includes a question: “Did you receive the help or assistance you needed while shopping with us?”;
- Radio Field — a block that provides “Yes” and ”No” options where customers can select if assistance was/was not effective;
- Form Page Break — a block that divides the form into several parts and makes those parts appear after filling in the previous part.
To add the values to the Radio Field block, select the block, and in the FILL OPTIONS FROM, select “Manual input” and then click on the “Manage Items” button.
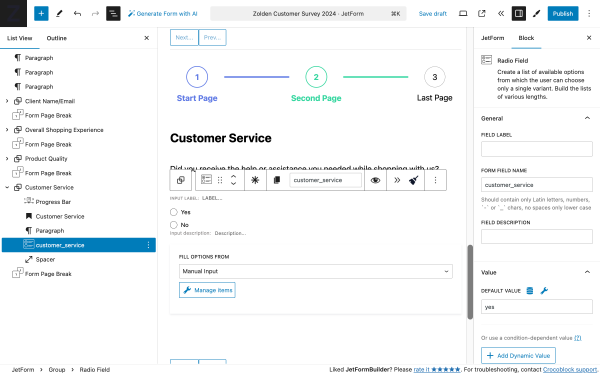
In the Edit Manual Options pop-up, you can create as many field options as you need. To create field options, click on the “+ Add new Option” button. To remove the field option, click on the red “trash can” icon in the upper right corner.
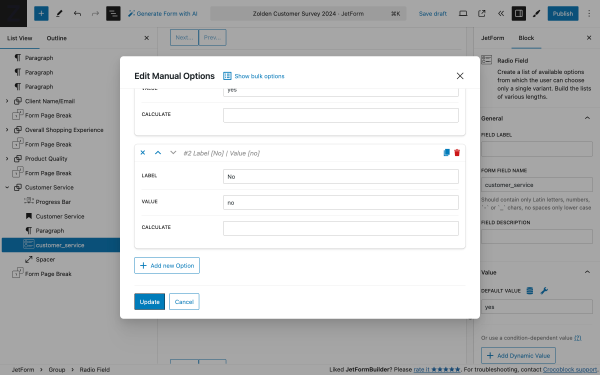
When you’re done, click on the “Update” button to save settings or “Cancel” to discard them.
Form step 5: Website navigation
If the store operates online, understanding how easily customers can navigate your website can help identify friction points.
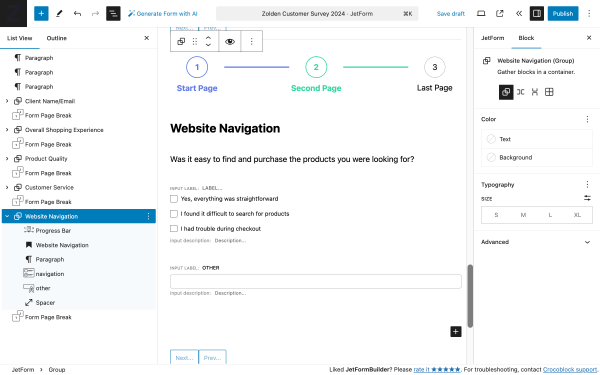
The structure of fields:
- Progress Bar — a block that adds navigation and shows users on what page they are now and how many pages are left to finish the form;
- Heading — a block that contains the title of the form step “Website Navigation”;
- Paragraph — a block that contains a question: “Was it easy to find and purchase the products you were looking for?”;
- Checkbox Field — a block that provides a list where customers can select all relevant options that describe their experience: “Easy to Find Products,” “Complicated Checkout,” “Quick Loading Time,” and “Other.”
- Form Page Break — a block that divides the form into several parts and makes those parts appear after filling in the previous part.
To add the values to the Checkbox Field block, select the block, and in the FILL OPTIONS FROM, select “Manual input” and then click on the “Manage Items” button.
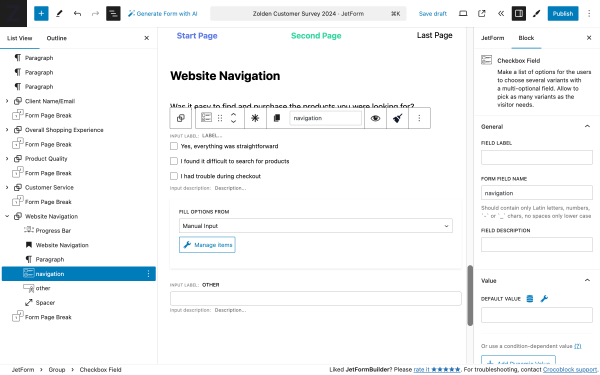
In the Edit Manual Options pop-up, you can create all the necessary field options. Click on the “+ Add new Option” button to create field options.
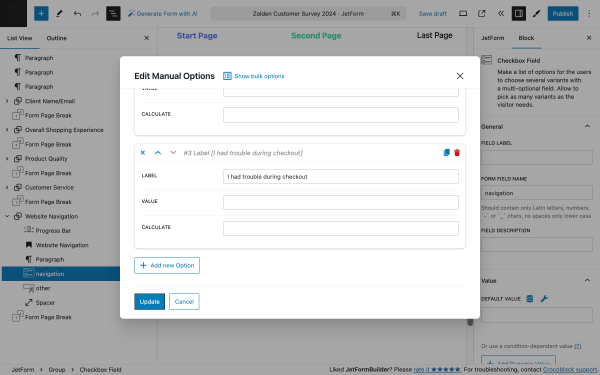
When you’re done, click on the “Update” button to save settings or “Cancel” to discard.
Form step 6: Suggestions for improvement
To close the survey, we provide a space for open-ended responses where customers can list specific suggestions.
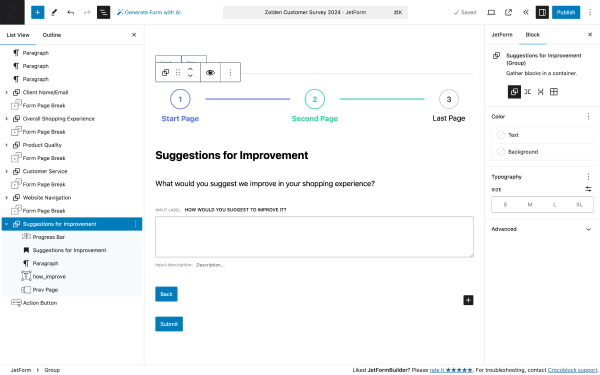
The structure of fields:
- Progress Bar — a block that adds navigation and shows users on what page they are now and how many pages are left to finish the form;
- Heading — a block that contains the title of the form step “Website Navigation”;
- Paragraph — a block that contains the question: “What would you suggest we improve in your shopping experience?”;
- Textarea Field — a block that gives the user enough space to type a detailed response;
- Form Page Break — a block that divides the form into several parts and makes those parts appear after filling in the previous part;
- Action Button — a block that allows the user to submit the responses.
Add Post-Submit Actions
To finalize this form, we’re going to add several form actions. To add form action, click on the JetForm in the side menu and press the “+ New Action” button in the Post Submit Actions tab.
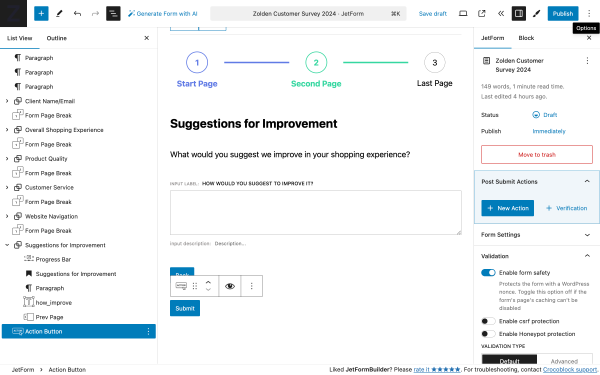
Send Email
With this form action, we’re going to send emails with entries from this survey to both the store admin and the user.
In the Add new action pop-up, click on Send Email to add it to your form.
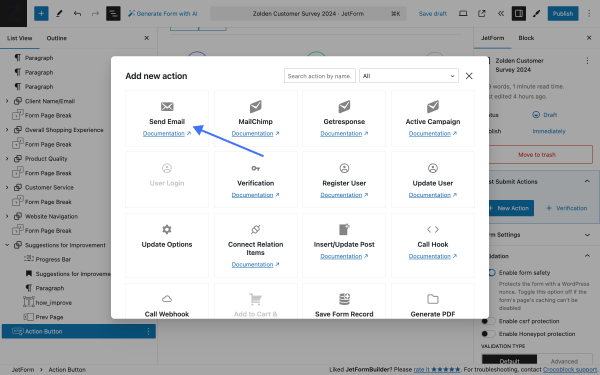
Once the action is added, hover it over and click the “pencil” icon to edit the action. In the Edit Send Email pop-up, we have the following settings.
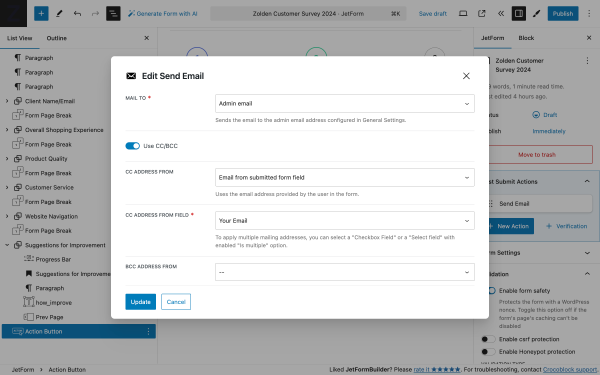
- MAIL TO 一 a required field to select who will receive the message. It includes several options, and we’re going to pick “Admin email”;
- Use CC/BCC — a toggle that enables the CC ADDRESS FROM and BCC ADDRESS FROM drop-down lists, which allows sending the secondary and hidden recipients of the email:
- CC ADDRESS FROM — in this field, we’re to choose the option “Email from submitted form field”;
- CC ADDRESS FROM FIELD — in this field, we’re to specify the fold that contains the user’s email. In our case, it’s the “Your Email” field;
- BCC ADDRESS FROM — we’re going to leave it empty.
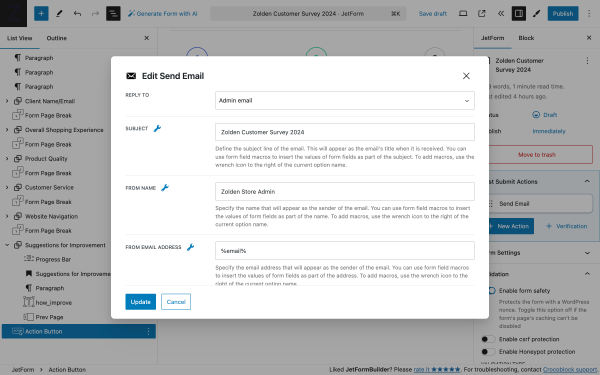
- REPLY TO 一 a drop-down list that allows setting the email that you would like to use for receiving answers; we’re going to pick “Admin email”;
- SUBJECT 一 a text field that is intended to enter the subject of the letter that the user will receive; if you click the “wrench” icon, you can choose the desired macros, but we’ll use a custom subject “Zolden Customer Survey 2024”;
- FROM NAME and FROM EMAIL ADDRESS 一 text fields for inserting the name that will appear as the email’s sender and the email address that will be added as the address of the letter sender; in our case, those are “Zolden Store Admin” and “%email%”.
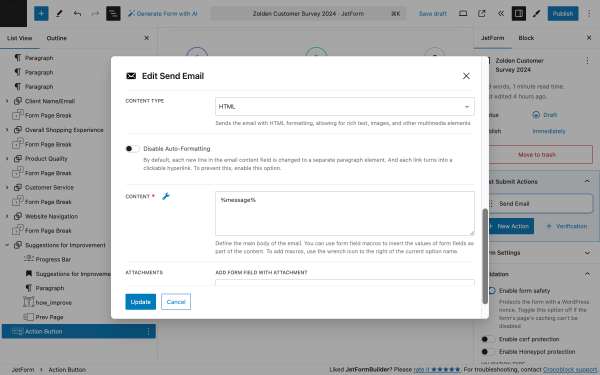
- CONTENT TYPE 一 a dropdown list allowing choosing if the message will be text only or with HTML formatting; we’re opting for “HTML”;
- CONTENT 一 a textarea field intended for adding to the body of the email. To add macros to insert the form field data, click the “wrench” icon to the right of the current option name.
When you’re done, click on the “Update” button to save settings or “Cancel” to discard.
Redirect to Page
Another form action we’re going to use is the Redirect to Page. It allows users to be redirected to custom pages after they submit the form. For this case, we’ve prepared a “Thank you” page that our users will see upon completing the survey form.
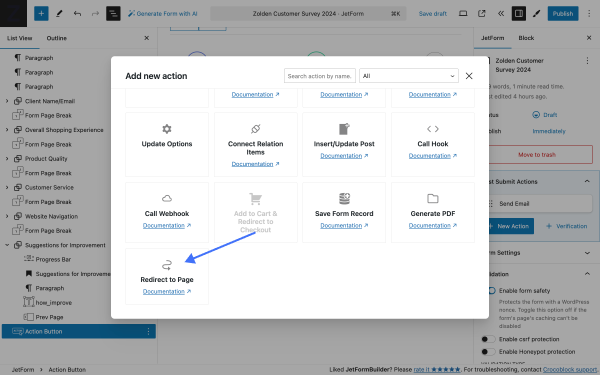
Once the action is added, hover it over and click the “pencil” icon to edit the action. In the Edit Redirect to Page pop-up, we have the following settings.
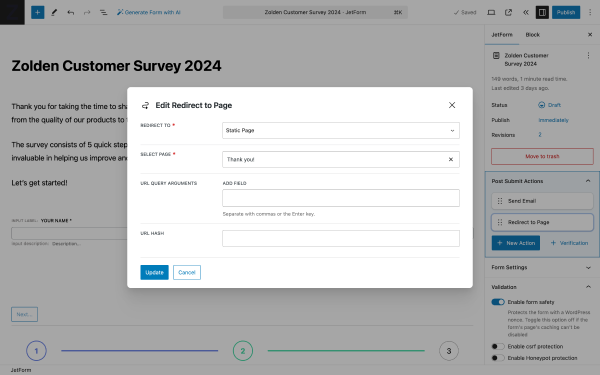
- REDIRECT TO 一 a required drop-down field where you can choose the type of page you would like to send the user to; we’ll choose “Static Page.” Once selected, the next field will be revealed;
- SELECT PAGE — a required drop-down field that lists all pages available on the website; among them, we can choose our “Thank you” page;
The rest of the fields we’ll leave as is. When you’re done, click on the “Update” button to save settings or “Cancel” to discard.
Alternatively, you can generate a PDF report for each form entry and add a Generate PDF Form Action; with its help, your form will automatically generate PDF files with the information submitted.
Add Form to Page
To use the form, one needs to click on the “Use the form” button “<<” to open Use the form pop-up. The pop-up contains a set of buttons divided into two steps:
- 1. How you want to use the form? — contains a set of buttons that allow the creation of an elementor widget, block, or generate a shortcode;
- 2. Where you want to use the form? — contains a set of buttons that allow one to select an existing page for the form or create a new one.
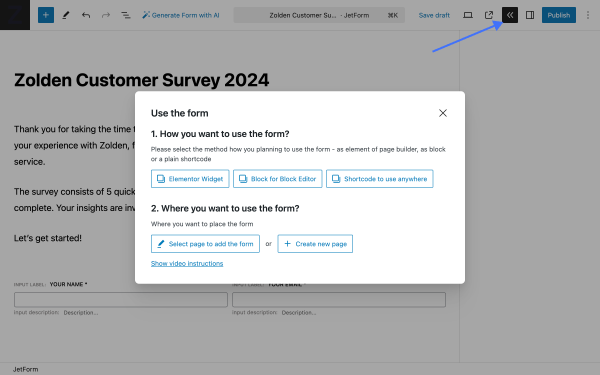
After adding the form page to the page we can preview it.
Preview the Form
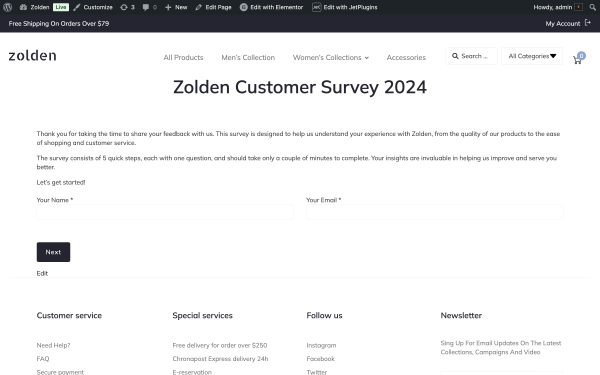
On the front, the first form step contains intro text and two Text Fields for collecting names and emails.
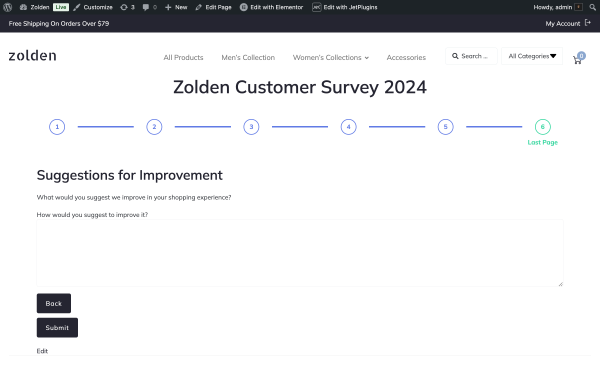
Upon filling in the form, the Progress Bar will change the color to demonstrate progress.
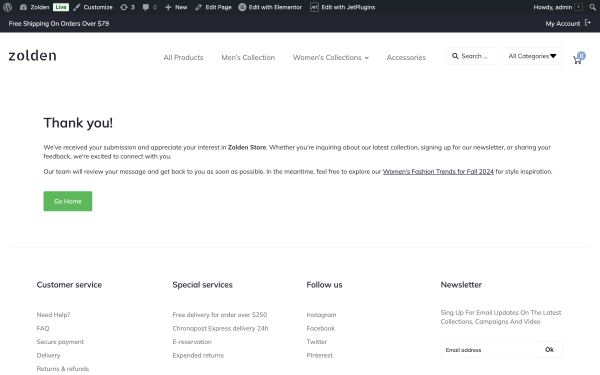
Upon clicking the “Submit” button, the data is saved, and the user is redirected to the Thank You page.
That’s all one needs to know about building the survey form with the JetFormBuilder plugin on a WordPress website.