How to Enable Extra Payment Methods in Stripe
With the JetFormBuilder WordPress plugin, you can set up payments through Stripe, PayPal, and WooCommerce. However, if you need to add additional payment methods, you can do so with Stripe integration in JetFormBuilder.
Table of Contents:
- Connect Stripe Payments
- Add the Code
- Connect the Method
- Set Up the Form
- Add the Form to the Page
- Check the Result
Connect Stripe Payments
First, install and activate the Stripe Payments & Subscriptions add-on. Refer to the Stripe Payments & Subscriptions guide to learn how to set up integration between Stripe and JetFormBuilder correctly.
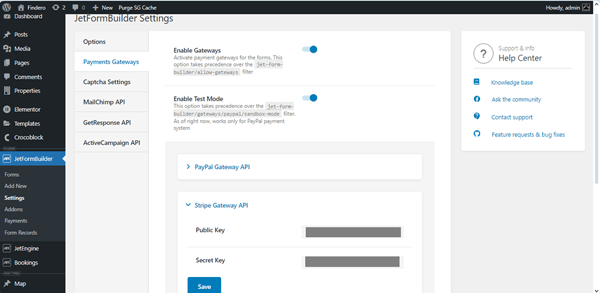
Navigate to the WordPress Dashboard > JetFormBuilder > Settings > Payments Gateways tab and turn the Enable Gateways toggle on.
Unfold the Stripe Gateway API tab. Here, you can enter the Public Key and Secret Key copied from the Stripe website and “Save” them to use in the JetFormBuilder forms further.
Add the Code
To enable additional payment methods, the custom code should be added to the functions.php file of the child theme or the Code Snippets plugin. Use the following code on the site:
<?php
add_filter(
    'jet-form-builder/stripe/payment-methods',
    function( $methods ) {
        return array('klarna');
    },
    10
);
Instead of “klarna,” use any needed payment method.
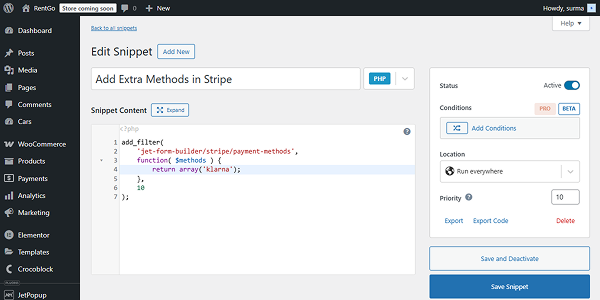
Click the “Save and Activate” button once you are ready.
Connect the Method
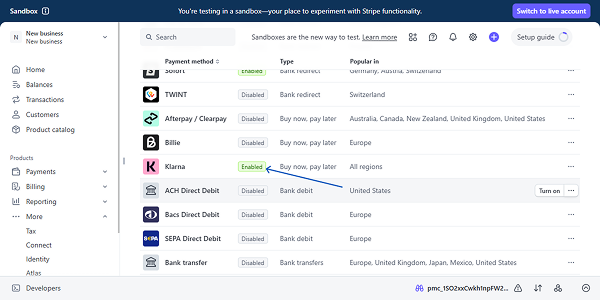
Ensure that the required payment methods are listed in the Create a Payment Method guide. Methods mentioned only on the Stripe site can be integrated with JetFormBuilder forms.
Then, in your Stripe account, navigate to Settings > Payments > Payment methods and ensure that the required payment method is enabled.
Set Up the Form
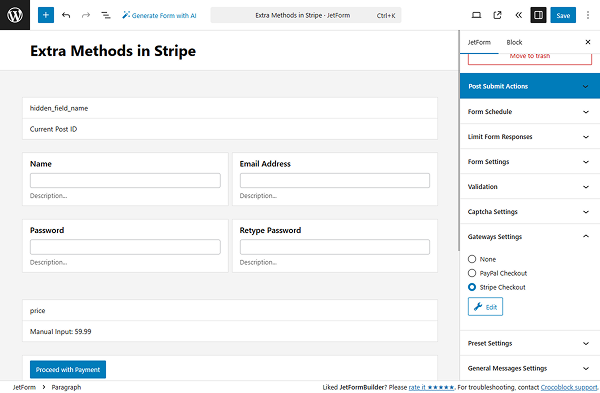
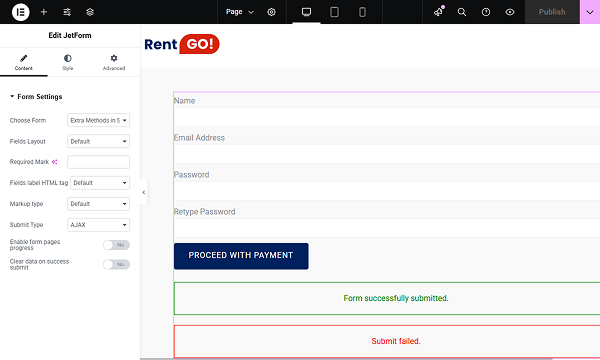
Proceed to setting up a form. For that, we navigate to WordPress Dashboard > JetFormBuilder > Add New Form.
Enter the form’s title — in this case, it is “Extra Methods in Stripe”.
The Welcome block appears by default. From here, you can select a form pattern or generate a form with OpenAI. Otherwise, you can hit the “Start from scratch” button and use the three fields added by default; otherwise, you can delete them to begin anew.
In this case, we built our form following the Stripe Payment Form with JetFormBuilder PRO Addon guide.

Proceed to the JetForm settings tab and open the Gateways Settings. Enable the “Stripe Checkout” option.
Click the “Edit” button. In the newly opened Edit Stripe Checkout Settings pop-up, enable the Use Global Settings toggle.
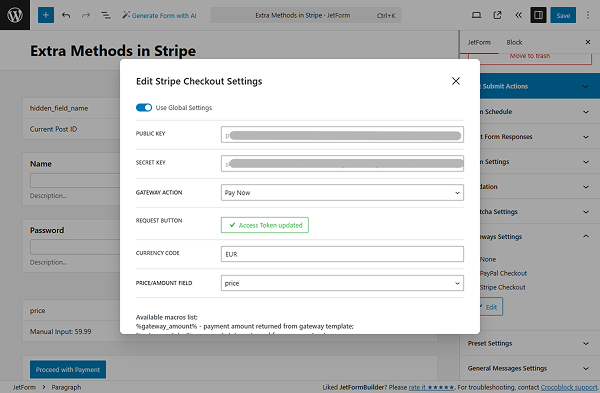
So the PUBLIC KEY and SECRET KEY are added automatically. Enter the needed CURRENCY CODE and ensure that it is supported by the payment method you use. Choose the needed field for the PRICE/AMOUNT FIELD.
You can change the PAYMENT SUCCESS or PAYMENT FAILED MESSAGES if needed. Then, click the “Update” button.
Once you are ready, hit the “Publish” button.
Add the Form to the Page
Following the How to Display a Form on the Front End guide, we add the created form to the necessary page.
Click the “Publish” button once you are ready with the settings.
Check the Result
Let’s proceed to the front end and fill in the form.
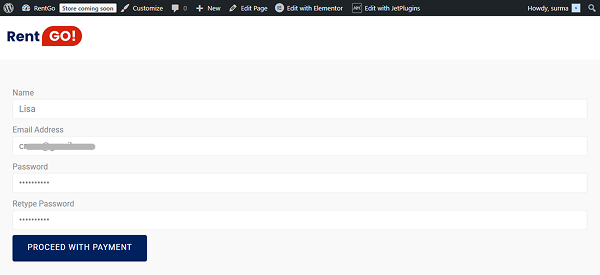
Once we click the “Proceed with Payment” button, we are redirected to the Stripe Checkout page, where we can choose whether to pay with Stripe or Klarna.

That’s it. Now you know how to add extra payment methods to your JetFormBuilder form on the WordPress site.