How to Create a Form with Map Autocomplete Functionality
In this tutorial, we explain how to apply the Address Autocomplete add-on for JetFormBuilder to select an address from a drop-down list of five proposed addresses and display the selected location on a map using the Map Field.
This functionality is implemented via the Address Autocomplete add-on for JetFormBuilder, the Maps Listing Module of the JetEngine plugin, and the Map Field block.
- Install and Activate the Add-on
- Set the Map Provider
- Receive the API Key
- Configure the JetEngine Settings
- Adjust the JetFormBuilder Settings
- Create a Form
- Add the Form to a Page
- Test the Flow
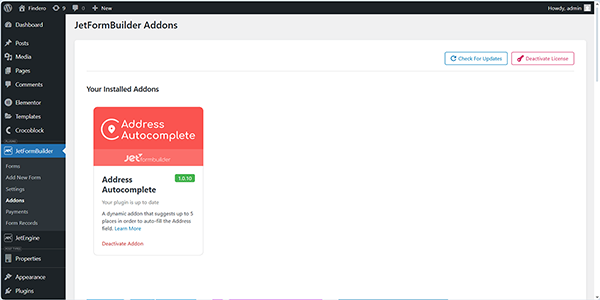
Install and Activate the Add-on
First, install and activate the Address Autocomplete add-on as you would any other WordPress plugin. Read the Plugin Installation tutorial to know different ways to do it.
Also, the Maps Listing Module of the JetEngine plugin should be enabled.
Set the Map Provider
Proceed to the WordPress Dashboard > JetEngine > JetEngine > Maps Settings tab and select the Map Provider: “Google Maps,” “Leaflet Maps,” or “Mapbox” option.
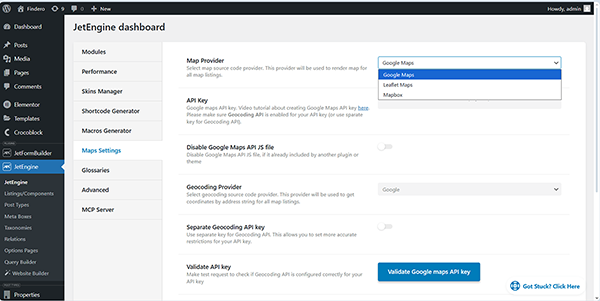
Since we intend to keep the default “Google Maps” Map Provider, we have to obtain a Google API Key.
In addition, if you set the “Leaflet Maps” or “Mapbox” options, the API Keys are not needed.
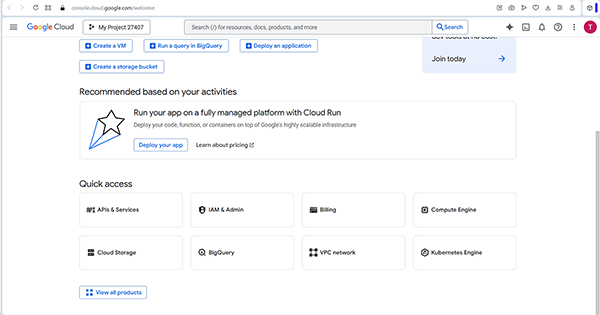
Receive the API Key
Enter your Google Cloud Console.
Here, scroll the page down to the APIs & Services and press this button.
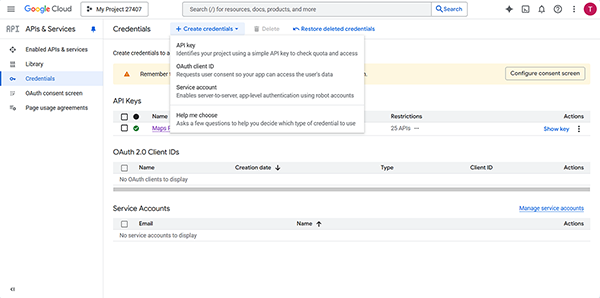
After that, the APIs & Services > Credentials tab will be unrolled. If you have previously created the API Key, it would be displayed in the API Keys section.
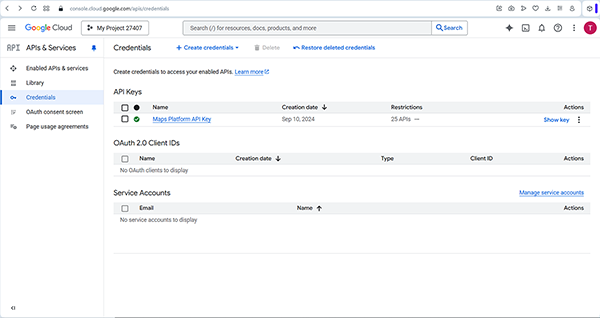
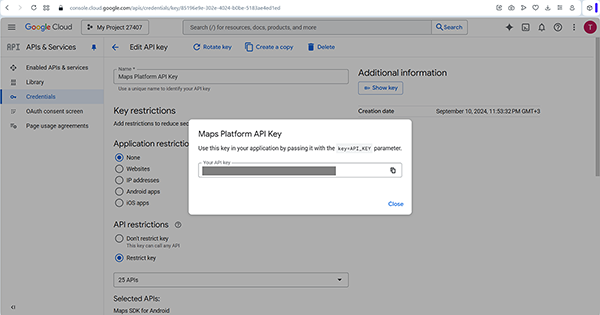
Click the corresponding link to unfold the API Key’s data.
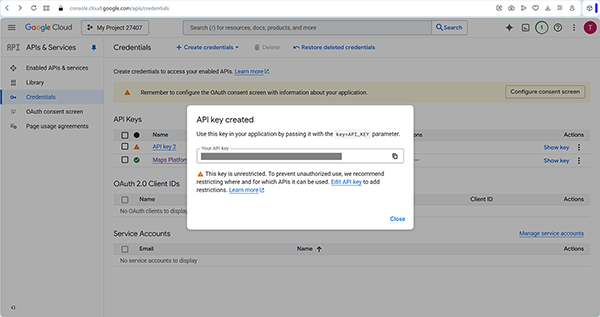
Also, you can create another one by clicking the “Create credentials” button. Here, select the API Key tab and then set its restrictions.
Finally, complete the restrictions, push the “Show key” button, and copy the API Key.
Configure the JetEngine Settings
Return to your site, go to the WordPress Dashboard > JetEngine > JetEngine > Maps Settings tab, and paste the copied API Key into the API Key field.
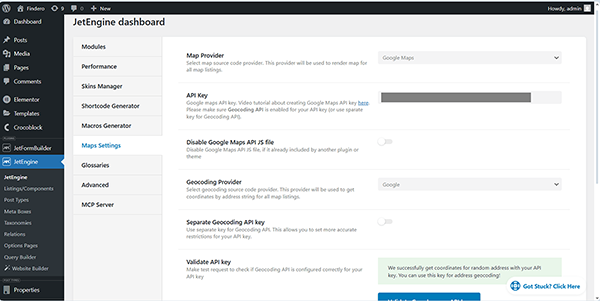
After that, set the Geocoding Provider to select the provider to get coordinates by address string for all map listings: “Google,” “Open Street Map,” “Photon,” or “Bing”. Read the How to Choose Different Front-end and Geocoding Map Providers for Map Listings tutorial to adjust any provider for the maps you are using on the WordPress website with the help of the JetEngine plugin.
Once set, validate the API Key by pressing the “Validate API key” button to make a test request and verify that the Geocoding API is configured correctly for your API Key.
If the validation was successful, the following text will appear near this button: “We successfully get coordinates for random address with your API Key. You can use this key for address geocoding!”
After fulfilling the field(s), the data will be saved automatically.
Adjust the JetFormBuilder Settings
In the next step, return to your site and go to the WordPress Dashboard > JetFormBuilder > Settings > Address Autocomplete API tab, then insert the copied API Key into the Google Places API Key field.
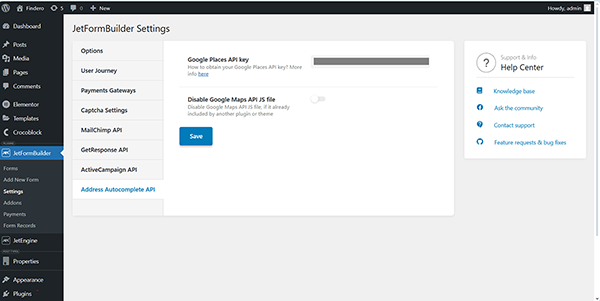
Once completed, press the “Save” button.
Create a Form
Move to the WordPress Dashboard > JetFormBuilder > Add New tab and create a new form.
The newly opened default form contains the Welcome block. Since we decided to build the form from scratch, we click the “Start from scratch” button on this block.
Read the Creating a Form tutorial to learn how to build forms from scratch and customize their settings.
Add the fields you need. We create a form to get the client’s address and display it on the map, we add the Autocomplete Field block, specify its FIELD LABEL and FORM FIELD NAME, and then select the required PLACE TYPES.
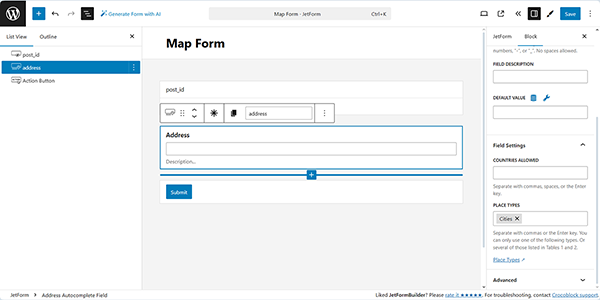
After that, insert the Map Field and navigate to the Map settings section. Here, enable the Show search autocomplete ㅡ a toggle that, when enabled, adds a drop-down field to select an address from a list of the proposed five addresses and displays the selected location on a map. In addition, move the HEIGHT ㅡ a slider that allows setting the map dimensions. The map height can be adjusted between “50” and “1000” pixels. Pressing the “Reset” button sets the height to 300 pixels.

In this case, we keep only the default “Save Form Record” Post Submit Action. You can also add the address to the specified Custom Post Type using the “Insert/Update Post” Post Submit Action.
Finally, save the form by pressing the “Publish/Save” button.
Add the Form to a Page
You can place this form on a page, Single Post Page, or an Archive template using the JetForm widget/block/element according to your requirements and preferences.
In this case, we use Elementor.
To learn how to add your form to pages using Elementor, Block Editor, or the Bricks theme, read the Displaying a JetFormBuilder Form in Any Page Builder tutorial.
Test the Flow
Next, move to the front end and fill out the form and type the first three characters of the text.
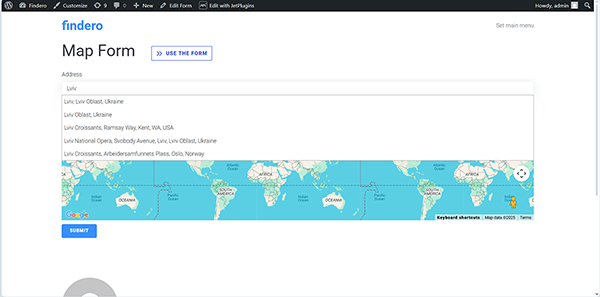
Then the text field in the Map Field block will display five addresses in the drop-down list. Select the needed variant, and the map will show you the location.
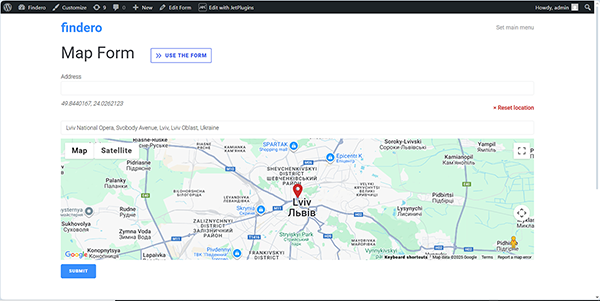
In this case, we pick the “Lviv National Opera, Svobody Avenue, Lviv, Lvivska Oblast, Ukraine” variant from the proposed ones.
Finally, after the form is successfully submitted, its record will be displayed in the WordPress Dashboard > JetFormBuilder > Form Records tab.
That’s it. Now you know how to apply the Address Autocomplete add-on for the JetFormBuilder and the Maps Listing Module of the JetEngine plugin for WordPress to allow selection of an address from a drop-down list and display the selected location on a map using the Map Field.