How to Ensure Form Fields Have Unique Values
When creating forms, it might be required to ensure that users do not enter the same value in multiple fields. For example, you may want each email address, username, or ID to be unique within a form. In this guide, you will learn how to set up validation in the JetFormBuilder WordPress plugin so that every form field input is checked for uniqueness. This helps improve data accuracy and prevents duplicate submissions.
Table of Contents:
In this tutorial, you will learn how to create a form that validates user input against the current post field value. If the value entered in the form field does not match the post’s meta field value, the form will display an error message.
For example, assume the current post contains a meta field called “promo.” The form should return an error unless the user enters the exact value stored in that meta field.
Install the Addon
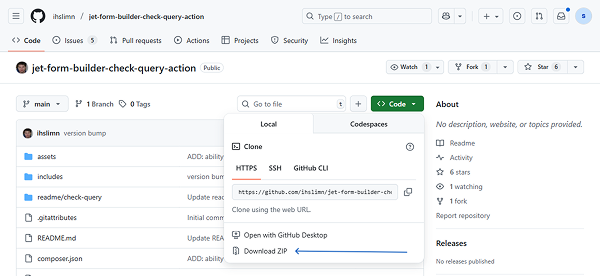
So, first of all, install the JetFormBuilder – JetEngine Query Actions addon from the following page: https://github.com/Crocoblock/jet-form-builder-check-query-action
Download a zip file by clicking the “Code” button and “Download ZIP”.
Then, proceed to WordPress Dashboard > Plugins > Add Plugin and click the “Upload Plugin” button. Select the file and install it as you would normally.
Create a Custom Query
Proceed to WordPress Dashboard > JetEngine > Query Builder and click the “Add New” button.
Type the Query Name and select the Posts Query Type.
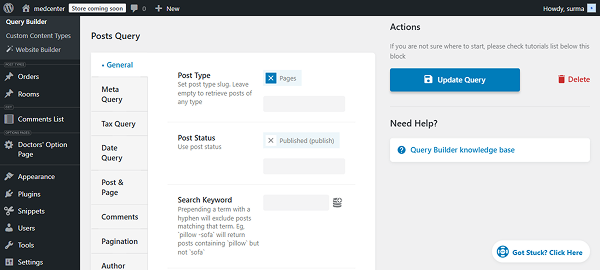
Scroll down to the General settings tab and select the needed Post Type (“Pages” in this case). Additionally, we chose the “Published” Post Status, but it is optional.
Then, proceed to the Meta Query tab and click the “Add new clause” button.
In the Field key/name, enter the field name (“promo” in this case), or you can use ‘JetEngine meta field’ macros to get the name of the field created by JetEngine. Select the “Not exist” operator for the Compare field, and the “Char” data Type.
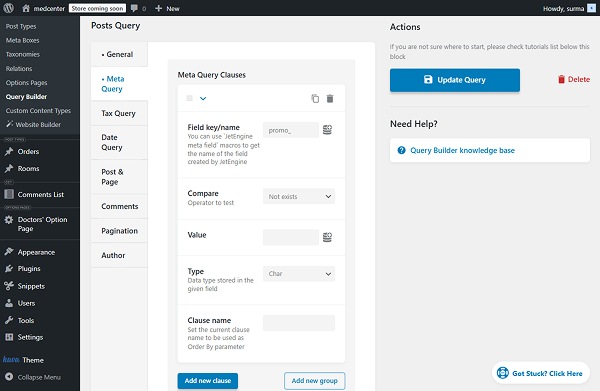
These settings allow the form to accept any value if no promo code was included in the post.
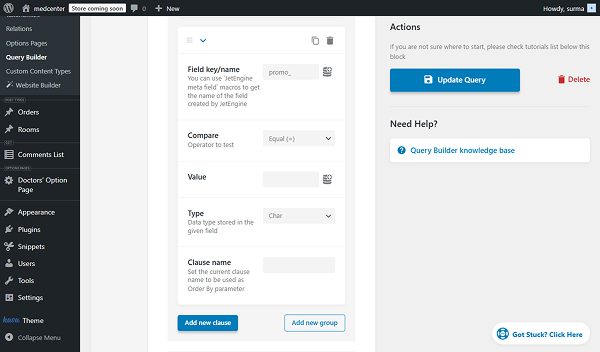
Then, click the “Add new clause” button again. In the Field key/name, enter the field name (“promo” in this case). Select the “Equal” operator for the Compare field, and the “Char” data Type. Keep the Value field empty.
If there is no promo code in the post, the form should accept any value.
Then, add one more clause and enter the field name in the Field key/name field. Select the “Equal” operator for the Compare field. In the Value field, select the “JFB Check Query – Form Field Value” option and enter the field’s name (“promo” in this tutorial). Set the “Char” data Type.
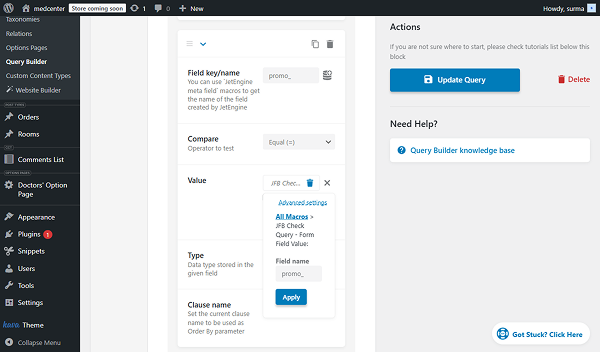
If the value entered is not one entered by the user, the form should display an error.
Here, we set it so that, upon form submission, the ‘promo’ form field value will be passed to the meta query.
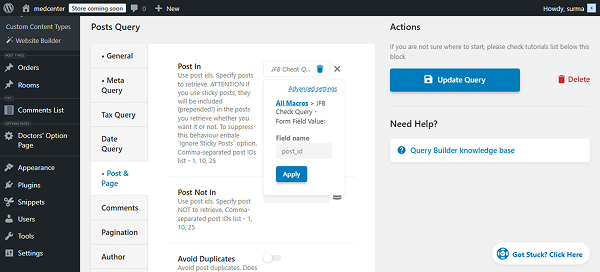
Now, proceed to the Post & Page tab and in the Post In field, click the “Dynamic Tag” icon and select the “JFB Check Query – Form Field” option. In the Field name input, enter the “post_id” value.
Click the “Apply” button.
Click the “Add Query” button once you are ready with the settings.
Set Up a Form
To build a WordPress form, we navigate to WordPress Dashboard > JetFormBuilder > Add New Form.
Enter the form’s title.
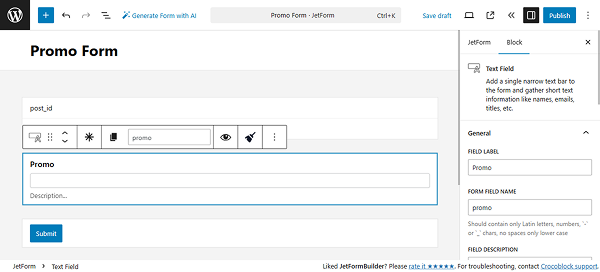
The Welcome block appears by default. From here, you can select a form pattern or generate a form with OpenAI. In this case, we hit the “Start from scratch” button.
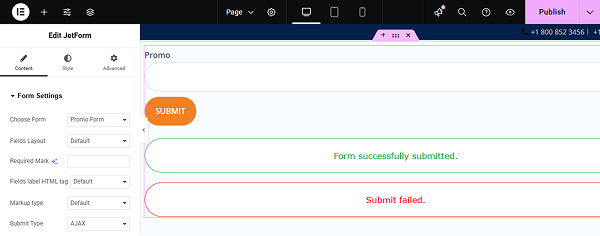
We keep the Hidden Field with the “Current Post ID” value and change the Text Field’s LABEL to “Promo”.
Adjust the submit action
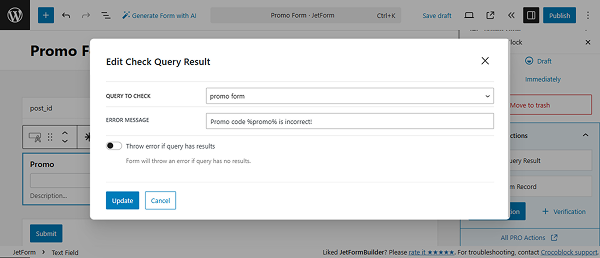
In the right-side settings section, open the Post Submit Actions tab and click the “New Action” button. Select the “Check Query Result” action.
In the newly opened pop-up, select the query you created before in the QUERY TO CHECK dropdown. Then, set the ERROR MESSAGE.
Click the “Update” button.
Once you are ready, press the “Publish” button.
Add the Form to the Page
Proceed to the page where you need to display the form. Refer to our How to Display a Form on the Front End guide if you are unsure about the settings.
Click the “Publish” button once you are ready.
Pay attention to the chosen page settings: the “promo” field on this page has the dedicated value (“Croco2025” in this case).
Check the Results
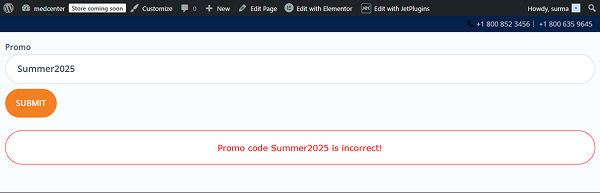
Now, open the front-end page and submit the form, entering an invalid promo code.
We get the error message.
That’s it. Now, you know how to set up validation in the JetFormBuilder WordPress plugin so that every form field input is checked for uniqueness.