How to Insert/Update WooCommerce Product with Attributes
In this article, we will focus on building forms to create new WooCommerce products and update products with attached attributes using the WordPress JetFormBuilder plugin. Particular attention will be given to updating and assigning attributes to products.
Table of Contents:
- Inserting a WooCommerce Product with Attributes via Form
- Updating the WooCommerce Product with Attributes via Form
Inserting a WooCommerce Product with Attributes via Form
Proceed to setting up a form. For that, we navigate to WordPress Dashboard > JetFormBuilder > Add New Form.
Enter the form’s title — in this case, it is “Create New Product”.
Form fields settings
The Welcome block appears by default. From here, you can select a form pattern or generate a form with OpenAI. Otherwise, you can hit the “Start from scratch” button and use the three fields added by default; otherwise, you can delete them to begin anew.
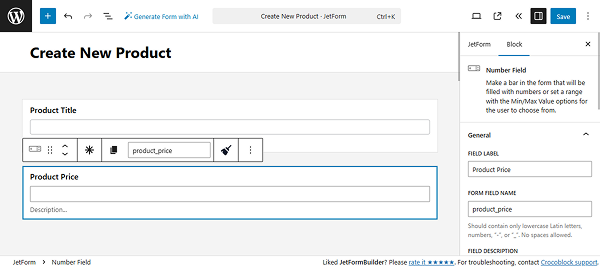
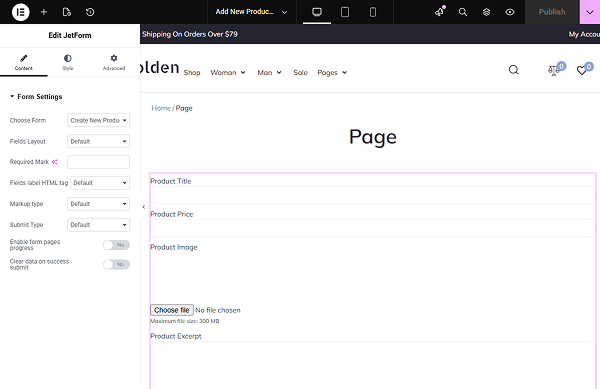
In this case, we build our form from scratch. We keep the Text Field for the post’s title. Additionally, we add a Number Field to store the product’s price.
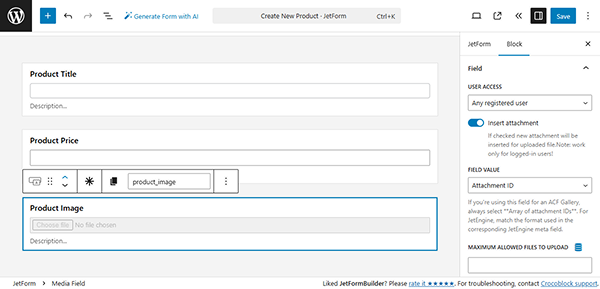
We also add the Media Field to set the product’s thumbnail. It is essential to enable the Insert Attachment toggle and select which users can upload images in the USER ACCESS field.
We add the Textarea Field for the excerpt.
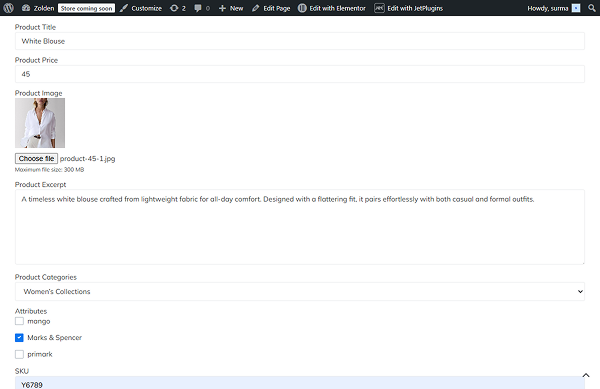
For the product categories, we add a Select Field with the “Terms” source and select the required taxonomy in the TAXONOMY input.
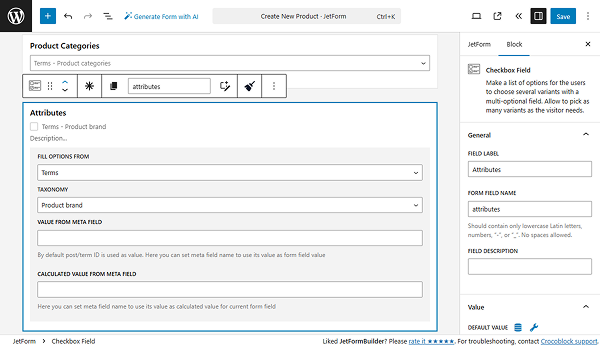
When attributes are stored as categories, we create a Checkbox Field with the “Terms” source and select the required attributes in the TAXONOMY input.
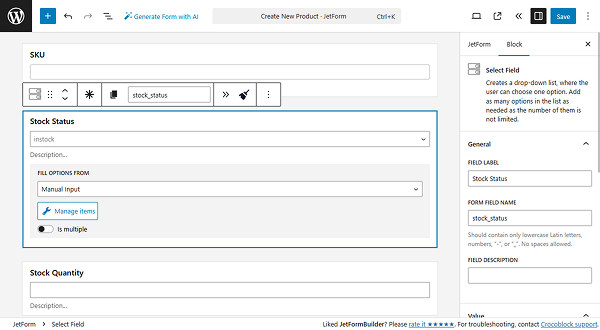
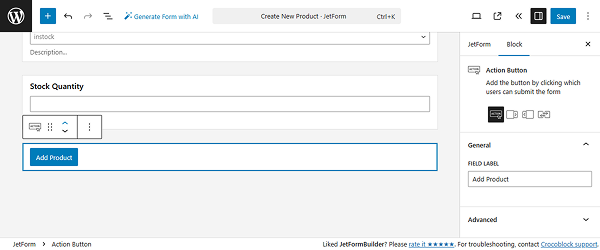
We also added a Text Field for the SKU, a Select Field for the stock status with manual input options, and a Number Field for the stock quantity.
You can add more or fewer fields — it depends on your needs.
Additionally, we changed the Action Button’s text to “Add Product”.
Set up the form Action
Then, open the Post Submit Actions tab and add the Insert/Update Post action. Open the action settings and select the “Products” for the POST TYPE and the required POST STATUS.
Now, we need to set up the FIELDS MAP:
- Text Field for the product’s title is for the “Post Title”;
- Number Field for the price is for the “Product Regular Price”;
- Media Field for the image is for the “Post Thumbnail”;
- Textarea Field is for the “Post Excerpt”;
- Select Field with the categories is for the “Post Terms,” in the newly appeared field, select the product categories you need;
- Checkout Field for the attributes is for the “Post Terms,” in the newly appeared field, select the product attributes you need;
- Text Field for SKu is for the “Product SKU”;
- Select Field for the stock status is for the “Product Stock Status”;
- Number Field for the stock quantity is for the “Product Stock Quantity”.

Click the “Update” button once you are ready. Then click the “Save” button to save the form’s settings.
Add the form to a page
Proceed to the static page where you need to add the form and insert it, following the How to Display a Form on the Front End guide.
Click the “Publish” button once you are ready.
Add the product from the frontend
Proceed to the frontend and fill in the form.
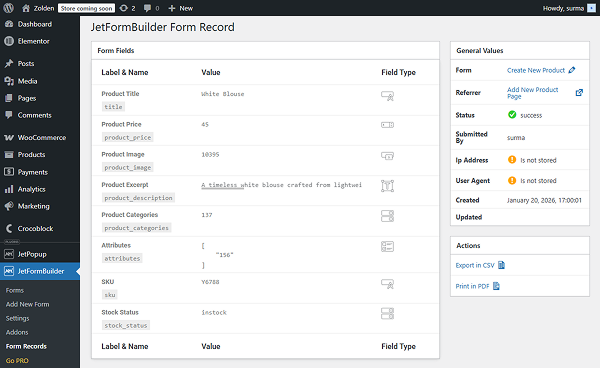
In the form records, we see that the form was successfully submitted and a new product was created.
Updating the WooCommerce Product with Attributes via Form
Proceed to setting up a form. For that, we navigate to WordPress Dashboard > JetFormBuilder > Add New Form.
Enter the form’s title — in this case, it is “Create New Product”.
Form fields settings
The Welcome block appears by default. From here, you can select a form pattern or generate a form with OpenAI. Otherwise, you can hit the “Start from scratch” button and use the three fields added by default; otherwise, you can delete them to begin anew.
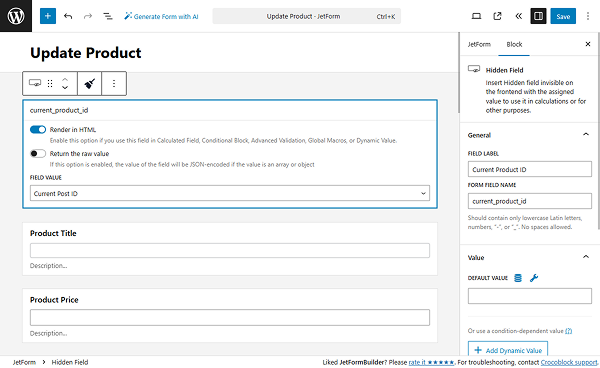
In this case, we build our form from scratch. We keep the Hidden Field with the “Current Post ID” option selected for the FIELD VALUE. Additionally, we keep the Text Field for the post’s title and add a Number Field to store the product’s price.
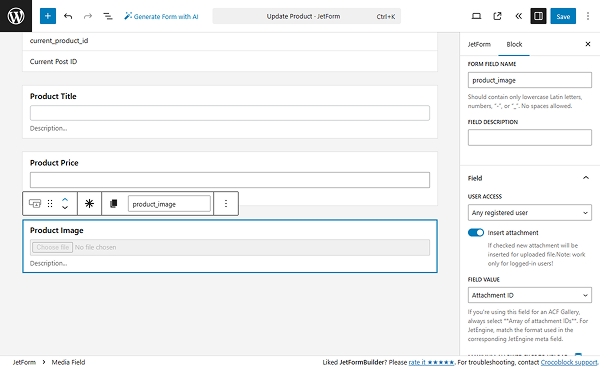
Then, we add the Media Field to set the product’s thumbnail. Enable the Insert Attachment toggle and select which users can upload images in the USER ACCESS field.
For the excerpt, we add the Textarea Field.
To update the product categories, we add a Select Field with the “Terms” source and select the required taxonomy in the TAXONOMY input.
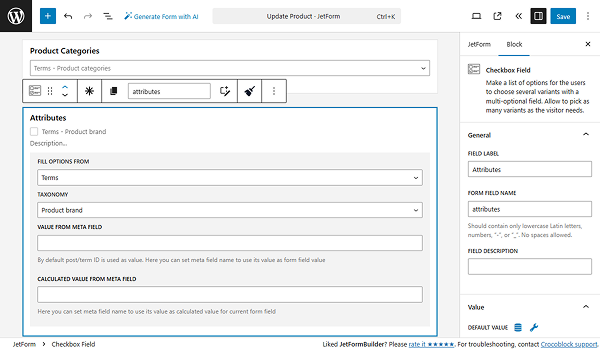
To edit the attributes, we create a Checkbox Field, as they are stored as categories. Set the “Terms” source, then select the required attributes in the TAXONOMY input.
Additionally, we added a Text Field for the SKU, a Select Field for the stock status with manual input options, and a Number Field for the stock quantity.
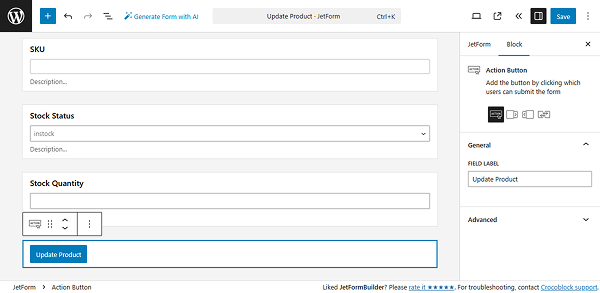
We also changed the Action Button’s text to “Update Product”.
Set up the form Action
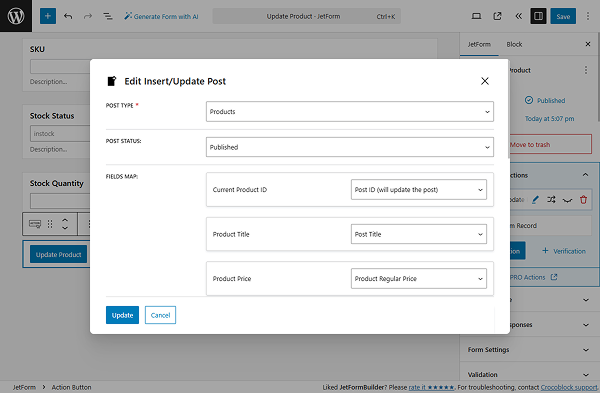
Proceed to the Post Submit Actions tab and add the Insert/Update Post action. Open the action settings and select the “Products” for the POST TYPE and the required POST STATUS.
Now, we need to set up the FIELDS MAP:
- Hidden Field with the current product ID is for the “Post ID”;
- Text Field for the product’s title is for the “Post Title”;
- Number Field for the price is for the “Product Regular Price”;
- Media Field for the image is for the “Post Thumbnail”;
- Textarea Field is for the “Post Excerpt”;
- Select Field with the categories is for the “Post Terms,” in the newly appeared field, select the product categories you need;
- Checkout Field for the attributes is for the “Post Terms,” in the newly appeared field, select the product attributes you need;
- Text Field for SKu is for the “Product SKU”;
- Select Field for the stock status is for the “Product Stock Status”;
- Number Field for the stock quantity is for the “Product Stock Quantity”.
Click the “Update” button once you are ready.
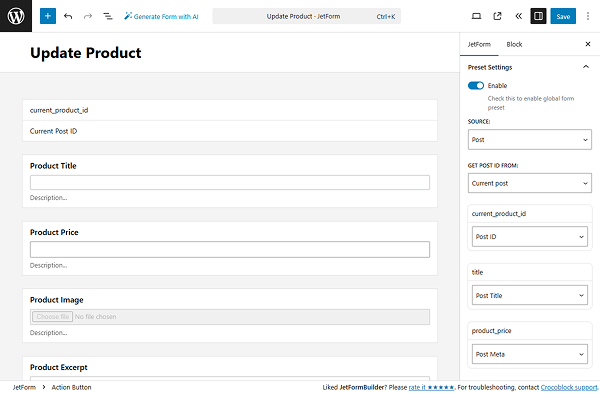
Preset settings
Open the Preset Setting tab and, following the Preset Settings guide, connect the form fields with the products’ fields.
Click the “Save” button once you are ready.
Add the form to a page
Proceed to the single product page template and insert the update form, following the How to Display a Form on the Front End guide.

Click the “Publish” button.
Update the product from the frontend
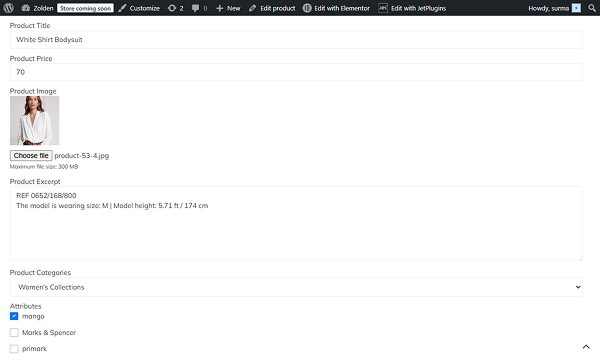
Now open any product page. The form has all fields pre-set, and if I update the title, attribute, and stock quantity, it will be submitted successfully.
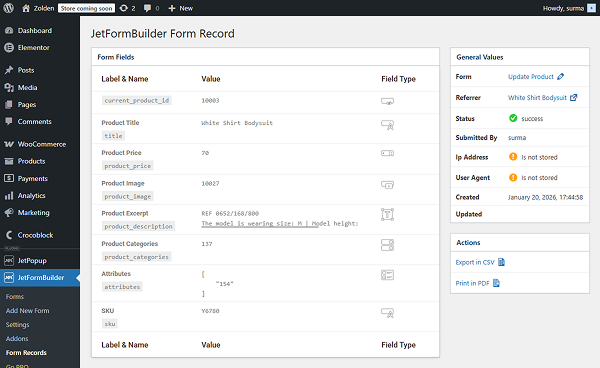
In the form record, we can ensure that the product data is updated.
That’s it. Now you know how to build forms for creating and updating WooCommerce products with the WordPress JetFormBuilder plugin.