How to Enable User Journey Tracking During Form Submission
This tutorial will help you save the user journey during the submission of JetFormBuilder forms. User journey tracking is a powerful feature that enables you to monitor how visitors interact with your forms before submitting them.
User journey tracking records the paths users take while navigating your website before submitting a form. It captures information such as:
- pages visited;
- time spent on each page;
- the sequence of interactions;
- form submission details.
This data helps you understand user behavior patterns and identify potential bottlenecks in the form submission process.
Switching on the Enable User Journey Tracking Feature in JetFormBuilder
To enable user journey tracking in your JetFormBuilder settings, go to WordPress Dashboard > JetFormBuilder > Settings, select the User Journey tab from the left sidebar, and toggle the Enable User Journey Tracking switch to ON.
When enabled, the switch reveals the following settings:
- Storage Type — a field that allows choosing where to store the user journey data, two options are available:
- Local Storage — an option (a default one) that stores the information much longer, even after closing and reopening the browser, until users clear it themselves. This option is recommended for most use cases.
- Session Storage — an option that stores the information only while the tab or window is open. Reloading the page is fine, but as soon as users close the tab, the data disappears. Other tabs or windows of the site can’t see it.
- Clear Journey After Submit — a field that specifies when to clear the user journey data after form submission, two options are available:
- After successful submit only — an option that clears the data only when a form is successfully submitted;
- Always any submit (success or failure) — an option that clears the data after any submission attempt, successful or not.
Configure Form-Specific User Journey Tracking
For each form where you want to track the user journey, open your form in JetFormBuilder. In the right sidebar, open the JetForm panel and scroll down to the Post Submit Actions section. Click on Save Form Record post-submit action (or add this action if it’s not already present by clicking on the “+ New Action” button, in the Add new action pop-up, find and click to open the Save Form Record post-submit action, and then click on the “Update” button).
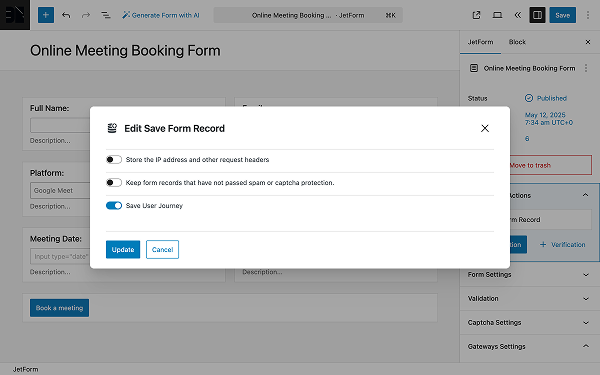
In the Edit Save Form Record pop-up, toggle the Save User Journey switch to ON.
Click the “Update” button to save your changes.
These settings ensure that the user journey data is saved along with the form submission record.
View and Analyze User Journey Data
Once configured, you can access the collected user journey data, go to WordPress Dashboard > JetFormBuilder > Form Records, scroll down to the User Journey section, where you will find a table displaying the user journey for every submitted form:
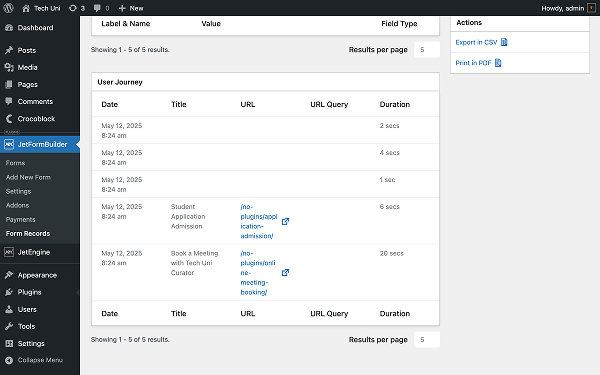
The User Journey table has five columns that display:
- Date and time of interactions;
- Title of the page(s) visited;
- URL of visited page(s);
- URL Query (if any);
- Duration of the interaction with the page.
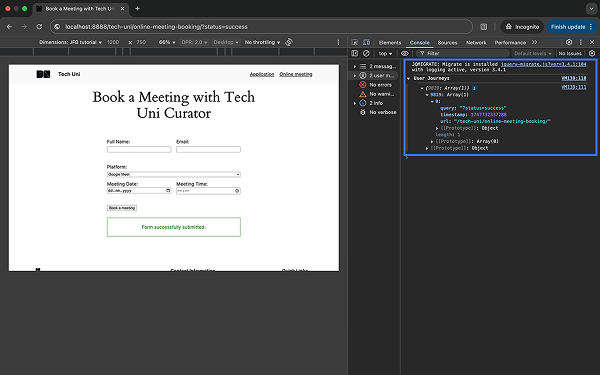
For testing purposes, one can check the user journey path in the Chrome Console. To enable this, locate the wp-config.php file in your website’s root folder and add the following code after the line /* Add any custom values between this line and the “stop editing” line. */
define( ‘WP_DEBUG’, ‘true’ ); define( ‘WP_DEBUG_LOG’, ‘true’ ); define( ‘WP_DEBUG_DISPLAY’, ‘false’ ); @ini_set( ‘display_errors’, 0 ); define( ‘SCRIPT_DEBUG’, ‘true’ ); define( ‘WP_ENVIRONMENT_TYPE’, ‘local’ );Once you have added it, save the file.
The user journey can now be viewed in the Chrome Console.
That’s all about the JetFormBuilder settings available for the User Journey tracking feature on a WordPress website.