How to Set Up a Pay-Per-Post Form in WordPress
When running a membership or premium content website, you may want to restrict access to certain posts and require users to unlock them by making a payment. A Pay-Per-Post form makes this possible by connecting each user to the specific content they purchase.
In this guide, you will learn how to create a Pay-Per-Post form in the JetFormBuilder WordPress plugin. The form is placed on the single post page, and once the user submits it, they are redirected to the payment gateway. After a successful transaction, the user is automatically connected to the purchased post and can view its content. Non-paying visitors, on the other hand, see restricted access.
Tutorial Requirements:
- JetFormBuilder plugin installed and activated
- JetEngine plugin installed and activated, with a Custom Post Type created and single posts set up
- JetThemeCore plugin installed and activated, with the single post page template created
- Stripe or PayPal Addon installed and activated
Table of Contents:
Set Up the Relations
First, the relations between the Custom Post Type and users should be set. This will allow to connect users with the posts for which they pay. In this case, we connect the “Courses” CPT to users.
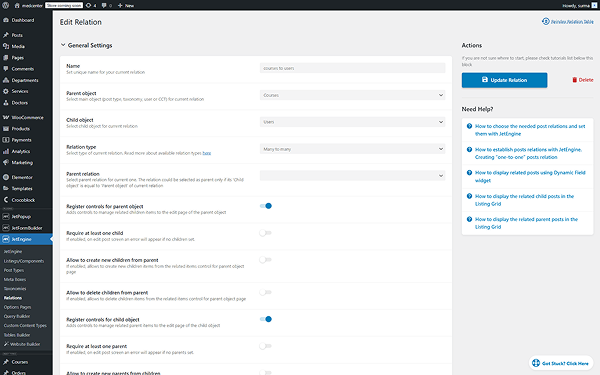
Click the “Add Relation” button.
Create a Form
Now, let’s proceed to setting up a form. To build a WordPress form, we navigate to WordPress Dashboard > JetFormBuilder > Add New Form.
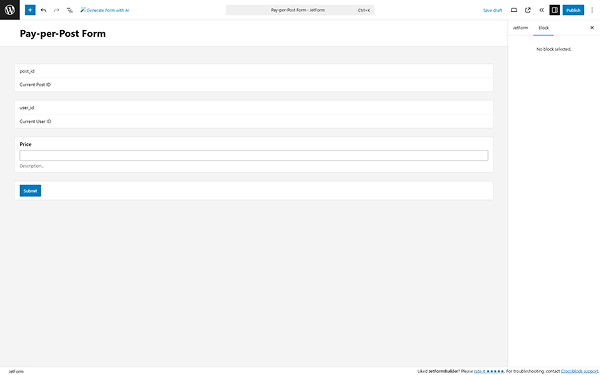
Enter the form’s title — in this case, it is “Pay-per-Post Form”.
The Welcome block appears by default. From here, you can select a form pattern or generate a form with OpenAI. Otherwise, you can hit the “Start from scratch” button and use the three fields added by default; otherwise, you can delete them to begin anew.
In this case, we build our form from scratch. We also delete the default fields. For this, we add two Hidden Fields for the current post ID and current user ID, a Number Field for the price, and the Action Button.
In the Gateways Settings tab, we check the PayPal Checkout option. Refer to our PayPal Recurring Payments guide to know how to set up the payments functionality.

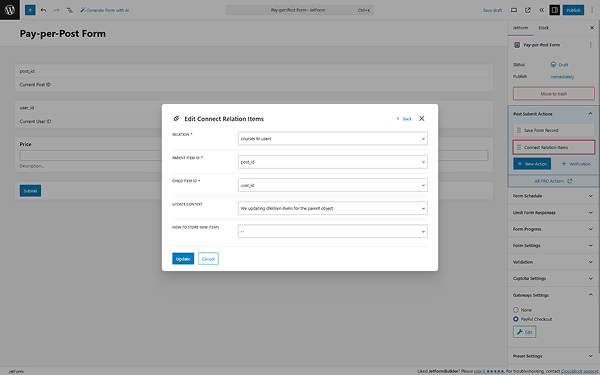
Open the JetForm > Post Submit Actions tab and press the “+ New Action” button. In the opened pop-up, find and click the “Connect Relation Items” action to add it.
Now, you should see a pop-up that provides the settings for this action. Select the RELATION, set the “post_id” field for the PARENT ITEM ID, and the “user_id” for the CHILD ITEM ID. Leave the UPDATE CONTEXT field empty. In the HOW TO STORE NEW ITEMS field, you can select the most appropriate choice for you. When you finish, press the “Update” button.
Then click the “Edit Conditions & Events” button next to the “Connect Relation Items” action. Proceed to the Events match tab and search for the “GATEWAY.SUCCESS” event in the ADD EVENT field.
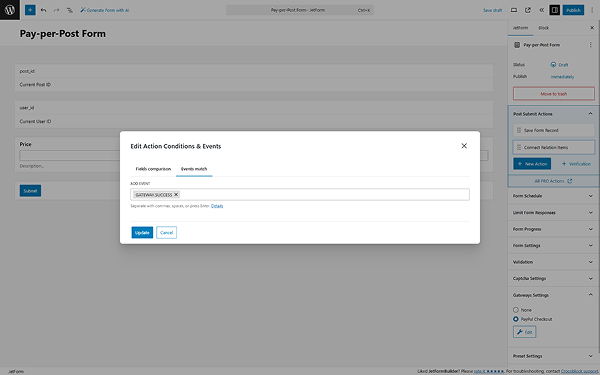
Click the “Update” button.
Once you are ready with the form settings, click the “Publish” button.
Add the Form to the Page
Now, proceed to the single page of the CPT you need to sell access to (“Courses” in this case).
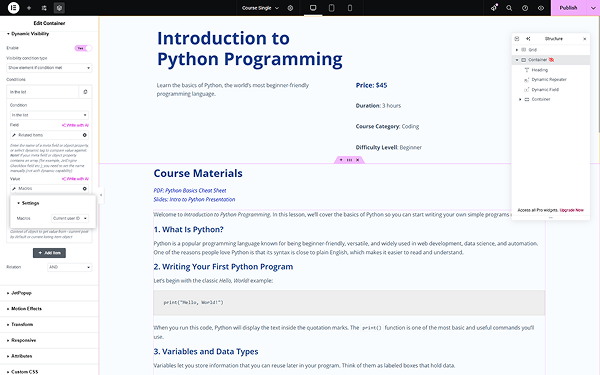
For this case, we keep some data of the post hidden until the user pays for it. For this, we use the Dynamic Visibility functionality.
For this, we use the “In the list” Condition. For the Field, we select the “Related Items” option from the Dynamic Tags and choose the relation we created earlier. For the Value input, select the “Macros” option from the Dynamic Tags and choose the “Current user ID”.
Following the How to Display a Form on the Front End guide, we added the form to the page.
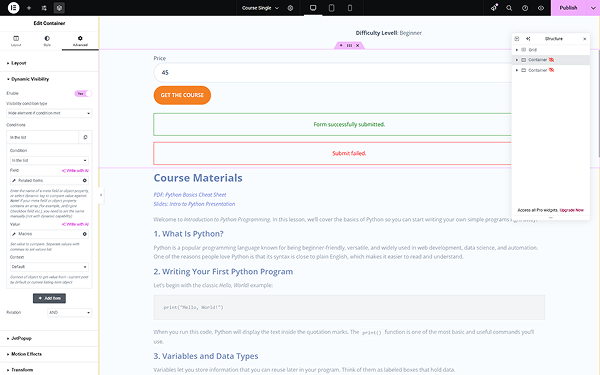
To show the form only until the user pays, we apply the same Dynamic Visibility rules, except for the “Hide element if condition met” in the Visibility condition type.
Click the “Publish” button once you are ready with the settings.
Check the Result
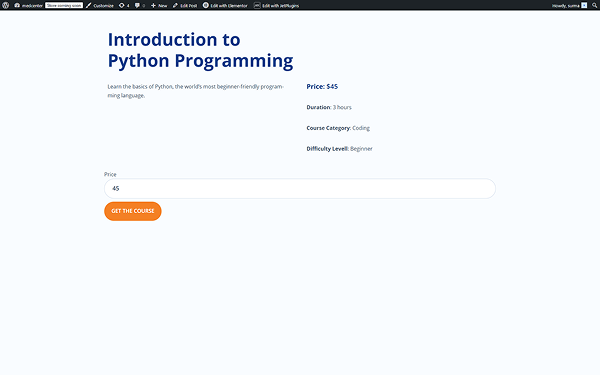
Let’s proceed to the front end page. Before the post is connected to the user through relations, the content is hidden, and the form is visible.
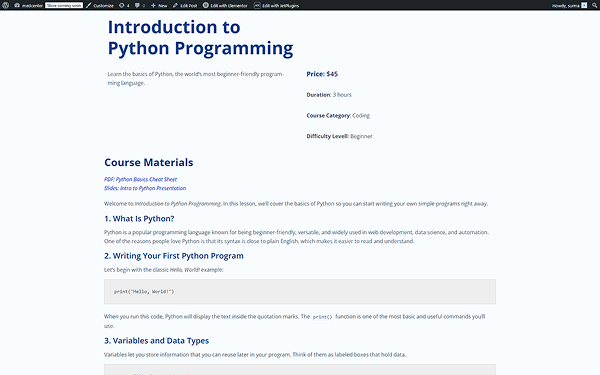
After the form is submitted, the user pays, and the relationship between the post and the current user is established, the content becomes accessible to the user.
That’s it. Now you know how to restrict access to certain posts and require users to unlock them by making a payment using the WordPress JetFormBuilder plugin.