How to Update Booking via the Form
In this guide, we will show how to build a JetFormBuilder form that will update the data of the bookings made with the JetBooking plugin.
Table of Contents:
- Create a Form
- Build a Pop-Up
- Add a Query
- Create a Listing
- Build a Template
- Attach Template to Profile Builder
- Check the Result
Create a Form
Proceed to WordPress Dashboard > JetFormBuilder > Add New to build a new form.
Initially, once the form is opened, complete its name.
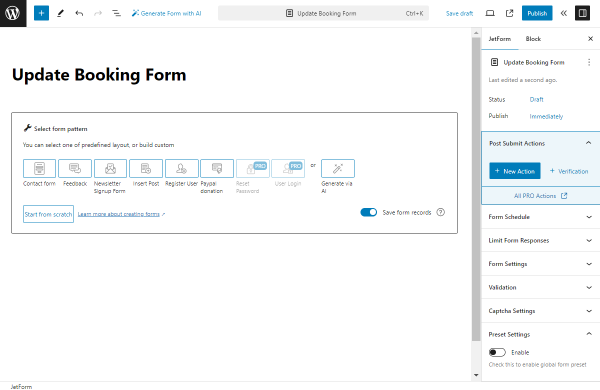
Also, you will see the Welcome block added to the page. We want to create a form from scratch, so we are deleting this block for now.
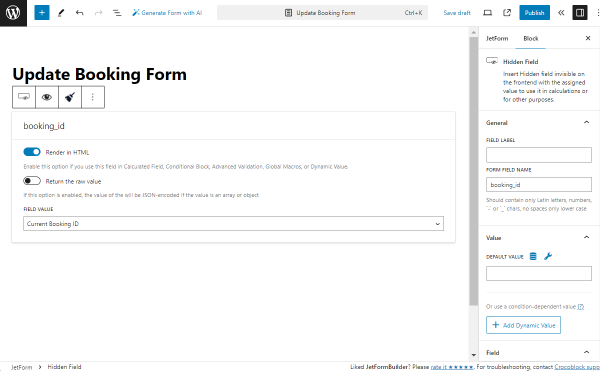
The first field we add to the form is the Hidden Field.
We set its FORM FIELD NAME to “booking_id” and select the “Current Booking ID” option as FIELD VALUE.
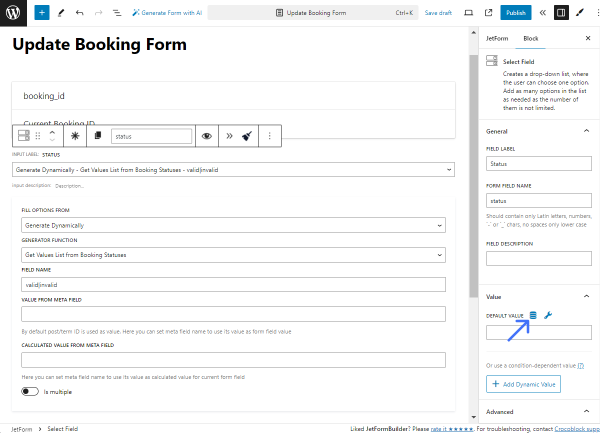
Next, we add is Select Field and set its FIELD LABEL to “Status.” The FORM FIELD NAME is generated automatically from the label this time.
In the FILL OPTIONS FROM drop-down list, we pick the “Generate Dynamically” option. Then, in the appeared GENERATOR FUNCTION field, we select the “Get Values List from Booking Statuses” option and complete the FIELD NAME with the “valid|invalid” value.
Also, we press the “Dynamic Tags” button next to the DEFAULT VALUE field to set the default value of the current “Status” Select Field.
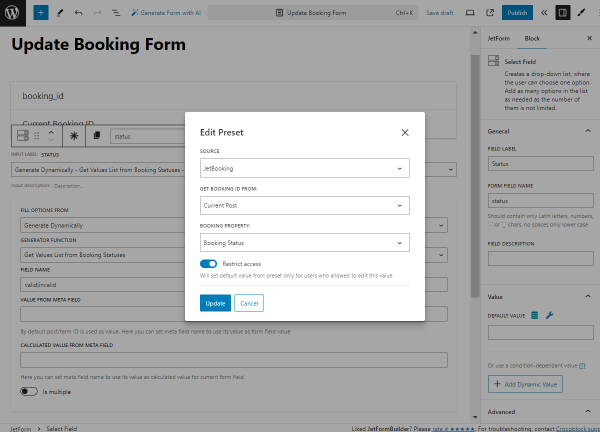
In the opened Edit Preset pop-up, we select the “JetBooking” SOURCE, “Current Post” option in the GET BOOKING ID FROM field, and “Booking Status” as the BOOKING PROPERTY.
To save the default value preset, press the “Update” button.
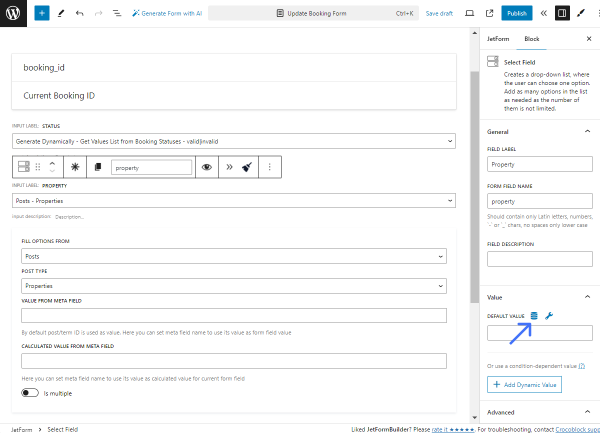
Next, we add one more Select Field, this time called “Property” (FIELD LABEL). As the FILL OPTIONS FROM value, we select the “Posts” option and the “Properties” in the appeared POST TYPE field.
To set the DEFAULT VALUE, press the “Dynamic Tags” button next to this field.
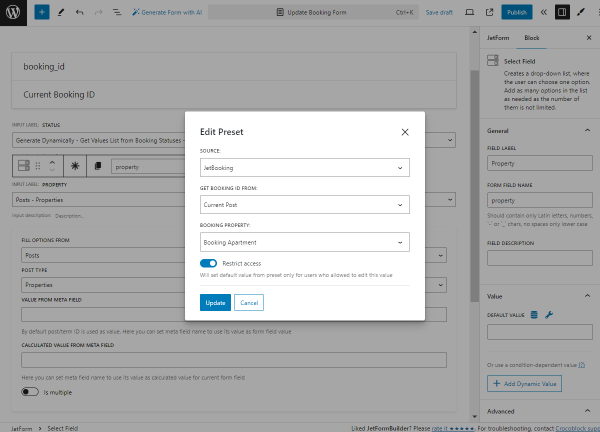
In the opened pop-up, we pick the “JetBooking” SOURCE, “Current Post” as GET BOOKING ID FROM, and “Booking Apartment” as BOOKING PROPERTY.
To save the changes, press the “Update” button.
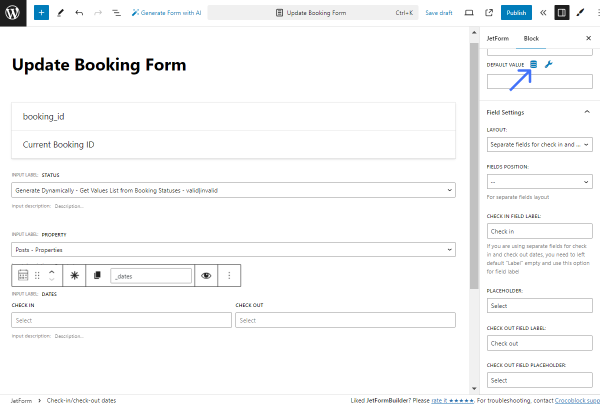
The next field we add is the Check-in/Check-out dates field with the “Dates” FIELD LABEL and the “_dates” FORM FIELD NAME.
We select the “Separate fields for check in and check out dates” option in the LAYOUT field and set the “Check in” as the CHECK IN FIELD LABEL and “Check out” as the CHECK OUT FIELD LABEL.
We also complete the PLACEHOLDER and CHECK OUT FIELD PLACEHOLDER fields with the “Select” value and press the “Dynamic Tags” button next to the DEFAULT VALUE field to set a preset.
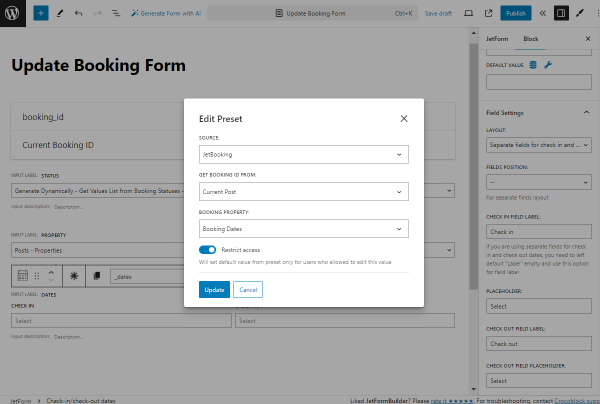
In the preset editing pop-up, we select the “JetBooking” option as a SOURCE, “Current Post” in the GET BOOKING ID FROM field, and “Booking Dates” in the BOOKING PROPERTY field.
Then, we press the “Update” button to save the preset.
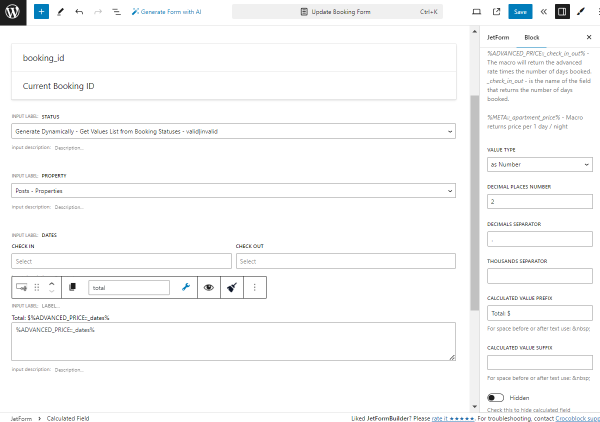
After that, we add the Calculated Field with the “total” FORM FIELD NAME and put the “%ADVANCED_PRICE::_dates%” value inside it.
In the CALCULATED VALUE PREFIX field, we put the “Total: $” value.
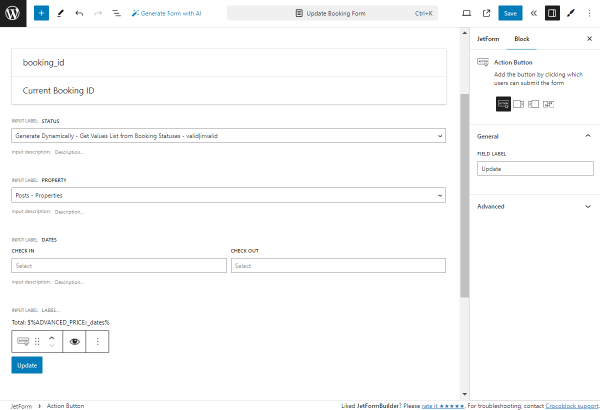
The final field of the form will be the Action Button. To make it suitable for the case, we change the FIELD LABEL to “Update.”
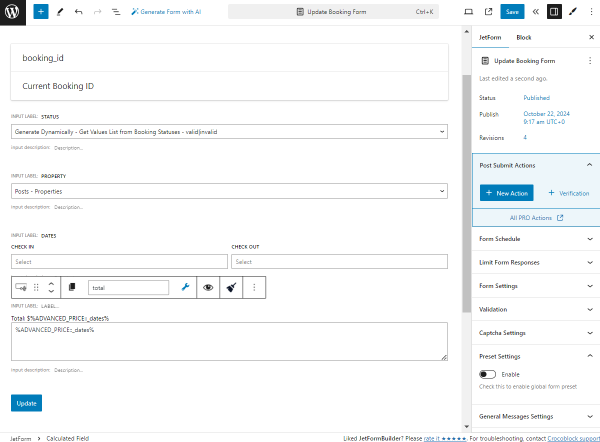
After the form fields are added, navigate to the JetForm tab of the form. Here, open the Post Submit Actions tab and press the “New Action” button.
In the opened pop-up, find and select the “Update Booking” action.
Right away, the pop-up with the action settings will be opened.
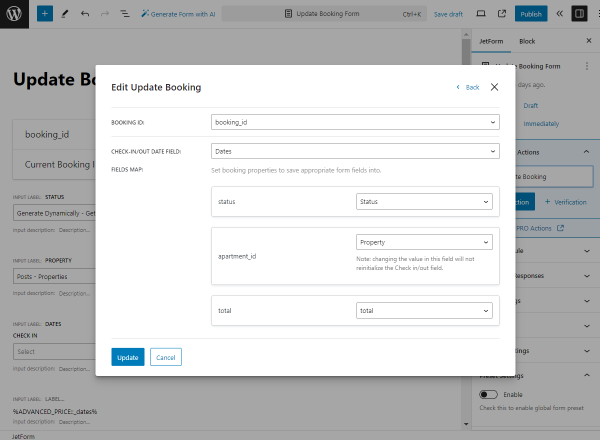
In the BOOKING ID field, select the name of the Hidden Field where the booking ID is stored, and in the CHECK IN/CHECK OUT field, pick the corresponding fields with the check-in/check-out dates.
The following fields located in the FIELDS MAP are optional for this action. The fields presented here are taken from the JetBooking data columns added in the Tools settings.
For instance, we have connected the status field with the “Status” field of the form, the apartment_id with the “Property” field, and the total with the “total” field.
To save the action settings, press the “Update” button.
Once the form is ready, press the “Publish” button.
Build a Pop-Up
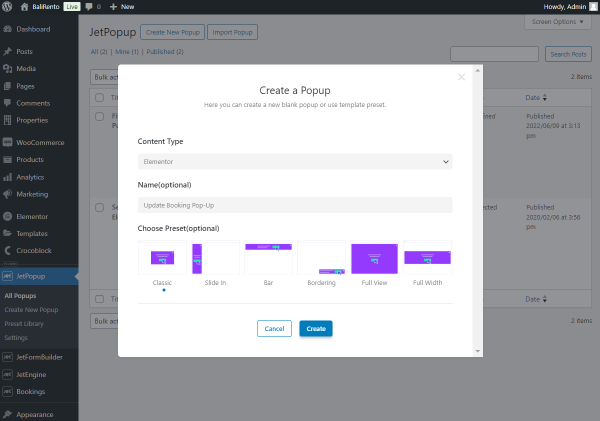
We want to add the built form to the pop-up that will be later linked to the Listing Grid placed on the Account Page. So, initially, we go to WordPress Dashboard > JetPopUp > Create New Popup to build a pop-up.
In the opened pop-up, select the desired Content Type (in our case, Elementor) and, optionally, complete the Name and select the preset in the corresponding section.
Press the “Create” button to proceed to the editor.
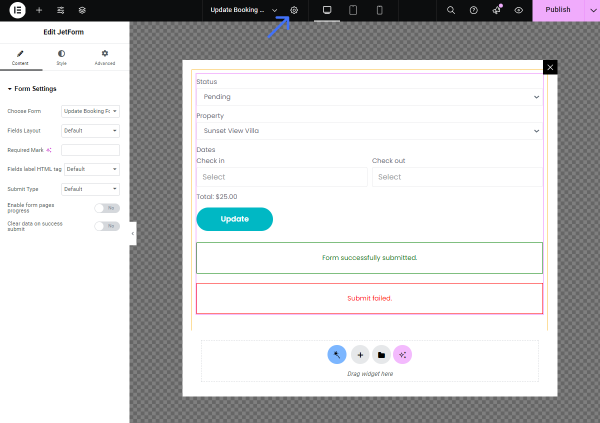
In the editor, we delete the content added to the pop-up by default and add a JetForm widget to the pop-up.
Once done, in the settings, pick a just-built form in the Choose Form field.
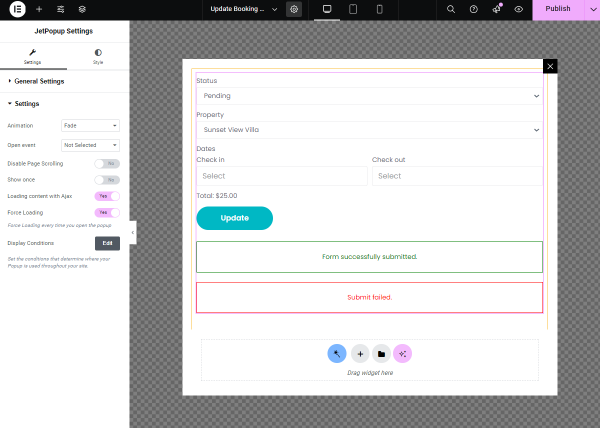
Customize the form settings if needed and press the “gear” button to open the pop-up settings.
Here, activate the Loading content with Ajax and Force Loading toggles and press the “Edit” button next to Display Conditions to set the pop-up conditions.
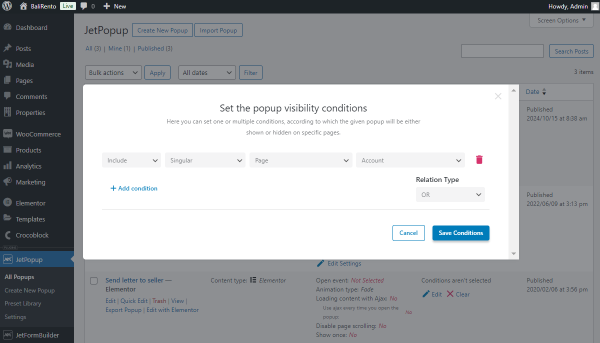
Once the button is clicked, the JetPopup dashboard will be opened in a new tab. There, the pop-up visibility conditions pop-up will be displayed.
Press the “Add condition” button and pick the following options in the available drop-down fields: “Include,” “Singular,” “Page,” and “Account.”
Save the conditions by hitting the corresponding button.
Return to the editor and publish the pop-up.
Add a Query
Now, let’s build a Query that will be used as a source for the Listing template.
Head to WordPress Dashboard > JetEngine > Query Builder and press the “Add New” button.
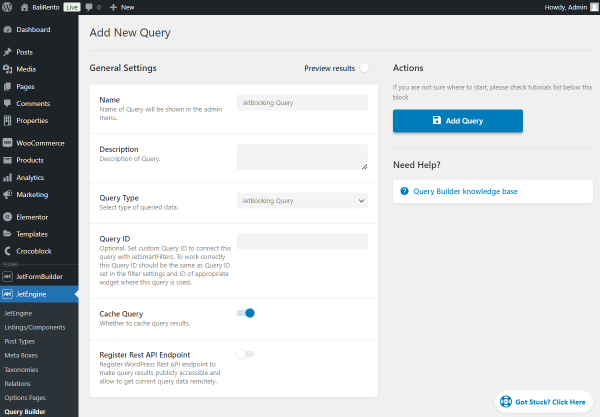
In the Add New Query page, complete the Name field and set the Query Type to “JetBooking Query.”
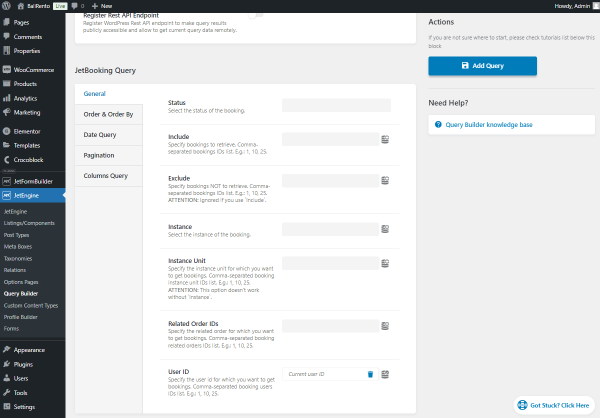
Scroll down to the JetBooking Query section and press the “Dynamic Tags” button. There, pick the “Current user ID” option and click the “Add Query” button.
This way, the future listing will query data by the current user.
Create a Listing
Now, it’s time to create a Listing Template based on the built query.
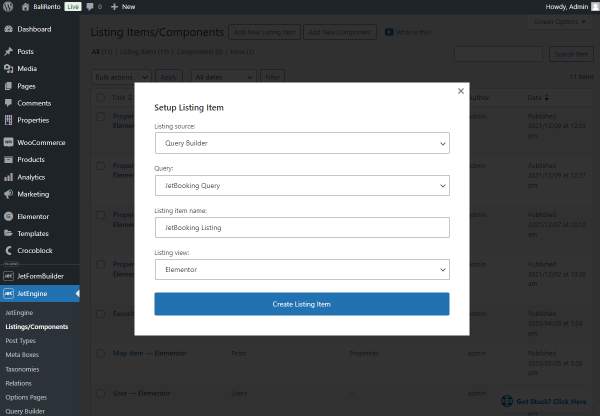
Open the WordPress Dashboard > JetEngine > Listings/Components directory and click the “Add New Listing Item” button.
Pick the “Query Builder” Listing source and the just-built query as the Query. Then, complete the Listing item name and pick the preferred Listing view.
Press the “Create Listing Item” button.
First, we want to display the booking ID.
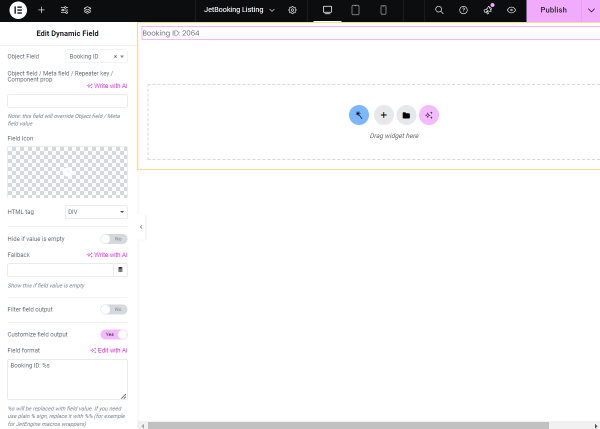
So, we add a Dynamic Field widget to the page. Then, we open the Object Field drop-down field, scroll down to the JetBooking section, and pick the “Booking ID” option.
Then, we activate the Customize field output toggle and complete the appeared Field format field with the “Booking ID: %s” value.
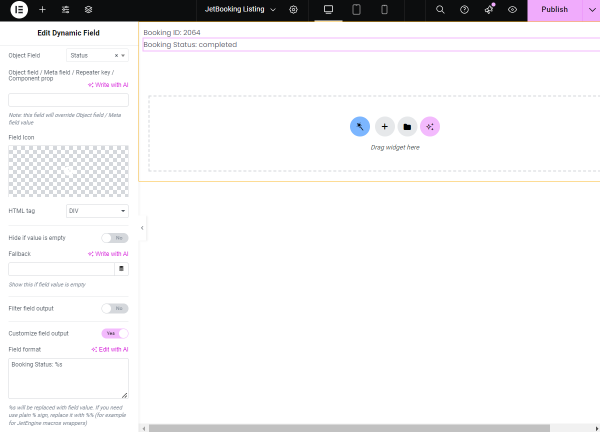
Next, we add another Dynamic Field to the page. This time, we pick the “Status” option in the Object Field.
For this widget, we activate the Customize field output toggle as well. This time, we fill in the Field format field with the “Booking Status: %s” value.
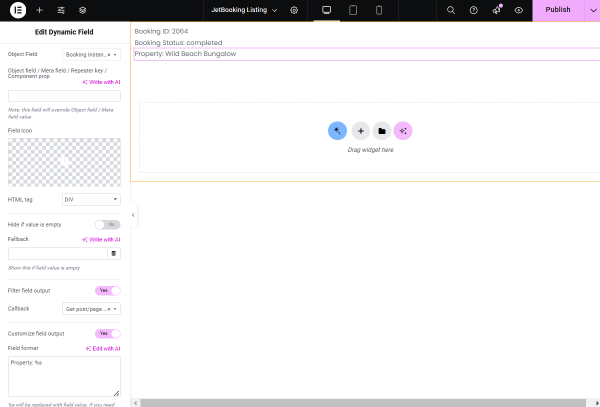
The following field we add is one more Dynamic Field; this time, the Object field is set to “Booking Instance ID”.
Then, we activate the Filter field output toggle and pick the “Get post/page title” Callback.
Next, we activate one more toggle, Customize field output, and complete the Field format field with the “Property: %s” value.
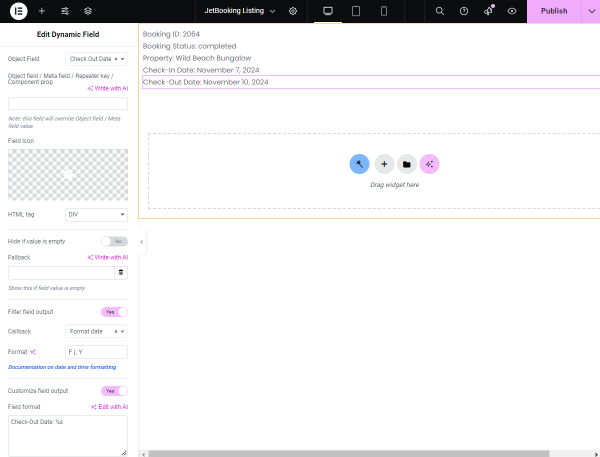
The next data we want to display is check-in/check-out dates, so at first, we add a Dynamic Field with the “Check In Date” Object Field.
For this field, we activate the Filter field output toggle and pick the “Format date” Callback. Another toggle we activate is Customize field output and complete the Field Format with the “Check-In Date: %s” value.
Then, we repeat the same procedure, but this time for the check-out date, so we pick the “Check Out Date” option in the Object Field, and the Field Format is set to “Check-Out Date: %s” correspondingly.
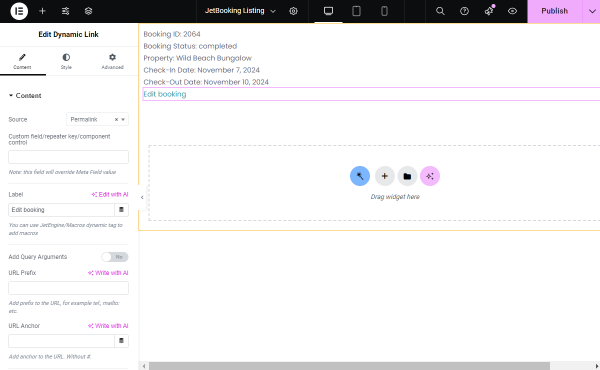
The last widget of the current Listing Item is the Dynamic Link.
Initially, we change its Label to “Edit Booking.”
Next, we open the Advanced tab of the widget settings and unroll the JetPopup settings.
In the Attached Popup field, pick the built pop-up and activate the Jet Engine Listing popup toggle.
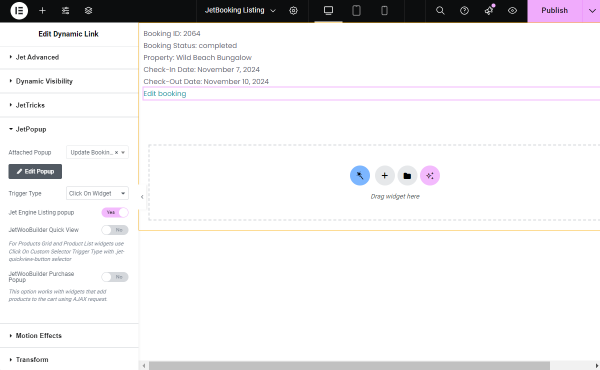
If you have finished with the Listing Item, click the “Publish” button.
Build a Template
Now, we want to build a template that will be added to the Account Page.
Go to WordPress Dashboard > Templates > Add New directory of the Elementor plugin.
In the pop-up, set the type of template to “Page”, complete the template’s name and press the “Create Template” button.
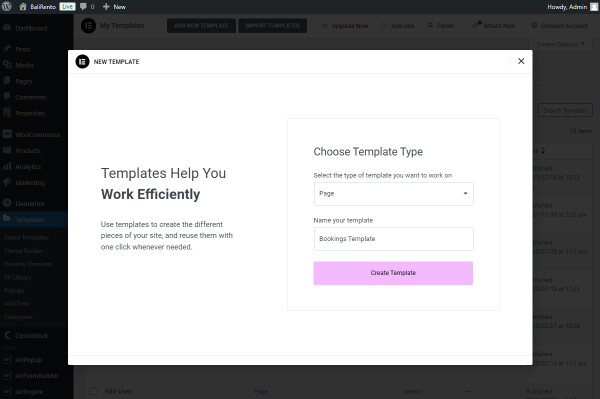
In the template, add the Listing Grid widget and pick the just-built Listing.
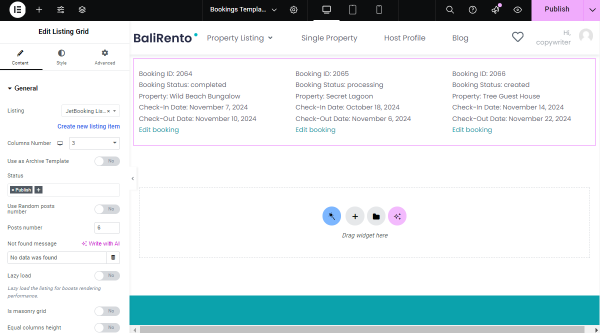
Customize the template additionally if needed, and whenever you are ready, hit the “Publish” button to save the template.
Attach Template to Profile Builder
Now, we want to connect the built template with the Account Page.
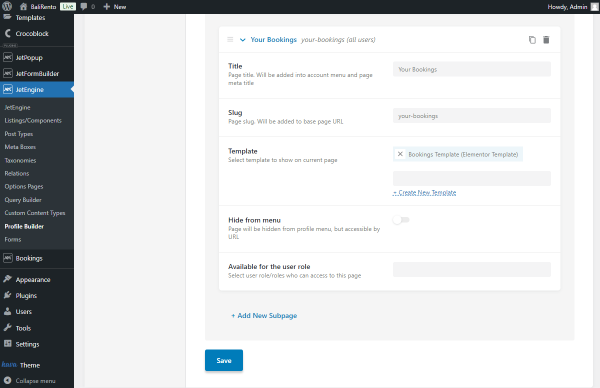
Head to WordPress Dashboard > JetEngine > Profile Builder and open the Account Page tab.
Scroll down the page and hit the “Add New Subpage” button.
We complete the Title field with “Your Bookings,” and the Slug is filled automatically.
As the Template, we pick the previously built Elementor template and press the “Save” button.
Check the Result
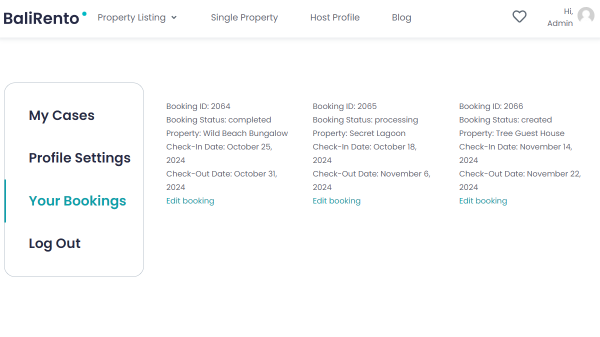
Open the Account Page on the front end and open the Your Bookings tab.
Here, the listing with the bookings made on the website is presented.
To access the pop-up with the form, we click the “Edit booking” button next to the first icon.
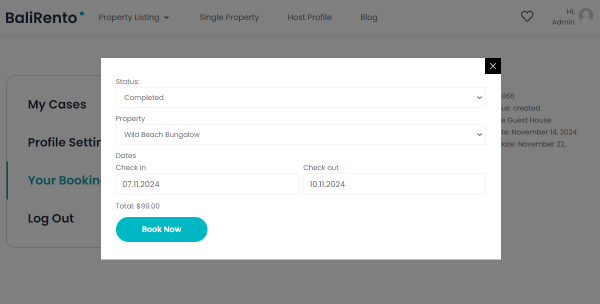
When the pop-up opens, you will see the completed form with the clicked booking data.
We change the dates in the Check in and Check out fields and press the “Update” button.
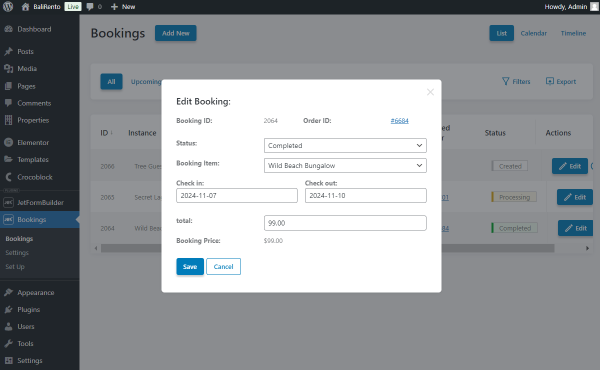
To check if the booking was edited, go to WordPress Dashboard > Bookings and open the booking that you have edited via the form.
That’s all; now you know how to update JetBooking booking with the help of the JetFormBuilder form.