How to Update the Post via the Pop-Up
Sometimes, you may need to edit or update the post in the listing item without opening the single post page. In this case, the form can be added to the pop-up to be opened after the button is clicked.
In this tutorial, you will learn how to configure the JetFormBuilder form to update the post via the JetPopup pop-up inside the JetEngine listing on the WordPress site.
Table of Contents:
Adjust a Form
First, we will build the “Edit post” form. For a detailed guide, refer to the Insert/Update Post article. In this tutorial, we will take an overall look at the form settings.
Proceed to setting up a form. For that, we navigate to WordPress Dashboard > JetFormBuilder > Add New Form.
Enter the form’s title — in this case, it is “Update Post”.
The Welcome block appears by default. From here, you can select a form pattern or generate a form with OpenAI. Otherwise, you can hit the “Start from scratch” button and use the three fields added by default; otherwise, you can delete them to begin anew.
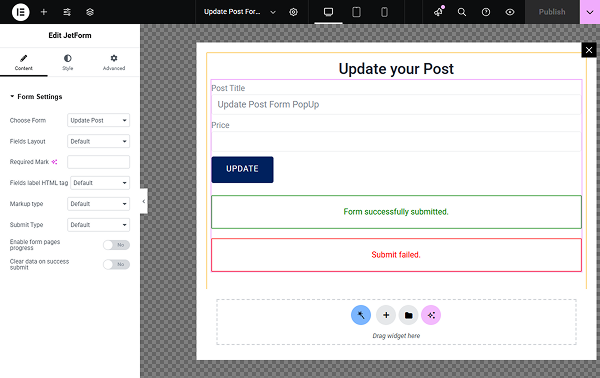
In this case, we build our form from scratch. We keep the Hidden Field for the current post ID and the Text Field for the post’s title. Additionally, we used the Number Field to update the price. You can add as many fields as needed.
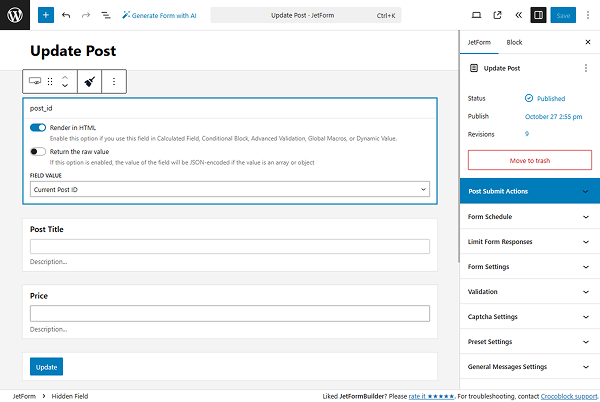
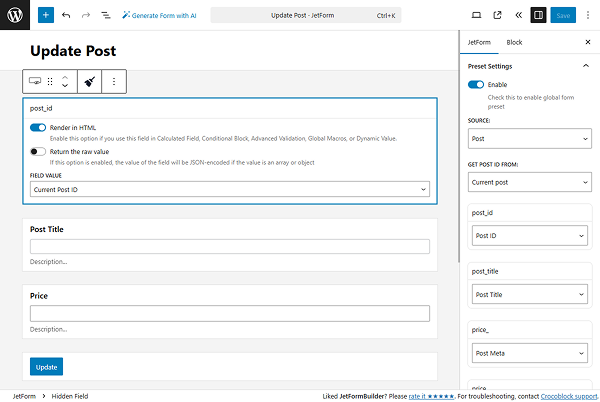
Go to the Preset Settings tab on the right side. Turn on the Enable toggle. Select the “Post” SOURCE, and the “Current post” option for the GET POST ID FROM. For the Hidden “Post ID” field, choose the “Post ID” option.
Choose the corresponding fields for each of the form fields you added.
Then, open the Post Submit Actions tab and add the Insert/Update Post action. Open the action settings and select the needed POST TYPE and POST STATUS.
In the FIELDS MAP section, set up the fields. It is necessary to select the “Post ID (will update the post)” option for the post_id field.
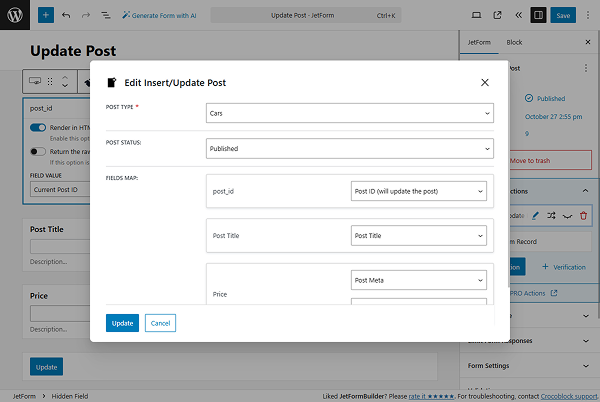
Click the “Update” button once you are ready.
Publish the form once everything is set up.
Set Up a Pop-Up
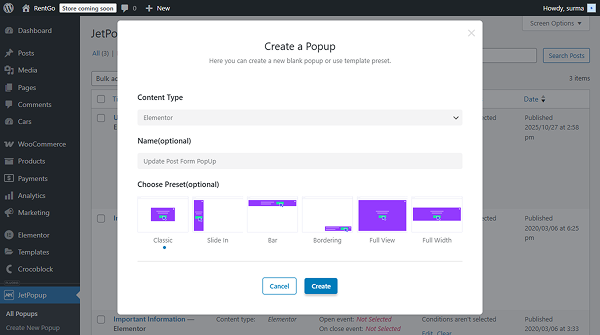
Move to WordPress Dashboard > JetPopup > Create New Popup.
Fill in the fields in the Create a Popup window that appears. In this case, we selected the “Elementor” Content Type, typed the “Update Post Form PopUp” text in the Name(optional) field, and ticked the “Classic” option in the Choose Preset(optional) field. Finally, click the “Create” button.
Refer to the How to Create a New Popup Template in Elementor tutorial to learn about pop-up settings.
In the pop-up settings, open the page builder, then add the JetForm widget. Select the form in the Choose Form input.
Then, click the “gear” icon in the top panel and open the Settings section. Enable the Loading content with Ajax toggle.

Click the “Publish” button once you are ready.
Add the Pop-Up to the Listing
Proceed to the listing template you created. Add the Button Elementor widget to the needed space. Open the Advanced tab and proceed to the JetPopup section.
Select the pop-up you created in the Attached Popup field. Keep the “Click on Widget” Trigger Type. Enable the JetEngine Listing popup toggle.
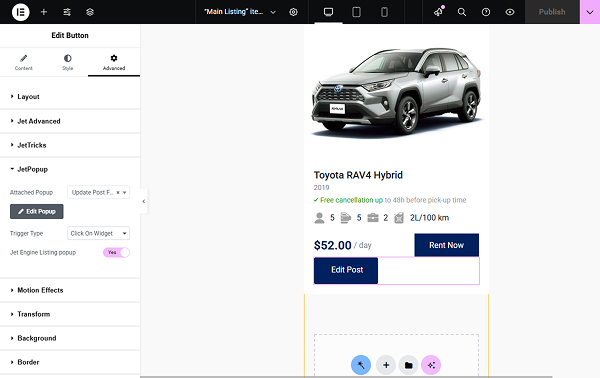
Click the “Publish” button once you are ready.
Check the Result
Proceed to the front-end page and click the “Edit Post” button on any post from the listing.
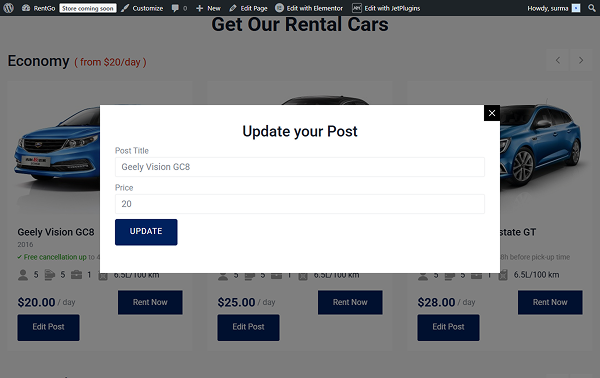
We can change the post title and price and update the post. New data is displayed straightaway after the form is submitted.

That’s it. Now, you know how to update the post via the JetPopup pop-up using the JetFormBuilder form on the WordPress site.